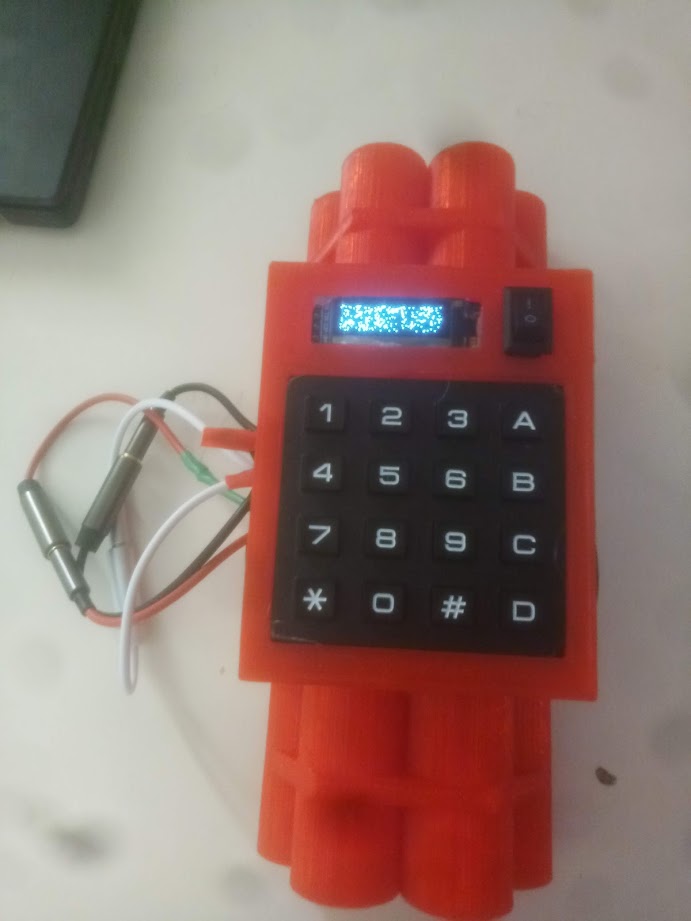
https://github.com/naorlivne/arduino_tnt_bomb_defuse_game
Somebody set up the bomb
https://github.com/naorlivne/arduino_tnt_bomb_defuse_game
Last synced: 20 days ago
JSON representation
Somebody set up the bomb
- Host: GitHub
- URL: https://github.com/naorlivne/arduino_tnt_bomb_defuse_game
- Owner: naorlivne
- License: lgpl-3.0
- Created: 2021-09-02T12:42:42.000Z (about 4 years ago)
- Default Branch: master
- Last Pushed: 2023-09-04T15:12:37.000Z (about 2 years ago)
- Last Synced: 2025-07-11T13:29:09.218Z (4 months ago)
- Language: C++
- Size: 2.88 MB
- Stars: 2
- Watchers: 2
- Forks: 0
- Open Issues: 0
-
Metadata Files:
- Readme: README.md
- Contributing: CONTRIBUTING
- Funding: .github/FUNDING.yml
- License: LICENSE
- Code of conduct: CODE_OF_CONDUCT.md
Awesome Lists containing this project
README

# arduino_tnt_bomb_defuse_game
A defuse the bomb type game, perfect for airsoft/paintball/etc, has multiple ways of disabling the bomb for extra fun:
1. Once turned on you type in a 4 digit disarm code
2. A 90 second countdown then starts (can be changed via changing a variable in the codebase)
3. At any point in this 90 second you can type in the disarm code to stop the bomb, but if you mistype you go boom
4. There are also 3 wires (optionally multiple colored one, depending on how you build it) that can be "cut" via unplugging them:
* One wire will defuse the bomb
* One wire will make you go boom
* One wire will dramatically increase the countdown speed so you won't have long to try again
Once the bomb go boom both a visual warning and an audioable (rather annoying one) goes off letting both teams know the round is over, then you simply turn it off and on again and have another round.
## BOM - (bill of materials)
* 1 ardiuno uno
* 3 AAA batteries
* 1 battery holder for 3 AAA batteries
* 1 3v active buzzer ( I used https://www.aliexpress.com/item/1005002537526187.html?spm=a2g0s.9042311.0.0.27424c4dKe6Iv1 )
* 1 4x4 metrix keypad (I used https://www.aliexpress.com/item/1005002717991471.html?spm=a2g0s.9042311.0.0.27424c4dSMUNud )
* 1 SSD1306 128X32 OLED module ( I used https://www.aliexpress.com/item/32672327708.html?spm=a2g0s.9042311.0.0.27424c4d4H5K10 )
* 1 rocker 10*15mm toggle switch ( I used https://www.aliexpress.com/item/1005001998277516.html?spm=a2g0s.9042311.0.0.27424c4dK9r7lB )
* 3 2.5 aux headset extention cables ( I used https://www.aliexpress.com/item/1005002637786689.html?spm=a2g0s.9042311.0.0.27424c4dolIJXD )
* lots of Dupont cables
## Needed tools
* 3d printer (or 3d printing service)
* Hot glue gun & glue sticks
* Soldering iron & tin
* Electric insolation tape and/or electric shrink-wrap
* wire cutter
## Software
### Install liberies:
* Keypad (version 3.1.1)
* Adafruit SSD1306 (version 2.4.6)
* Adafruit GFX Library (version 1.10.10)
* Adafruit BusIO (version 1.9.1)
### install codebase
Flash your arudino with the code that's located in `software/arduino_tnt_defuse_game/arduino_tnt_defuse_game.ino`
## Hardware
3D print the two STL files that are located in `hardware`
## Electronics
Connect your ardiuno according to the diagram in `electronics/tnt_game_electronics.jpg`
## Putting it all togther:
1. Install the liberies described above to your arudino
2. Flash the codebase to the arudino
3. 3d print the 2 STL files described above
4. Cut your aux headset extention cables in half so you have 6 cables total, 3 with male & 3 female, thread each through a hole on the side of the 3d printed case
5. Place the toggle switch, the on the top in it's open space (you'll need to do this before wiring it up) & hot glue it into place
6. Wire the arudino as described above (some soldering required as not everything is Dupont)
7. Place the OLED screen and keypad in place and hotglue them to the top
8. Close the top on the case