https://github.com/nerdingitout/oc-quota
Enforcing resource consumption limits using OpenShift ResourceQuota
https://github.com/nerdingitout/oc-quota
Last synced: 6 months ago
JSON representation
Enforcing resource consumption limits using OpenShift ResourceQuota
- Host: GitHub
- URL: https://github.com/nerdingitout/oc-quota
- Owner: nerdingitout
- License: apache-2.0
- Created: 2021-01-13T09:50:47.000Z (over 5 years ago)
- Default Branch: main
- Last Pushed: 2021-02-01T10:11:34.000Z (over 5 years ago)
- Last Synced: 2025-05-14T10:32:28.550Z (about 1 year ago)
- Size: 51.8 KB
- Stars: 0
- Watchers: 2
- Forks: 0
- Open Issues: 0
-
Metadata Files:
- Readme: README.md
- License: LICENSE
Awesome Lists containing this project
README
# Enforcing resource consumption limits using OpenShift ResourceQuota
## Introduction
When several users or teams share a cluster with a fixed number of nodes, there is a concern that one team could use more than its fair share of resources. Therefore, resource quota is a tool for administrators to address this concern.
A resource quota provides constraints that limit aggregate resource consumption per project or pod/container. It can limit the quantity of objects that can be created in a project by type, as well as the total amount of compute and storage resources that may be consumed by resources in that project.
In Red Hat OpenShift, you can manage constraints on a project level using the Resource Quota object or on a pod/container level using the Limit Range object.
In Limit Ranges, you can specify the minimum and maximum usage of memory and CPU. As for Resource Quotas, you can specify amount of memory and CPU and number of Pods, replication controllers, services, secrets and presistent volume claims.
A resource quota is enforced on a project or pod/container when there is ResourceQuota/LimitRange specified.
## Prerequisites
For this tutorial you will need:
- Red Hat OpenShift Cluster 4.3 or higher on IBM Cloud.
- oc CLI (can be downloaded from this link or you can use it at http://shell.cloud.ibm.com/.
## Estimated Time
It will take you around 30 minutes to complete this tutorial.
## Steps
- Create a Project & Enforce Resource Quota
- Configure a Pod Quota for a Namespace
- Verify that the Pod Quota works
- Configure Memory and CPU for a Namespace
- Verify that the CPU and Memory Quotas work
## Login to the CLI & Create a Project
- Go to the web console and click on your username at the top right then 'Copy Login Command', then display the token and copy the ```oc login``` command in your terminal.

- From the CLI, create a project and name it 'quota-demo' as shown in the following command.
```
oc new-project quota-demo
```
## Configure a Pod Quota for a Namespace
- Create a ResourceQuota for the project that limits the number of pods to 2 using the following command
```
oc apply -f https://raw.githubusercontent.com/nerdingitout/oc-quota/main/project-quota.yaml
```
- Check if the ResourceQuota has been created successfully.
```
oc get resourcequota
```

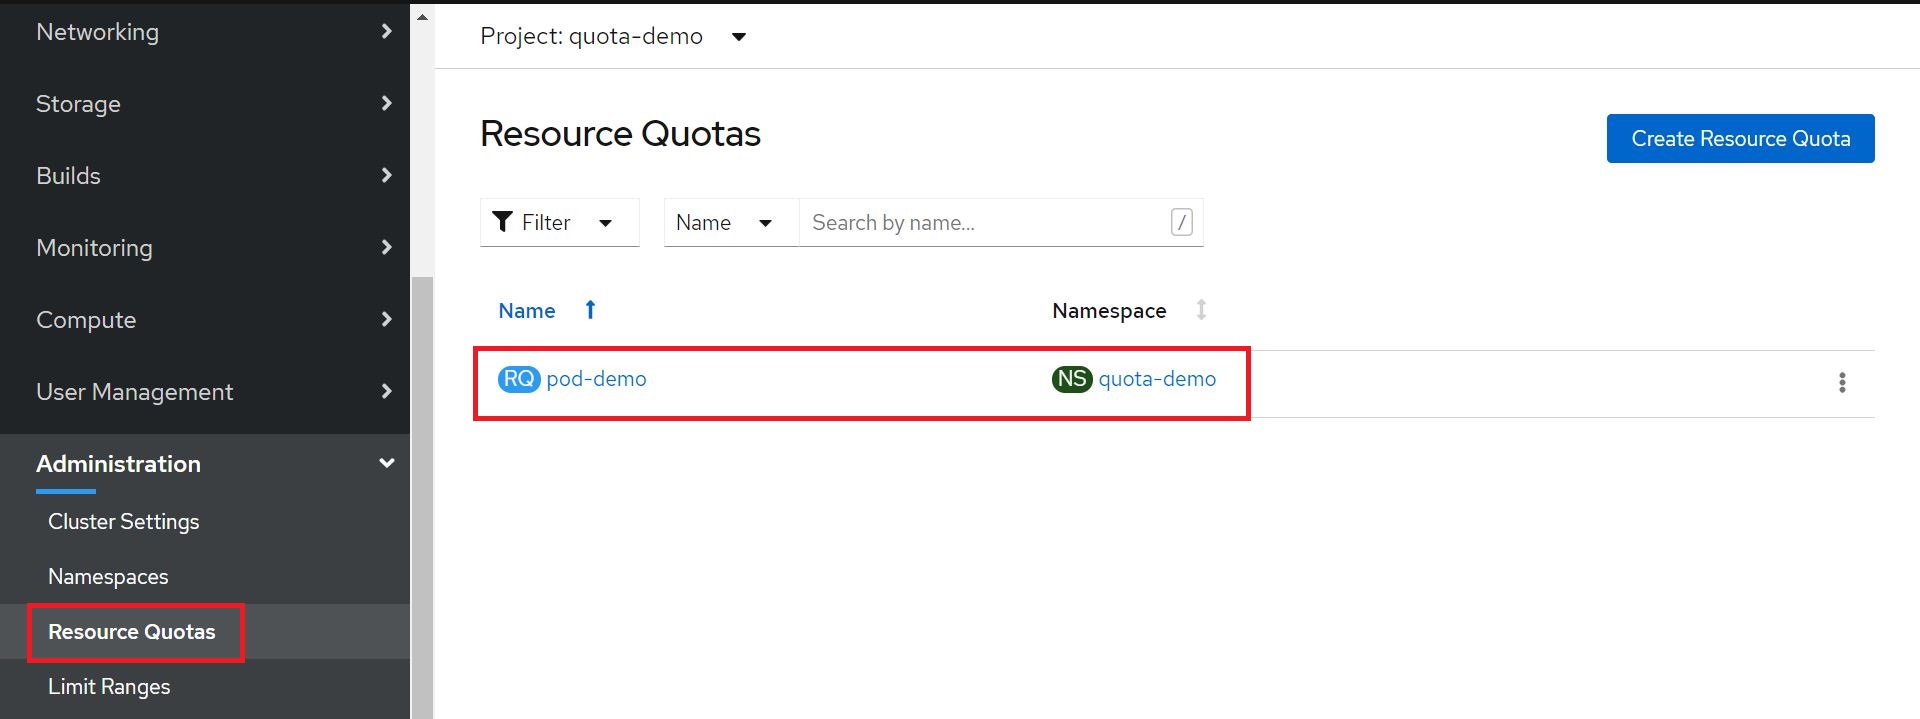
- You can also view the resource quota on the web console from the Administrator Perspective. Go to Administration → Resource Quotas as shown in the image below.
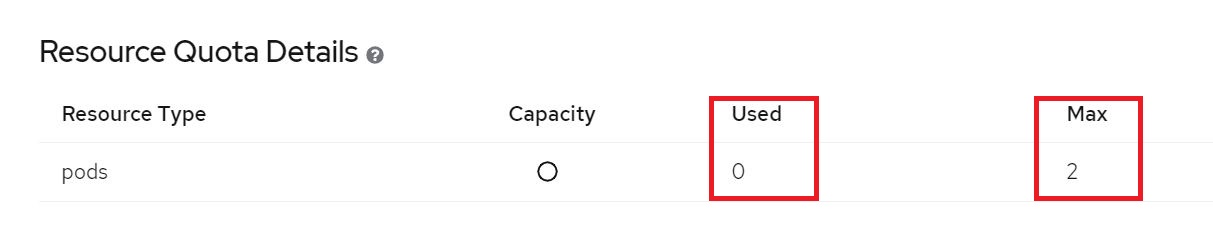
- If you view the details of the resource quota and scroll down to Resource Quota Details table, you can notice information on used and maximum resources. Since you haven't delpoyed any pods yet, it will show 0 pods used.
## Verify that the Pod Quota works
- Deploy a simple application, we will scale it to 2 replicas in the next step
```
oc create deployment myguestbook --image=ibmcom/guestbook:v1 -n quota-demo
```

- If you use the the ```oc get pods``` command you will notice that the pod is in running state.

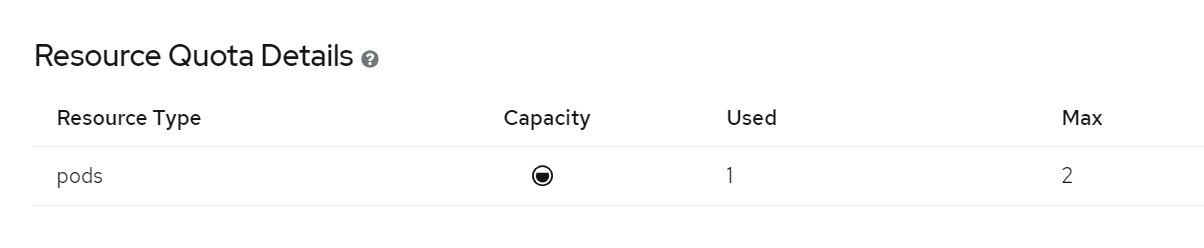
- If you go back to the Resource Quota 'pod-demo' on the web console, you will notice the number of used pods is now 1 as expected. This shows that the ResourceQuota has correctly accounted our Pod against the specified Quota
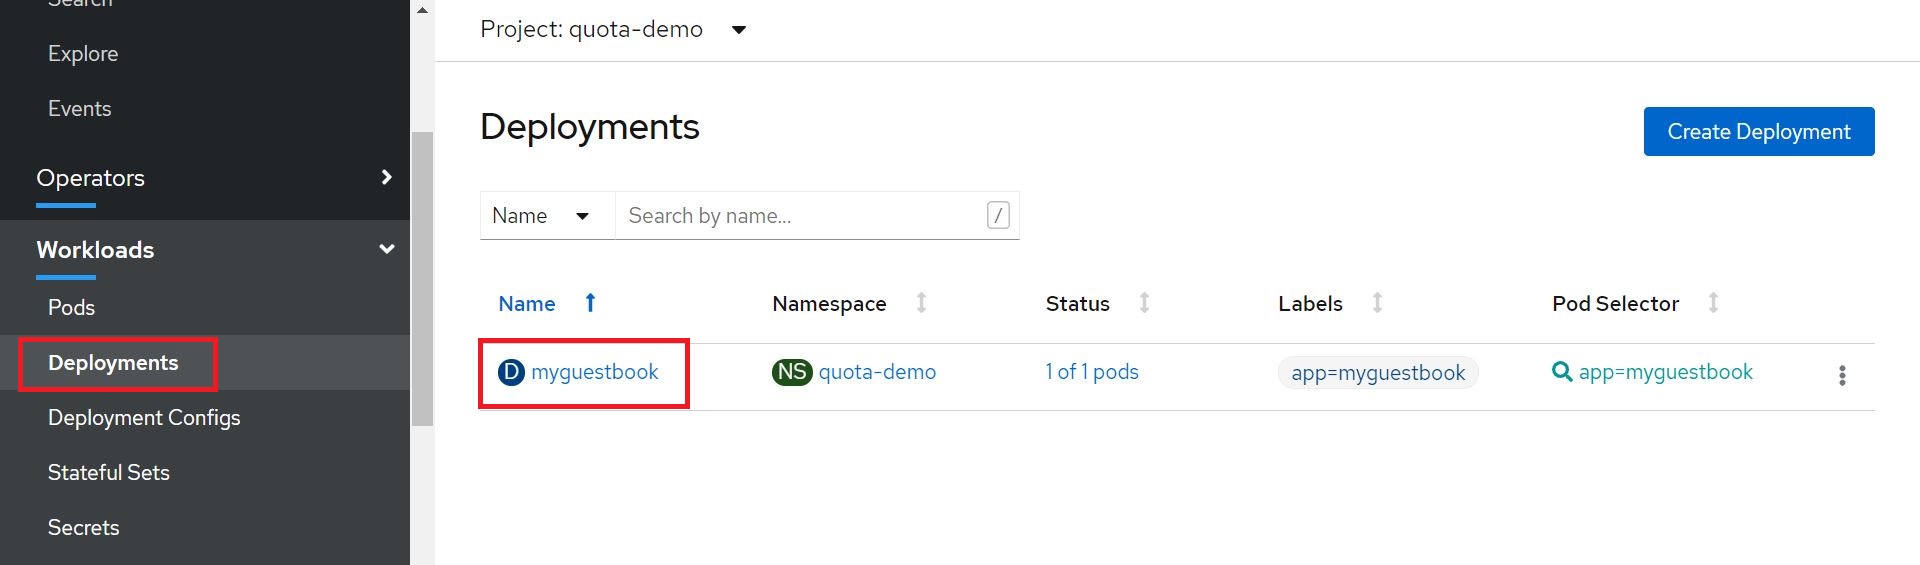
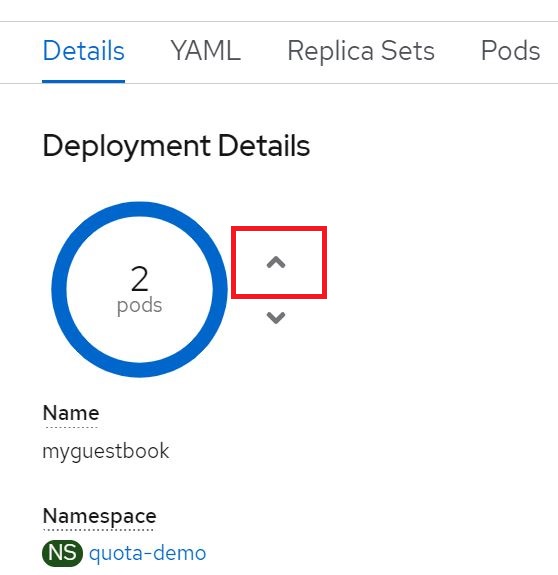
- Next, you will need to scale the application to 2 replicas. You can scale the application from both web console and command line. In this step, you will perform it from the web console. Go to Workloads → Deployments and click on 'myguestbook' deployment.
- Clicking on the upper arrow will increase number of replicas, down arrow decreases number of replicas. In this step you will need to increase number of replicas to 2.
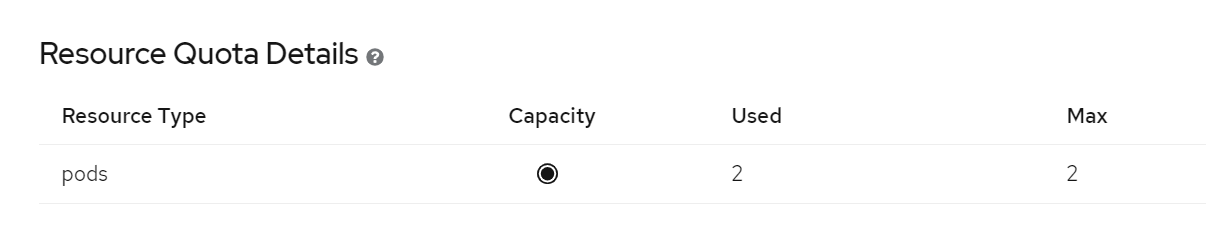
- If you go back to the Resource Quota 'pod-demo' on the web console, you will notice the number of pods used has increased to 2.
- Now, let's try exceeding the quota by adding another pod.
```
oc create deployment myguestbookv2 --image=ibmcom/guestbook:v2 -n quota-demo
```

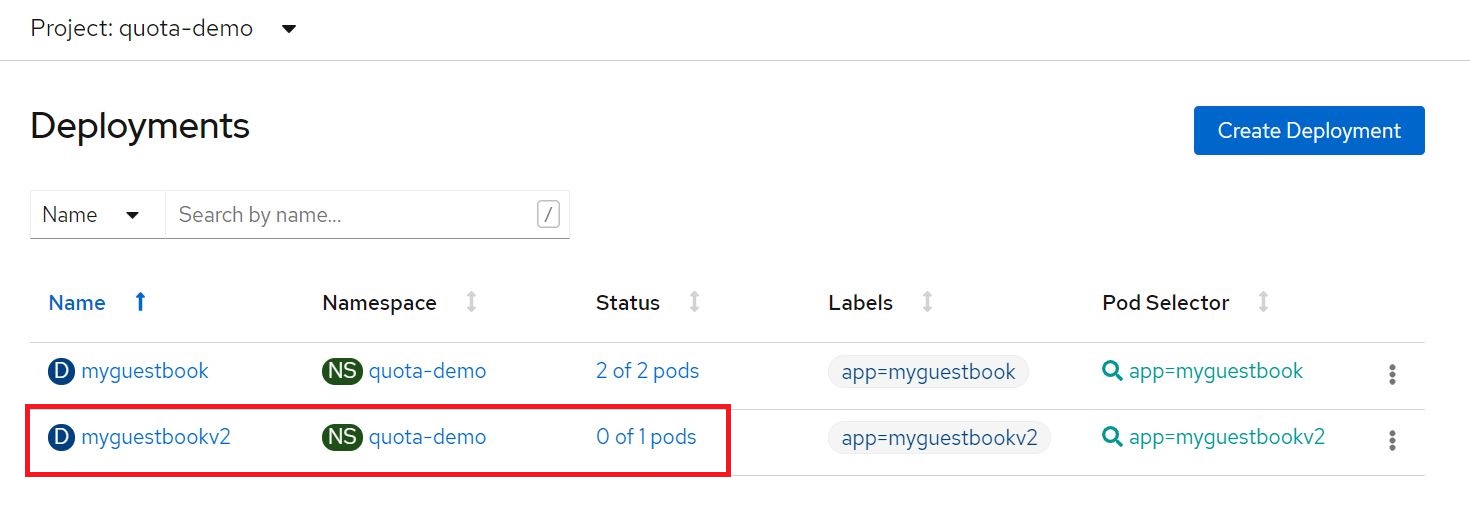
- If you run ```oc get pods``` you will notice that there are only 2 pods running even though you created a total of 3 pods.

- Go back to the web console and go to Workloads → Deployments. Notice the status of the pod showing '0 of 1 pods'
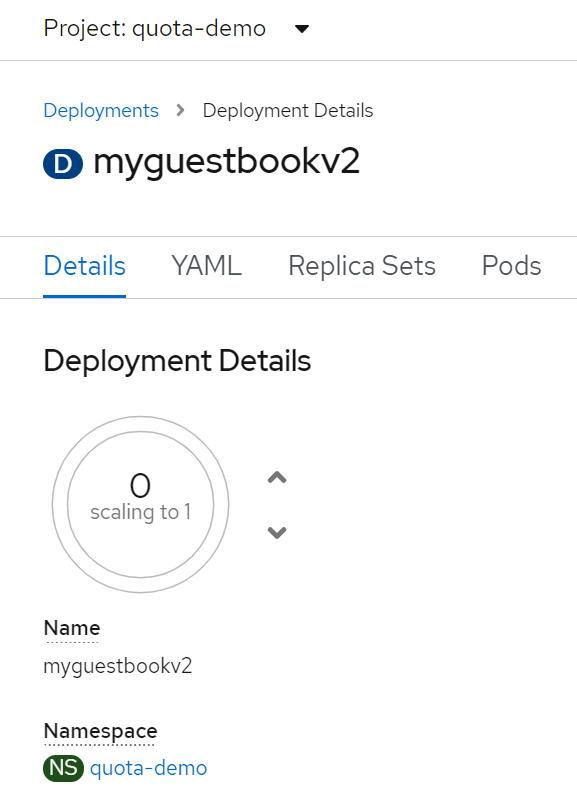
- Click on the 'myguestbook2' deployment to view more details. You will notice that the pod hasn't been deployed.
- If you scroll all the way down, you will notice the conditions section which shows that the pod has failed because the quota has been exceeded.

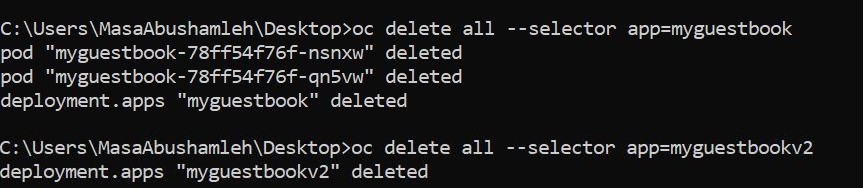
- Before moving to the next step, make sure to delete all resources and the resource quota you created in this step. You can delete the resource quota from the web console. Use the following commands to delete all resources for 'myguestbook' and 'myguestbookv2' deployments.
```
oc delete all --selector app=myguestbook
oc delete all --selector app=myguestbookv2
```
## Configure Memory and CPU for a Namespace
- Create a new ResourceQuota for memory and CPU using the following ```oc apply``` command.
```
oc apply -f https://raw.githubusercontent.com/nerdingitout/oc-quota/main/quota-mem-cpu.yaml
```

- The YAML file contains the following details for the quota
```
apiVersion: v1
kind: ResourceQuota
metadata:
name: mem-cpu-demo
spec:
hard:
requests.cpu: "1"
requests.memory: 1Gi
limits.cpu: "2"
limits.memory: 2Gi
```
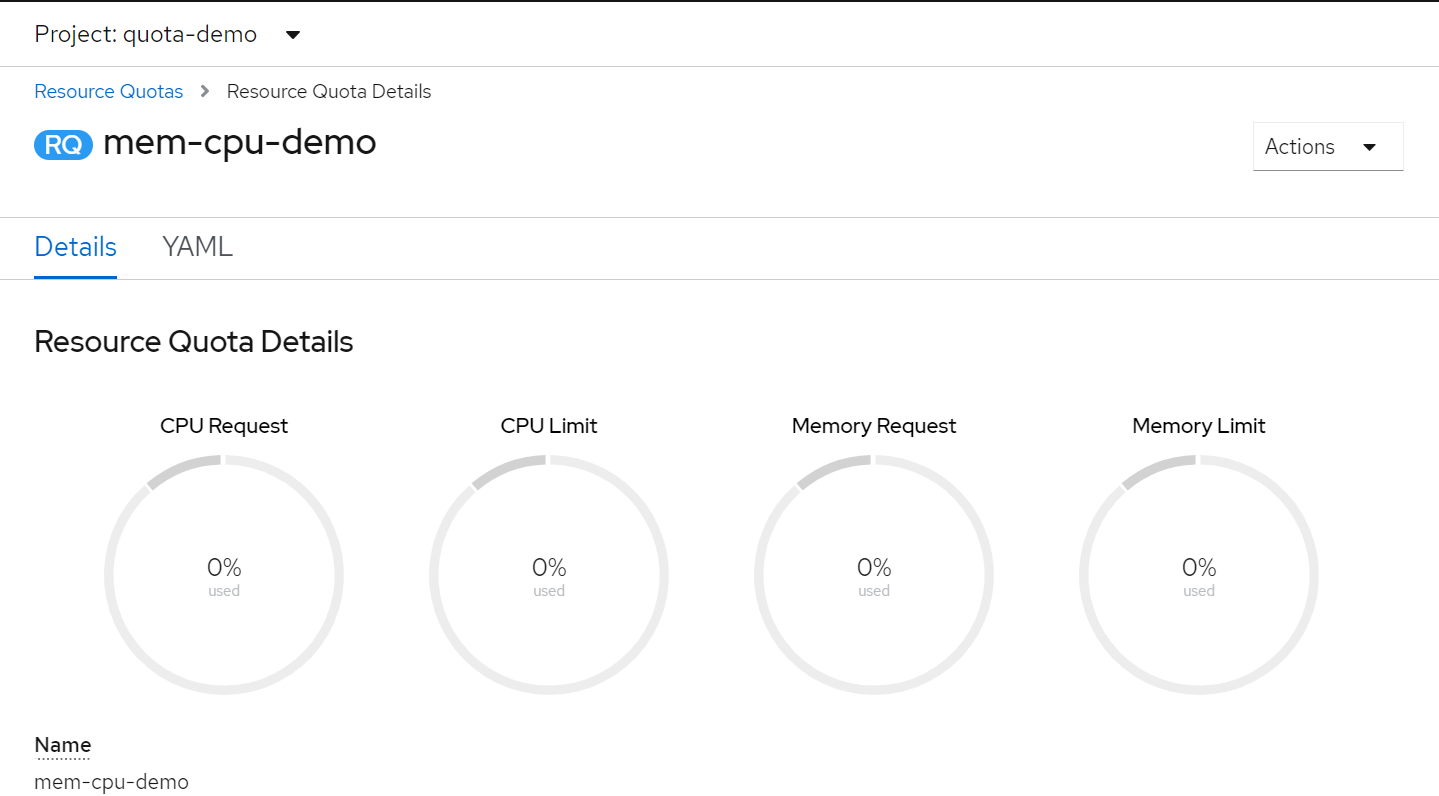
As you can notice, when defining the quota got CPU and memory you are defining minimum (requests) and maximum (limits) resources to be used. Once created, you can view the resource quota on the web console. The following screenshot shows that the resources haven't been used yet.
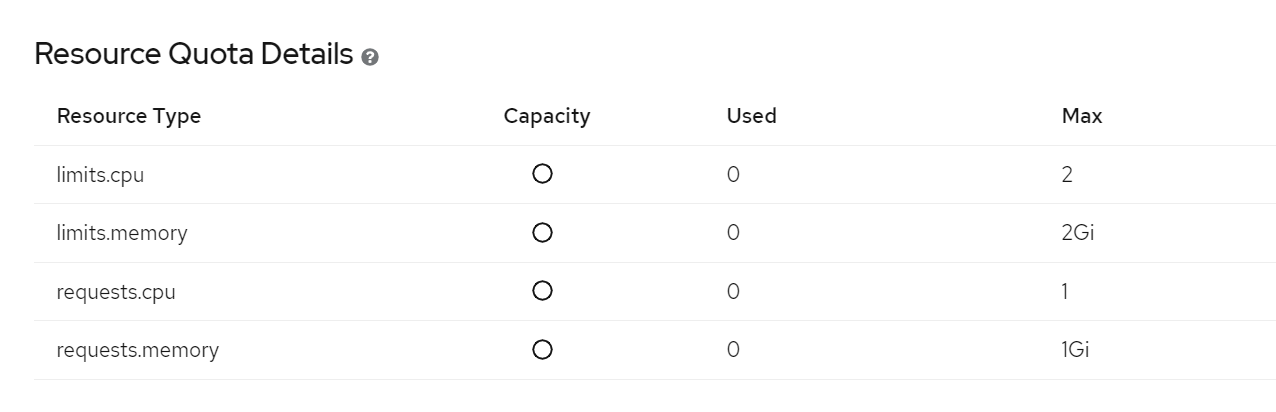
This ResourceQuota places these requirements on the quota-demo namespace: Every Container must have a memory request, memory limit, cpu request, and cpu limit.
- The memory request total for all Containers must not exceed 1 GiB.
- The memory limit total for all Containers must not exceed 2 GiB.
- The CPU request total for all Containers must not exceed 1 core.
- The CPU limit total for all Containers must not exceed 2 cores.
## Verify that the CPU and Memory Quotas work
- Create an Nginx application using the following command.
```
oc apply -f https://raw.githubusercontent.com/nerdingitout/oc-quota/main/nginx-app.yaml
```

- The yaml definition specfies the memory and CPU for the pod as shown below.
```
apiVersion: v1
kind: Pod
metadata:
name: nginx-app
spec:
containers:
- name: quota-mem-cpu-demo-ctr
image: nginx
resources:
limits:
memory: "800Mi"
cpu: "800m"
requests:
memory: "600Mi"
cpu: "400m"
```
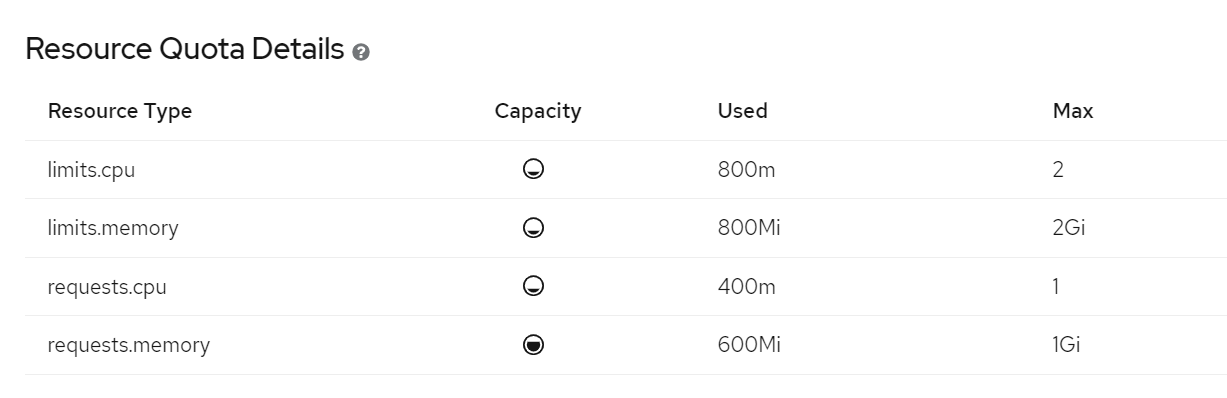
- Since the requests and limits for the CPU and memory are within the quota, the pod should be created successfully.

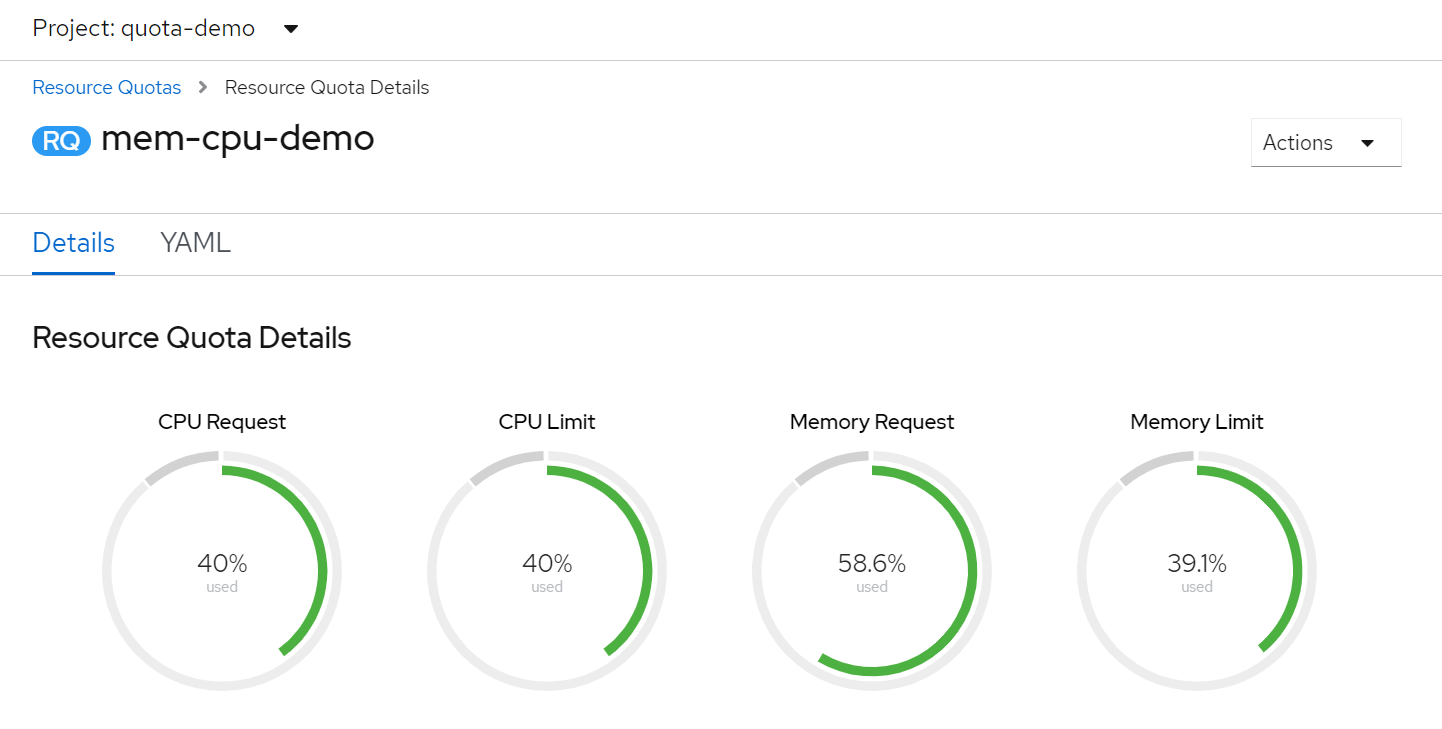
- On the web console, if you go back to the resource quota, you will notice that the Nginx Pod’s CPU and Memory requests and limits are correctly accounted for against the ResourceQuota.
- Now, try to exceed the quota by creating a new application using redis docker image. The yaml defitnition includes the following details. Keep in mind that it will exceed the quota, therefore the application won't be created.
```
apiVersion: v1
kind: Pod
metadata:
name: redis-app
spec:
containers:
- name: quota-mem-cpu-demo-2-ctr
image: redis
resources:
limits:
memory: "1Gi"
cpu: "800m"
requests:
memory: "700Mi"
cpu: "400m"
```
- Use the following command to create the application
```
oc apply -f https://raw.githubusercontent.com/nerdingitout/oc-quota/main/redis-app.yaml
```
- You will notice the following error and that's because the application exceeded the quota.

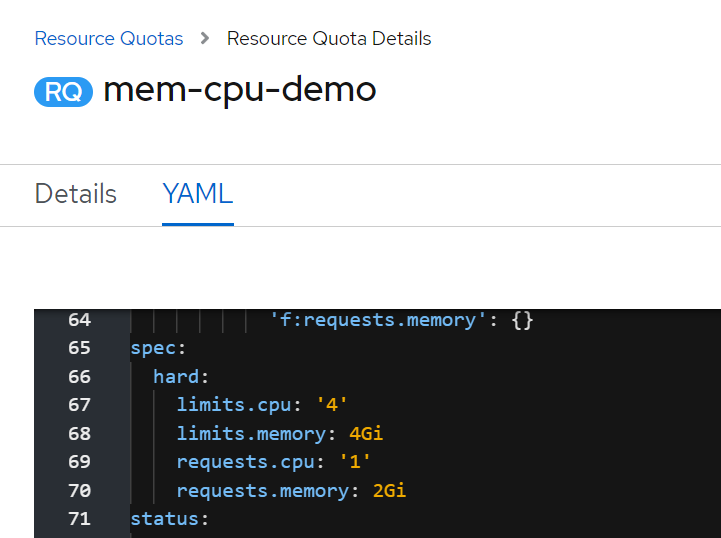
- You can increase the resource quota to fit in the new application. Go to the YAML definition of the 'mem-cpu-demo' resource quota and edit it under the spec section (between lines 65 and 71) as shown below and then save your changes.
```
spec:
hard:
limits.cpu: '4'
limits.memory: 4Gi
requests.cpu: '1'
requests.memory: 2Gi
```
- Attempt to create the same redis application again, it will be created successfully.
```
oc apply -f https://raw.githubusercontent.com/nerdingitout/oc-quota/main/redis-app.yaml
```

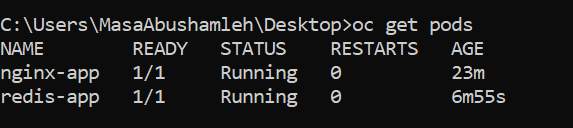
- If you use ```oc get pods``` you will see that the new applciation has been created successfully.
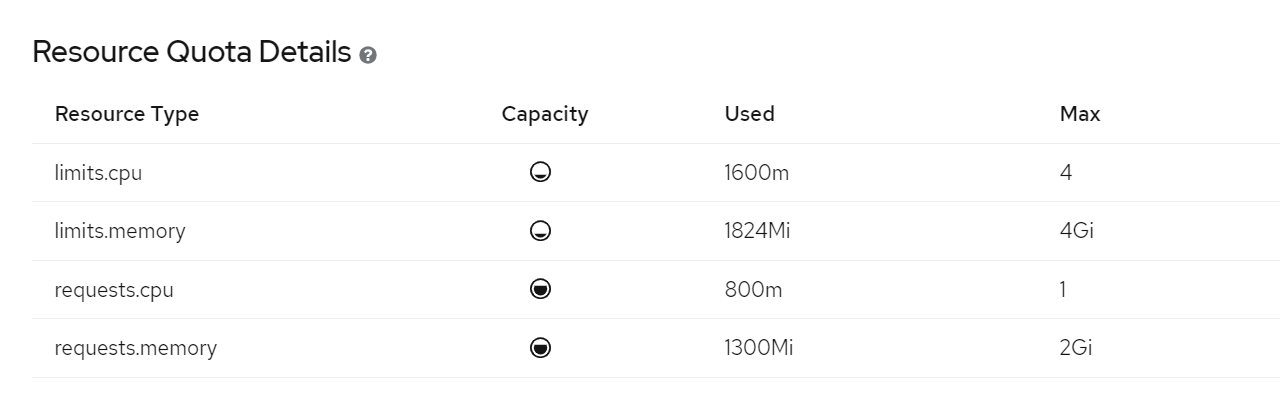
- If you go back to the 'mem-cpu-demo' details page, you will notice that it has changed and now the consumed resources are counted for both applications

## Summary
In this tutorial, you learned what is a resource quota and how to create resource quotas for namespaces and pods. With resource quota you can control CPU usage, memory usgae, number of pods, replication controllers, services, secrets and presistent volume claims. You performed several tasks to control resources and saw changes in the project and pods and learned what happens when you exceed the resource quota and how to change it.