https://github.com/nerdingitout/oc-web
https://github.com/nerdingitout/oc-web
Last synced: about 1 year ago
JSON representation
- Host: GitHub
- URL: https://github.com/nerdingitout/oc-web
- Owner: nerdingitout
- Created: 2020-11-15T12:13:19.000Z (over 5 years ago)
- Default Branch: main
- Last Pushed: 2020-12-16T18:17:08.000Z (over 5 years ago)
- Last Synced: 2025-05-14T10:32:27.853Z (about 1 year ago)
- Language: Python
- Size: 33.2 KB
- Stars: 2
- Watchers: 2
- Forks: 1
- Open Issues: 0
-
Metadata Files:
- Readme: README.md
Awesome Lists containing this project
README
# Red Hat OpenShift for Developers
This tutorial aims to introduce 2 things which are essential for Developers using OpenShift:
- **Part1**: How to deploy/scale/update and rollback applications using existing Docker Images
- **Part2**: Building web applications using S2I from Github directly and how to automate deployments
In this tutorial you will learn:
- For **Part1** - Follow the instructions in this [gitbook](https://masamh.gitbook.io/oc-dev/)
- For **Part2** - Follow the instructions in this [gitbook](https://masamh.gitbook.io/oc-dev/automating-deployment)
The source code for **Part2** exercise is hosted here.
## Prerequisites
- Create your IBM Cloud account for free here.
- Access to free OpenShift Cluster:
- URL:
- Key:
- OC CLI. You can install it on your machine or use the CLI on IBM Cloud here.
## Steps
### Fork this Repository
- You will need to fork this repository because you will be making changes in your code.
### Create Project
- On the web console, go to Projects and click 'Create Project'. Name it 'my-flask-project'.
### Create Application from GitHub
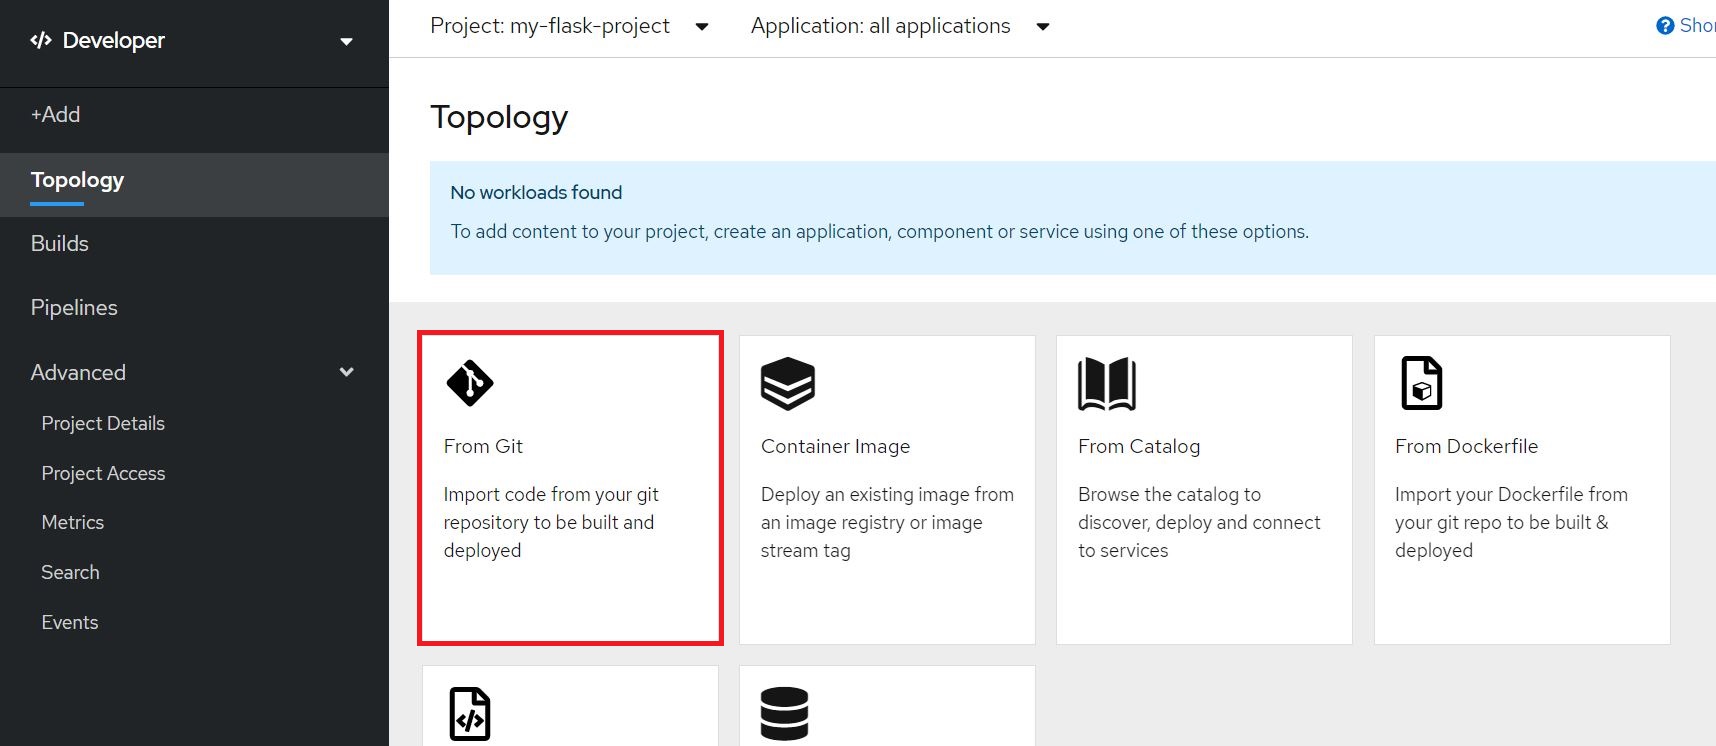
- Switch to the Developer Perspective, and from the topology create application from Git.
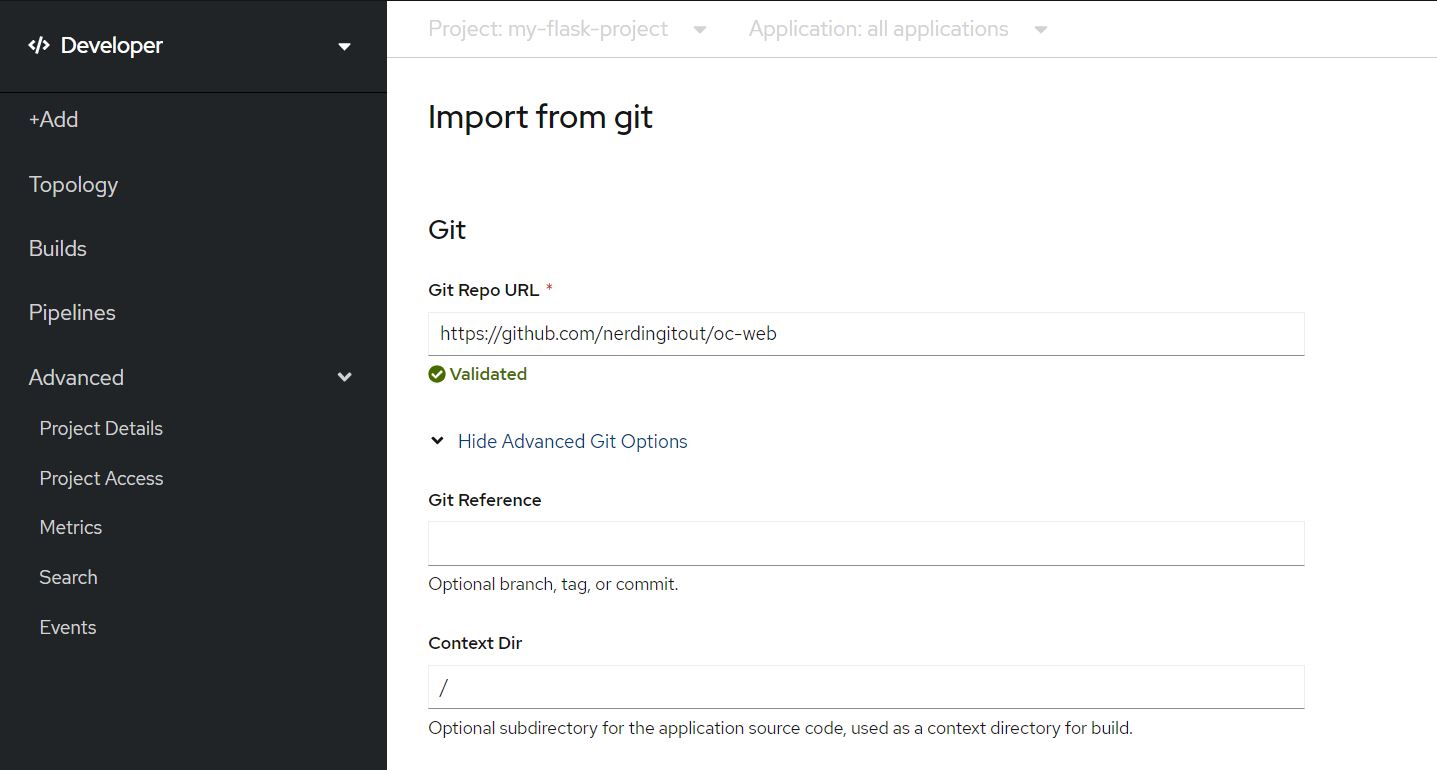
- Copy the URL of the GitHub repository that you forked and paste it under 'Git Repo URL', and choose Python 3.6 for your builder image, then click 'Create'.
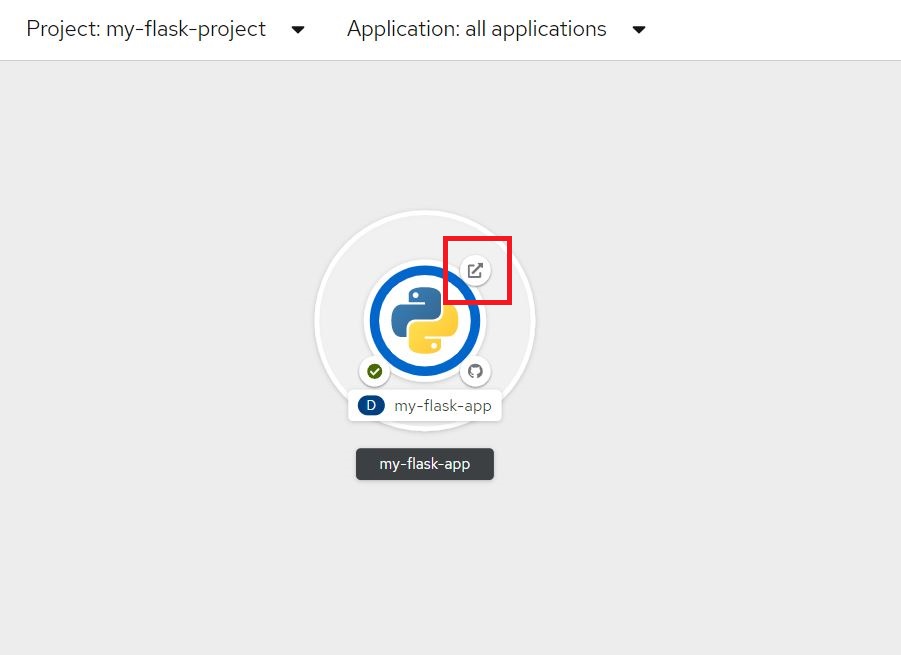
- Once created, you will be redirected to the topology view where you can view your pods. Once the application is built successfully, the pod will turn from light blue to dark blue. You can access the URL of the application from the top corner of the pod as shown in the image.
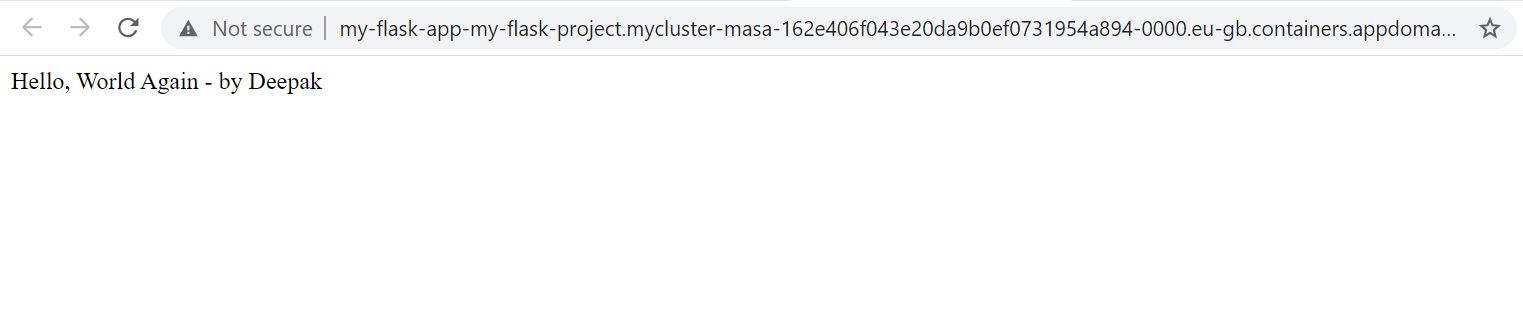
- You will be redirected to a simple Hello World page.
- If you add ```/version``` at the end of the URL, you will be redirected to a different route with the following details.

### Connect Application to GitHub Webhook
- Go to Builds where you can show Build Configs. Click on 'my-flask-app' where you will be redirected to an overview page of the build configs of the application.

- Scroll all the way down to Webhooks and copy the URL with secret (usually go for the GitHub URL, but if it fails for some applications the Generic URL would still work and you can go for it as well).
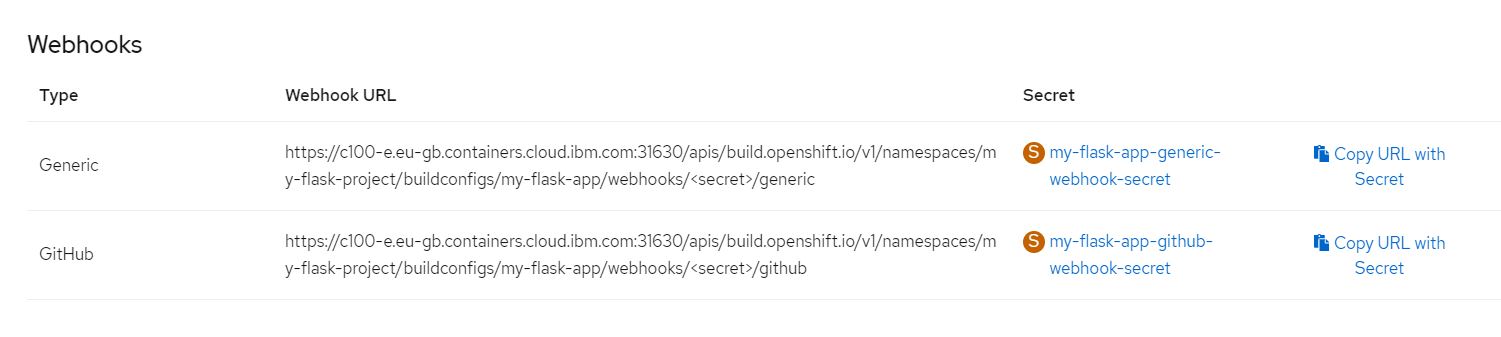
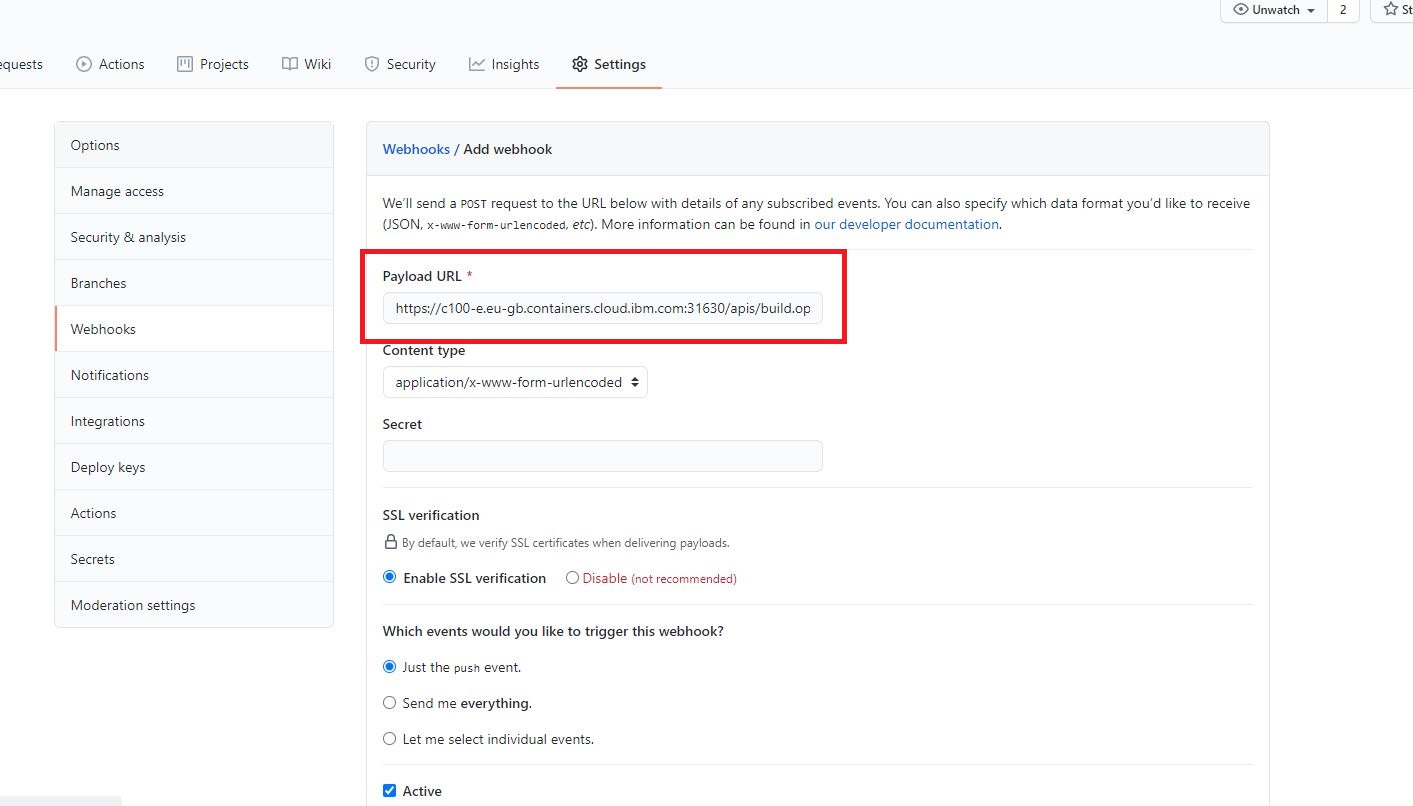
- Now go to Settings in your GitHub repository, then go to Webhooks tab where you can find an 'add webhook' button, when you click it, you will be prompted to enter your password, then you will be redirected to a new page. Paste the copied URL under 'Payload URL' as shown below. You can go with the default settings and then 'add webhook'.
### Make Changes to application
- Now that you have connected your application to GitHub Webhook, make a change in app.py file by adding the following lines right above line 16. These lines of code add a new route in the application.
```
@app.route('/test')
def get_test():
return 'You are accessing /test endpoint'
```
### See Changes on Web Console
- If you go back to the web console, you will notice the new builds
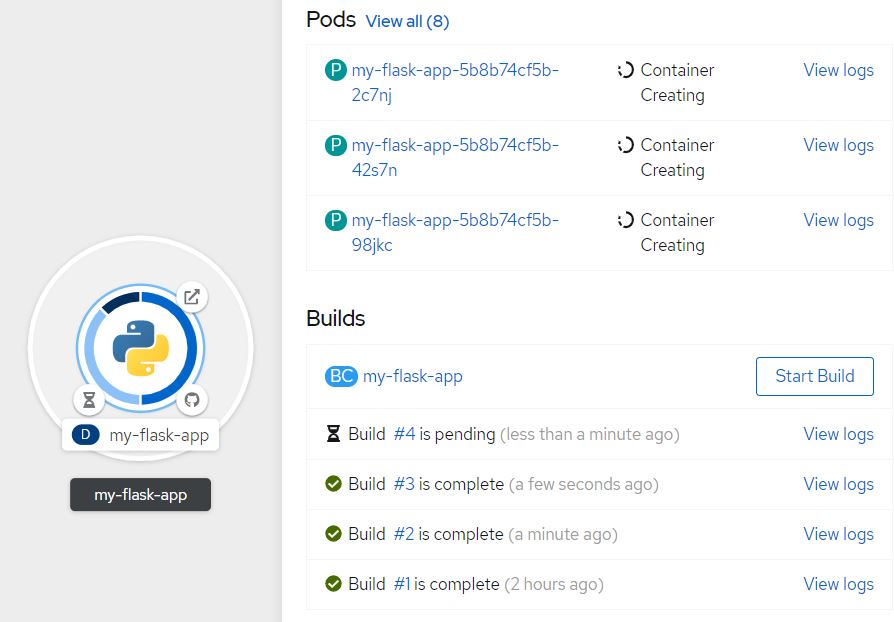
- You can access the new route from ```/test```, and it will look like the following.
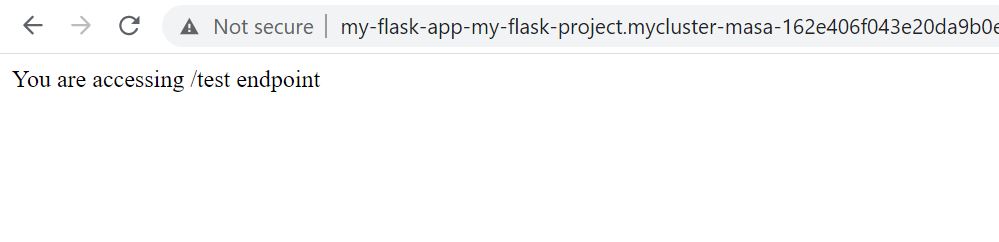
- Keep in mind that everytime you commit new changes, new builds will get triggered.