https://github.com/netlify-templates/nextjs-blog-theme
A customizable Next.js and Tailwind blog starter with visual editing and Git Content Source. Designed by the Bejamas agency.
https://github.com/netlify-templates/nextjs-blog-theme
blog netlify nextjs react tailwindcss tailwindcss-v4 theme visual-editor
Last synced: about 1 year ago
JSON representation
A customizable Next.js and Tailwind blog starter with visual editing and Git Content Source. Designed by the Bejamas agency.
- Host: GitHub
- URL: https://github.com/netlify-templates/nextjs-blog-theme
- Owner: netlify-templates
- License: mit
- Created: 2021-12-09T16:18:08.000Z (over 4 years ago)
- Default Branch: main
- Last Pushed: 2025-05-12T07:25:16.000Z (about 1 year ago)
- Last Synced: 2025-05-12T08:46:22.875Z (about 1 year ago)
- Topics: blog, netlify, nextjs, react, tailwindcss, tailwindcss-v4, theme, visual-editor
- Language: JavaScript
- Homepage: https://bejamas-nextjs-blog.netlify.app
- Size: 3.67 MB
- Stars: 547
- Watchers: 8
- Forks: 249
- Open Issues: 12
-
Metadata Files:
- Readme: README.md
- License: LICENSE
Awesome Lists containing this project
- awesome-nextjs - Nextjs Blog Theme - A customizable Next.js and Tailwind blog starter with visual editing and Git Content Source. Designed by the Bejamas agency. (Blog)
README

[](https://app.netlify.com/start/deploy?repository=https://github.com/netlify-templates/nextjs-blog-theme)
A customizable blog starter using:
- [Next.js](https://github.com/vercel/next.js) v15 (Pages Router)
- [Tailwind](https://tailwindcss.com/) v4.x
- [Netlify Visual Editor](https://docs.netlify.com/visual-editor/overview/)
- Built-in [MDX](https://mdxjs.com/) support
- Includes modern design with dark & light themes

[Take a gander at the demo.](https://bejamas-nextjs-blog.netlify.app)
[Click here to watch the template walkthrough!](https://www.youtube.com/watch?v=63QZHs259dY)
## Table of Contents:
- [Getting Started](#getting-started)
- [Setting Up Locally](#setting-up-locally)
- [Using the Wizard](#using-the-setup-wizard)
- [Configuring the Blog](#configuring-the-blog)
- [Adding New Posts](#adding-new-posts)
- [Netlify Visual Editor](#netlify-visual-editor)
- [Testing](#testing)
- [Included Default Testing](#included-default-testing)
- [Removing Renovate](#removing-renovate)
## Getting Started
---
You can get started with this project in two ways: locally or using the [setup wizard](https://nextjs-wizard.netlify.app/).
### Setting Up Locally
If you're doing it locally, start with clicking the [use this template](https://github.com/netlify-templates/nextjs-blog-theme/generate) button on GitHub. This will create a new repository with this template's files on your GitHub account. Once that is done, clone your new repository and navigate to it in your terminal.
From there, you can install the project's dependencies by running:
```shell
yarn install
```
Finally, you can run your project locally with:
```shell
yarn run dev
```
Open your browser and visit , your project should be running!
### Using the Setup Wizard

Through the [setup wizard](https://nextjs-wizard.netlify.app/), you can create your blog in a few clicks and deploy to Netlify.
## Configuring the blog
The config is based on environment variables to make it easy to integrate with any Jamstack platform, like Netlify.
Here are the variables you can edit:
| Variable | Description | Options
| --- | --- | --- |
| `BLOG_NAME` | the name of your blog, displayed below the avatar ||
| `BLOG_TITLE` | the main header (`h1`) on the home page ||
| `BLOG_FOOTER_TEXT`| the text in the footer ||
| `BLOG_THEME` | the theme to pass to Tailwind | default |
| `BLOG_FONT_HEADINGS` | the font-family for all HTML headings, from `h1` to `h6`| sans-serif (default), serif, monospace|
| `BLOG_FONT_PARAGRAPHS` | the font-family for all other HTML elements | sans-serif (default), serif, monospace|
All of the env variables can be configured through the [Wizard](https://nextjs-wizard.netlify.app/) or through setting the project's environment variables. You can do this in your Netlify dashaboard (Site settings/Build & deploy/Environment/Environment variables).
https://user-images.githubusercontent.com/3611928/153997545-6dcdeef0-e570-49e7-93d6-ce0d393d16c9.mp4
[alt: video walkthrough of editing env vars]
If setting an environment variable isn't your cup of tea, the defaults can be changed in [`utils/global-data.js`](/utils/global-data.js). You can also remove the variables and hard code blog information where these variables are used in the code base.
- `BLOG_THEME, BLOG_FONT_HEADINGS, & BLOG_FONT_PARAGRAPHS` are used in [`tailwind-preset.js`](tailwind-preset.js)
- `BLOG_NAME, BLOG_TITLE, BLOG_FOOTER_TEXT` are used in [`pages/index.js`](pages/index.js) & [`pages/posts/[slug].js`](pages/posts/[slug].js) through the `globalData` object.
## Adding new posts
All posts are stored in `/posts` directory. To make a new post, create a new file with the [`.mdx` extension](https://mdxjs.com/).
Since the posts are written in `MDX` format you can pass props and components. That means you can use [React components](https://reactjs.org/docs/components-and-props.html) inside your posts to make them more interactive. Learn more about how to do so in the [MDX docs on content](https://mdxjs.com/docs/using-mdx/#components).
https://user-images.githubusercontent.com/3611928/152727802-102ec296-41c8-446d-93ed-922d11187073.mp4
[alt: video walkthrough of adding a new blog post]
## Netlify Visual Editor
This template is configured to work with [visual editing](https://docs.netlify.com/visual-editor/overview/) and [Git Content Source](https://docs.netlify.com/create/content-sources/git/).
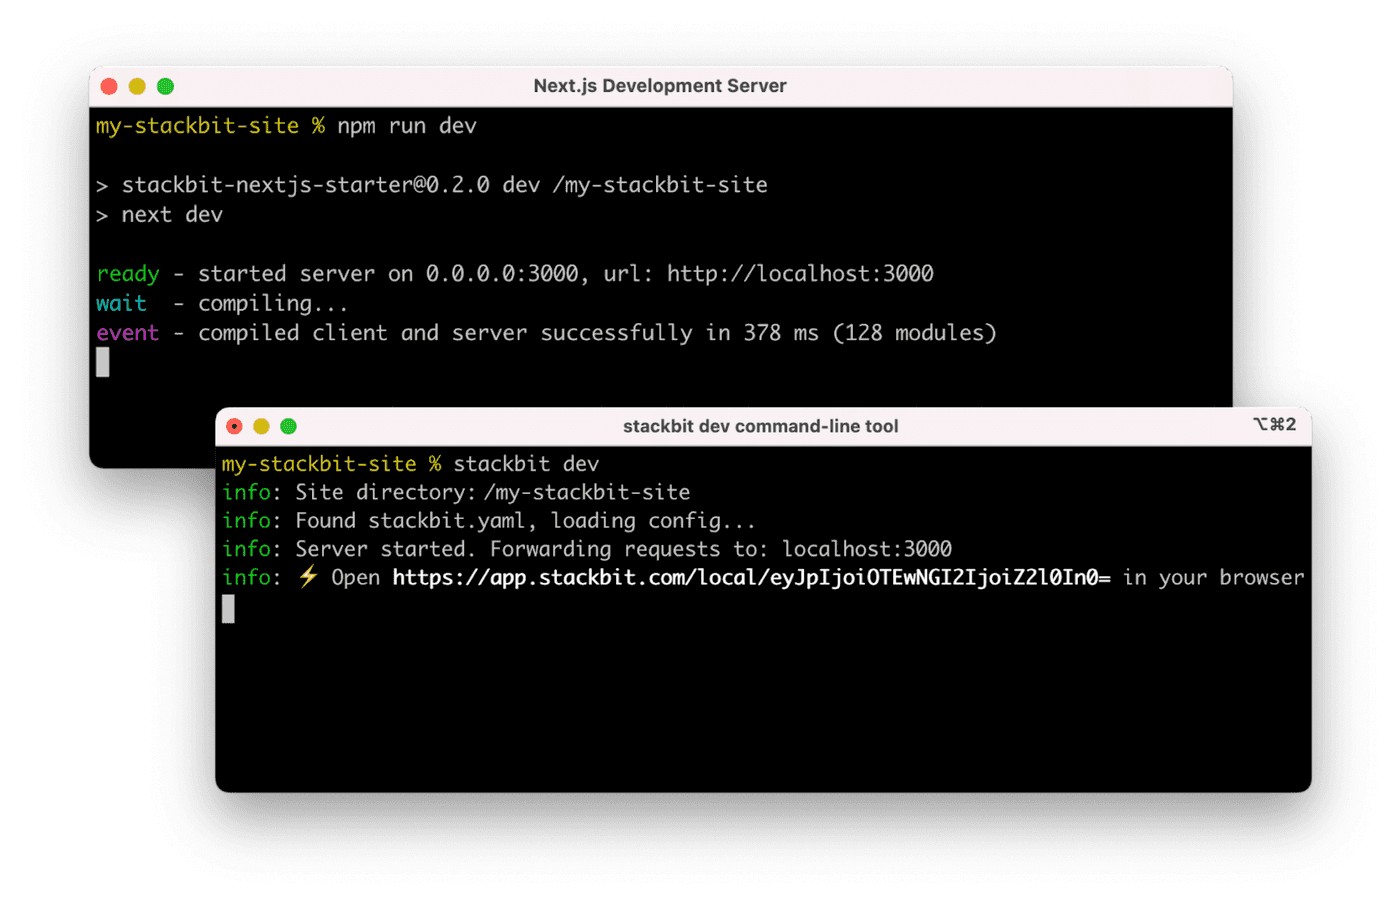
### Develop with Netlify Visual Editor Locally
The typical development process is to begin by working locally. Clone this repository, then run `npm install` in its root directory.
Run the Next.js development server:
```txt
cd nextjs-blog-theme
npm run dev
```
Install the [Netlify Visual Editor CLI](https://www.npmjs.com/package/@stackbit/cli). Then open a new terminal window in the same project directory and run the Netlify visual editor dev server:
```txt
npm install -g @stackbit/cli
stackbit dev
```
This outputs your own Netlify visual editor URL. Open this, register, or sign in, and you will be directed to Netlify's visual editor for your new project.
### Next Steps
Here are a few suggestions on what to do next if you're new to Netlify Visual Editor:
- Learn [Netlify visual editor overview](https://docs.netlify.com/visual-editor/visual-editing/)
- Check [Netlify visual editor reference documentation](https://visual-editor-reference.netlify.com/)
## Testing
### Included Default Testing
We’ve included some tooling that helps us maintain these templates. This template currently uses:
- [Renovate](https://www.mend.io/free-developer-tools/renovate/) - to regularly update our dependencies
If your team is not interested in this tooling, you can remove them with ease!
### Removing Renovate
In order to keep our project up-to-date with dependencies we use a tool called [Renovate](https://github.com/marketplace/renovate). If you’re not interested in this tooling, delete the `renovate.json` file and commit that onto your main branch.
## Support
If you get stuck along the way, get help in our [support forums](https://answers.netlify.com/).