https://github.com/ngneat/dag
🐠 An Angular service for managing directed acyclic graphs
https://github.com/ngneat/dag
angular dag directed-acyclic-graph graph
Last synced: about 1 year ago
JSON representation
🐠 An Angular service for managing directed acyclic graphs
- Host: GitHub
- URL: https://github.com/ngneat/dag
- Owner: ngneat
- License: mit
- Created: 2020-11-11T06:57:43.000Z (over 5 years ago)
- Default Branch: main
- Last Pushed: 2024-12-12T02:53:02.000Z (over 1 year ago)
- Last Synced: 2025-05-07T18:15:36.591Z (about 1 year ago)
- Topics: angular, dag, directed-acyclic-graph, graph
- Language: TypeScript
- Homepage:
- Size: 4.76 MB
- Stars: 156
- Watchers: 5
- Forks: 7
- Open Issues: 3
-
Metadata Files:
- Readme: README.md
- Contributing: CONTRIBUTING.md
- Funding: .github/FUNDING.yml
- License: LICENSE
- Code of conduct: CODE_OF_CONDUCT.md
Awesome Lists containing this project
- awesome-angular - dag - An Angular service for managing directed acyclic graphs. (Table of contents / Third Party Components)
- fucking-awesome-angular - dag - An Angular service for managing directed acyclic graphs. (Table of contents / Third Party Components)
README

[]()
[]()
[]()
[](https://github.com/prettier/prettier)
[](#contributors-)
[](https://github.com/ngneat/)
[]()
[](https://app.netlify.com/sites/ngneat-dag-demo/deploys)
@ngneat/dag is designed to assist in creating and managing a [directed acycylic graph](https://en.wikipedia.org/wiki/Directed_acyclic_graph) model in an Angular application. You can think of a DAG as a workflow where a user adds steps and based on given criteria continues on to the next step or steps. With this library, you can add or remove steps to the DAG and the model will be properly updated. With this part of the workflow being managed by the service, you can focus on what the workflow does rather than how to let the user build it.
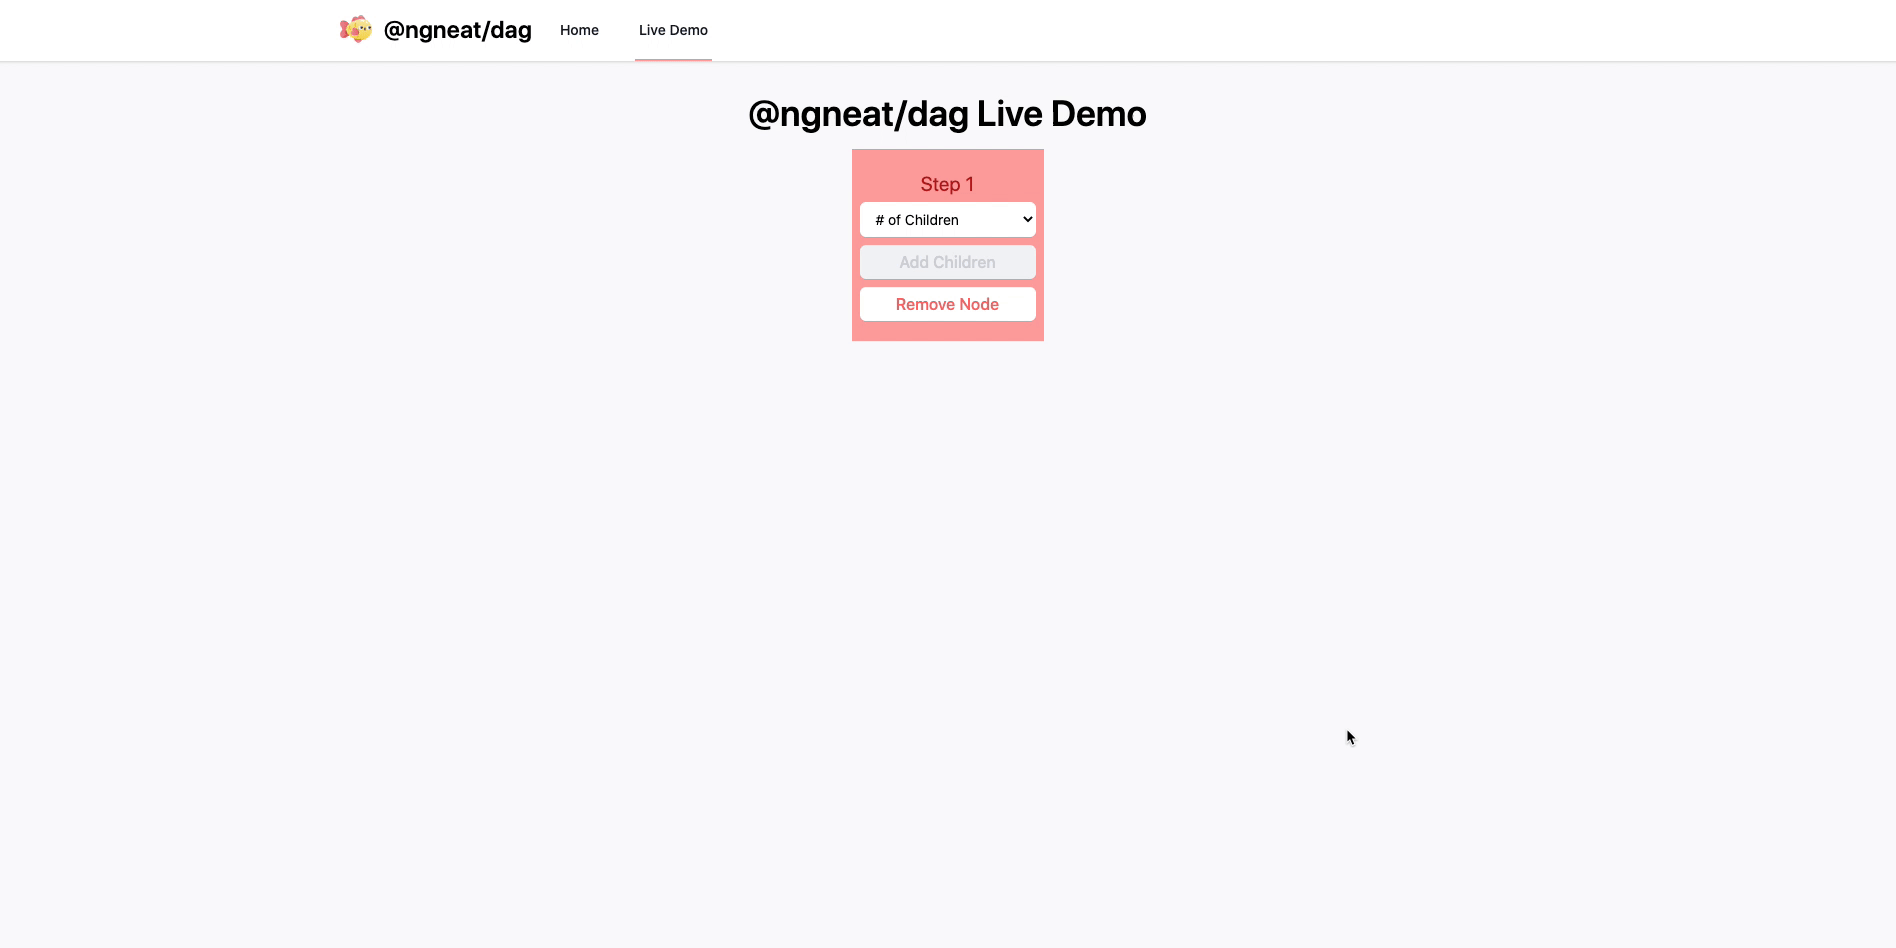
[Live Demo](https://ngneat-dag-demo.netlify.app)
## Features
- ✅ Create and manage a directed acyclic graph model in you Angular application
- ✅ Add or remove items
- ✅ Convert the DAG model to a single dimensional array
## Table of Contents
- [Installation](#installation)
- [Usage](#usage)
- [FAQ](#faq)
## Installation
### NPM
`npm install @ngneat/dag`
### Yarn
`yarn add @ngneat/dag`
## Usage
The first thing to note is that this service is not provided in the root of the Angular application. The reasoning for this is because each time a DAG model needs to be created, a new instance of the service should be created. This means that when you import the service into a component, you should add it to the component's `providers` array.
```ts
// workflow-builder.component.ts
@Component({
selector: 'app-workflow-builder',
...
providers: [DagManagerService]
})
export class WorkflowBuilderComponent {}
```
Each time the component is activated, a new instance of this service will be created. This ensures that there will not be any previous data still in the service when you go to the component; you'll start fresh each time.
The next step when using the service is to define an interface or class that extends the included `DagModelItem` interface provided in this library. Your interface and class can have any number of attributes on it, but extending the `DagModelItem` ensures that the correct attributes will be present for the `DagManagerService` to properly work. Here's the `DagModelItem` interface:
```ts
// dag-model-item.interface.ts
export interface DagModelItem {
stepId: number;
parentIds: number[];
branchPath: number;
}
```
The `stepId` is a unique identifier for a given step. The number doesn't matter, as long as it is unique in any given workflow. The `parentIds` is an array of `stepId`s that are direct parents of a given step. With the DAG model, each step doesn't need to know what its children steps are as long as the parent IDs are tracked. The `branchPath` attribute defines how a workflow is traversed if a step has multiple children steps. Think of a step using if/else logic. If a given set of criteria is `true`, the workflow would traverse `branchPath` one, and if the criteria is `false` it would traverse `branchPath` two. The `branchPath` itself doesn't matter technically; the `false` path could be `branchPath` 1 if you want. The steps are ordered though by `branchPath` in ascending order.
After creating your interface or class, you should provide that in angle brackets when declaring the service in the component's constructor. This allows for the service to know more about the items as the DAG model is being managed.
```ts
// workflow-item.interface.ts
export interface WorkflowItem extends DagModelItem {
name: string;
id: string;
}
// workflow-builder.compoonent.ts
export class WorkflowBuilderComponent {
constructor(private _dagManager: DagManagerService) {}
}
```
### Set the Next Step Number
After creating an instance of the service, one of the first things that should be done in the `ngOnInit` method is to determine what the next `stepId` should be when an item is created. If you're creating a new workflow, you can start with 1. If you're loading a saved workflow to edit it, you should find the highest ID in the loaded workflow and start at the next number. This will ensure that no two items have the same `stepId`.
```ts
// workflow-builder.component.ts
export class WorkflowBuilderComponent implements OnInit {
constructor(private _dagManager: DagManagerService) {}
ngOnInit() {
const nextItemNumber =
this.startingItems && this.startingItems.length
? getMaxItemNumber(this.startingItems)
: 1;
this._dagManager.setNextNumber(nextItemNumber);
}
getMaxItemNumber(arr: WorkflowItem) {
return (
Math.max.apply(
Math,
arr.map((i) => i.stepId)
) + 1
);
}
}
```
### Priming the Service to Manage the DAG Model
At this point, you are now ready to start having the service manage your DAG model. When the component loads, the service should be provided with an array of items that extend the `DagModelItem`. This could be a new array if the workflow is new, or the array could come from a database. Again, this should be a single dimension array of those items. The service will provide an observable of the DAG model which is a two dimensional array of these items, but we'll talk about that momentarily. Here's an example of priming the service with the starting items:
```ts
// workflow-builder.component.ts
export class WorkflowBuilderComponent implements OnInit {
startingItems: WorkflowItem[] = [
{
id: 1,
name: 'Step 1',
stepId: 1,
parentIds: [0],
branchPath: 1,
},
];
constructor(private _dagManager: DagManagerService) {}
ngOnInit() {
this._dagManager.setNewItemsArrayAsDagModel(this.startingItems);
}
}
```
A couple things to note here. First, all items need to have a `parentIds` array, even if the only item in the array is 0. This means that the step is the very starting point of the workflow. Also, every step should have a `branchPath`, regardless of if it has any siblings coming from a given parent.
When this method is called on the service, the DAG model observable from the service emits a new value. The type of that value is a two dimensional array of the provided class or interface, such as `WorkflowItem[][]`. If you don't want to use the observable, you can use the `getCurrentDagModel` method to get the current DAG model from the service, or the `getSingleDimensionalArrayFromModel` to get the DAG model as a single dimensional array. There are multiple ways to manage the model.
### Subscribing to the `dagModel$` Observable
The service provides a `dagModel$` observable that you can subscribe to to display the model to the end user in the component. As changes are made to the model, the UI can update accordingly and reactively. This is the recommended method to display the model.
```ts
// workflow-builder.component.ts
export class WorkflowBuilderComponent implements OnInit {
public dagModel$: Observable;
constructor(private _dagManager: DagManagerService) {}
ngOnInit() {
this.dagModel$ = this._dagManager.dagModel$;
}
}
```
### Adding New Steps to the Workflow
The service provides easy to use methods for adding items to the workflow. Adding items to a DAG model can be complicated, but the service should simplify the process. In a nutshell, when an item is added as a child for a parent, it will insert itself on the next row of the DAG model display. If the parent item already had a child or children, they will be updated to be children of the new item. The previous child(ren) will be added as child(ren) of the new item that has a `branchPath` of one.
The service provides four ways to add new steps to the workflow, `addNewStep`, `addNewStepAsNewPath`, `addItem`, and `addItemAsNewPath`. The `addNewStep` and `addItem` methods are very similar. The point is to add a new step to the model at a given location. There are slight differences between the two functions which will be demonstrated here. The `addNewStep` method is the easier of the two methods to use, as it gets the single dimension array from the service and automatically updates the observable after adding the item. You can use it like this:
```ts
// workflow-builder.component.ts
export class WorkflowBuilderComponent implements OnInit {
startingItems: WorkflowItem[] = [
{
id: 1,
name: 'Step 1',
stepId: 1,
parentIds: [0],
branchPath: 1,
},
];
constructor(private _dagManager: DagManagerService) {}
// addStep would be called when a button in this component is clicked, or something similar, signalling the need to add a new step
addStep(parentIds: number[], numberOfChildren: number = 1) {
this._dagManager.addNewStep(parentIds, numberOfChildren, 1, {
id: null,
name: '',
});
}
}
```
This example is a function that will be called when a button is clicked in the component. It then calls the service with 4 parameters: the new step's `parentIds`, the number of children that should be created for those `parentIds` (again in the situation that there is a branch being created from a parent), the starting branch number (which will likely always be 1 when creating a new item), and an object with the attributes from `WorkflowItem`, minus the attributes inherited from `DagModelItem`. When you add a new item using this method, the `dagModel$` observable will automatically be updated.
The other method available for adding items is slightly different and doesn't update the DAG model observable. You will need to provide the same information as above, but in addition the single dimension array of items that serves as the backing to the DAG model. Here's an example:
```ts
// workflow-builder.component.ts
export class WorkflowBuilderComponent implements OnInit {
workflowItems: WorkflowItem[] = [
{
id: 1,
name: 'Step 1',
stepId: 1,
parentIds: [0],
branchPath: 1,
},
];
constructor(private _dagManager: DagManagerService) {}
ngOnInit() {
this.workflowItems = this._dagManager.addItem(
parentIds,
[...this.workflowItems],
numberOfChildren,
1,
{
id: null,
name: '',
}
);
}
}
```
The `addItem` method returns a single dimension array of `WorkflowItems`, the same as the `workflowItems` array in the previous example. After adding the item to the array, you will need to make sure the UI is updated in some fashion.
The last two methods for adding an item are slightly different. Instead of adding a new item that pushes other items down further in the workflow, this method will add a new item as a new `branchPath` for a given parent. So, if your workflow should branch at a given point and you forgot to add it, this would allow for the branch to be created. These methods only take a single `parentId` as a parameter rather than the array, because the branch will split from a single parent. You also don't need to provide the starting branch path number, as it will be determined by the method based on the new items' existing siblings. Other than that, the methods are the same as `addItem` and `addNewStep`. Just like those two methods, `addNewStepAsNewPath` will automatically update the observable, and `addItemAsNewPath` doesn't update the observable but instead returns the single dimension array.
```ts
// workflow-builder.component.ts
export class WorkflowBuilderComponent implements OnInit {
workflowItems: WorkflowItem[] = [
{
id: 1,
name: 'Step 1',
stepId: 1,
parentIds: [0],
branchPath: 1,
},
];
constructor(private _dagManager: DagManagerService) {}
ngOnInit() {
this.workflowItems = this._dagManager.addItemAsNewPath(
parentIds,
[...this.workflowItems],
numberOfChildren,
{
id: null,
name: '',
}
);
}
}
```
### Removing Items from the Workflow
Sometimes steps need to be removed from a workflow, and the service provides that ability as well. There are two ways to do this, similar to adding new items. The `removeStep` method updates the observable automatically, while the `removeItem` method does not update the observable but does return the single dimension array.
Removing items from a DAG model is quite complicated. There are specific ways that this is done in this model. If you remove an item that has no children, it's straightforward; the item is just removed. If it has a single child, then it is removed and its child is moved up to its spot in the workflow. If an item is removed and it has multiple children (multiple branches, like if/else), then the `branchPath` one is retained while all other `branchPath`s are removed from the model. If the root item is removed, then its child will be moved up to be the new root item.
Here are examples of how to use the `removeStep` and `removeItem` methods:
```ts
// workflow-builder.component.ts
export class WorkflowBuilderComponent implements OnInit {
workflowItems: WorkflowItem[] = [
{
id: 1,
name: 'Step 1',
stepId: 1,
parentIds: [0],
branchPath: 1,
},
];
constructor(private _dagManager: DagManagerService) {}
// this method will be called when a remove button in the UI is clicked
removeStep(stepId: number) {
this._dagManager.removeStep(stepId);
}
}
```
The only parameter the `removeStep` method needs is the `stepId` that should be removed. The item will be removed and the observable updated.
```ts
// workflow-builder.component.ts
export class WorkflowBuilderComponent implements OnInit {
workflowItems: WorkflowItem[] = [
{
id: 1,
name: 'Step 1',
stepId: 1,
parentIds: [0],
branchPath: 1,
},
];
constructor(private _dagManager: DagManagerService) {}
// this method will be called when a remove button in the UI is clicked
removeItem(stepId: number) {
this.workflowItems = this._dagManager.removeItem(
stepId,
[...this.workflowItems],
false
);
}
}
```
The `removeItem` method takes three arguments. The first is the `stepId` for the item that should be removed. The second is the single dimension array where the item is contained. The last determines if the items children should be deleted. You should never have to pass anything other than `false` as this argument; that parameter is used for recursion inside the method automatically. The method returns the updated single dimension array after removing the item.
The easiest way to remove an item is, again, the `removeStep` method because you only need to know the `stepId` that should be removed, and the service handles the rest.
### Getting Children Count for a Node
Sometimes your UI may need to know if a specific node has children and/or how many children it has. In those situations, you can use the `nodeChildrenCount` method. You provide a `stepId`, and it returns a number representing how many children nodes that node has.
```ts
const numberOfChildren = this._dagManager.nodeChildrenCount(1);
```
### Adding Relation Between Two Nodes
Sometimes you may need to add a new relationship between two nodes. For example, if the graph branches and then needs to merge again into a single path. That graph may look like this:
```
1
2 3
4
```
Where 1 branches to 2 and 3, and then 2 and 3 merge back to 4. When you first added step 4, maybe you only added step 2 as a parent but you now need to add step 3 as a parent as well. The `addRelation` and `addNewRelation` methods will do this for you. `addNewRelation` adds the relation (if possible) and then updates the observable for you. `addRelation` adds the relation and then returns the single dimensional array of items. Here's an example:
```ts
// This will update the dagModel$ observable
addRelationForChildNode(childNodeId: number, parentNodeId: number) {
try{
this._dagManager.addNewRelation(childNodeId, parentNodeId);
} catch(err) {
// handle error
}
}
// This will add it to the array and return the array
addRelationForChildNode(childNodeId: number, parentNodeId: number) {
try{
const newItems = this._dagManager.addRelation(childNodeId, parentNodeId);
} catch(err) {
// handle error
}
}
```
You cannot add a relationship between nodes if:
- The two nodes are already parent/child
- The two nodes are siblings
- The child node is a direct descendent (grandchild, etc) of the parent node
- The child node is higher in the graph than the parent node
If you are trying to add a relationship and get an error, then this is likely why. You should likely wrap your code in `try/catch` as noted above because the function will throw an error if it can't add the relation.
### Inserting Nodes at a Specific Point in the Graph
There are times where you need to insert a new node at a specific point in the graph. Sometimes that insert should push resulting items down, and sometimes it replaces the node that is at that current position. There are methods to support both of these situations.
To insert a node at a specific point and push other items down, use the `insertNode` and `insertNewNode` methods. `insertNode` returns a new single dimension array of items, and `insertNewNode` just updates the observable. You just need to provide the ID of the item that's being replaced, and an object that represents the new item. You don't need to set `stepId`, `parentIds`, or `branchPath` as the method will set those for you.
```ts
// This method inserts the item, but doesn't replace item with stepId of 2, and returns the array
const updatedItems = service.insertNode(2, {
branchPath: null,
name: 'Step 4',
parentIds: [],
stepId: null,
});
// This method inserts the item, but doesn't replace item with stepId of 2, and updates the observable
service.insertNewNode(2, {
branchPath: null,
name: 'Step 4',
parentIds: [],
stepId: null,
});
```
The methods that insert an item at a specific place in the graph and replace the item that was already there work the same way, and you call them the same way. The names of the methods are `insertNodeAndRemoveOld` and `insertNewNodeAndRemoveOld`.
## FAQ
### Question: How do I display the DAG model?
Answer: The easiest way to display the DAG model is to use the `async` pipe to subscribe to the `dagModel$` observable and to use two `*ngFor` loops, one nested inside the other. The DAG model is a two dimensional array of items. The first for loop allows you to loop over rows of the model, and the second for loop displays the columns. Here's an example:
```html
{{ wfs.stepId }}
```
### Question: How do I show that two items are connected?
Answer: There are many ways to do this, but the simplest is to use a library that draws an SVG line between two HTML elements. [leader-line](https://www.npmjs.com/package/leader-line) is a library that does just that. It is well documented and easy to use.
## Contributors ✨
Thanks goes to these wonderful people ([emoji key](https://allcontributors.org/docs/en/emoji-key)):
This project follows the [all-contributors](https://github.com/all-contributors/all-contributors) specification. Contributions of any kind welcome!
## Logo Attribution
