https://github.com/nitdraig/mailprex
https://github.com/nitdraig/mailprex
email-service nextjs nodejs open-source webapp
Last synced: about 2 months ago
JSON representation
- Host: GitHub
- URL: https://github.com/nitdraig/mailprex
- Owner: nitdraig
- License: mit
- Created: 2024-06-08T00:51:27.000Z (about 2 years ago)
- Default Branch: main
- Last Pushed: 2025-07-15T03:58:27.000Z (11 months ago)
- Last Synced: 2025-07-15T11:25:02.890Z (11 months ago)
- Topics: email-service, nextjs, nodejs, open-source, webapp
- Language: TypeScript
- Homepage: https://mailprex.excelso.xyz
- Size: 1.12 MB
- Stars: 1
- Watchers: 1
- Forks: 0
- Open Issues: 0
-
Metadata Files:
- Readme: README.md
- License: LICENSE.md
Awesome Lists containing this project
README

Mailprex | Hook & Docs to MAILPREX
Send Emails from your Website with Ease
Explore Mailprex docs »
Explore Mailprex web »
Report bug
·
Request feature
·
Creator Portfolio
# Mailprex
[](https://www.npmjs.com/package/mailprex)
[](https://www.npmjs.com/package/mailprex)
`Mailprex` is a React hook for handling contact forms and sending data to a server using fetch. This hook simplifies managing the form state and server response.
## What is Mailprex?
Mailprex is a service designed to facilitate sending emails from web forms. It handles the backend processes, allowing you to focus on creating and managing your forms without worrying about the complexities of email delivery.
## Installation
First, install the package using npm:
```bash
npm install mailprex
```
## Usage
- Register in `https://mailprex.excelso.xyz/`, Confirm your account
- Login in `https://mailprex.excelso.xyz/`, Get a formToken in dashboard
- Install the hook in your project and **Enjoy**
Here is an example of how to use useMailprex in a contact form component in a react.js application.
```bash
"use client";
import React from "react";
import { useMailprex } from "mailprex";
const ContactForm = () => {
const webName = "Mailprex Test";
const emailDestiny = "example@example.com";
const url = "https://api.mailprex.excelso.xyz/email/send";
const formToken = "your-form-token";
const { formData, handleChange, handleSubmit, response } = useMailprex({
url,
webName,
emailDestiny,
formToken,
});
const handleFormSubmit = async (e) => {
e.preventDefault();
await handleSubmit(e);
if (response.error) {
alert(
"Error sending message. Try again later.",
);
} else {
alert(
"Message sent succesfully!"
);
}
};
return (
Full Name *
Email *
Phone
Service
Message *
Send Message
{response.loading && (
Sending email...
)}
{response.error && (
Error sending email: {response.error.message}
)}
{response.data && (
{response.data.message}
)}
);
};
export default ContactForm;
```
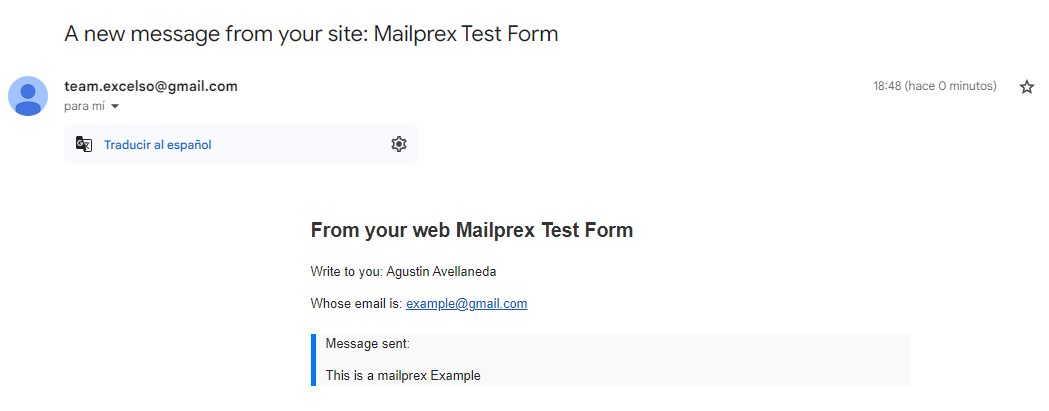
## Example Email
### Here is an example of how the emails sent through Mailprex will appear when they arrive at the specified email address:
# API
## useMailprex
### Parameters
- **url:** The server URL to send the form data to.
- **webName:** The name of the website from which the form is being submitted.
- **emailDestiny:** The destination email address.
- **formToken:** The form token for authentication.
### Returns
- **formData:** An object containing the form data.
- **handleChange:** A function to handle changes in the form fields.
- **handleSubmit:** A function to handle form submission.
- **response:** An object containing data, loading, and error regarding the API response.
## Contributing
**_Contributions are welcome. Please open an issue or a pull request for any improvements or fixes._**