https://github.com/nopnop2002/Arduino-STM32-CAN
Can Example for Arduino Core STM32
https://github.com/nopnop2002/Arduino-STM32-CAN
arduino bxcan can canbus stm32 stm32f072 stm32f103 stm32f303 stm32f405 stm32f407 stm32f413 stm32f446 stm32f722 stm32f767 stm32l452 stm32l496
Last synced: 7 months ago
JSON representation
Can Example for Arduino Core STM32
- Host: GitHub
- URL: https://github.com/nopnop2002/Arduino-STM32-CAN
- Owner: nopnop2002
- Created: 2020-02-26T11:10:14.000Z (almost 6 years ago)
- Default Branch: master
- Last Pushed: 2024-11-14T03:52:14.000Z (about 1 year ago)
- Last Synced: 2024-11-14T04:28:12.259Z (about 1 year ago)
- Topics: arduino, bxcan, can, canbus, stm32, stm32f072, stm32f103, stm32f303, stm32f405, stm32f407, stm32f413, stm32f446, stm32f722, stm32f767, stm32l452, stm32l496
- Language: C++
- Homepage:
- Size: 254 KB
- Stars: 211
- Watchers: 13
- Forks: 53
- Open Issues: 6
-
Metadata Files:
- Readme: README.md
Awesome Lists containing this project
- awesome-canbus - Arduino-STM32-CAN - Can communication example for Arduino Core STM32. (Hardware / ARM)
README
# Arduino-STM32-CAN
Basic Extended CAN(BxCan) communication example for Arduino Core STM32.
# Hardware requirements
- STM32F072 Development Board.
- STM32F103 Development Board.
- STM32F303 Development Board.
- STM32F405 Development Board.
- STM32F407 Development Board.
- STM32F413 Development Board.
- STM32F446 Development Board.
- STM32F722 Development Board.
- STM32F767 Development Board.
- STM32L452 Development Board.
- STM32L496 Development Board.
- CAN Transceiver.
MCP2551/2561/2562(5V)
TJA1040/1050/1051/1055(5V)
SN65HVD230/231/232(3.3V)
__NOTE__
3V CAN Transceivers are fully interoperable with 5V CAN Transceivers.
Check [here](http://www.ti.com/lit/an/slla337/slla337.pdf).
# Software requirements
- Arduino IDE
I used V1.8.19

- Arduino core support for STM32 based boards.
https://github.com/stm32duino/Arduino_Core_STM32
___Note for Core version___
Core version 2.8 or later requires Arduino IDE 2.x.
I used version 2.7.1.
This is the final version available for Arduino IDE 1.x.

__There is some core library for STM32.__
__It doesn't work with [Arduino STM32](https://github.com/rogerclarkmelbourne/Arduino_STM32).__

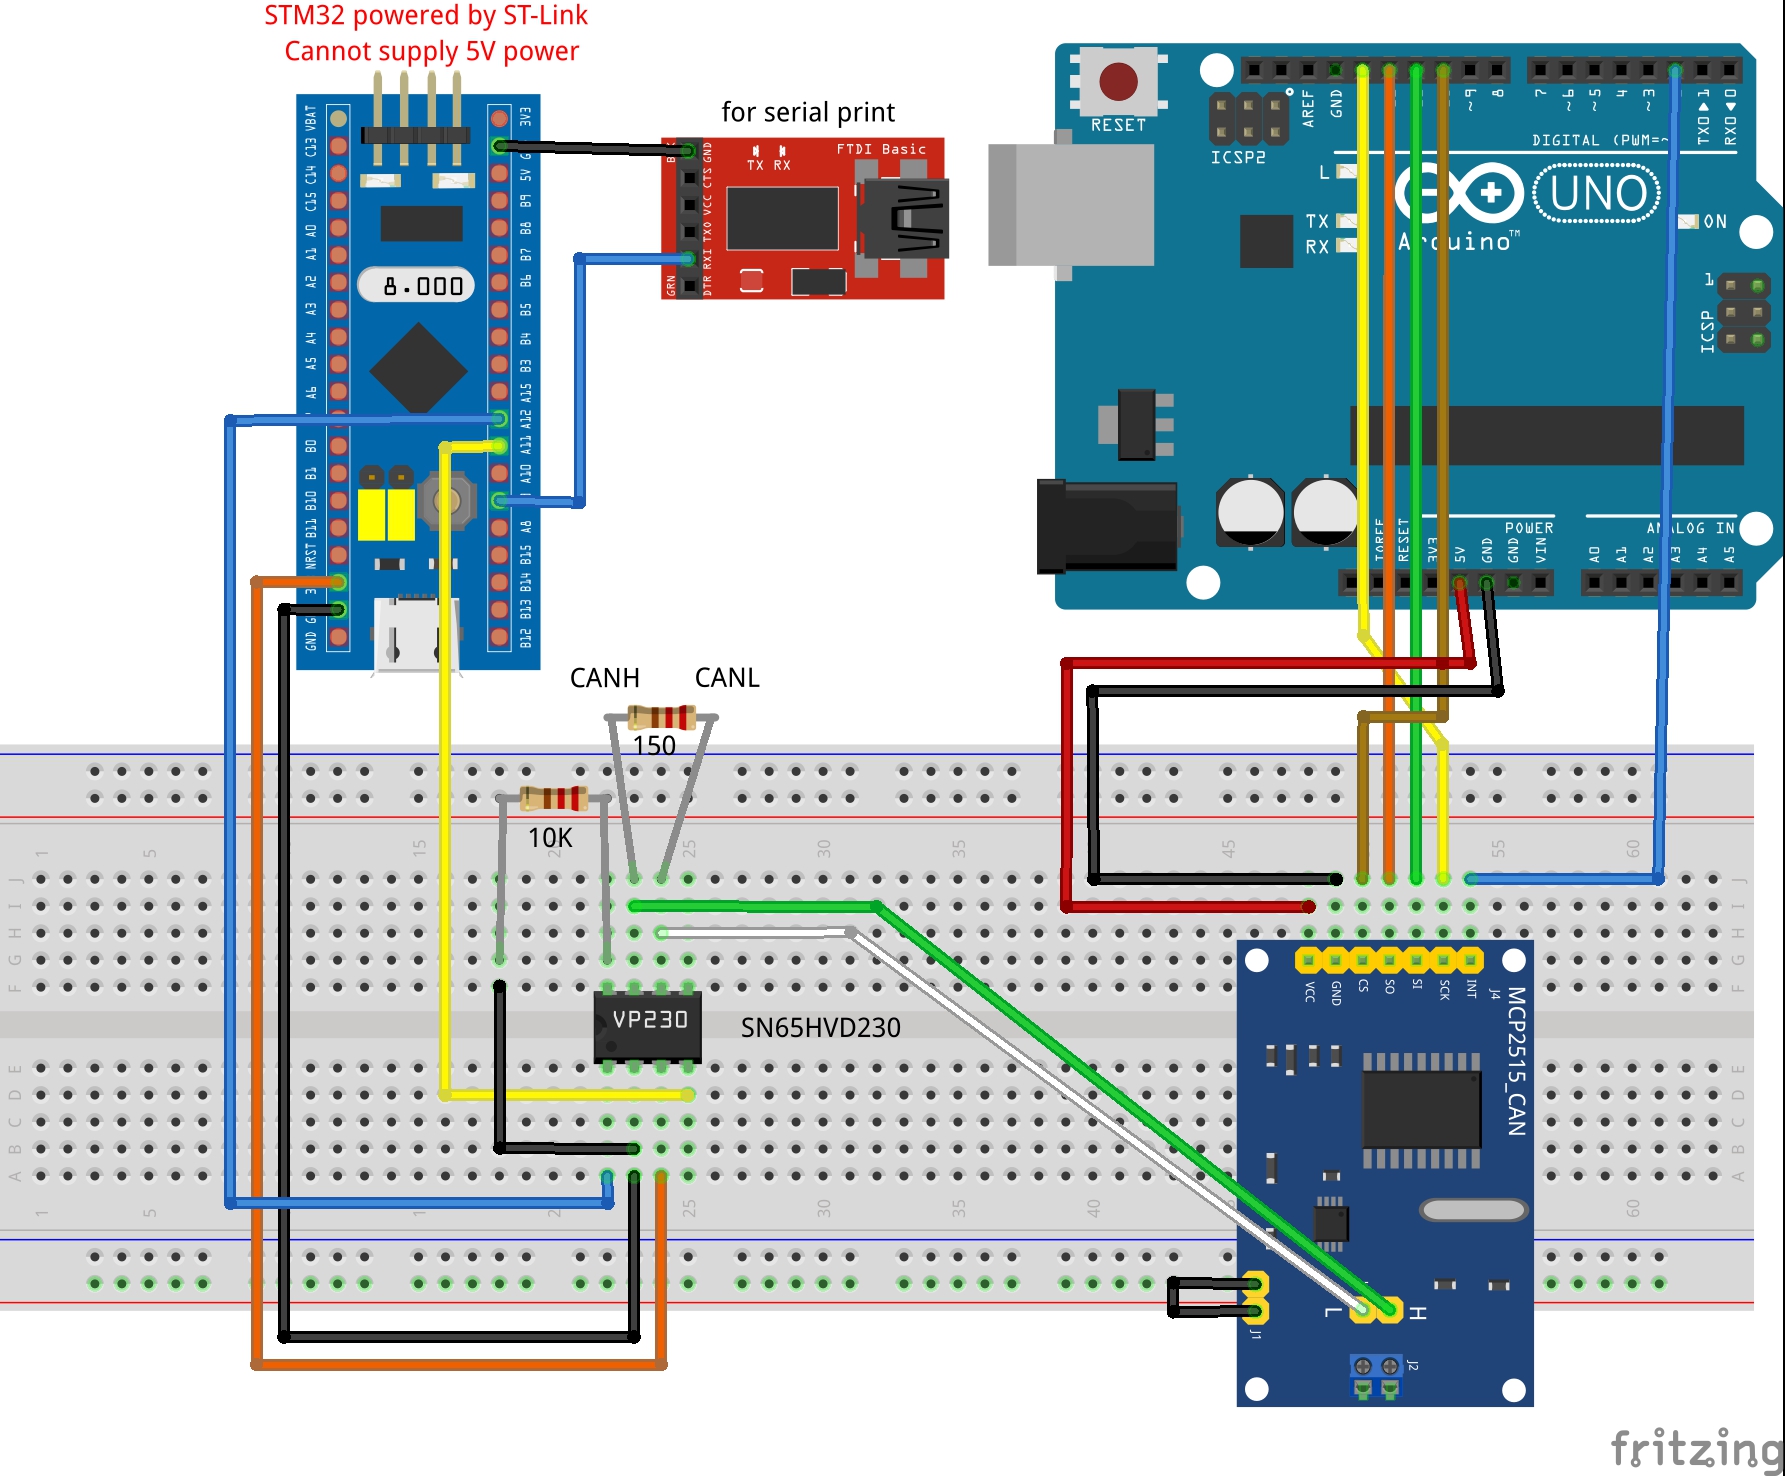
# Wirering
- USB power supply (board with 5V pin)
STM32 CAN RX GPIO has 5V tolerant.
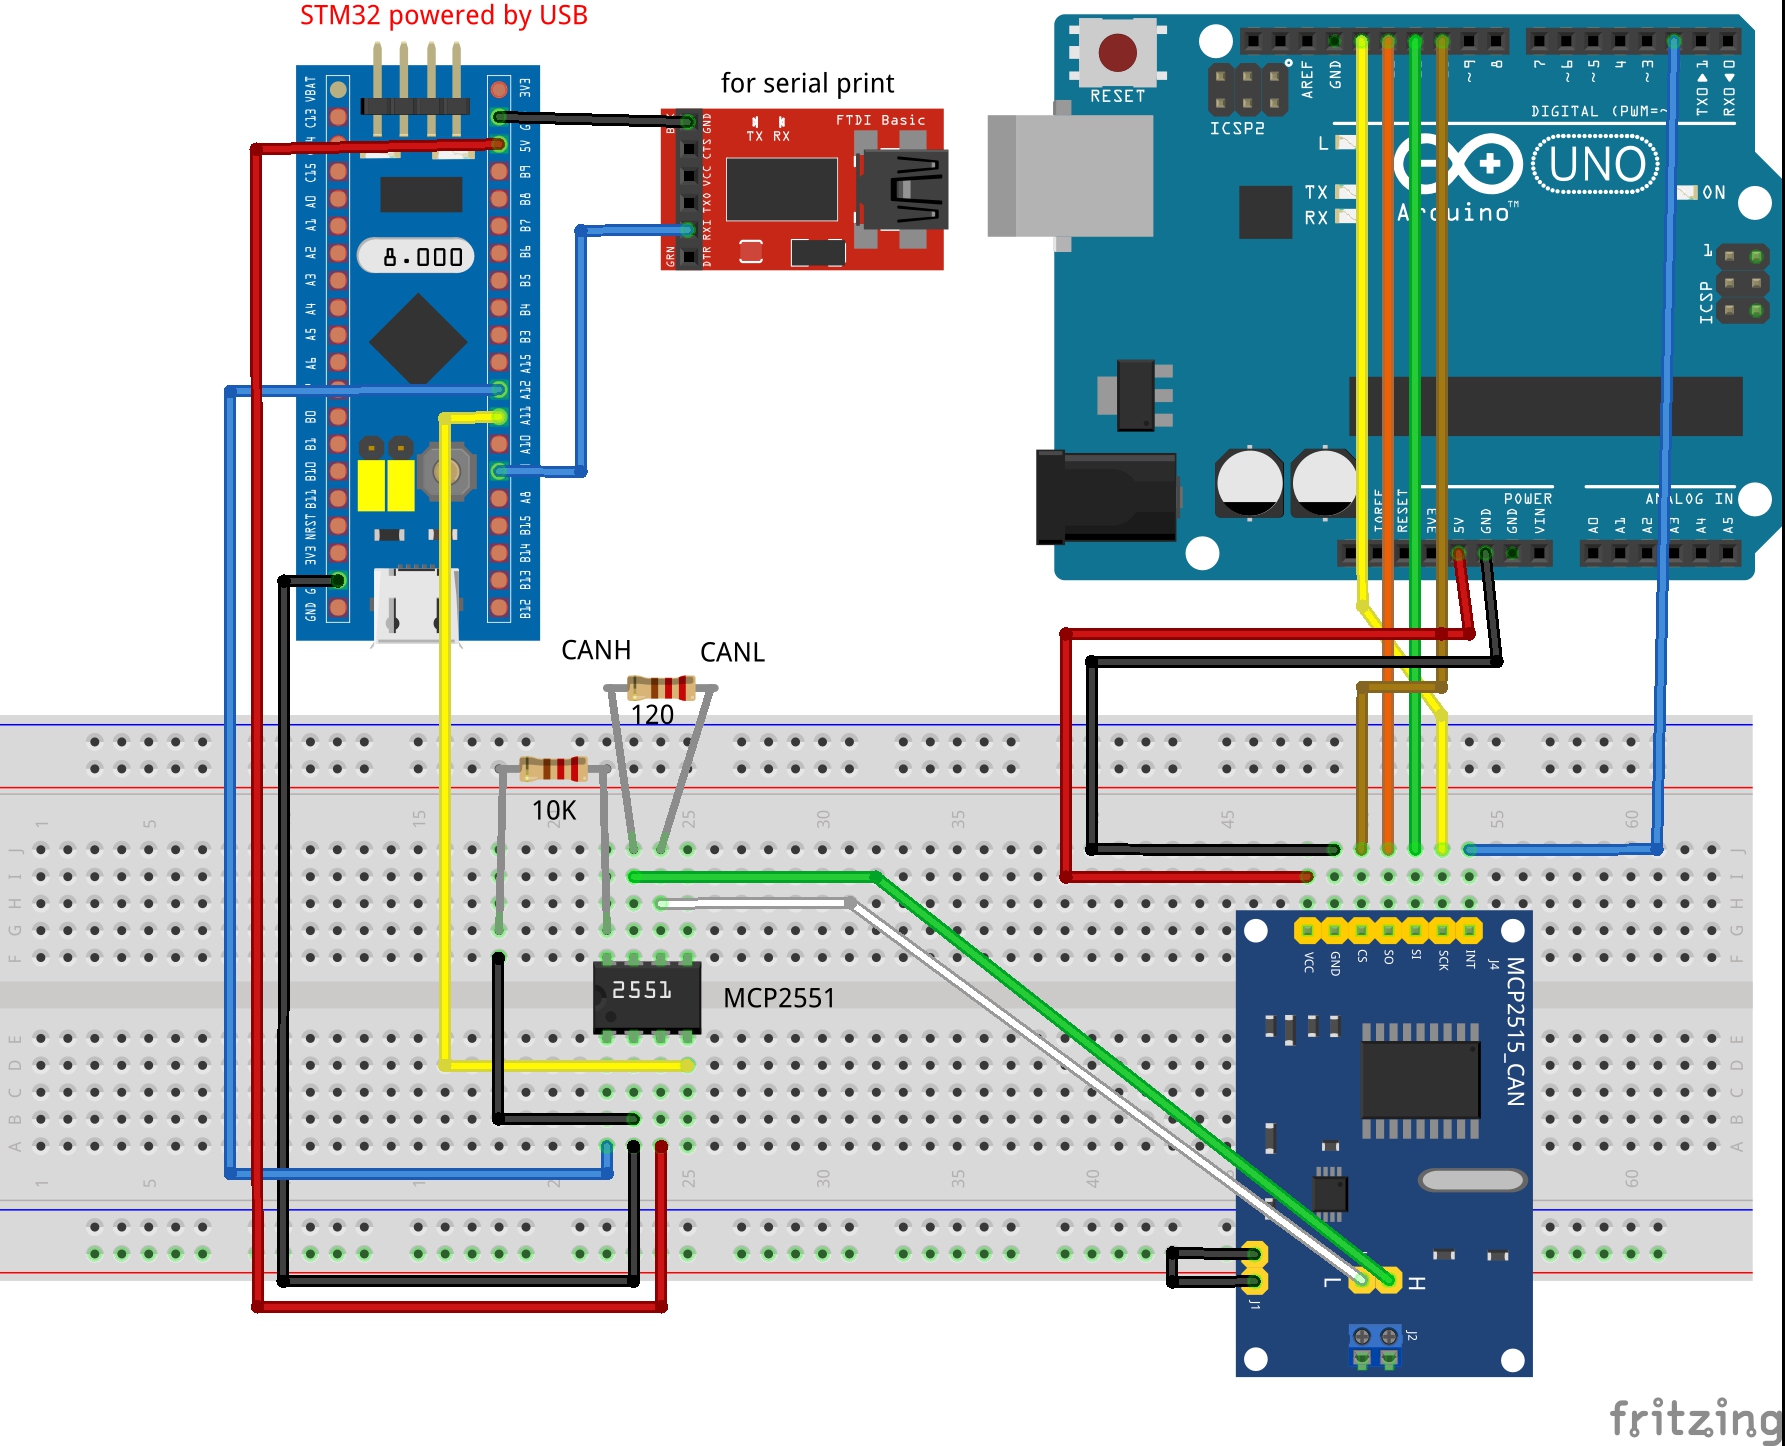
- Board without 5V pin, such as BlackPill, or ST-Link power supply
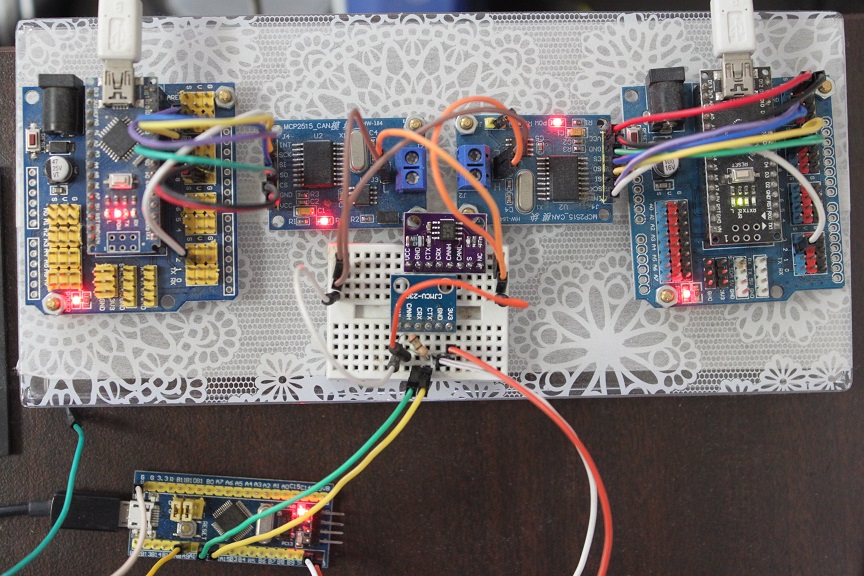
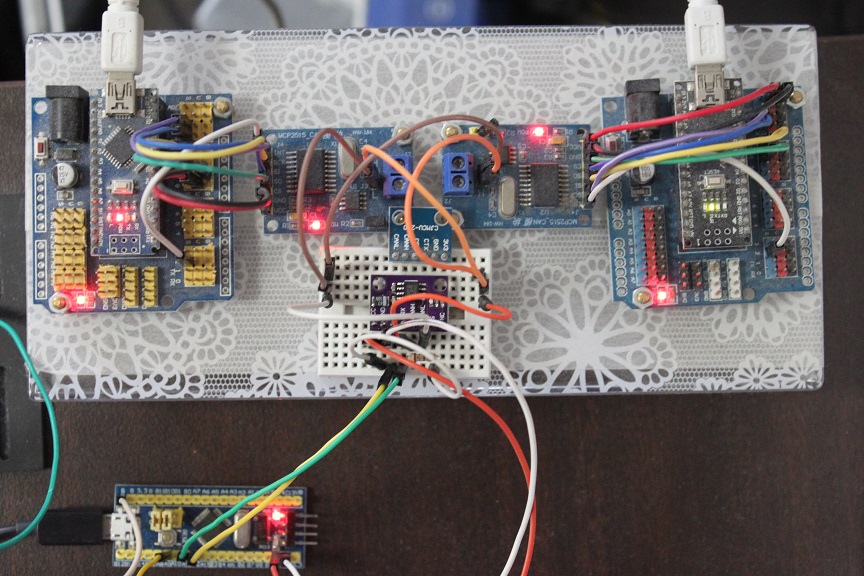
# My test circuit
The Nano on the left is a receiver with a terminating resistor.
The Nano on the right is a transmitter without a terminating resistor.
The STM32 transceiver has a terminating resistor.
- Using SN65HVD230
- Using TJA1051
# Transmitter
- from STM32F072

- from STM32F103

- from STM32F303

- from STM32F407

- from STM32F413
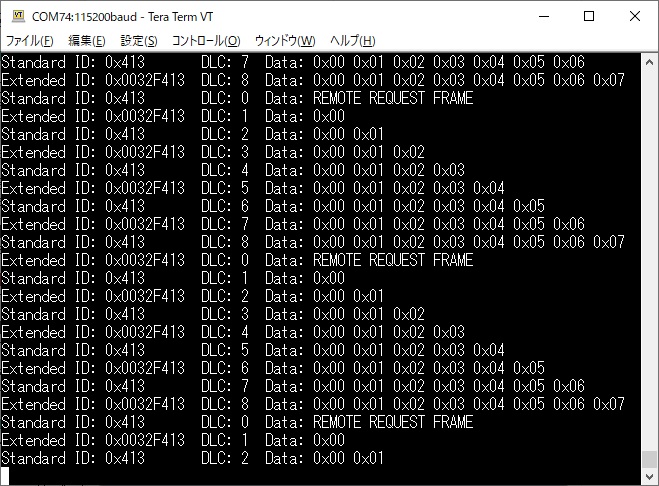
- from STM32F446

- from STM32F767
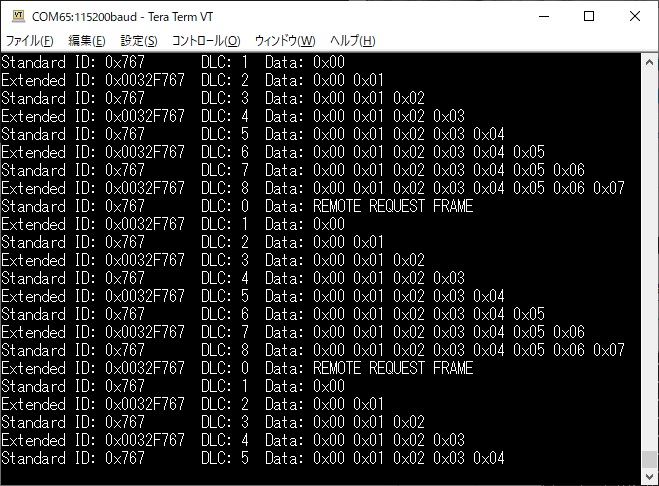
- from STM32L452
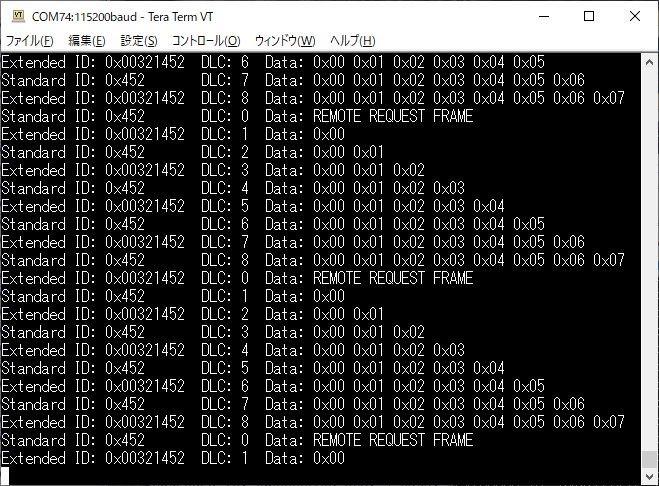
# Receiver

# Communication with Arduino-UNO
You can use [this](https://github.com/coryjfowler/MCP_CAN_lib) library.
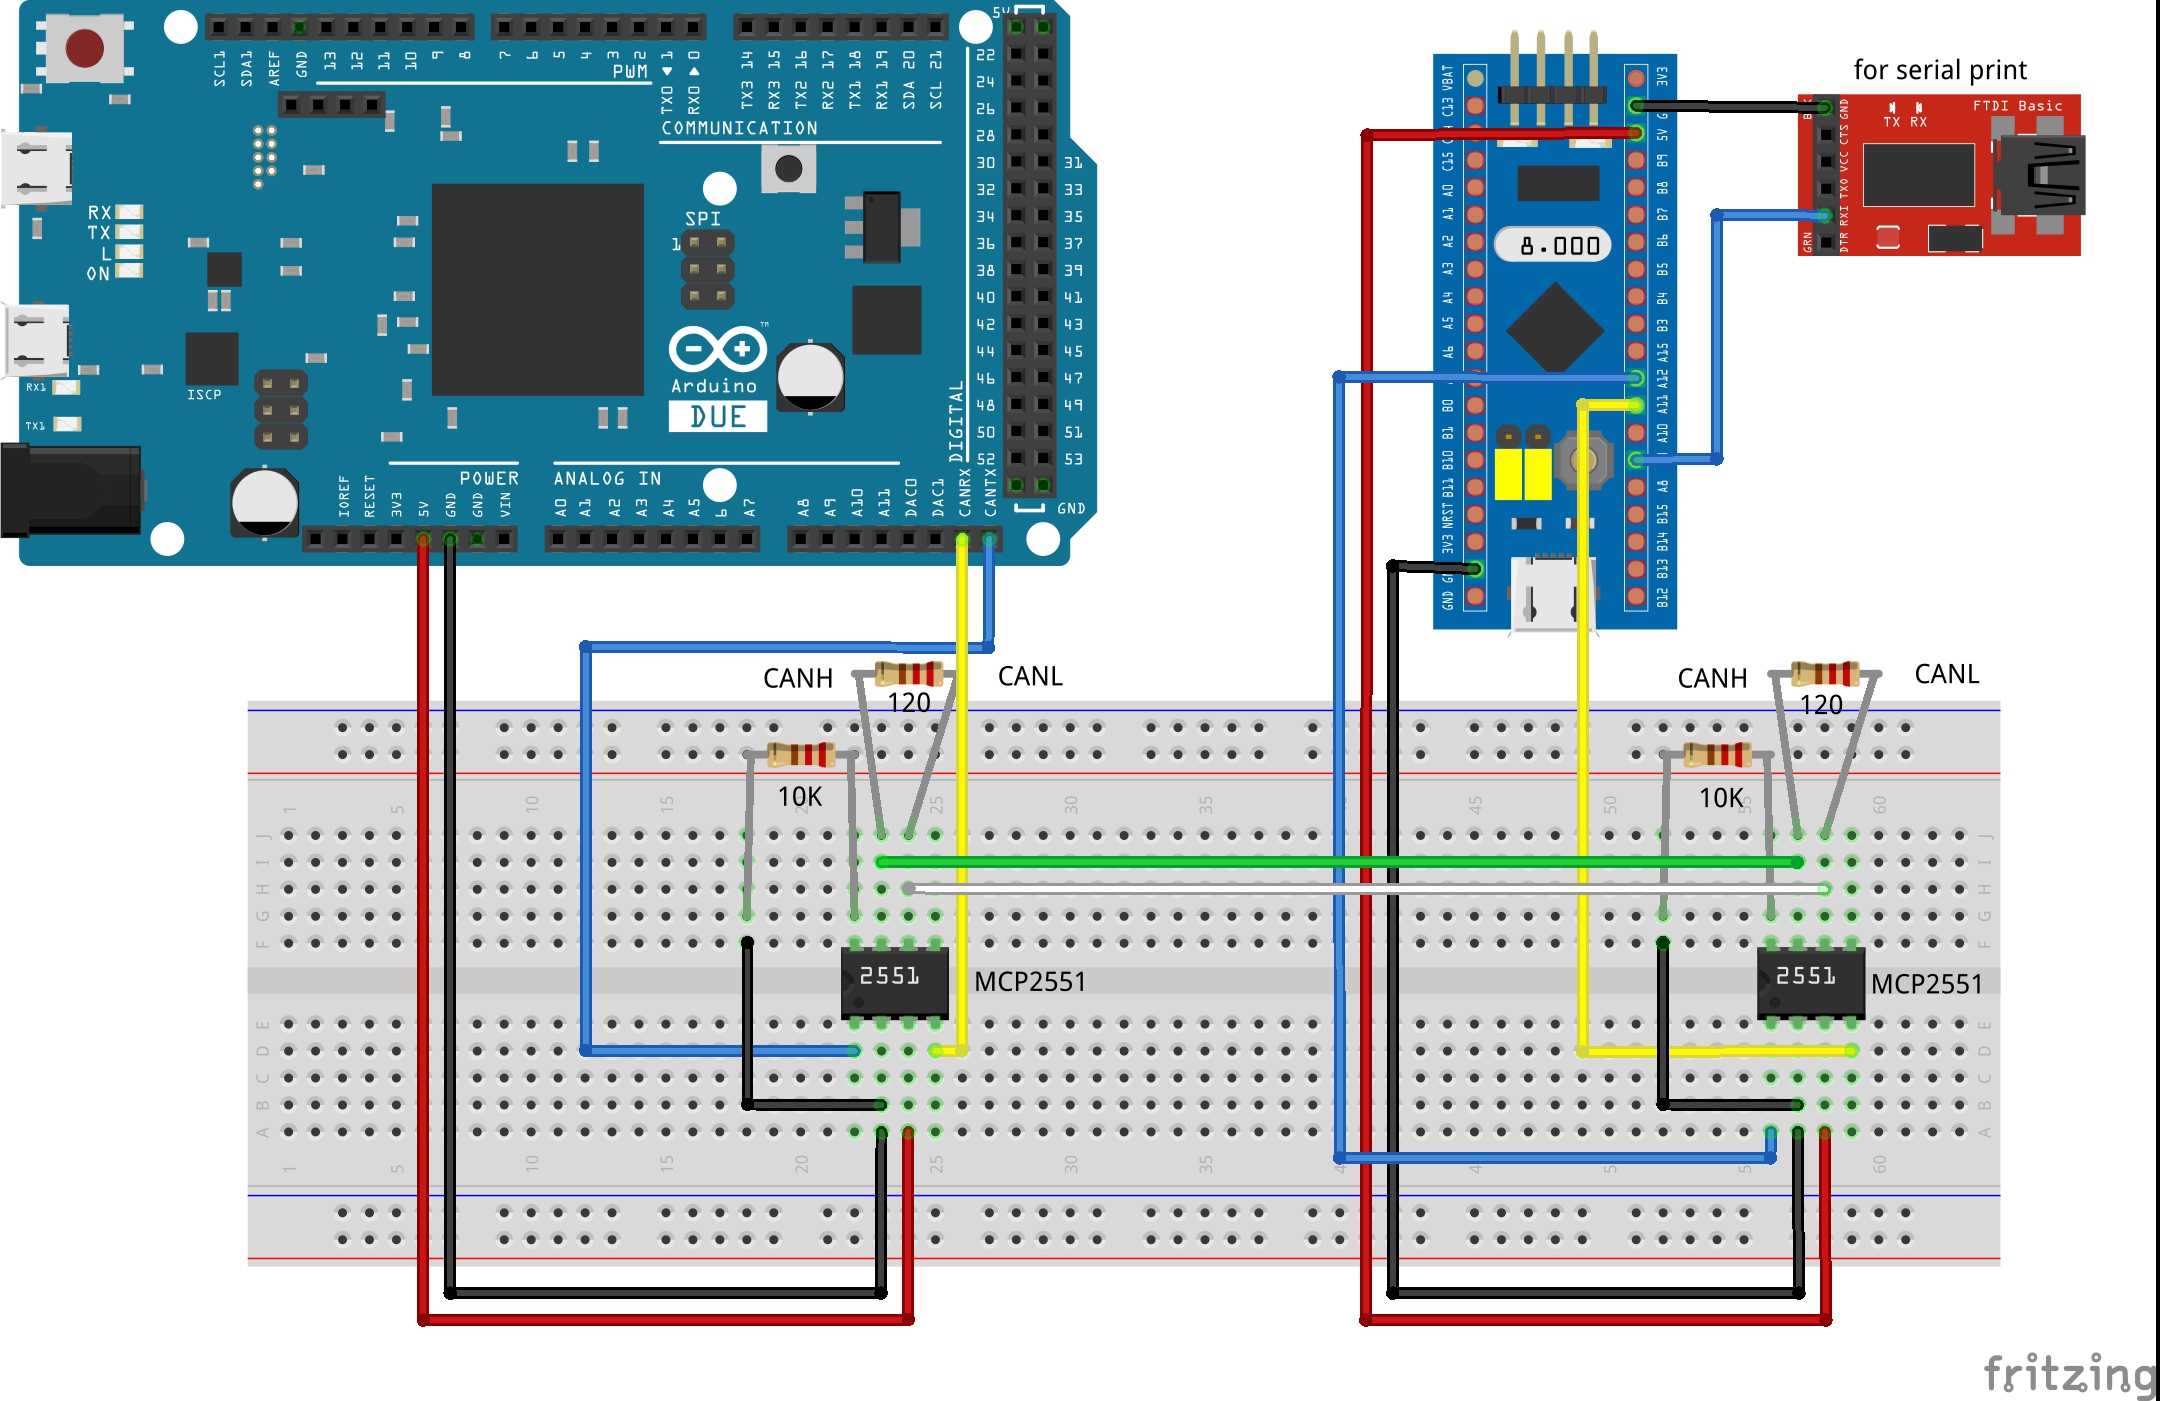
# Communication with Arduino-DUE
You can use [this](https://github.com/collin80/due_can) library.
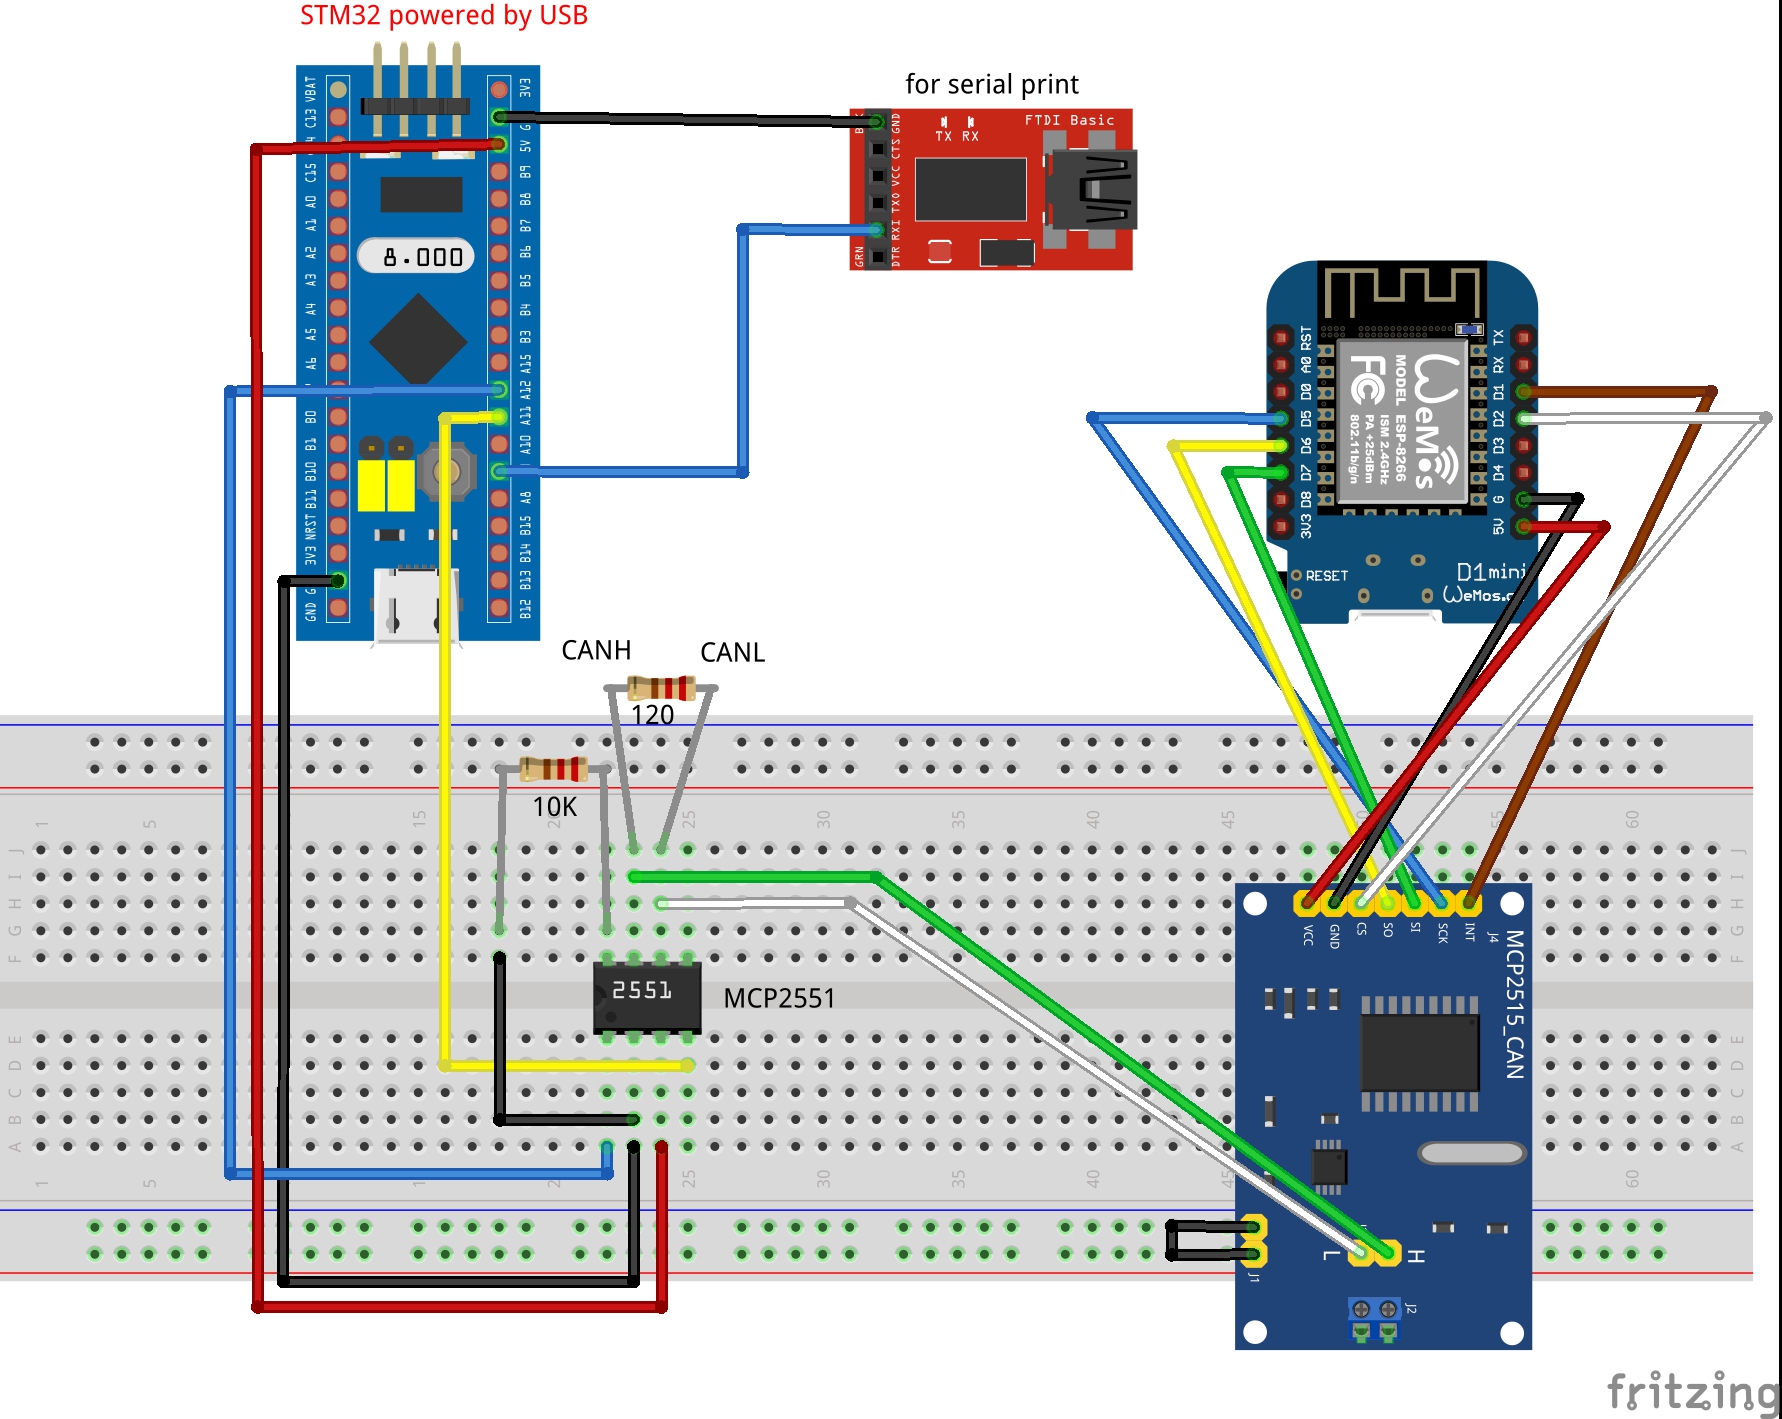
# Communication with ESP8266
You can use [this](https://github.com/coryjfowler/MCP_CAN_lib) library.
# Communication with ESP32
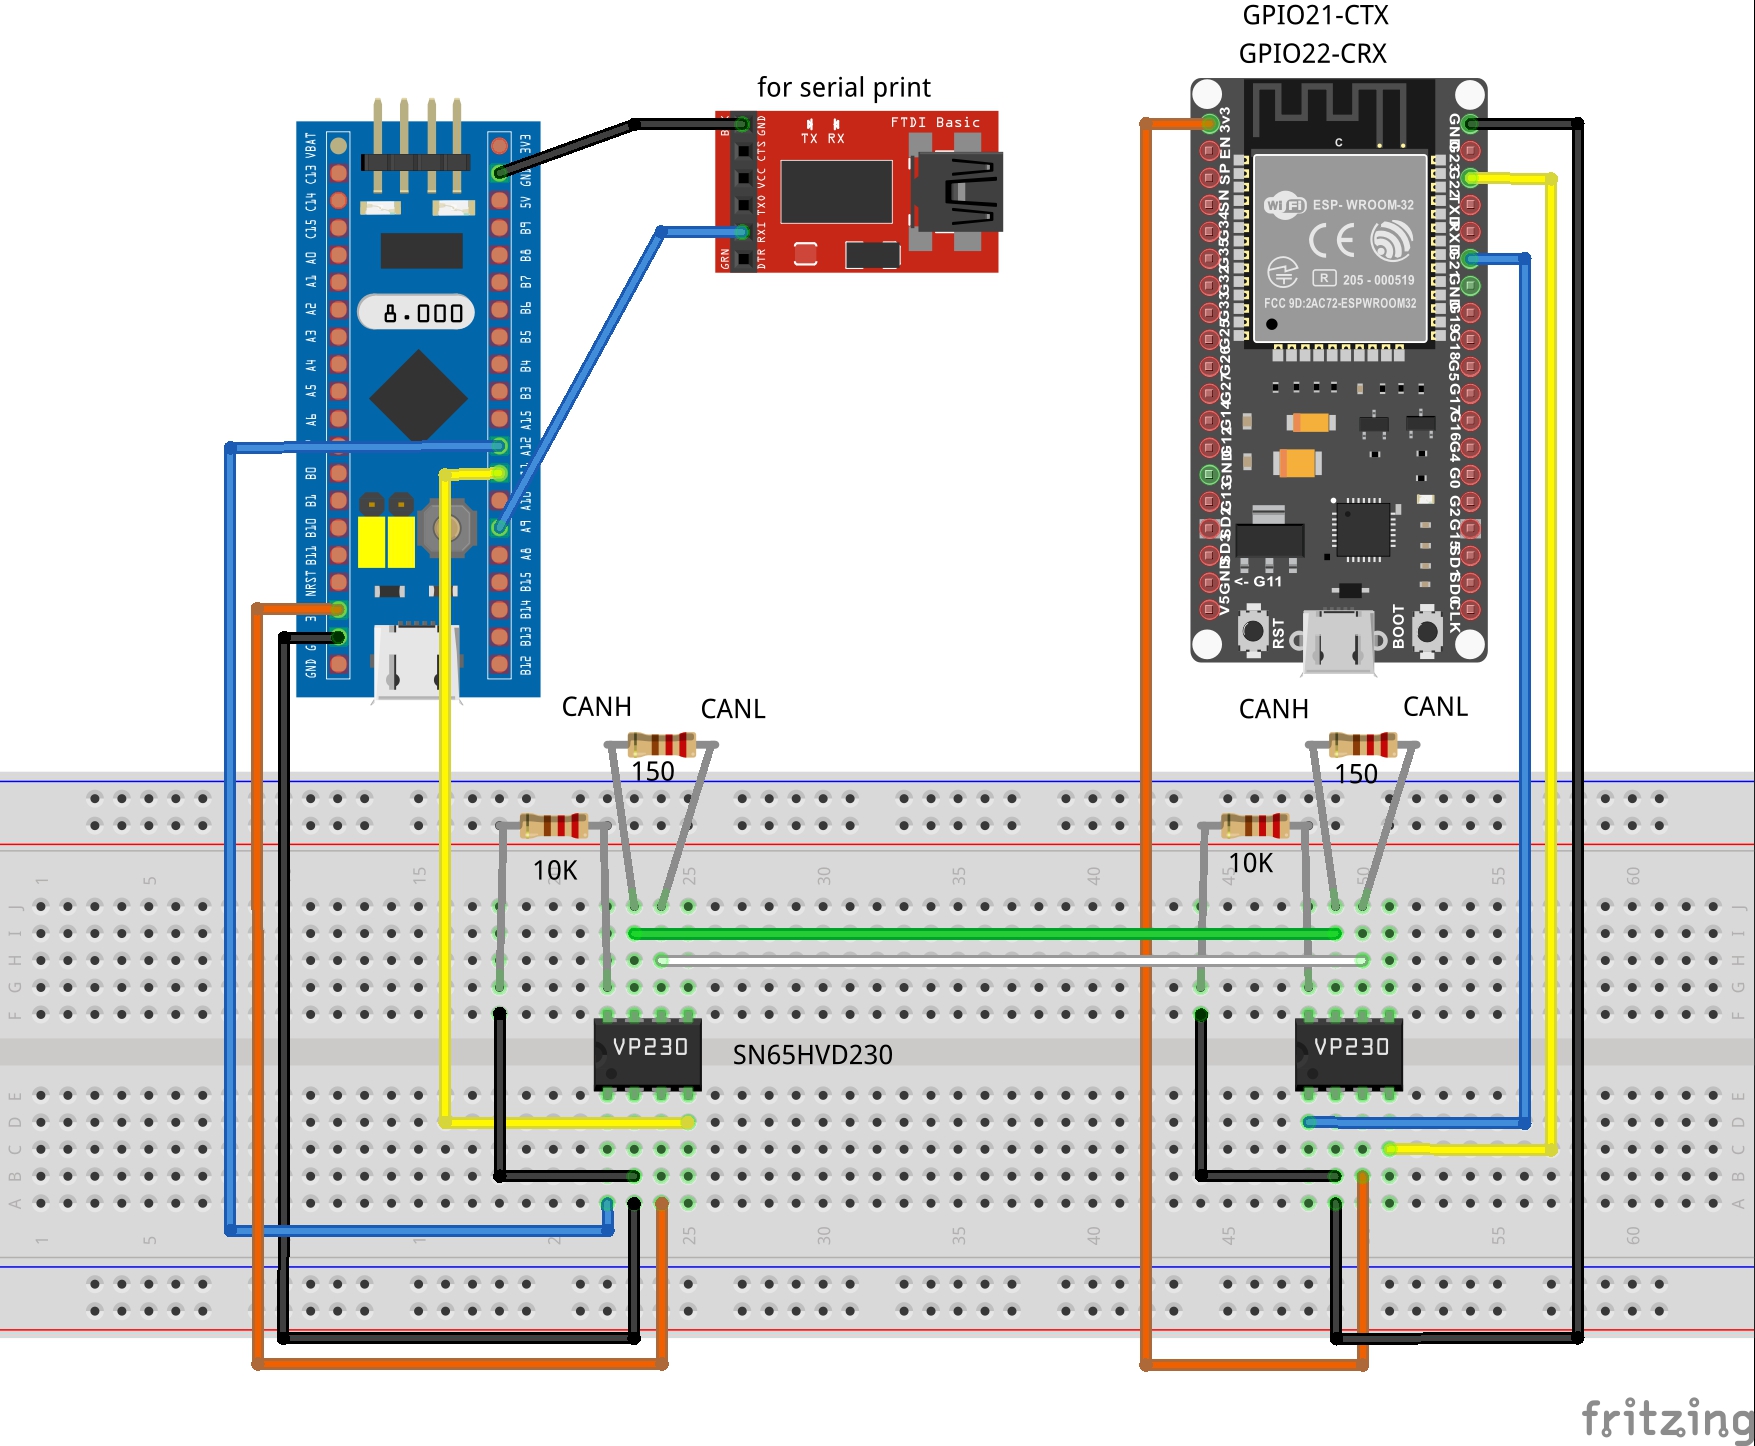
ESP-IDE has a CAN Network example.
https://github.com/espressif/esp-idf/tree/master/examples/peripherals/twai/twai_network
You can use [it](https://github.com/nopnop2002/esp-idf-candump).
__Notes on ESP32 bitrate__
In ESP-IDF V4, CONFIG_ESP32_REV_MIN >= 2 means "halve communication speed".
This is to support slower bitrates below 25Kbps.
This fuature can be controlled by CONFIG_ESP32_REV_MIN.
This fuature is enabled when CONFIG_ESP32_REV_MIN >= 2.
See [here](https://www.esp32.com/viewtopic.php?t=15581) for detail.
This specification is not available in ESP-IDF V5.
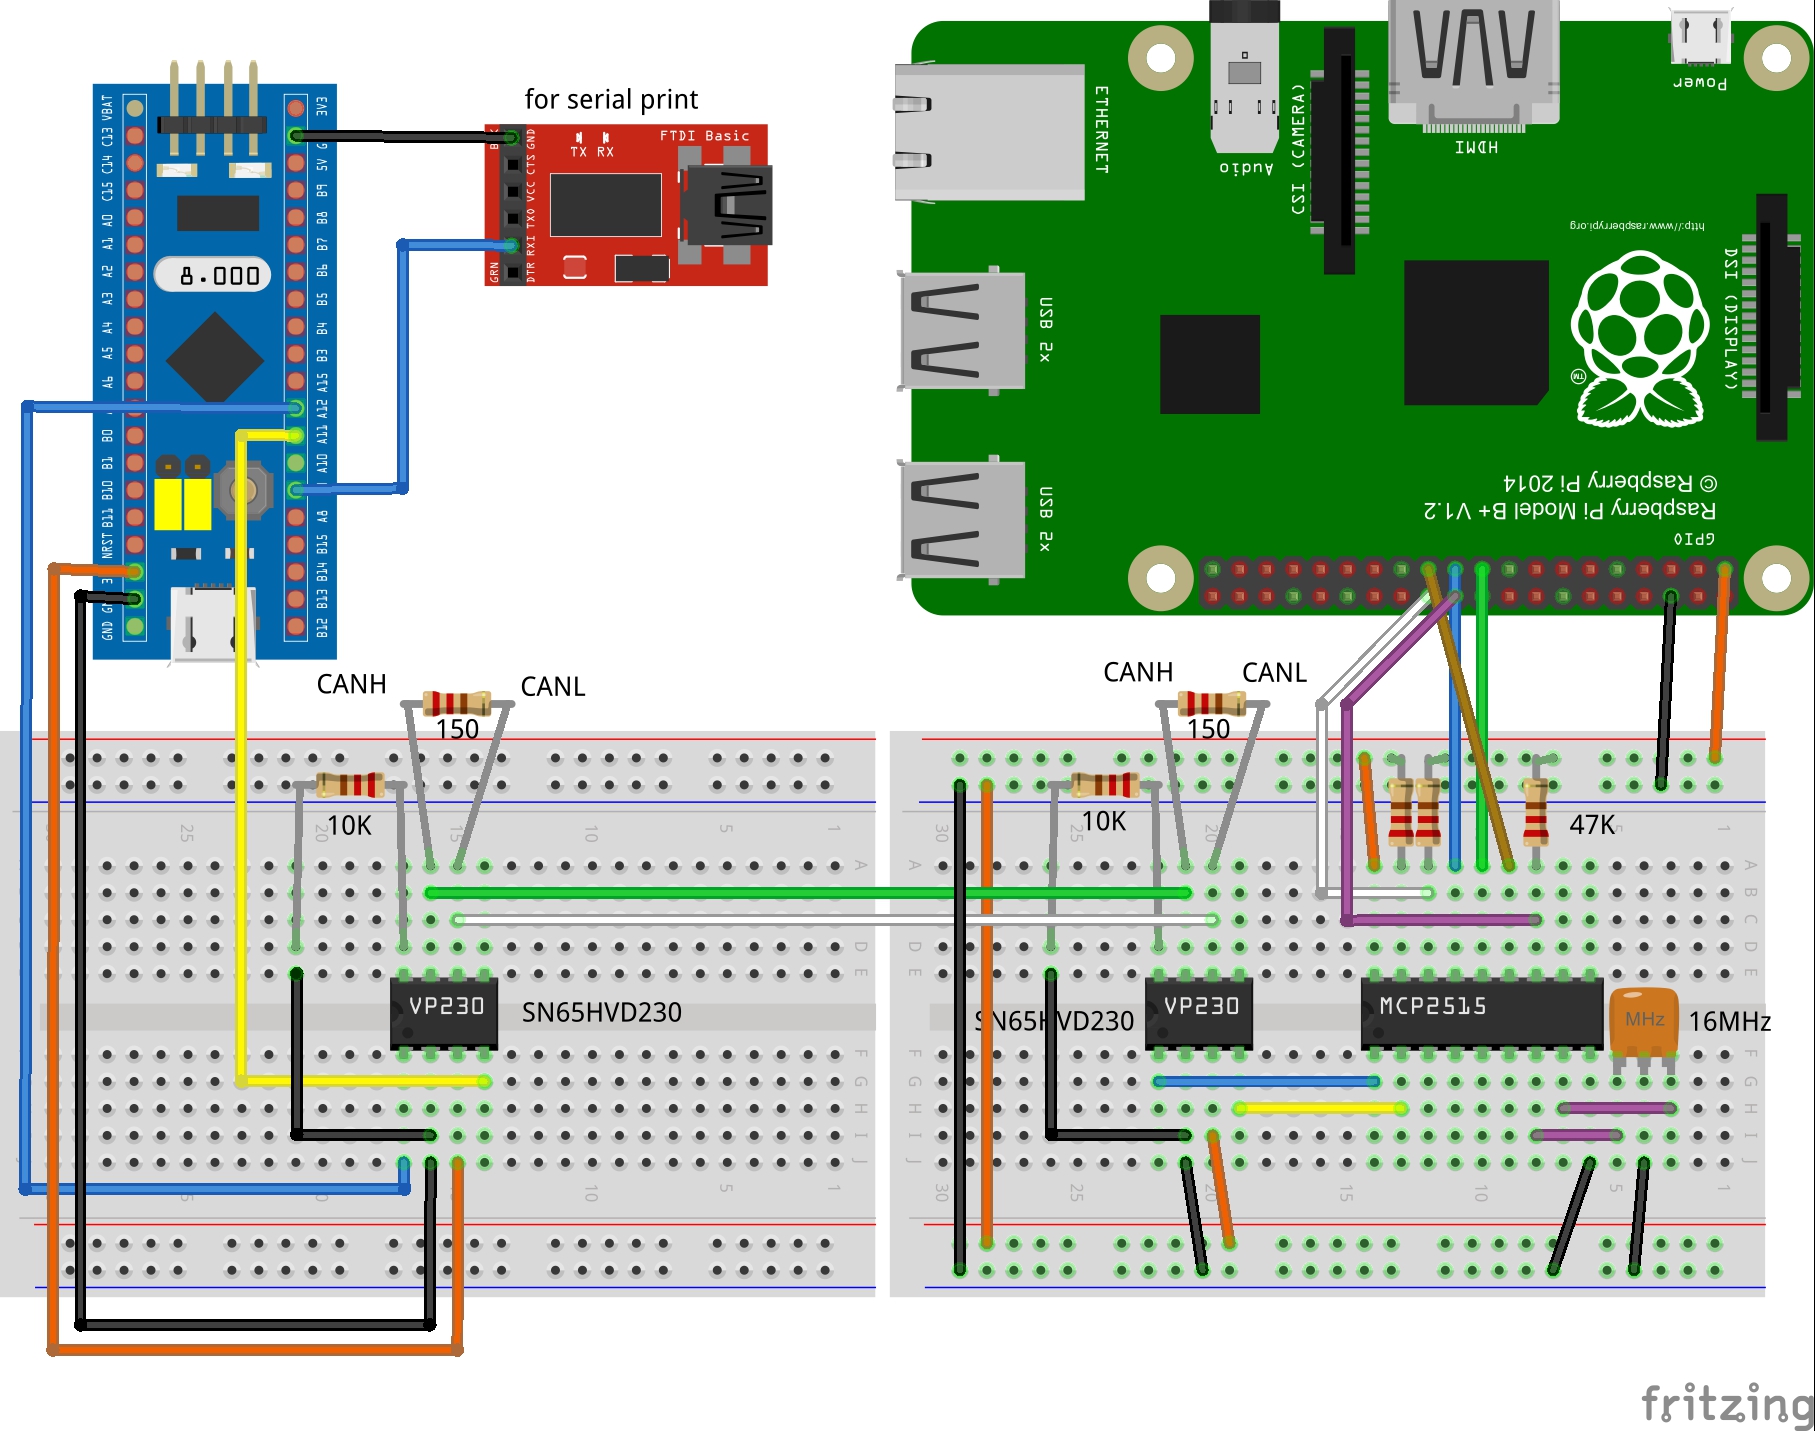
# Communication with Raspberry Pi
Edit /boot/config.txt and reboot.
```
dtparam=spi=on
dtoverlay=mcp2515-can0,oscillator=16000000,interrupt=25
dtoverlay=spi-bcm2835-overlay
```
Make sure the device is ready after reboot.
```
$ dmesg | grep mcp251x
[ 19.992025] mcp251x spi0.0 can0: MCP2515 successfully initialized.
$ ls /sys/bus/spi/devices/spi0.0
driver modalias net of_node power statistics subsystem uevent
$ ls /sys/bus/spi/devices/spi0.0/net
can0
$ sudo /sbin/ip link set can0 up type can bitrate 1000000
$ dmesg | grep can0
[ 19.992025] mcp251x spi0.0 can0: MCP2515 successfully initialized.
[ 1309.525795] IPv6: ADDRCONF(NETDEV_CHANGE): can0: link becomes ready
$ sudo ifconfig can0
can0: flags=193 mtu 16
unspec 00-00-00-00-00-00-00-00-00-00-00-00-00-00-00-00 txqueuelen 10 (UNSPEC)
RX packets 0 bytes 0 (0.0 B)
RX errors 0 dropped 0 overruns 0 frame 0
TX packets 0 bytes 0 (0.0 B)
TX errors 0 dropped 0 overruns 0 carrier 0 collisions 0
$ sudo ifconfig can0 txqueuelen 1000
```
Install can-utils.
```
$ sudo apt-get install can-utils
# Receiver
$ candump can0
# Transmitter
$ cansend can0 123#11223344AABBCCDD
```
# Troubleshooting
There is a module of SN65HVD230 like this.

There is a __120 ohms__ terminating resistor on the left side.

A transmission fail will occur.

I have removed the terminating resistor.
And I used a external resistance of __150 ohms__.
A transmission fail is fixed.

If the transmission fails, these are the possible causes.
- There is no receiving app on CanBus.
- The speed does not match the receiver.
- There is no terminating resistor on the CanBus.
- There are three terminating resistors on the CanBus.
- The resistance value of the terminating resistor is incorrect.
- 3.3V transceiver and 5V transceiver are mixed.
Use +1V Ground Shift using Split Termination.
Check out Figure 7 [here](http://www.ti.com/lit/an/slla337/slla337.pdf).
- Stub length in CAN bus is too long.
ISO11898 Standard specifies a maximum bus length of 40m and maximum stub length of 0.3m at 1Mbps.
See [here](https://e2e.ti.com/support/interface-group/interface/f/interface-forum/378932/iso1050-can-bus-stub-length).
- Noise effects.
It occurs when the wire cable is thin or wire cable is crossing.
It is preferable to use wires that are noise-proof.
I changed the single wire to twisted wire. It's fixed.

# Using PlatformIO
Arduino-IDE only supports ST-LINK V2.1 adapters, but OpenOCD used by PlatformIO supports both V2.0 and V2.1.
With ST-LINK, there is no need to change boot mode when writing firmware.
PlatformIO allows you to use cheap Chinese ST-LINK adapters like this one.
You can get it at a low price (about $2).


Connect the ST-LINK adapter and the STM32 development board as follows.
|ST-LINK|STM32|
|:---|:---|
|3.3V|3.3V|
|GND|GND|
|SWDIO|SWIO(=PA13)|
|SWCLK|SWCLK(=PA14)|

# Advanced use of BxCan
Skip if you don't need advanced usage.
Advanced usage has different purposes depending on the requirements of the application.
So I can't give you a concrete code example.
### About transmission
STM32 has three transmit(TX) mailboxes.
Three TX mailboxes are provided to the software for setting up messages.
This sample code uses only the first TX mailbox and blocks the application until the send is successfully completed.
There are two ways to know if the send was successful without blocking.
Read the reference manual carefully and modify the source code as needed.
- Uses a transmission completion interrupt
You need to set the CAN interrupt enable register (CAN_IER) appropriately.
- Check TX mailbox space before sending
An application can store transmission requests in three TX mailboxes simultaneously.
When there are requests for multiple TX mailboxes, the transmission scheduler decides which mailbox has to be transmitted first.
You can specify which mailbox has priority using the CAN Master Control Register (CAN_MCR).
You can tell if a mailbox is free using the CAN Transmit Status Register (CAN_TSR).
When all three TX mailboxes are pending, no new messages can be sent until the transmit is canceled or completed.
When all three TX mailboxes are pending, you can choose to cancel the pending transmission, wait until the transmission is complete, or give up on the new transmission.
This choice depends on your application requirements.
When all three TX mailboxes are pending for a long time, it could be a transmission error.
CAN Error Status Register (CAN_ESR) should be checked.
### About reception
STM32 has two receive(RX) mailboxes.
Each RX Mailbox allows access to a 3-level depth FIFO, the access being offered only to the oldest received message in the FIFO.
This sample code uses only the first RX mailbox.
The RX mailbox is closely related to the receive filter settings.
By properly setting the receive filter, you can sort the received messages into two RX Mailboxes.
For example, high priority messages can be stored in the first RX MailBox and low priority messages can be stored in the second RX MailBox.
Read the reference manual carefully and modify the source code as needed.
# Reference
https://github.com/nopnop2002/Robotell-USB-CAN-Python
https://github.com/nopnop2002/esp-idf-CANBus-Monitor