https://github.com/nopnop2002/esp-idf-http-camera
Take a picture and Publish it via HTTP
https://github.com/nopnop2002/esp-idf-http-camera
eap32 esp-idf esp32-cam http http-requests
Last synced: 11 months ago
JSON representation
Take a picture and Publish it via HTTP
- Host: GitHub
- URL: https://github.com/nopnop2002/esp-idf-http-camera
- Owner: nopnop2002
- License: mit
- Created: 2020-11-20T06:10:08.000Z (over 5 years ago)
- Default Branch: main
- Last Pushed: 2025-03-01T01:11:20.000Z (over 1 year ago)
- Last Synced: 2025-03-16T02:14:11.753Z (over 1 year ago)
- Topics: eap32, esp-idf, esp32-cam, http, http-requests
- Language: C
- Homepage:
- Size: 109 KB
- Stars: 27
- Watchers: 1
- Forks: 6
- Open Issues: 0
-
Metadata Files:
- Readme: README.md
- License: LICENSE
Awesome Lists containing this project
README
# esp-idf-http-camera
Take a picture and Publish it via HTTP.
This project use [this](https://components.espressif.com/components/espressif/esp32-camera) Camera Driver.
# Hardware requirements
ESP32 development board with OV2640 camera.
If you use other camera, edit sdkconfig.default.
From the left:
- Aithinker ESP32-CAM
- Freenove ESP32-WROVER CAM
- UICPAL ESPS3 CAM
- Freenove ESP32S3-WROVER CAM (Clone)

## Software requirements
ESP-IDF V5.0 or later.
ESP-IDF V4.4 release branch reached EOL in July 2024.
# Start HTTP Server
You can use a server using flask or a simple server.
## flask HTTP server
```
sudo apt update
sudo apt install python3-pip python3-setuptools libimage-exiftool-perl jhead
python3 -m pip install -U pip
python3 -m pip install -U wheel
python3 -m pip install -U Werkzeug
python3 -m pip install -U pillow
python3 -m pip install -U python-magic
python3 -m pip install -U requests
python3 -m pip install -U flask
python3 -m pip install -U piexif
git clone https://github.com/nopnop2002/esp-idf-http-camera
cd esp-idf-http-camera/flask
python3 main.py
```
Open your browser and enter the host address in the address bar.

When you start ESP32, a list of ESP32 will be displayed.

Select ESP32 and then press the Take Picture button.
You can add Exif to JPEG.

ESP32 takes a photo and transmits it to the server.
You can see the photos.


- Directory to save photos
This project will save photos in the following directory:
`esp-idf-http-camera/flask/uploaded`
```
$ pwd
/home/nop/esp-idf-http-camera/flask/uploaded
$ ls
picture0_1024x768.jpg picture2_800x600.jpg
picture1_1280x720.jpg
```
- About Exif tags
In this project, we will use exiftool to add Exif tags to JPG files.
The name of the tag to be added is `UserComment`.
You can view the Exif content with the following command:
`jhead *.jpg`

You can use exiftool to modify the Exif tags.
Exiftool will save the file with the original Exif tag changes under a different name.
```
$ jhead picture2_800x600.jpg
File name : picture2_800x600.jpg
File size : 15020 bytes
File date : 2025:04:23 03:47:27
Resolution : 800 x 600
JPEG Quality : 62
Comment : test-03
$ exiftool -usercomment=test-03-01 picture2_800x600.jpg
1 image files updated
$ jhead picture2_800x600.jpg
File name : picture2_800x600.jpg
File size : 15022 bytes
File date : 2025:04:23 04:11:26
Resolution : 800 x 600
JPEG Quality : 62
Comment : test-03-01
$ ls picture2_800x600*
picture2_800x600.jpg picture2_800x600.jpg_original
```
jhead treats UserComment tags the same as Comment tags.
exiftool distinguishes between UserComment and Comment tags.
An explanation of the difference between UserComment tags and Comment tags can be found [here](https://exiftool.org/forum/index.php?topic=12466.0).
## Simple HTTP server
```
python3 -m pip install -U wheel
python3 -m pip install opencv-python
git clone https://github.com/nopnop2002/esp-idf-http-camera
python3 ./http_server.py --help
usage: http_server.py [-h] [--port PORT] [--timeout TIMEOUT]
options:
-h, --help show this help message and exit
--port PORT http port
--timeout TIMEOUT wait time for keyboard input[sec]
```
When timeout is specified, display the image for the specified number of seconds.
When timeout is not specified, the image will be displayed until the ESC key is pressed.
New requests are queued while the image is displayed.
__Close the image window with the ESC key. Do not use the close button.__

This script works not only on Linux but also on Windows 10.
I used Python 3.9.13 for Windows.

## Installation for ESP32
For AiThinker ESP32-CAM, you need to use a USB-TTL converter and connect GPIO0 to GND.
|ESP-32|USB-TTL|
|:-:|:-:|
|U0TXD|RXD|
|U0RXD|TXD|
|GPIO0|GND|
|5V|5V|
|GND|GND|
```
git clone https://github.com/nopnop2002/esp-idf-http-camera
cd esp-idf-http-camera
idf.py set-target {esp32/esp32s3}
idf.py menuconfig
idf.py flash monitor
```
## Start firmware
For AiThinker ESP32-CAM, Change GPIO0 to open and press the RESET button.
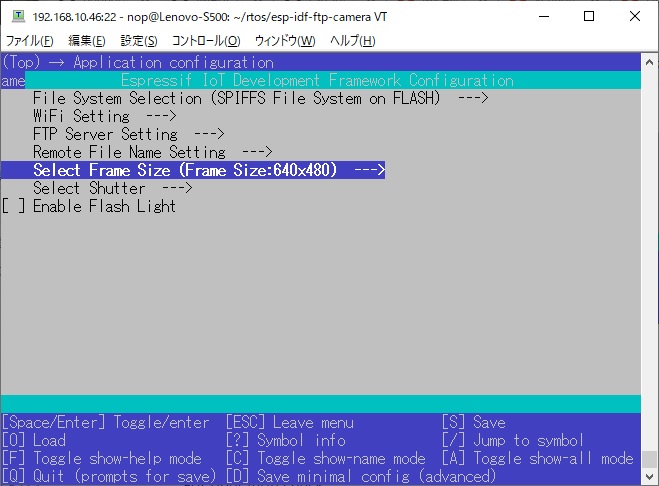
## Configuration

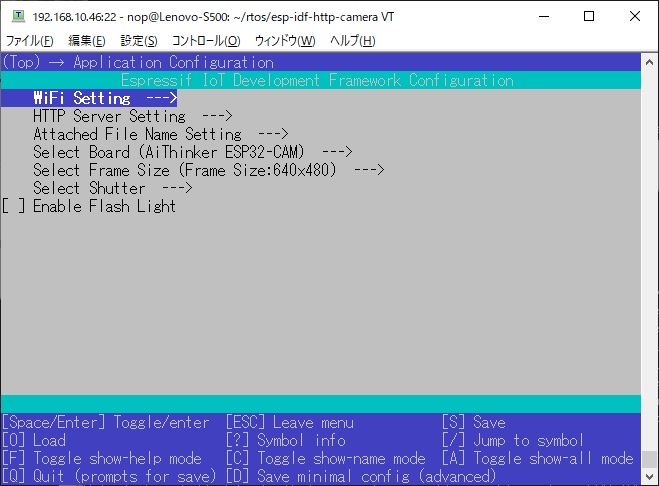
### Wifi Setting
Set the information of your access point.
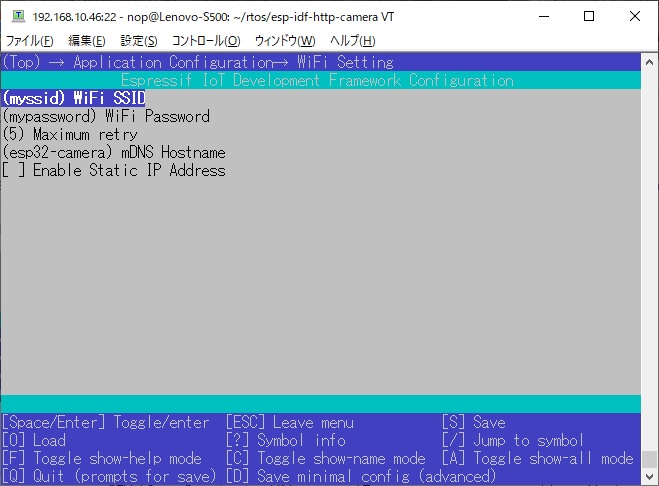
You can connect using the mDNS hostname instead of the IP address.
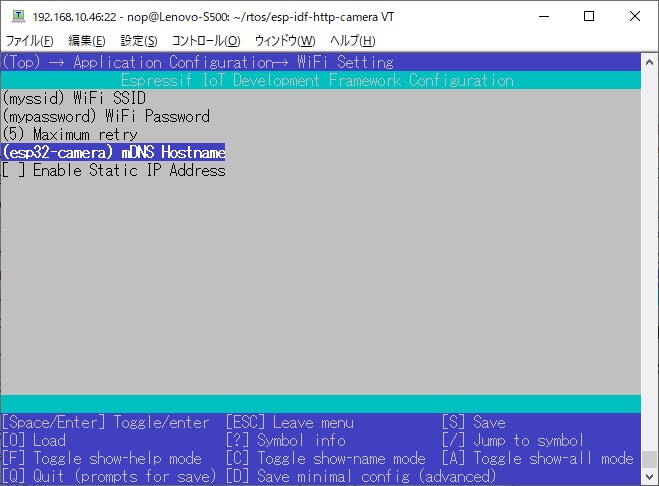
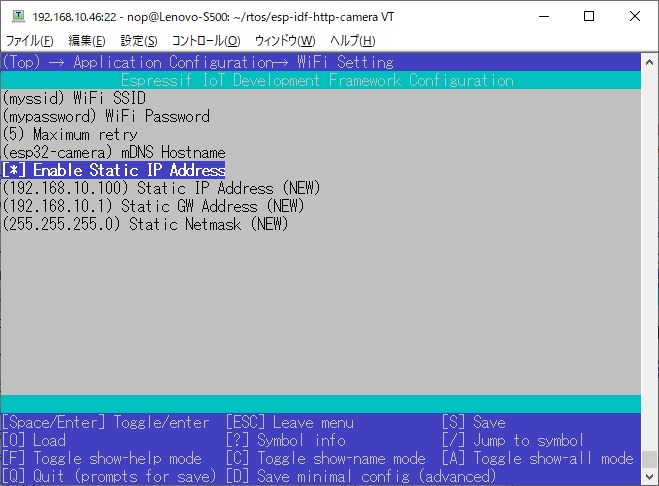
You can use static IP.
### HTTP Server Setting
Specify the IP address and port number of the http server.
You can use mDNS hostnames instead of IP addresses.

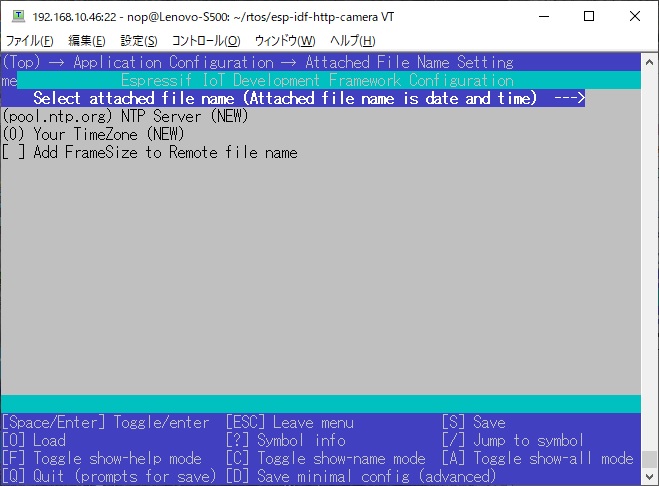
### Attached File Name Setting
You can select the file name to send to the HTTP server from the following.
- Always the same file name
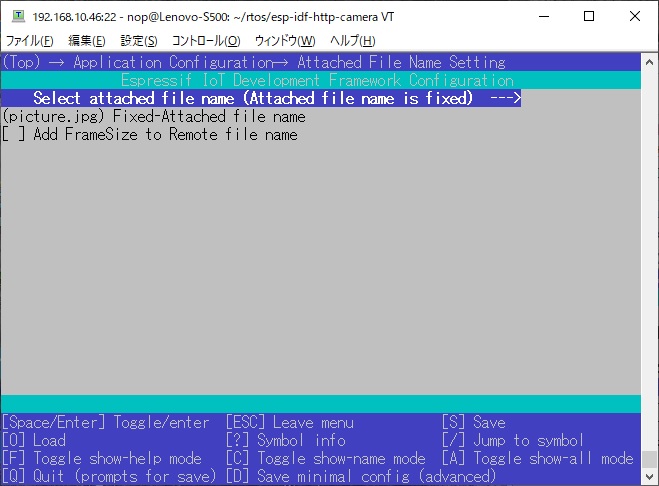
- File name based on date and time
When you choose date and time file name, you will need an NTP server.
The file name will be YYYYMMDD-hhmmss.jpg.
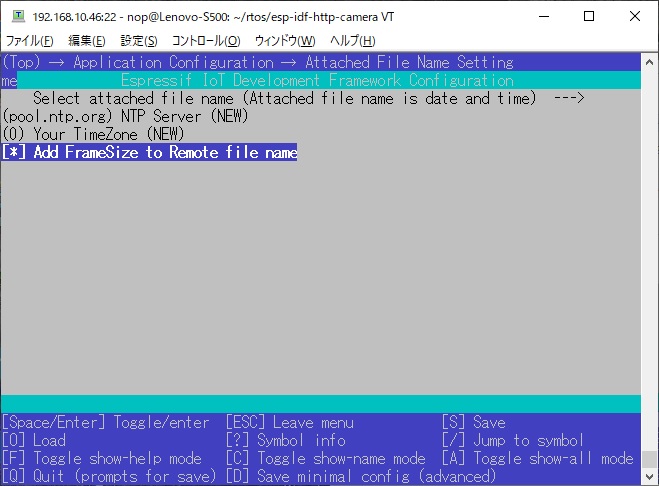
- Add FrameSize to Remote file Name
When this is enabled, FrameSize is added to remote file name like this.
`picture_800x600.jpg`
`20210520-165740_800x600.jpg`
### Select Board

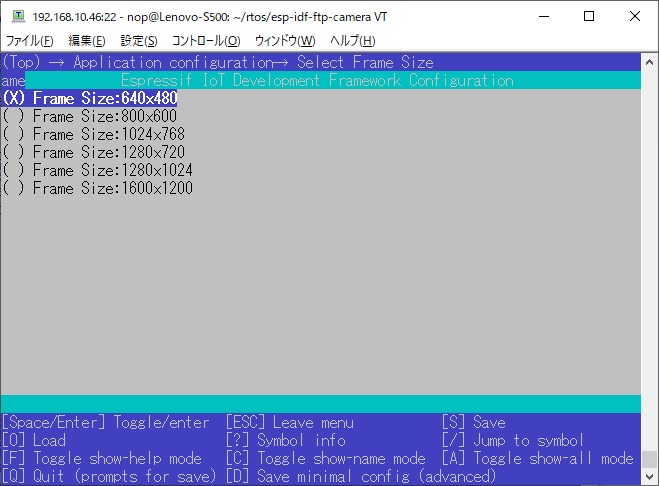
### Select Frame Size
Large frame sizes take longer to take a picture.
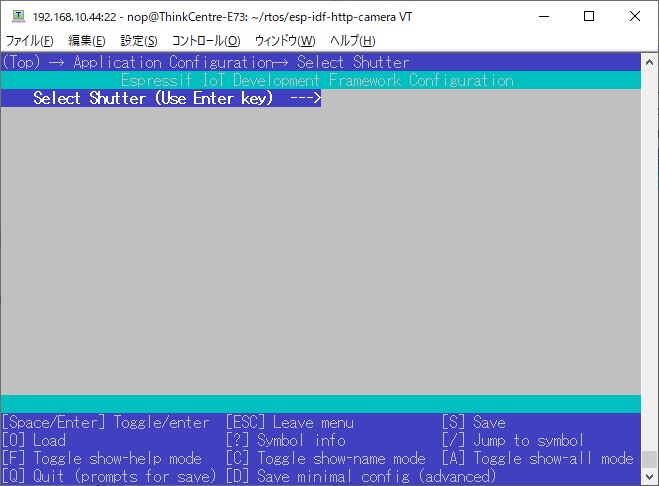
### Select Shutter
ESP32 acts as a HTTP server and listens for requests from HTTP clients.
You can use this command as shutter.
`curl -X POST http://{ESP32's IP Address}:8080/post`
If your ESP32's IP address is `192.168.10.157`, it will look like this.
`curl -X POST http://192.168.10.157:8080/post`
In addition to this, you can select the following triggers:
- Shutter is the Enter key on the keyboard
For operation check.
When using the USB port provided by the USB Serial/JTAG Controller Console, you need to enable the following line in sdkconfig.
```
CONFIG_ESP_CONSOLE_USB_SERIAL_JTAG=y
```
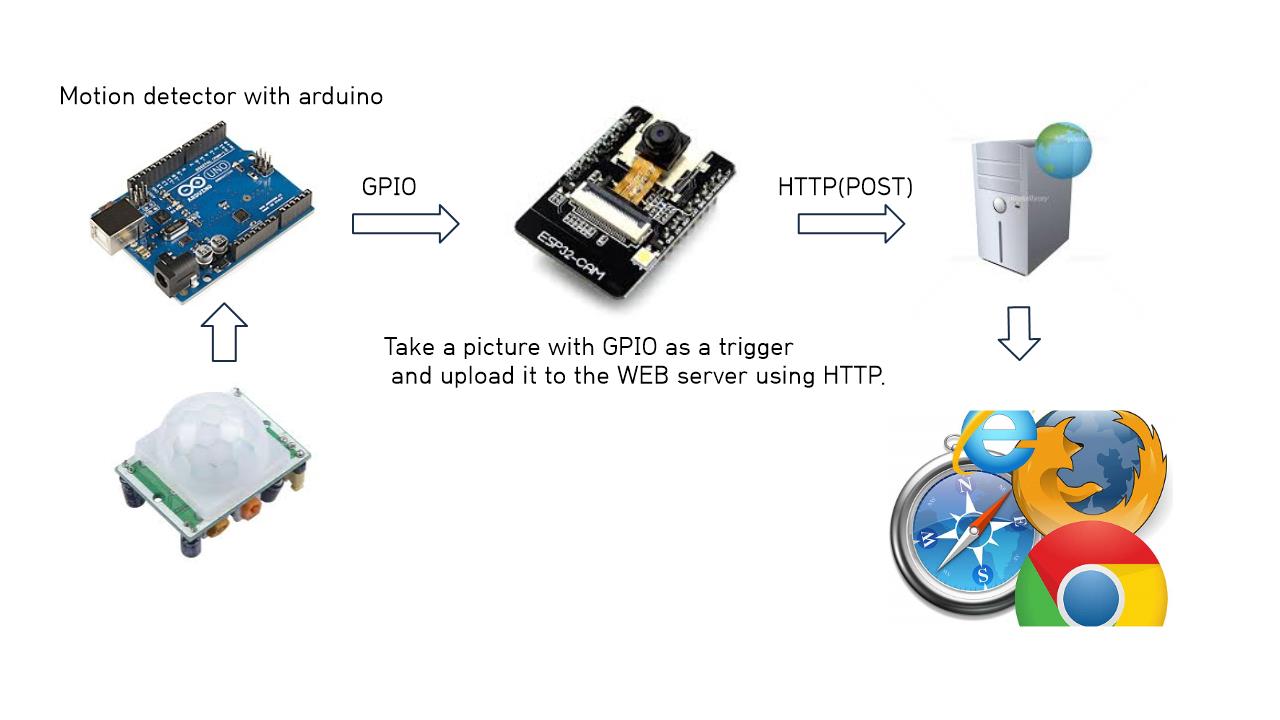
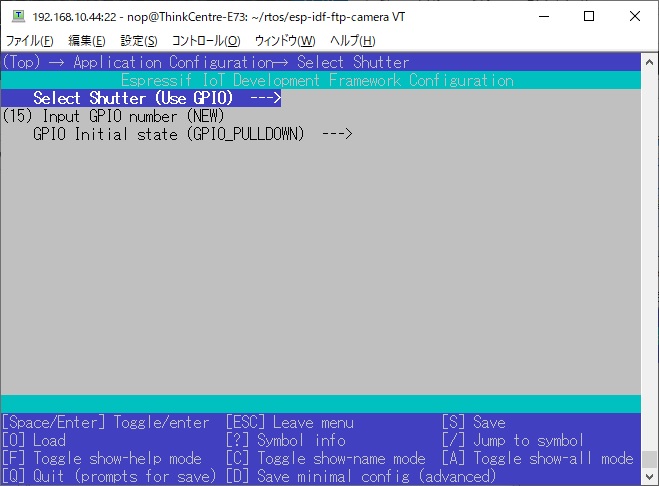
- Shutter is a GPIO toggle
- Initial Sate is PULLDOWN
The shutter is prepared when it is turned from OFF to ON, and a picture is taken when it is turned from ON to OFF.
- Initial Sate is PULLUP
The shutter is prepared when it is turned from ON to OFF, and a picture is taken when it is turned from OFF to ON.
I confirmed that the following GPIO can be used.
|GPIO|PullDown|PullUp|
|:-:|:-:|:-:|
|GPIO12|OK|NG|
|GPIO13|OK|OK|
|GPIO14|OK|OK|
|GPIO15|OK|OK|
|GPIO16|NG|NG|
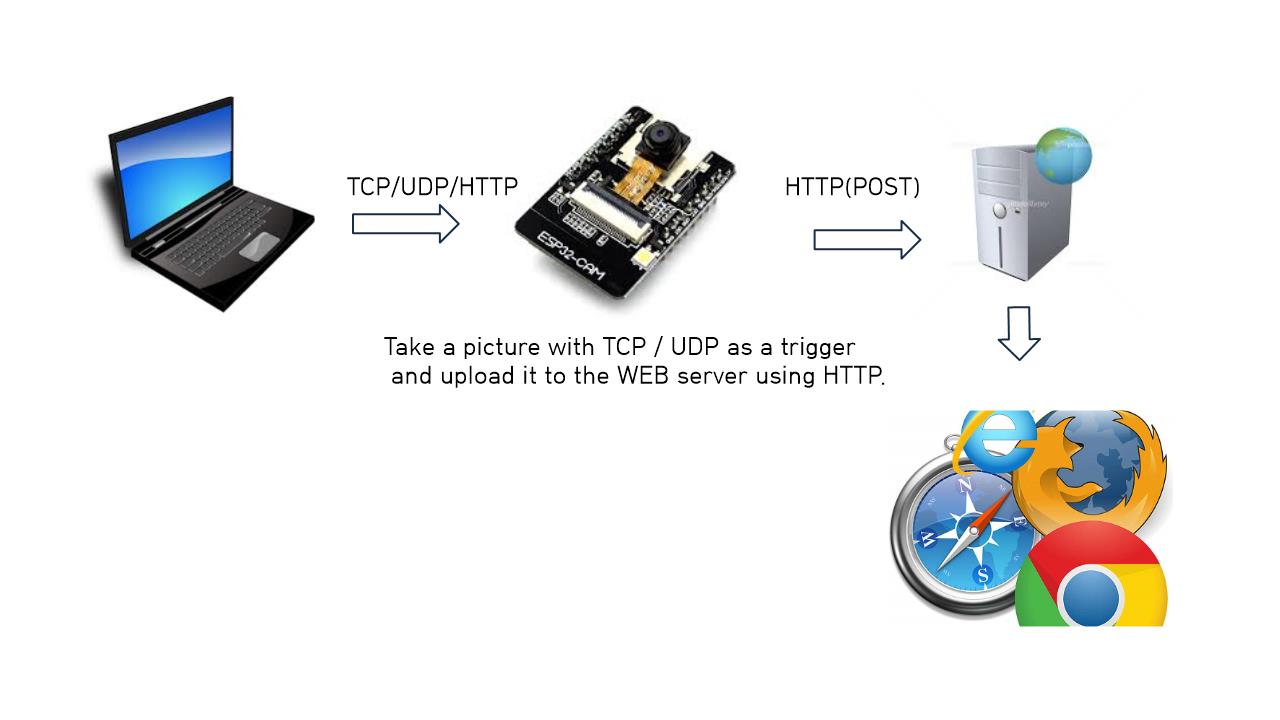
- Shutter is TCP Socket
ESP32 acts as a TCP server and listens for requests from TCP clients.
You can use tcp_send.py as shutter.
`python3 ./tcp_send.py`

- Shutter is UDP Socket
ESP32 acts as a UDP listener and listens for requests from UDP clients.
You can use this command as shutter.
`echo -n "take" | socat - UDP-DATAGRAM:255.255.255.255:49876,broadcast`
You can use udp_send.py as shutter.
Requires netifaces.
`python3 ./udp_send.py`

You can use these devices as shutters.

Click [here](https://github.com/nopnop2002/esp-idf-selfie-trigger) for details.
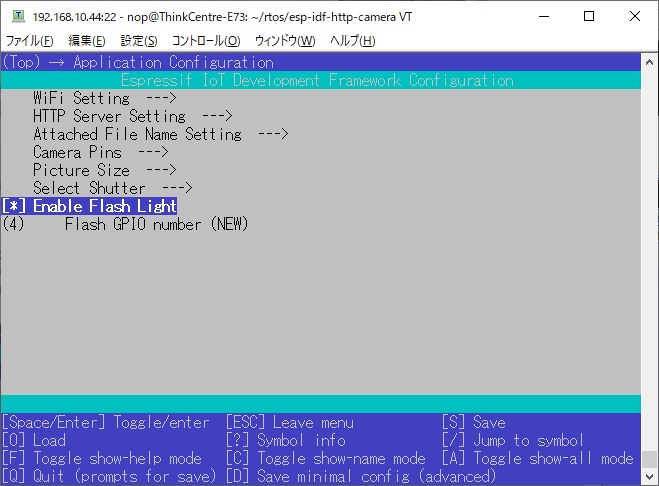
### Flash Light
ESP32-CAM by AI-Thinker have flash light on GPIO4.
## PSRAM
When you use ESP32S3-WROVER CAM, you need to change the PSRAM type.

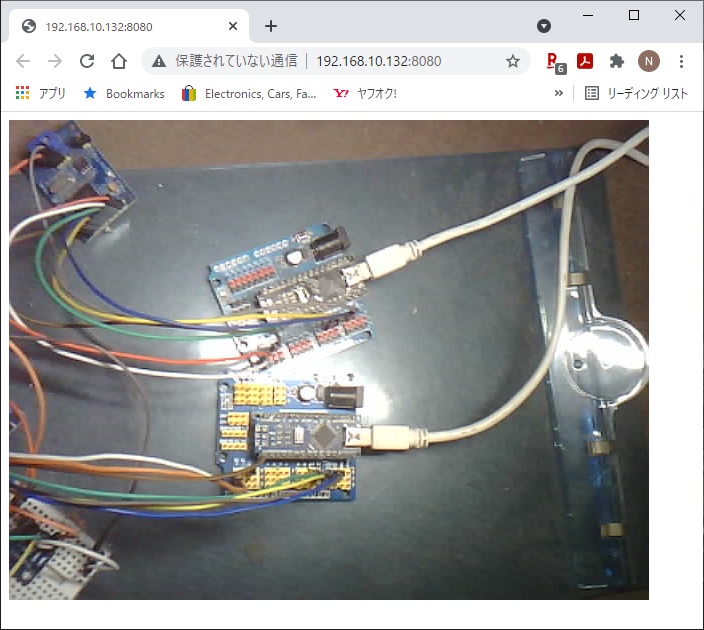
# View picture using Built-in WEB Server
ESP32 works as a web server.
You can view the pictures taken using the built-in WEB server.
Enter the ESP32's IP address and port number in the address bar of your browser.
You can connect using mDNS hostname instead of IP address.