https://github.com/nopnop2002/stm32_tft_8bit
STM32F103 8bit parallel TFT Library for Arduino_STM32
https://github.com/nopnop2002/stm32_tft_8bit
arduino ili9325 ili9341 ili9342 ili9481 ili9486 jpeg lgdp4532 r61505 r61509v rm68140 spfd5408 st7783 st7793 stm32f103
Last synced: about 2 months ago
JSON representation
STM32F103 8bit parallel TFT Library for Arduino_STM32
- Host: GitHub
- URL: https://github.com/nopnop2002/stm32_tft_8bit
- Owner: nopnop2002
- Created: 2018-01-04T06:21:37.000Z (almost 8 years ago)
- Default Branch: master
- Last Pushed: 2021-08-23T00:57:15.000Z (over 4 years ago)
- Last Synced: 2025-03-17T09:06:30.029Z (9 months ago)
- Topics: arduino, ili9325, ili9341, ili9342, ili9481, ili9486, jpeg, lgdp4532, r61505, r61509v, rm68140, spfd5408, st7783, st7793, stm32f103
- Language: C++
- Homepage:
- Size: 632 KB
- Stars: 61
- Watchers: 7
- Forks: 16
- Open Issues: 3
-
Metadata Files:
- Readme: README.md
Awesome Lists containing this project
README
# STM32_TFT_8bit
8bit TFT Library for Arduino_STM32(MAPLE Core)
I ported from here.
https://github.com/prenticedavid/MCUFRIEND_kbv
----
# Software requirement
- Core library
https://github.com/rogerclarkmelbourne/Arduino_STM32
- Adafruit GFX Library
https://github.com/adafruit/Adafruit-GFX-Library
----
# Wirering for 8bit Parallel TFT
Using GPIOA as Data Port
`#define TFT_DATA GPIOA`
|TFT||STM32F103|
|:-:|:-:|:-:|
|LCD_RST|--|PB7|
|LCD_CS|--|PB6|
|LCD_RS|--|PB5|
|LCD_WR|--|PB4(*2)|
|LCD_RD|--|PB3(*2)|
|LCD_D0|--|PA0|
|LCD_D1|--|PA1|
|LCD_D2|--|PA2|
|LCD_D3|--|PA3|
|LCD_D4|--|PA4|
|LCD_D5|--|PA5|
|LCD_D6|--|PA6|
|LCD_D7|--|PA7|
|5V|--|5V(*1)|
|3.3V|--|3.3V(*1)|
|GND|--|GND|
Using GPIOC as Data Port
`#define TFT_DATA GPIOC`
|TFT||STM32F103|
|:-:|:-:|:-:|
|LCD_RST|--|PB7|
|LCD_CS|--|PB6|
|LCD_RS|--|PB5|
|LCD_WR|--|PB4(*2)|
|LCD_RD|--|PB3(*2)|
|LCD_D0|--|PC0|
|LCD_D1|--|PC1|
|LCD_D2|--|PC2|
|LCD_D3|--|PC3|
|LCD_D4|--|PC4|
|LCD_D5|--|PC5|
|LCD_D6|--|PC6|
|LCD_D7|--|PC7|
|5V|--|5V(*1)|
|3.3V|--|3.3V(*1)|
|GND|--|GND|
(*1)When a regulator(It's often AMS1117) is mounted on the back, it's operated 5V.
When a regulator is NOT mounted on the back, it's operated 3.3V.
(*2)By several boards, This port is used as JTAG.
You need remap.
afio_cfg_debug_ports(AFIO_DEBUG_NONE)
Pin define is "STM32_TFT_8bit.h"
----
# Tested TFT
- ILI9325 2.4inch 240x320 TFT-Shield
- ILI9341 2.4inch 240x320 TFT-Shield
- ILI9342 2.4inch 240x320 TFT-Shield
- SPFD5408 2.4inch 240x320 TFT-Shield
- R61505 2.4inch 240x320 TFT-Shield
- ST7783 2.4inch 240x320 TFT-Shield
- LGDP4532 2.4inch 240x320 TFT-Shield
- R61509V 3.6inch 240x400 TFT-Shield
- ST7793 3.6inch 240x400 TFT-Shield
- ILI9481 3.5inch 320x480 TFT-Shield
- ILI9486 3.5inch 320x480 TFT-Shield
- RM68140 3.95inch 320x480 TFT-Shield
- ST7796 3.95inch 320x480 TFT-Shield
- OPEN-SMART ILI9225 TFT-Shield
- OPEN-SMART ILI9327 TFT-Shield
- OPEN-SMART ILI9340 TFT-Shield
I found that these display cannot follow high-speed GPIO-ON and GPIO-OFF.
- OPEN-SMART S6D1121 16Pin-Parallel
- OPEN-SMART ST7775 16Pin-Parallel
- OPEN-SMART ST7783 16Pin-Parallel
- OPEN-SMART R61509V 16Pin-Parallel
- OPEN-SMART ILI9488 16Pin-Parallel
----
# Setting your TFT's resolution
If your TFT's resolution is 320x480,
you have to set your TFT's resolution using tft.setResoution.
Example:
```
ID = tft.readID();
tft.setResolution(320, 480); // Set your resolution
Serial.print("Device ID: 0x"); Serial.println(ID, HEX);
tft.begin(ID);
uint32_t width = tft.width();
Serial.print("Width: "); Serial.println(width); // You will see 320
uint32_t height = tft.height();
Serial.print("Height: "); Serial.println(height); // You will see 480
```
If your TFT's resolution is 240x400,
you have to set your TFT's resolution and TFT's offset.
Example:
```
ID = tft.readID();
tft.setResolution(240, 400); // Set your resolution
tft.setOffset(32); // Set your offset
Serial.print("Device ID: 0x"); Serial.println(ID, HEX);
tft.begin(ID);
uint32_t width = tft.width();
Serial.print("Width: "); Serial.println(width); // You will see 240
uint32_t height = tft.height();
Serial.print("Height: "); Serial.println(height); // You will see 400
```
---
- SPFD5408 + ILI9486

- ILI9325 + ILI9481

- ILI9341 + ST7793

- ILI9342 + R61509V

- ST7783 + ST7796

----
# F4 board support
If you want more faster, plase use [this](https://github.com/nopnop2002/Arduino-STM32-8bitTFT).
F4 board is very fast.
----
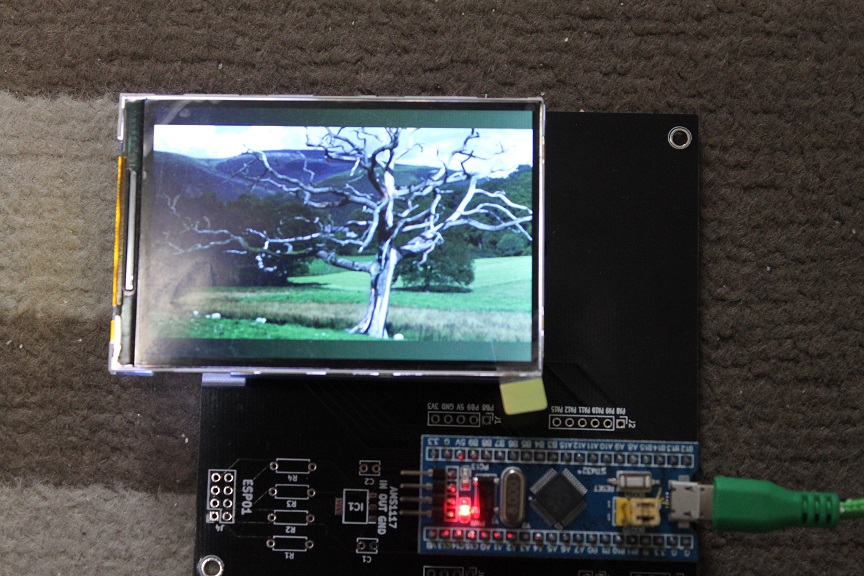
# JPEG Viewer
Viewer of a JPEG file in the SD card.
# Software requirement
- Arduino FAT16/FAT32 Library
https://github.com/greiman/SdFat
- JPEG decoder library
https://github.com/Bodmer/JPEGDecoder
# Wirering for TFT built-in SD-CARD Reader
|TFT||STM32F103|
|:-:|:-:|:-:|
|SD_SS|--|PB12|
|SD_SCK|--|PB13|
|SD_DI|--|PB15|
|SD_DO|--|PB14|
|5V|--|5V(*)|
|3.3V|--|3.3V(*)|
|GND|--|GND|
\*When a regulator(It's often AMS1117) is mounted on the back, it's operated 5V.
\*When a regulator is NOT mounted on the back, it's operated 3.3V.
# How to use
Copy JPEGS file to your SD-CARD.
\*The biggest length of the JPEG file name is 32 character.
Wire TFT built-in SD-CARD Reader to STM32.
Execute JpegView_240x320_SMT32.