https://github.com/oliverswift/promys
Screencasting project
https://github.com/oliverswift/promys
linux macos raspberry-pi-3 screencast windows
Last synced: over 1 year ago
JSON representation
Screencasting project
- Host: GitHub
- URL: https://github.com/oliverswift/promys
- Owner: OliverSwift
- License: bsd-3-clause
- Created: 2018-01-28T17:24:57.000Z (over 8 years ago)
- Default Branch: master
- Last Pushed: 2025-03-27T11:04:41.000Z (over 1 year ago)
- Last Synced: 2025-04-02T19:07:52.699Z (over 1 year ago)
- Topics: linux, macos, raspberry-pi-3, screencast, windows
- Language: C
- Homepage: https://promys.me
- Size: 8.09 MB
- Stars: 68
- Watchers: 3
- Forks: 2
- Open Issues: 1
-
Metadata Files:
- Readme: README.md
- License: LICENSE
Awesome Lists containing this project
README
https://promys.me
## Changes
* _`2025/03/30`_ Windows 11 executable with desktop scaling bug fixed and netcard enumeration crash fixed.
* _`2018/06/06`_ DDay. Moved to GitLab
* _`2018/05/13`_ Smaller client sizes
* _`2018/05/11`_ Windows client didn't quit well when server shuts down connection. 10s timeout on server side. `Return` tv remote key used to force server side connection shutdown.
* _`2018/05/09`_ Fedora rpm available. Better cursor capture for Windows client.
* _`2018/05/03`_ Linux client now captures the cursor.
* _`2018/05/02`_ Logo when booting.
* _`2018/04/26`_ New logo from [Ssnjrthegr8](https://github.com/ssnjrthegr8). MacOS client now captures mouse. Timeout on input video stream. Settings can be accessed from front page.
* _`2018/04/15`_ Overscan can be adjusted with TV Remote (through CEC). During screencasting use Up/Down buttons to adjust overscan by 1 pixel and Left/Right to adjust it by 4 pixels.
* _`2018/03/26`_ settings.html page lets you change many parameters. If no password was set user we'll be prompted for it.
## Introduction
It's a screencasting system project based on a Pi 3 (or similar). Nothing very new for such project except that it aims at being very user friendly. Easy setup for users on Windows, Mac and Linux.
User connects to the Promys Device Wifi access point, visits the embedded web page, downloads client application from there and starts it. Almost as easy as ClickShare from BARCO but at a reasonable price (~40€).
It's **NOT** like a Chromecast device, guests don't have to join hosts wifi network. It's suitable for companies that would like to offer easy screencasting to visitors and employees. It's more similar to Clickshare. I don't see a point using it at home, but, why not?
An already made system image is available on the web site (see below), so it should be very straightforward to setup a Pi3 out of the box and have an up and running system.
For the moment it is very basic but it can be extended with plenty of nifty features. Check out TODO/Ideas section for that and feel free to contribute.
## Background
What this is all about...
I've seen those BARCO boxes that let you screencast your desktop onto a TV set or projector a lot. Very handy, but as usual no Linux binary (there used to be one but not maintained anymore for lame reasons) and also very expensive.
There are blogs and blablas about how to do screencasting, but most of the time instructions are awkward and based on complicated ffmpeg or VLC setup, well nothing very user friendly.
Considering RPi3 hardware capabilities, espcecially the H264 decoder and the Wifi addon I just put myself into the challenge to deliver an easy to use or setup system. Building a Promys device is easy and cheap, using it is easy as well. It can improve in many ways. Dig in and join!
## Building a Promys device
Just want to build a `Promys device` and use it ?
1. First get a Raspberry Pi 3 (I haven't tested with Pi 2 but you'll miss the main advantage of Wifi). It works with a Raspberry Pi Zero W as well, without LAN.
2. Find **[here](https://promys.me/downloads/image_2025-03-30-Promys.zip)** a zipped image for a 1GB or more micro SD card
3. Get **[ETCHER](https://etcher.io/)** and burn the image (you don't even have to unzip the file) on the micro SD.
4. Insert the SD in the Raspberry, connect to a projector or TV with HDMI cable. Power TV on.
5. Power on the Promys device.
6. Tada 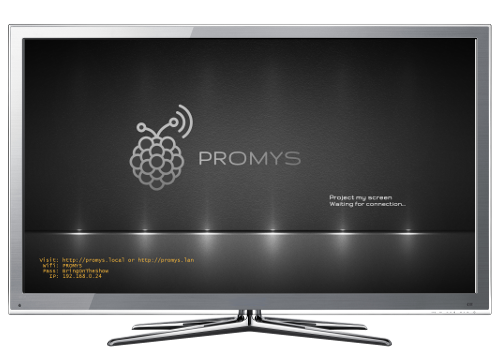
> **Warning**, you won't be able to login to the device. SSH is not active by default. You'll need to modify the image by mounting the SD (on a Linux box) uncomment some lines in `/etc/rc.local` file and make root read-write by modifying `/etc/fstab`. You'll then need to reboot and ssh to it (usual Pi credentials are preserved), change password, make root file filesystem read-only again and comment the extra lines in `rc.local`.
> **Note:** **[ETCHER](https://etcher.io/)** by _[Resin.io](https://resin.io/)_ makes image burning on SD very easy and safe on Linux, MacOS and Windows.
For administrators, the `/boot` partition is VFAT formatted and can easily be mounted on any PC/Mac. It contains `wifi.cfg` for Wifi access point configuration where you can change ESSID, password, channel, etc. If a `nat.txt` file exists there ip forwarding and masquerading will be performed so connected users on Wifi will be routed to LAN. You may also visit the `settings.html`page to adjust main parameters, on first vist you'll be asked to set a password.
The splash image (see above) is a jpeg file named `splash.jpg` (1920 by 1080 pixels) that can easily be customized (with company logo and additional technical details for users for example).
## Server
This section describes what is needed to build and setup the server.
### _Binary_
You'll need a Pi3 running `Raspian stretch` to compile the server executable. I don't cover any cross-compiling instructions.
If you've installed a Raspbian disto you'll need `libjpeg62-turbo-dev` and `libfreetype6-dev` packages.
Just get to `Server` directory and type make. It relies on `/opt/vc` package that contains helper libraries to use the OpenMAX layer available for the Broadcom ARM chip.
### _Server setup_
_This section needs to be updated_
`Server/Target` directory contains a few things to modify on the system to make it dedicated.
* `boot` directory contains suggested modified `cmdline.txt` and `config.txt` files.
* `boot` also contains Wifi configuration and splash.jpg file for easier customization. NAT is not active by default now, it can become active if a `nat.txt` file exists in `/boot`.
* `/etc/rc.local` should be replaced with the one proposed.
* Making the device a Wifi access point and adjusting various networking things relies on `/etc` content.
* Embedded web site is also setup in `www`, you'll need to install `lighttpd` package to serve it. You'll need to install client binaries in `downloads` sub-directory.
* application directory is `/opt/promys`.
* I also made mounted `rootfs` filesystem `readonly` to avoid the annoying usual SD issues.
The web server also exposes a `settings.html` page that relies on cgi scripts to allow some changes.
Section below points to how to create an image for dedicated Promys box. You should find insteresting things there.
### _Creating an image_
I've forked `pi-gen` project and modified it to generate a Promys image. Check out https://github.com/OliverSwift/pi-gen
It still needs a lot of clean up to get the bare necessities, but it's a start.
A new method is based on an already made image and just updates what's needed. Script `build.sh` is in `Image`.
## Client
The client part is the application to be run on a desktop so as to cast it to a Promys device connected to a TV set or projector.
Once launched it will start searching promys device over available networks. When a promys device is found your desktop will be cast to it.
A desktop PC or Mac can be directly connected to a Promys device using its Wifi access point or the same lan network they both are connected to. Usually, Wifi is used for guests and Lan for co-workers in a company. For security reason there is no routing between ethernet and wifi although it can be actived along with NAT.
You'll need native 64bit platforms running (or VMs). I used Ubuntu 16.04, Windows 7, MacOS High Sierra.
Minimum environment is required for compiling client binaries. You'll need bash, git, gcc (or clang), g++, make, and nasm 2.13.
On Windows `cygwin64` is required with these specific packages. On Linux you'll probably have to get recent nasm package. On MacOS you'll need XCode and nasm.
It depends on x264 and ffmpeg package. It only uses libswscale/libavutil from ffmpeg, x264 is used for video compression.
For each platform you'll have to compile them this way:
You'll have to clone and checkout both sub-projects:
```
# git submodule init
# git submodule update
```
Current promys clients have been compiled against these exact versions:
```
x264: b00bcafe53a166b63a179a2f41470cd13b59f927
ffmpeg: bfe397e4313c640e2f05c90a2ff1541f50524094
```
For versions matching reason I recommend to git checkout these commits. _Note that x264 hash start is awesome, couldn't resist to stick with it._
**Important:** For compiling `x264` you'll need nasm version 2.13 or superior.
| Build OS | NASM 2.13 |
|----------|------------------|
| Ubuntu/Debian | https://debian.pkgs.org/sid/debian-main-amd64/nasm_2.13.02-0.1_amd64.deb.html |
| MacOS | http://www.nasm.us/pub/nasm/releasebuilds/2.13.01/macosx/nasm-2.13.01-macosx.zip |
| Windows | Add nasm in package selection when installing `cygwin64` https://www.cygwin.com/setup-x86_64.exe |
Compile `x264`:
```
# cd Client/Common/x264
# ./configure --disable-cli --enable-shared
# make -j
```
Compile `ffmpeg`:
```
# cd Client/Common/ffmpeg
# ./configure --disable-all --enable-swscale --enable-shared
# make -j
```
For both, no installation step needed. Leave libs where they are.
Once you have x264, swscale and avutil libraries compiled you can proceed to each specific build stages below.
**Note:** I've written a `Makefile` to handle all steps above. Location: `Client/Common`
### Windows
Get to `Client/Windows` and type `make install`. This will generate a `promys.exe` file which is
a autoextractable executable with all needed stuff in it. User has just to run it, no installer, automatic clean-up.
### Linux
Get to `Client/Linux` and type `make package`. This will generate a `promys.deb` file which is
intended for debian based distros. User will have to install it prior to using the client.
With any launcher, search for promys and start the application. Works fine on Ubuntu, Mint, Fedora, ...
### MacOS
Get to `Client/MacOS` and type `make`. This will generate a `promys.dmg` file which is
a software drive. User will have to download it, open it and start the application. GateKeeper
will certainly ask permission to run an application downloaded from the Internet.
The already built one is signed with my developer account so users just have to allow its execution because it comes _the Internet_. I haven't pushed it on the Mac Store though.
## TODO
_and ideas_
* version checking
* connect a smartphone and fake a laser spot
* improve clients (performance, power consumption, mouse capture, ...)
* token passing for presenters (queuing for screencasting)
* ...