https://github.com/openedx/xblock-image-explorer
https://github.com/openedx/xblock-image-explorer
Last synced: 3 months ago
JSON representation
- Host: GitHub
- URL: https://github.com/openedx/xblock-image-explorer
- Owner: openedx
- License: agpl-3.0
- Created: 2014-03-09T14:40:29.000Z (over 11 years ago)
- Default Branch: master
- Last Pushed: 2025-03-17T00:28:26.000Z (4 months ago)
- Last Synced: 2025-03-21T18:03:15.072Z (4 months ago)
- Language: Python
- Size: 1.43 MB
- Stars: 9
- Watchers: 25
- Forks: 39
- Open Issues: 6
-
Metadata Files:
- Readme: README.md
- License: LICENSE
Awesome Lists containing this project
README
Image Explorer XBlock
=====================
[](https://github.com/openedx/xblock-image-explorer/actions/workflows/ci.yml)
This package provides the Image Explorer XBlock that allows you to
use an image with hotspots in a course. When the student clicks a
hotspot icon, tooltip containing custom content is displayed.
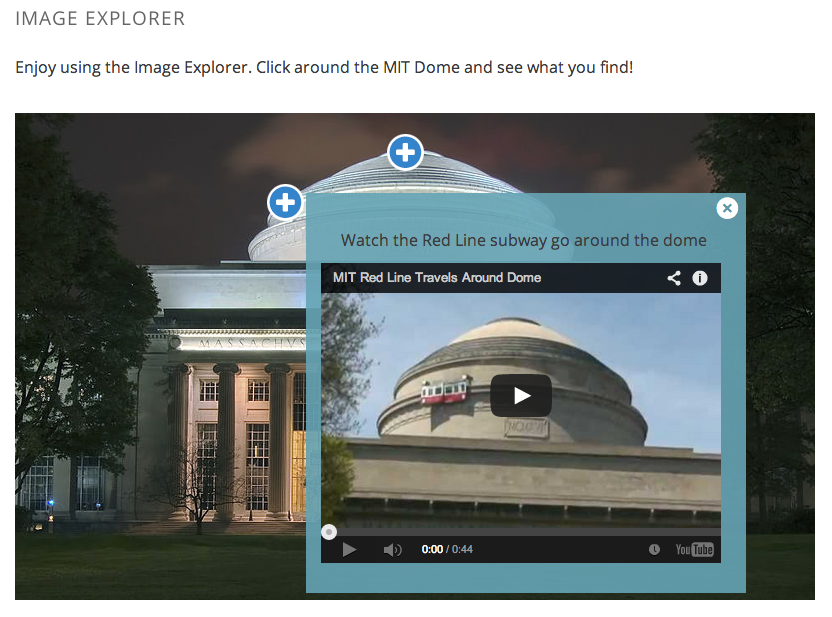
Screenshot below shows the Image Explorer XBlock rendered inside the
edX LMS with an activated tooltip containing and embedded YouTube video.

Installation
------------
Install the requirements into the python virtual environment of your
`edx-platform` installation.
```bash
$ pip install -r requirements.txt
```
Enabling in Studio
------------------
You can enable the Image Explorer XBlock in studio through the
advanced settings.
1. From the main page of a specific course, navigate to `Settings ->
Advanced Settings` from the top menu.
2. Check for the `advanced_modules` policy key, and add
`"image-explorer"` to the policy value list.
3. Click the "Save changes" button.
Testing
-------
Make sure you have firefox and geckodriver installed and added to your `PATH`,
then, follow these instructions:
1. Create a virtualenv and enable it.
2. Install tox with `pip install tox`
3. Run `tox` to run all tests.
You can also run separate test environments like this:
```
tox -e unit # Run only unit tests
tox -e integration # Integration tests
tox -e quality # pylint
```
Usage
-----
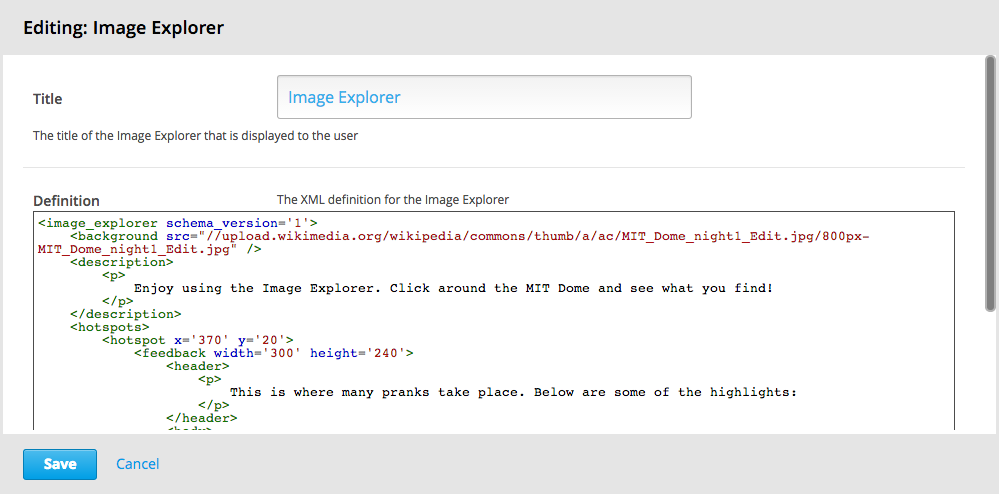
When you add the `Image Explorer` component to a course in the studio,
the block is field with default content, shown in the screenshot below.

The basic structure of the `image_explorer` XBlock looks like this:
```xml
...custom HTML content...
...custom HTML content...
...custom HTML content...
...
...
...
```
The `schema_version` attribute of the `` wrapper
element should be set to `1`. It currently isn't used but will provide
help for easier schema migrations if the XML schema changes in future
versions.
The `` element should contain the following child
elements:
* `` (required)
* `` (optional)
* `` (required)
### The background element
The `src` attribute of the `` element defines the image
over which the hotspots are placed.
### The description element
The optional `` element can contain arbitrary HTML
content that is rendered above the image.
### The hotspots element
The `` element wraps an arbitrary number of child
`` elements. These define the position of the hotspots on the
background image and the content of the tooltips.
The supported attributes of `` elements are `x` and `y` (both
required) that specify the position of the hotspot on the background
image, `item-id` which can be set to a unique string used to
identify the hotspot in the emitted events and optional `side` attribute
that allows to override hotspot's popup position. If `side` attribute is
missing or set to anything except `left` and `right` automatic positioning
is used.
Each `` element must contain the `` child
element. The `` element supports `width`, `height` and `max-height`
attributes (all optional) that specify the dimensions of the tooltip
element. The default width is `300px` and if no height is specified, the
max-height is set to `500px`. So the content will be sized dynamically with a
vertical scrollbar for the overflow.
The `` element can contain the following child elements:
* ``
* ``
* ``
#### The header element
If present, the `` specifies the tooltip header. It may
contain arbitrary HTML content.
#### The body element
The `` element can contain arbitrary HTML content that is
rendered in the tooltip.
#### The youtube element
The `` element offers a convenient way of placing an embedded
YouTube video into a tooltip. The required attributes are `video_id`,
`width`, and `height`.
#### The Ooyala element
The `` element offers a convenient way of placing an embedded
Ooyala video into a tooltip. The required attributes are `video_id`,
`width`, and `height`.
#### The Brightcove element
The `` element offers a convenient way of placing an embedded
Brightcove video into a tooltip. The required attributes are `video_id`,
`account_id`, `width`, and `height`.
e.g;
```
```
API for native mobile frontends
-------------------------------
**Retrieve fixed data for all Image Explorer XBlocks in a course:**
```
GET https:///api/courses/v1/blocks/?course_id=&username=&depth=all&requested_fields=student_view_data
```
Example image explorer return value:
```
"student_view_data": {
"hotspots": [
{
"item_id": "hotspotA",
"x": "370",
"feedback": {
"body": "
- Once there was a police car up here
- Also there was a Fire Truck put up there
"width": "300",
"youtube": null,
"max_height": null,
"height": "240",
"header": "
This is where many pranks take place. Below are some of the highlights:
","type": "text",
"side": "auto"
},
"y": "20"
},
{
"item_id": "hotspotB",
"x": "250",
"feedback": {
"body": null,
"width": "440",
"youtube": {
"width": "400",
"video_id": "dmoZXcuozFQ",
"id": "youtube-f6c7d27d30834097bb1b17af1074e98c",
"height": "300"
},
"max_height": null,
"height": "400",
"header": "
Watch the Red Line subway go around the dome
","type": "youtube",
"side": "auto"
},
"y": "70"
}
],
"description": "
Enjoy using the Image Explorer. Click around the MIT Dome and see what you find!
","background": {
"src": "//upload.wikimedia.org/wikipedia/commons/thumb/a/ac/MIT_Dome_night1_Edit.jpg/800px-MIT_Dome_night1_Edit.jpg",
"height": null,
"width": null
}
},
```
License
-------
The Image Explorer XBlock is available under the GNU Affero General
Public License (AGPLv3).