https://github.com/pasqualerossi/Born2BeRoot-Guide
Step-By-Step on How to Complete The Born2BeRoot Project.
https://github.com/pasqualerossi/Born2BeRoot-Guide
42-born2beroot 42born2beroot born2beroot born2beroot-1337 born2beroot-42 debian virtual-machine virtualization
Last synced: about 1 year ago
JSON representation
Step-By-Step on How to Complete The Born2BeRoot Project.
- Host: GitHub
- URL: https://github.com/pasqualerossi/Born2BeRoot-Guide
- Owner: pasqualerossi
- Created: 2022-06-21T01:47:52.000Z (almost 4 years ago)
- Default Branch: main
- Last Pushed: 2024-07-20T03:12:56.000Z (almost 2 years ago)
- Last Synced: 2024-08-01T10:20:03.968Z (almost 2 years ago)
- Topics: 42-born2beroot, 42born2beroot, born2beroot, born2beroot-1337, born2beroot-42, debian, virtual-machine, virtualization
- Homepage:
- Size: 194 KB
- Stars: 125
- Watchers: 2
- Forks: 19
- Open Issues: 1
-
Metadata Files:
- Readme: README.md
Awesome Lists containing this project
- 42-resources - Born2beroot Guide
README
## Born2BeRoot Guide
This guide has 8 Parts:
- Part 1 - Downloading Your Virtual Machine
- Part 2 - Installing Your Virtual Machine
- Part 3 - Starting Your Virtual Machine
- Part 4 - Configurating Your Virtual Machine
- Part 5 - Connecting to SSH
- Part 6 - Continue Configurating Your Virtual Machine
- Part 7 - Signature.txt
- Part 8 - Your Born2BeRoot Defence Evaluation with Answers
## Part 1 - Downloading Your Virtual Machine
1. Click on this link **https://cdimage.debian.org/debian-cd/current/amd64/iso-cd/**
2. Scroll to the bottom of the website and click `debian-xx.x.x-amd64-netinst.iso`
### Part 1.2 - Virtual Box
#### Now head over to Virtual Box to continue on.

#### Don't have Virtual Box Installed?
1. Click on Search Icon 🔍 in the top right on a Apple Computer/Laptop and type in `Managed Software Center`
2. Click on software and scroll 🖱️ to the bottom ⏬ and click `DOWNLOAD` on Virtual Box.

## Part 2 - Installing Your Virtual Machine
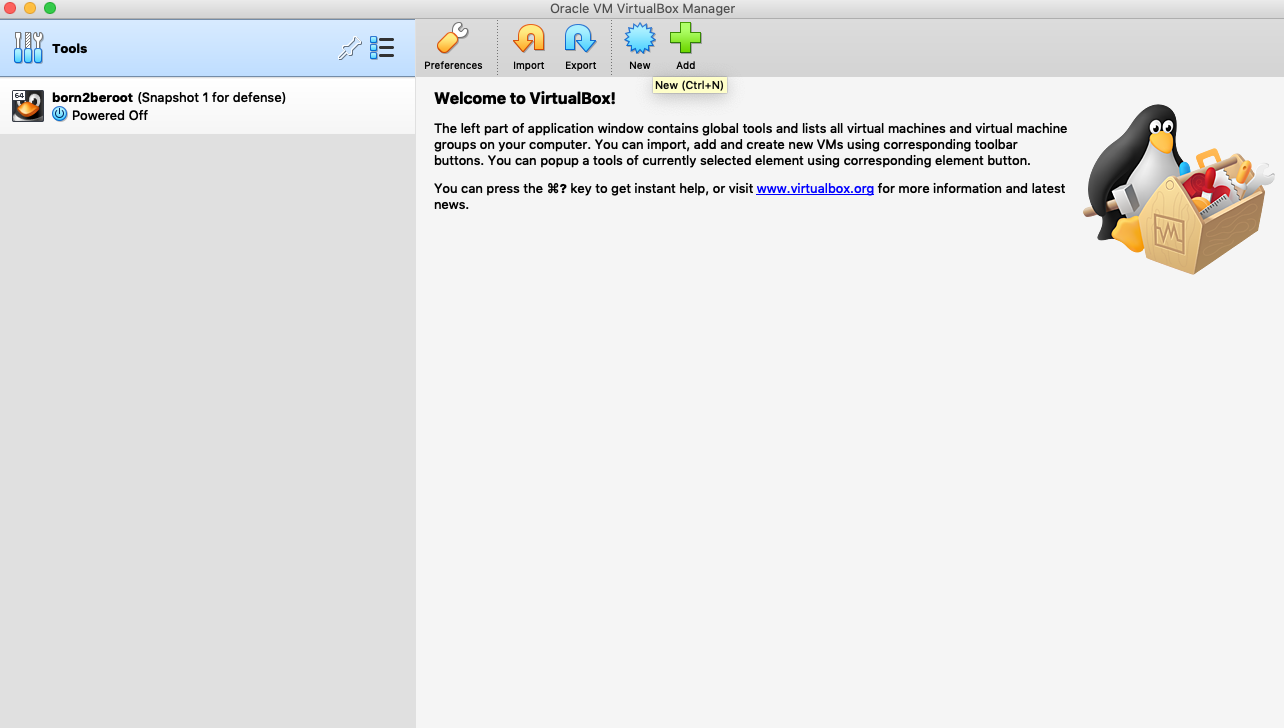
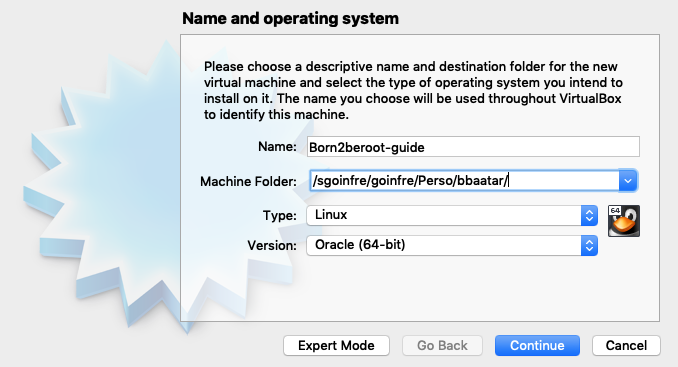
1. Open Virtual Box and Click on `New`
2. Change Machine Folder to `sgoinfre/students/your_intra_login/Virtual Machine Name` and then click `continue` to move to the next step.
3. Set Memory Size as `1024 MB` and click continue.

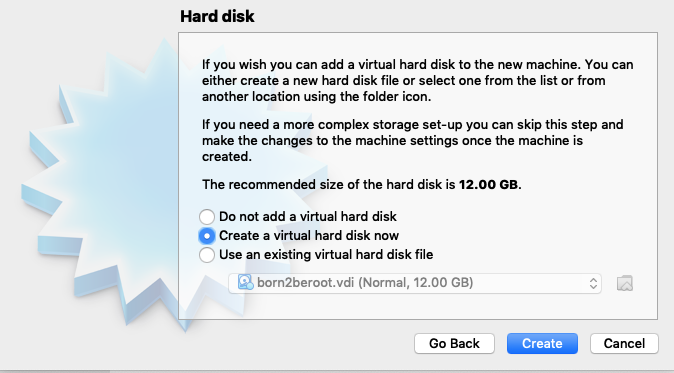
4. Click `Create a Virtual Hard Disk Now` and then click `Create` to create the Hard Disk.
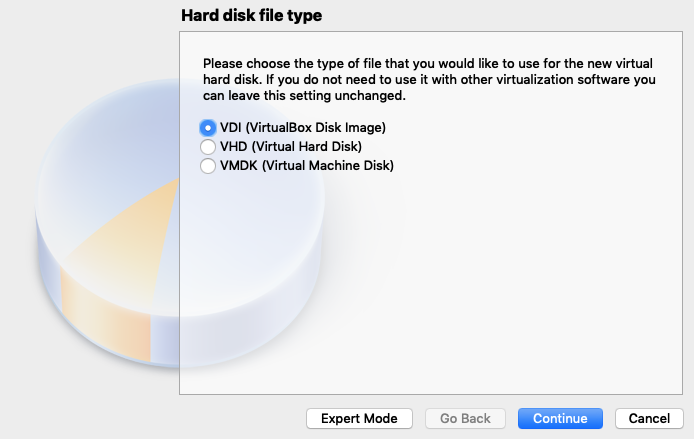
5. Click `VDI (VirtualBox Disk Image)` and then click `Continue` to select VDI.
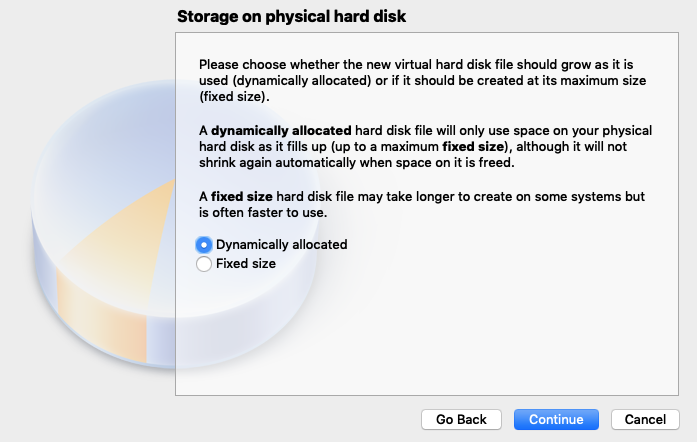
6. Click `Dyamically Allocated` and then click `Continue` to only use space on your Hard Disk.
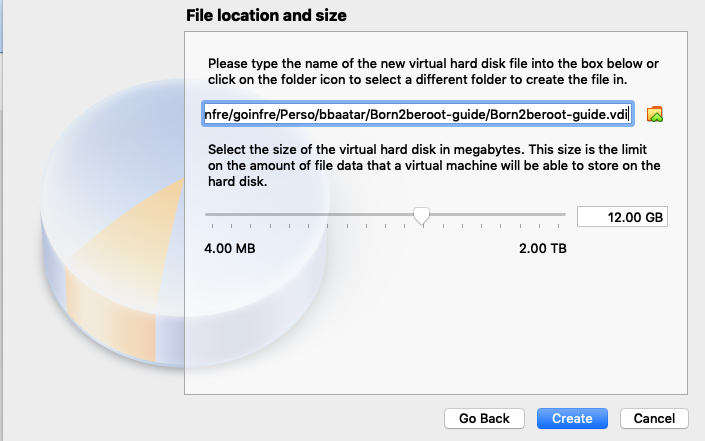
7. Set Size as `12.00 GB` and then click `Continue` this should be enough for this project.
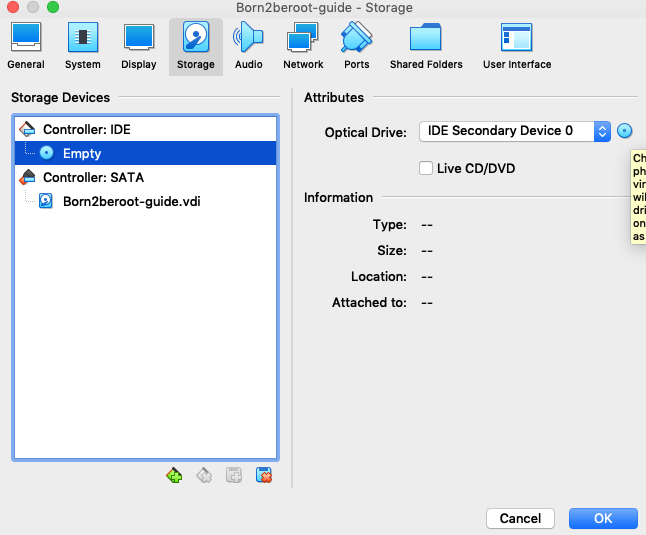
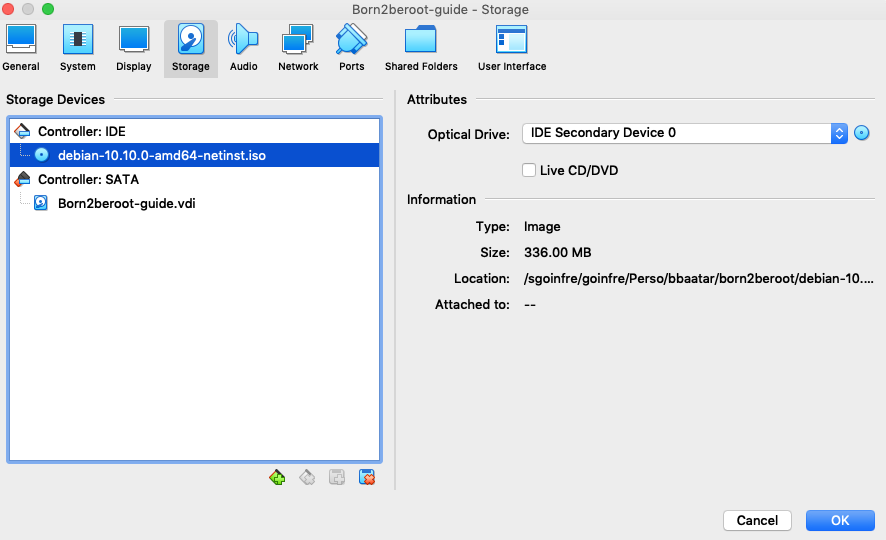
8. Click `Settings` and then click `Storage` to view your Virtual Machine Storage.

9. Click on `Optical Drive` (Optical Drive - far right blue small box).
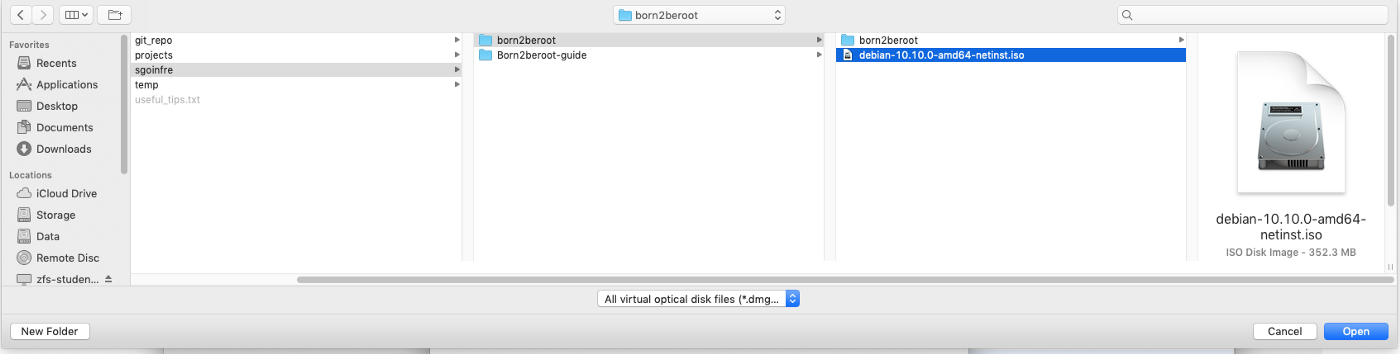
10. Click on `Choose a disk file...` (2nd option in the drop down).
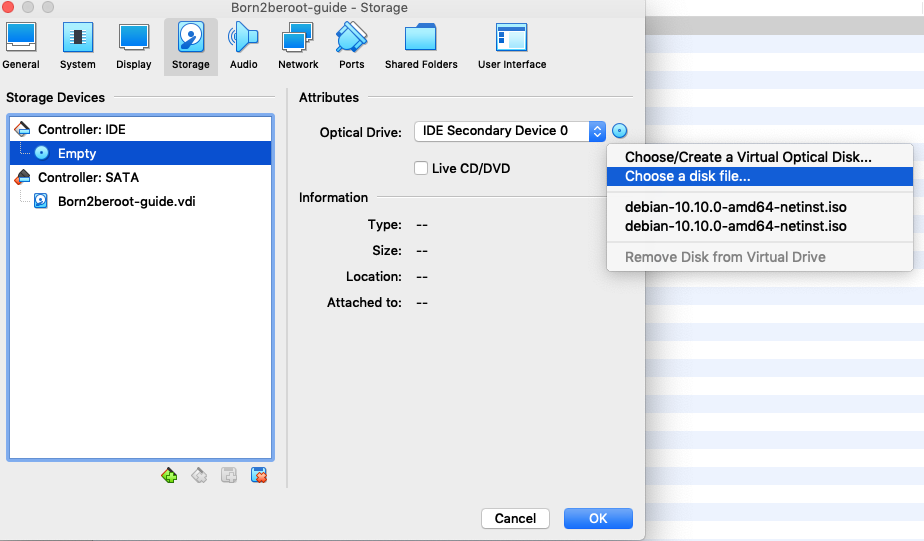
11. Then click on the Virtual Machine file (.iso).
12. Click on your `Virtual Machine` and then click `'ok` to confirm you Virtual Machine Storage.
13. Click `Start` (The Green Arrow ➡️) to start your Virtual Machine.

## Part 3 - Accessing Your Virtual Machine
#### In the Virtual Machine, you will not have access to your mouse and will only use your Keyboard to operate your Virtual Machine.
0. To increase your Virtual Machine size, press `command` + `c` on your Apple Keyboard at the same time and then use your mouse to drag the screen to the size you wish or do the following:

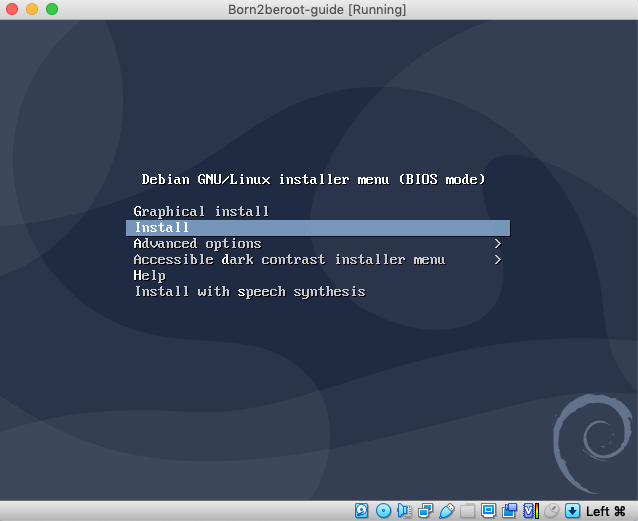
1. Use the arrow keys on your keyboard 🔼 🔽 and press `Enter` on `Install` (This will start the installation proccess).
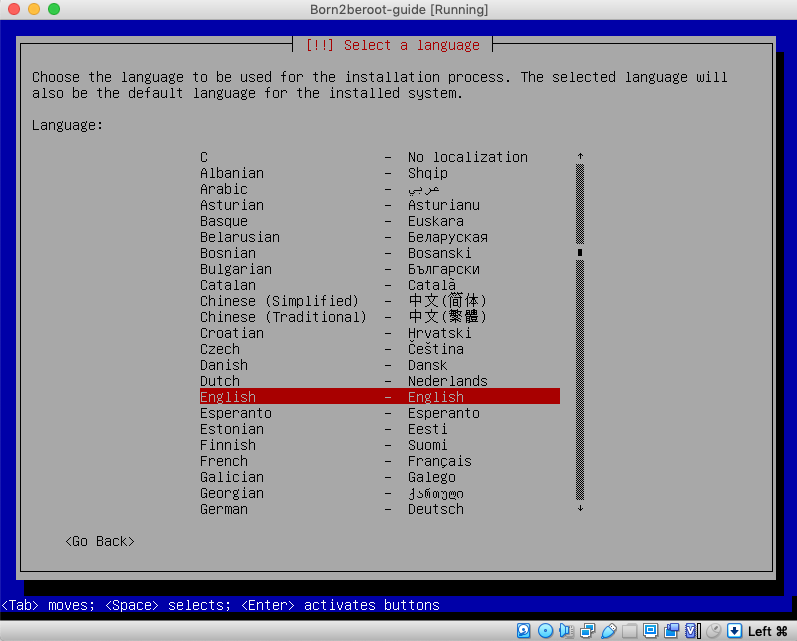
2. Press `enter` on `English - English` or your language of preference.
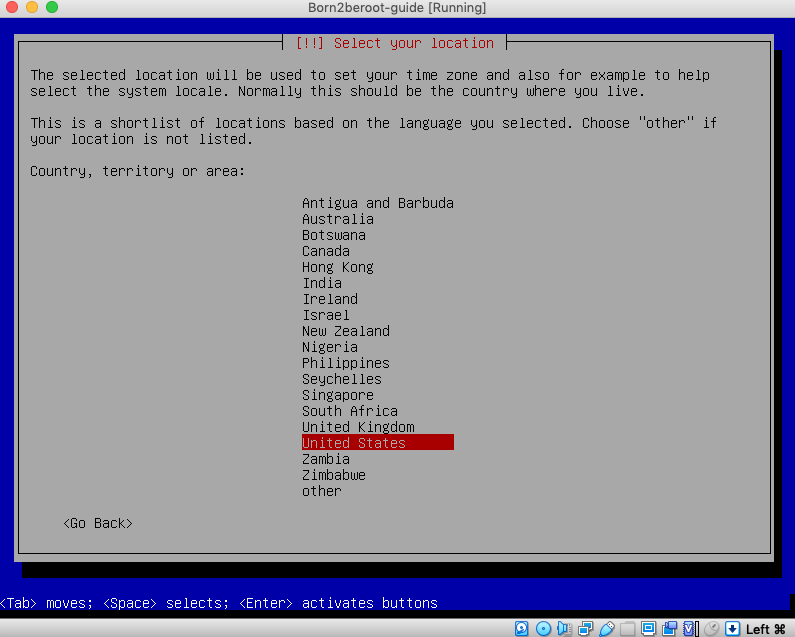
3. Press `enter` on `Australia` or the country your installing this Virtual Machine.
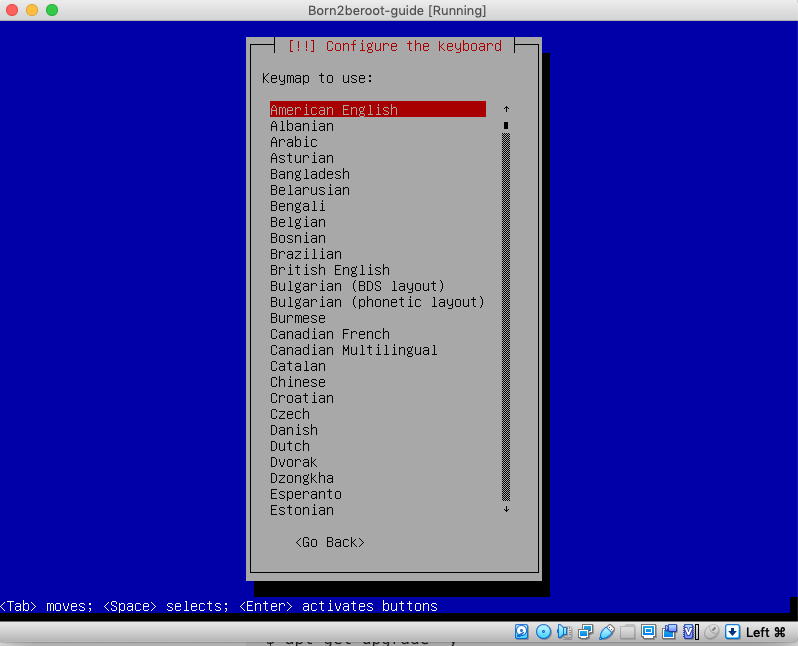
4. Press `enter` on `American English` or your keyboard of preference.
## ⚠️ NOTE: Whenever you are told to create a password, use the same password as everything.
5. Create a Host Name as your login, with 42 at the end (eg. prossi42) - write down your Host Name, as you will need this later on.

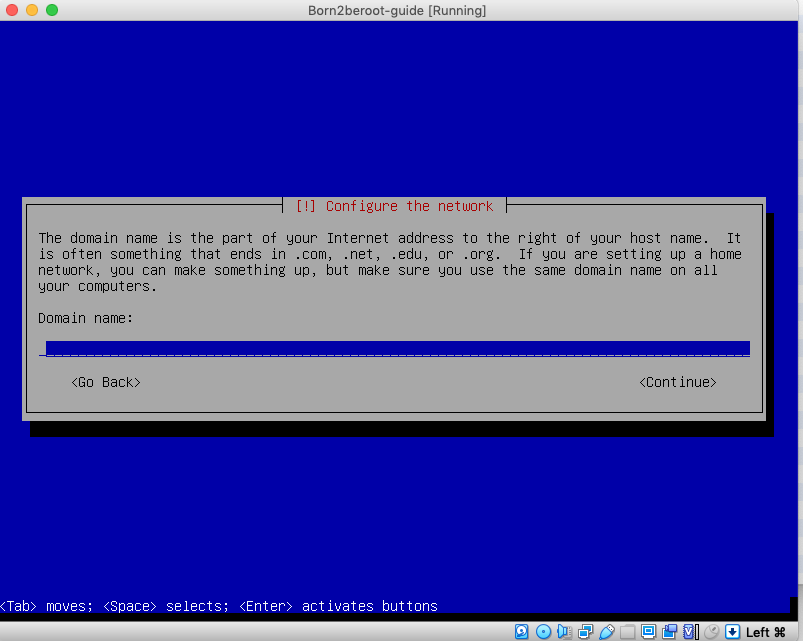
6. Leave this blank, press `enter` on Continue.
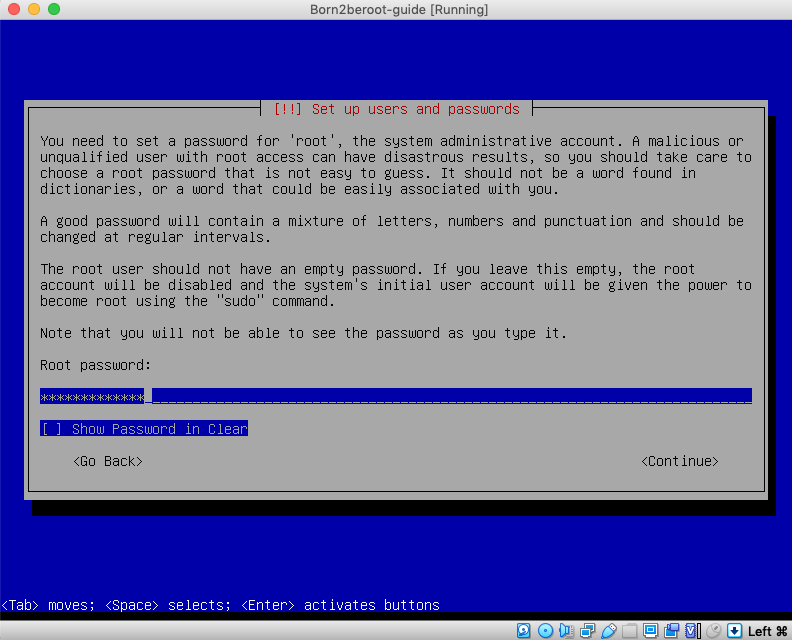
7. Create a Password for the Host Name - write this down as well, as you will need this later on.
8. Create a User Name without 42 at the end (eg. prossi) - write down your Host Name, as you will need this later on.
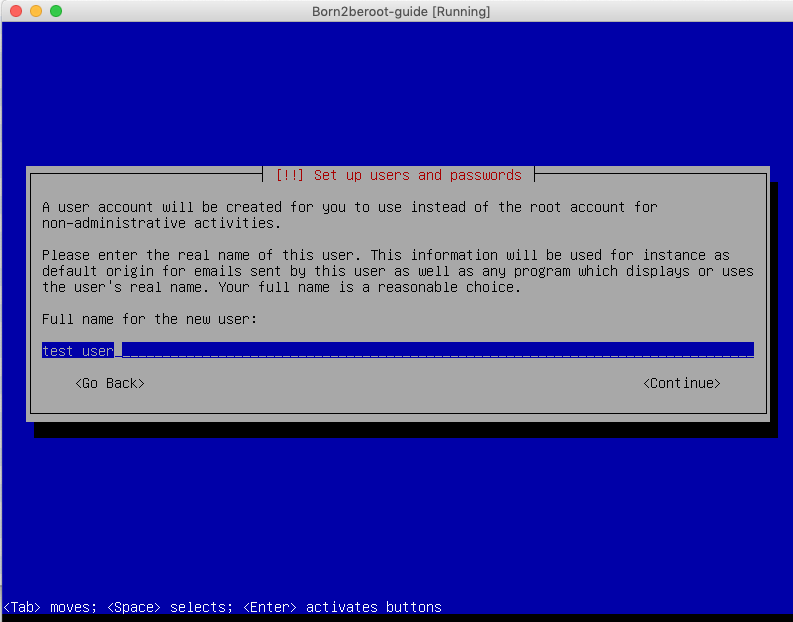
9. Create a Password for the User Name (you might as well use the same password as your Host Password) write this down as well, as you will need this later on.
10. Press `enter` on your `Timezone` (The timezone your currently doing this project in).

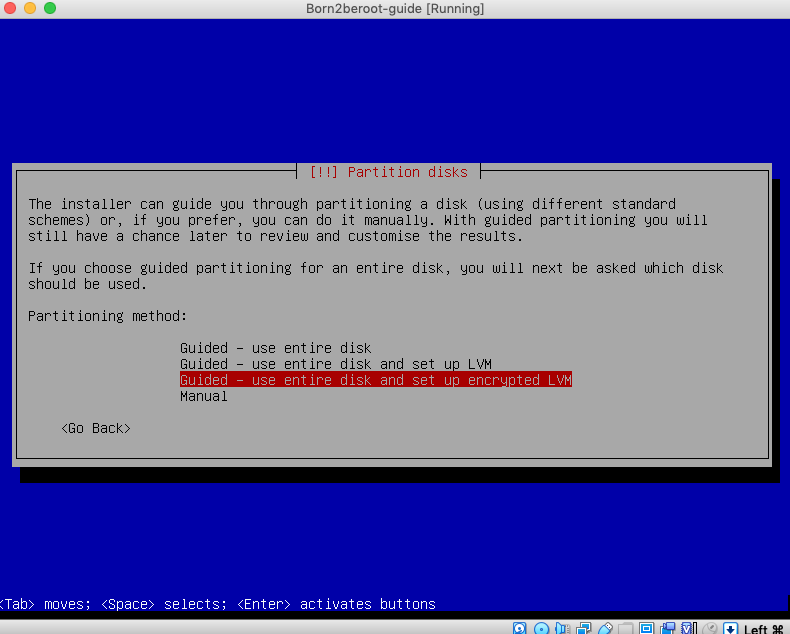
11. Press `enter` on `Guided - use entire disk and set up encrypted LVM` (Second to last option from the list).
12. Press `enter` on Select Disk to Partition.

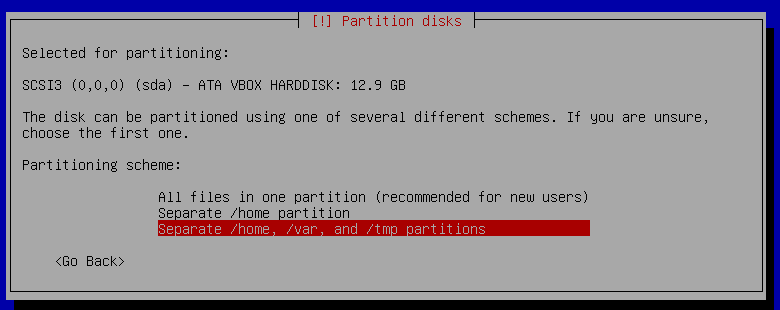
13. Press `enter` on Select `Separate /home, /var, and /tmp paritions` (Last option from the list).
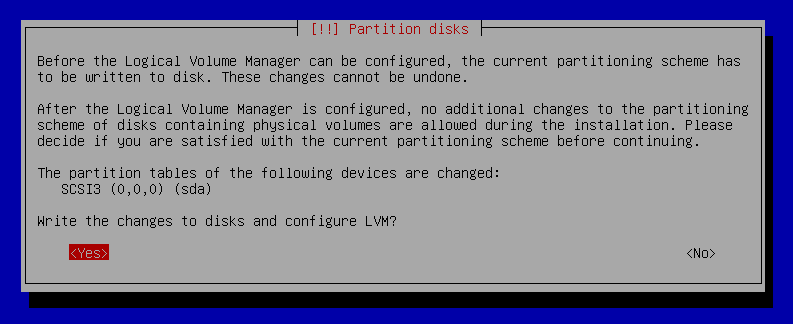
14. Select `Yes` and press `Enter` to write the changes to disks and configure LVM.
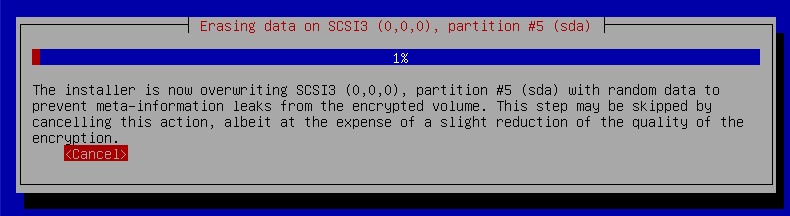
15. Press `Enter` to `cancel` Erasing data as you won't need this for your Virtual Machine.
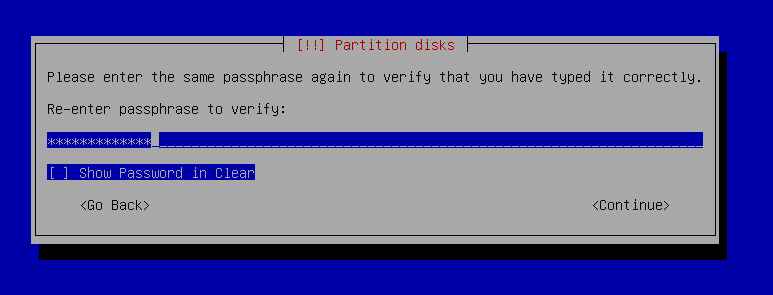
16. Create a Encryption passphrase - write this down as well, as you will need this later on.

17. Retype the Encryption passphrase you just created.
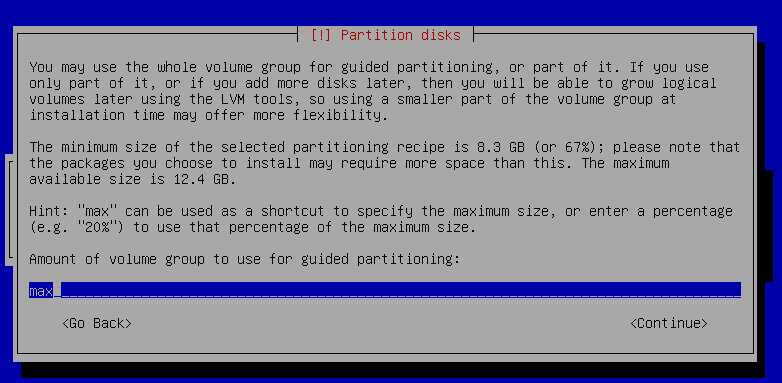
18. Type in `max`and press enter on `Continue` to assign the amount of volume group to use for guided partitioning.
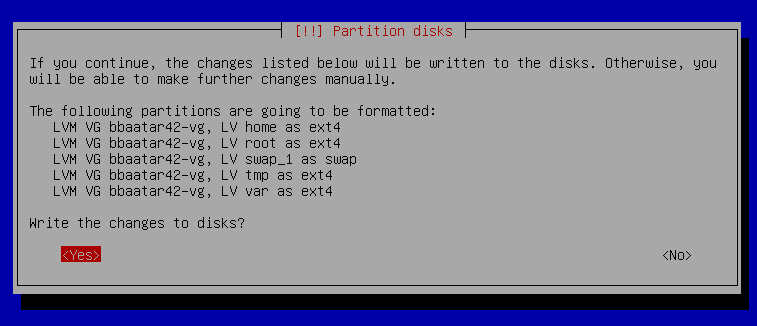
19. Press enter on `Finish partitioning and write changes to disk`.

20. Press enter on `Yes` for Partition Disks.
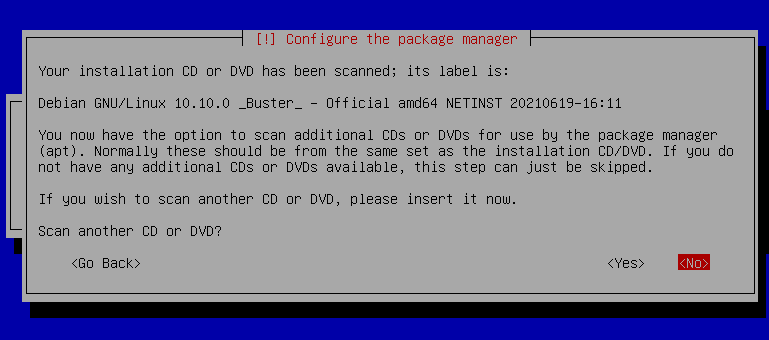
21. Press enter on `No` for Configure the package manager.
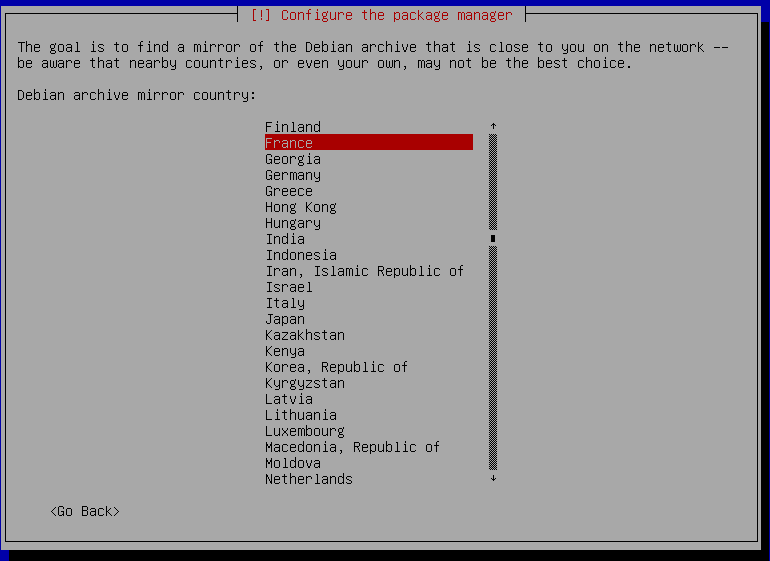
22. Press `enter` in the country that your in.
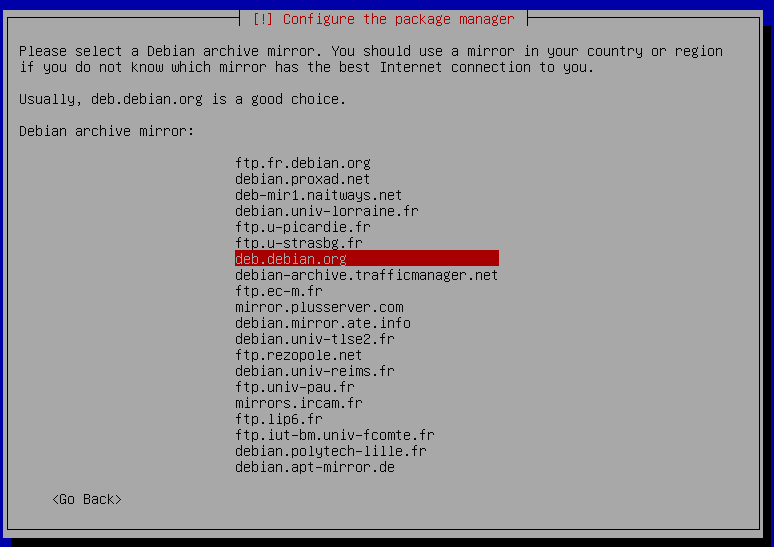
23. Press `enter` on deb.debian.org.
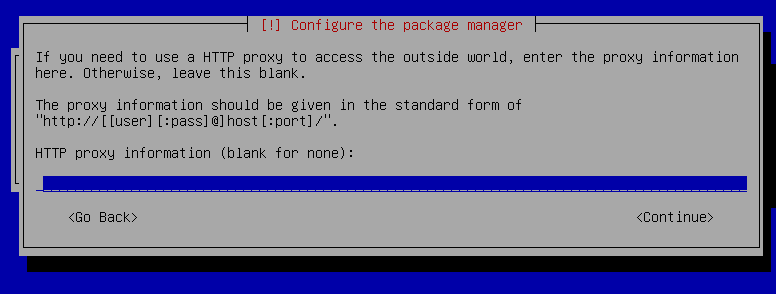
24. Leave this blank and press `enter` on continue.
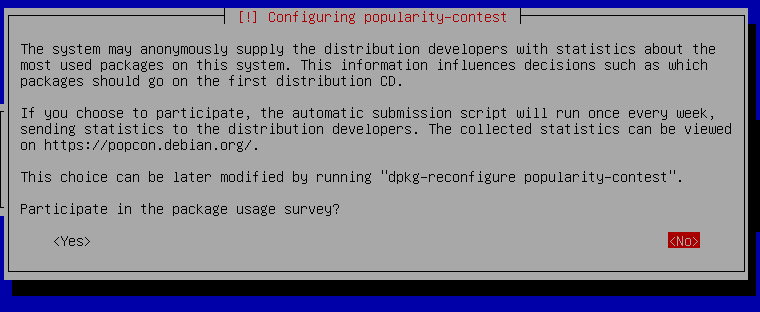
25. Press `enter` on `no` for Configuring popularity-contest.
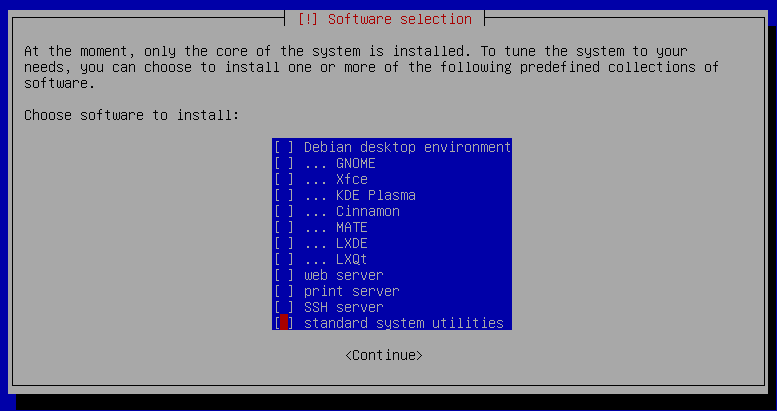
26. Deselect `SSH server` and `standard system utilities` by pressing the `Space key` and then press `enter` on `Continue`.
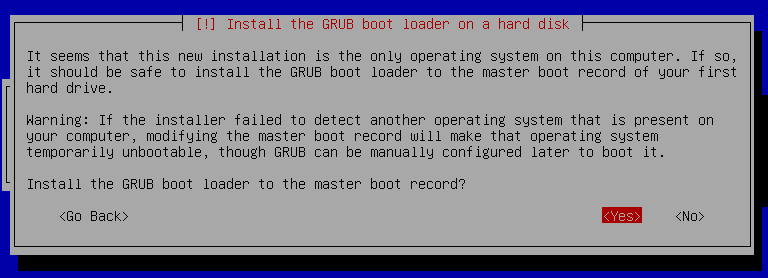
27. Press `enter` on `Yes` to Install the GRUB boot loader on a hard disk.
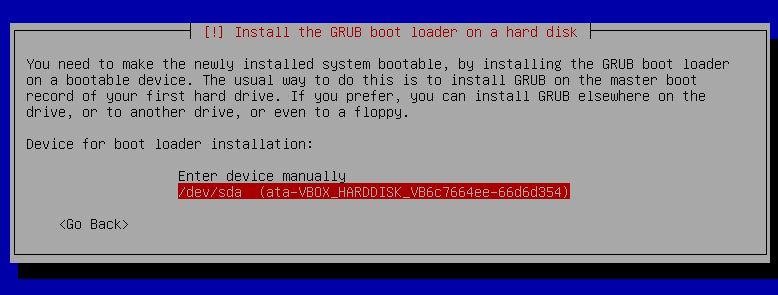
28. Press `enter` on /dev/sda
29. Press `enter` on `continue` to finish the installation.

30. Before we move onto starting your Virtual Machine, make sure you have your Host, Username and Password/s saved or written down somewhere.
## Part 3.1 - Starting Your Virtual Machine
1. Press enter on `Debian GNU/Linux`
2. Enter your encryption password you had created before
3. Login in as the your_username you had created before
4. Type `lsblk` in your Virtual Machine to see the partition
## Part 4 - Configurating Your Virtual Machine
### Part 4.1 - Installing Sudo
1. First type `su -` to login in as the root user.
2. Then type `apt-get update -y`
3. Then type `apt-get upgrade -y`
4. Then type `apt install sudo`
5. Then type `usermod -aG sudo your_username` to add user in the sudo group (To check if user is in sudo group, type `getent group sudo`)
6. Type `sudo visudo` to open sudoers file
7. Lastly find - # User privilege specification, type `your_username ALL=(ALL) ALL`
### Part 4.2 - Installing Git and Vim
1. Then type `apt-get install git -y` to install Git
2. Then type `git --version` to check the Git Version
### Part 4.3 - Installing and Configuring SSH (Secure Shell Host)
1. Type `sudo apt install openssh-server`
2. Type `sudo systemctl status ssh` to check SSH Server Status
3. Type `sudo vim /etc/ssh/sshd_config`
4. Find this line `#Port22`
5. Change the line to `Port 4242` without the # (Hash) in front of it
6. Save and Exit Vim
7. Then type `sudo grep Port /etc/ssh/sshd_config` to check if the port settings are right
8. Lastly type `sudo service ssh restart` to restart the SSH Service
### Part 4.4 - Installing and Configuring UFW (Uncomplicated Firewall)
1. First type `apt-get install ufw` to install UFW
2. Type `sudo ufw enable` to inable UFW
3. Type `sudo ufw status numbered` to check the status of UFW
4. Type `sudo ufw allow ssh` to configure the Rules
5. Type `sudo ufw allow 4242` to configure the Port Rules
6. Lastly Type `sudo ufw status numbered` to check the status of UFW 4242 Port
## Part 5 Connecting to SSH
0. To exit your Virtual Machine and use your mouse, press `command` on your Apple Keyboard and your mouse should appear
1. Go to your Virtual Box Program
2. Click on your Virtual Machine and select `Settings`
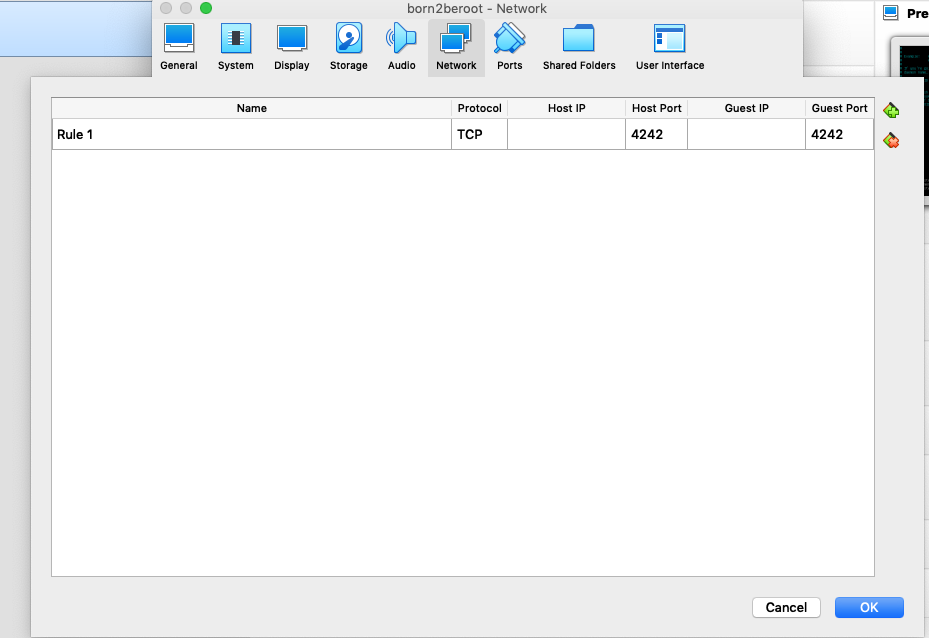
3. Click `Network` then `Adapter 1` then `Advanced` and then click on `Port Forwarding`
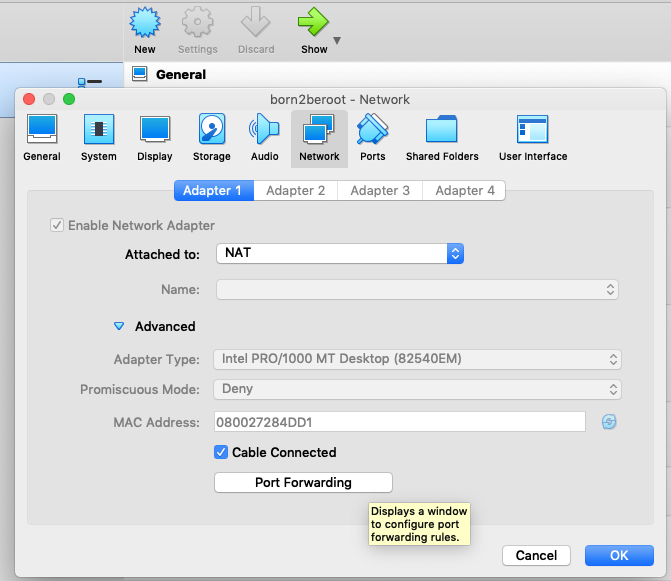
4. Change the Host Port and Guest Port to `4242`
5. Then head back to your Virtual Machine
6. Type `sudo systemctl restart ssh` to restart your SSH Server
7. Type `sudo service sshd status` to check your SSH Status
8. Open an iTerm and type the following `ssh your_username@127.0.0.1 -p 4242`
9. In case an error occurs, then type `rm ~/.ssh/known_hosts` in your iTerm and then retype `ssh your_username@127.0.0.1 -p 4242`
10. Lastly type `exit` to quit your SSH iTerm Connection
## Part 6 - Continue Configurating Your Virtual Machine
### Part 6.1 - Setting Password Policy
1. First type `sudo apt-get install libpam-pwquality` to install Password Quality Checking Library
2. Then type `sudo vim /etc/pam.d/common-password`
3. Find this line. `password requisite pam_deny.so` or

4. Add this to the end of that line `minlen=10 ucredit=-1 lcredit=-1 dcredit=-1 maxrepeat=3 reject_username difok=7 enforce_for_root`
- 4.1 The line should now look like this - `password requisite pam_pwquality.so retry=3 minlen=10 ucredit=-1 lcredit=-1 dcredit=-1 maxrepeat=3 reject_username difok=7 enforce_for_root`

5. Save and Exit Vim
6. Next type in your Virtual Machine `sudo vim /etc/login.defs`
7. Find this part `PASS_MAX_DAYS 9999` `PASS_MIN_DAYS 0` `PASS_WARN_AGE 7`
8. Change that part to `PASS_MAX_DAYS 30` and `PASS_MIN_DAYS 2` keep `PASS_WARN_AGE 7` as the same
9. Lastly type `sudo reboot` to reboot the change affects
### Part 6.2 - Creating a Group
1. First type `sudo groupadd user42` to create a group
2. Then type `sudo groupadd evaluating` to create an evaluating group
3. Lastly type `getent group` to check if the group has been created
### Part 6.3 - Creating a User and Assigning Them Into The Group
1. First type `cut -d: -f1 /etc/passwd` to check all local users
2. Type `sudo adduser new_username` to create a username - write down your new_username, as you will need this later on.
- 2.1 Type `sudo usermod -aG user42 your_username`
- 2.2 Type `sudo usermod -aG evaluating your_new_username`
3. Type `getent group user42` to check if the user is the group
4. Type `getent group evaluating` to check the group
5. Type `groups` to see which groups the user account belongs to
6. Lastly type `chage -l your_new_username` to check if the password rules are working in users
### Part 6.4 - Creating sudo.log
1. First type `cd ~/../../`
4. Then type `cd var/log`
5. Then type `mkdir sudo` (if it already exists, then continue to the next step).
6. Then type `cd sudo && touch sudo.log`
7. Then type `cd ~/../`
### Part 6.4.1 - Configuring Sudoers Group
1. First type `sudo nano /etc/sudoers` to go the sudoers file
2. Now edit your sudoers file to look like the following by adding in all of the defaults in the image below - 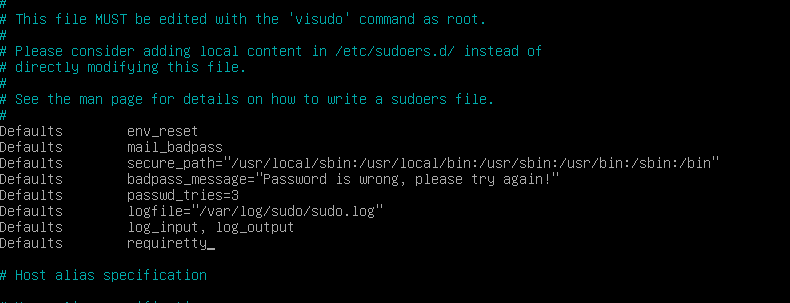
```
Defaults env_reset
Defaults mail_badpass
Defaults secure_path="/usr/local/sbin:/usr/local/bin:/usr/bin:/sbin:/bin"
Defaults badpass_message="Password is wrong, please try again!"
Defaults passwd_tries=3
Defaults logfile="/var/log/sudo/sudo.log"
Defaults log_input, log_output
Defaults requiretty
```
### Part 6.5 - Crontab Configuation
1. Then type `apt-get install -y net-tools` to install the netstat tools
2. Then type `cd /usr/local/bin/`
3. Then type `touch monitoring.sh`
4. Lastly type `chmod 777 monitoring.sh`
### Part 6.5.1 - Copy Text Below onto Virtual Machine
1. Copy this text (To copy the text below, hover with your mouse to the right corner of the text below and a copy icon will appear).
```
#!/bin/bash
arc=$(uname -a)
pcpu=$(grep "physical id" /proc/cpuinfo | sort | uniq | wc -l)
vcpu=$(grep "^processor" /proc/cpuinfo | wc -l)
fram=$(free -m | awk '$1 == "Mem:" {print $2}')
uram=$(free -m | awk '$1 == "Mem:" {print $3}')
pram=$(free | awk '$1 == "Mem:" {printf("%.2f"), $3/$2*100}')
fdisk=$(df -BG | grep '^/dev/' | grep -v '/boot$' | awk '{ft += $2} END {print ft}')
udisk=$(df -BM | grep '^/dev/' | grep -v '/boot$' | awk '{ut += $3} END {print ut}')
pdisk=$(df -BM | grep '^/dev/' | grep -v '/boot$' | awk '{ut += $3} {ft+= $2} END {printf("%d"), ut/ft*100}')
cpul=$(top -bn1 | grep '^%Cpu' | cut -c 9- | xargs | awk '{printf("%.1f%%"), $1 + $3}')
lb=$(who -b | awk '$1 == "system" {print $3 " " $4}')
lvmu=$(if [ $(lsblk | grep "lvm" | wc -l) -eq 0 ]; then echo no; else echo yes; fi)
ctcp=$(ss -Ht state established | wc -l)
ulog=$(users | wc -w)
ip=$(hostname -I)
mac=$(ip link show | grep "ether" | awk '{print $2}')
cmds=$(journalctl _COMM=sudo | grep COMMAND | wc -l)
wall " #Architecture: $arc
#CPU physical: $pcpu
#vCPU: $vcpu
#Memory Usage: $uram/${fram}MB ($pram%)
#Disk Usage: $udisk/${fdisk}Gb ($pdisk%)
#CPU load: $cpul
#Last boot: $lb
#LVM use: $lvmu
#Connections TCP: $ctcp ESTABLISHED
#User log: $ulog
#Network: IP $ip ($mac)
#Sudo: $cmds cmd"
```
2. Then open up a iTerm2 seperate from your Virtual Machine and type in iTerm `ssh your_host_name42@127.0.0.1 -p 4242` and then type your password, when it asks for it.
3. Then type `cd /usr/local/bin`.
4. Then type `nano monitoring.sh` and paste the text above into the vim monitoring.sh you just created, by doing `command` + `v` on your Apple keyboard.
5. Save and Exit your `monitoring.sh`
- 5.1 - Then type `exit` to exit the iTerm SSH Login.
- 5.2 - Then go back to your Virtual Machine (not iTerm) and continue on with the steps below.
6. Then type `sudo visudo` to open your sudoers file
7. Add in this line `your_username ALL=(ALL) NOPASSWD: /usr/local/bin/monitoring.sh` under where its written %sudo ALL=(ALL:ALL) ALL
8. It should look like this
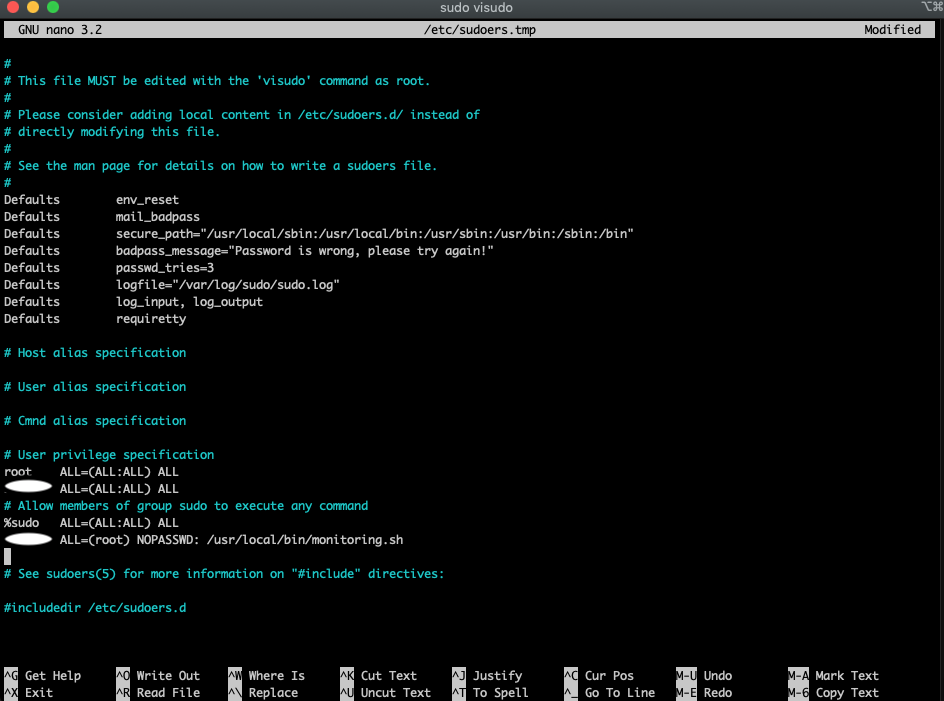
9. Then exit and save your sudoers file
10. Now type `sudo reboot` in your Virtual Machine to reboot sudo
11. Type `sudo /usr/local/bin/monitoring.sh` to execute your script as su (super user)
12. Type `sudo crontab -u root -e` to open the crontab and add the rule
13. Lastly at the end of the crontab, type the following `*/10 * * * * /usr/local/bin/monitoring.sh` this means that every 10 mins, this script will show
## Part 7 - Signature.txt (Last Part Before Defence)
⚠️ Warning: before you generate a signature number, turn off your Virtual Machine. ⚠️
1. Open iTerm and type `cd`
1. Then type `cd sgoinfre/students//VirtualBox VMs`
2. Type `shasum VirtualBox.vdi` or whatever your Virtual Machine is called (This can take from a few seconds to 5 mins).
3. Copy the output number and create a signature.txt file and paste that number in the file.
3. Now you submit the signature.txt file with the output number in it.
### 🥳 CONGRATULATIONS! YOU HAVE NOW FINISHED!
> [!NOTE]
> Attribution and Links To The Originality and Inspiration Of This Guide.
>
> ✍️ [Baigalmaa Baatar Born2BeRoot Medium Post](https://baigal.medium.com/born2beroot-e6e26dfb50ac)
>
> :octocat: [Baigalmaa Baatar GitHub](https://github.com/baigalmaa-baatar)
>
> 💻 [Baigalmaa Baatar Born2BeRoot GitHub Repository](https://github.com/baigalmaa-baatar/school_42/tree/main/projects/born2beroot)
### NEXT IS THE EVALUATION 🔽
## Part 8 - Born2BeRoot Defence Evaluation with Answers
[Link](https://docs.google.com/document/d/1-BwCO0udUP7MhRh81Y681zz0BalXtKFtte_FHJc6G4s/edit) to the [Born2BeRoot Evaluation Checklist](https://docs.google.com/document/d/1-BwCO0udUP7MhRh81Y681zz0BalXtKFtte_FHJc6G4s/edit) created by [Adrian Musso-Gonzalez](https://github.com/AdrianMussoGonzalez).
### The Evaluation Questions
### Why did I choose Debian?
Easier to install and configure so better for personal servers.
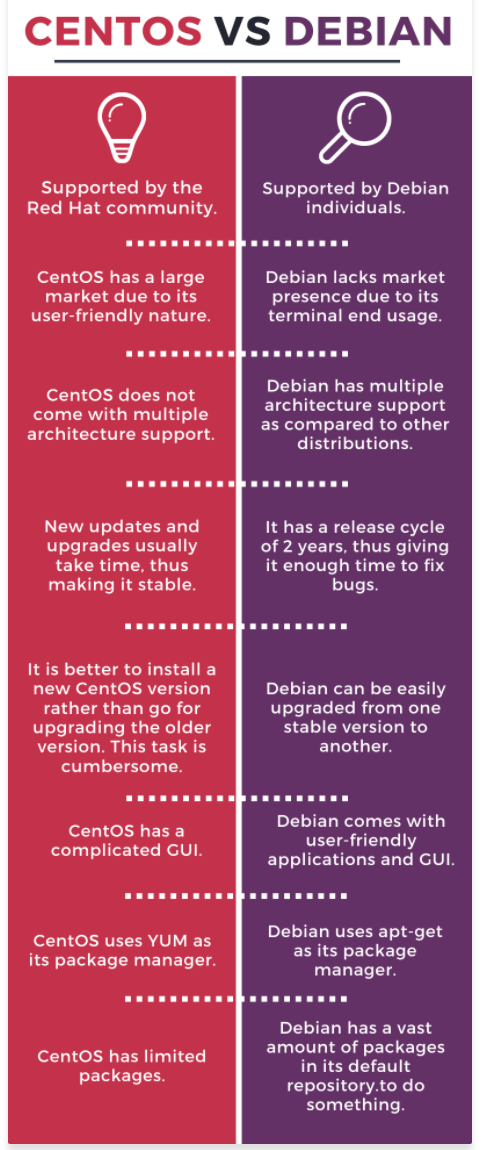
### Difference between Debian and CentOS?
Debian is a lot easier to update then CentOS when a new version is released. Debian is more user-friendly and supports many libraries, filesystems and architecture. It also has more options for customisation. If you are a larger business CentOS offers more Enterprise features and excellent support for the Enterprise software.
### What is a Virtual Machine?
Is a resource that uses software instead of a physical computer to run programs or apps. Each VM has its own operating system and functions separately, so you can have more than one VM per machine. Can be used to test applications in a safe, separate environment. Works by using software to simulate virtual hardware and run on a host machine.
### What is the difference between aptitude and APT (Advanced Packaging Tool)?
* Aptitude is a high-level package manager while APT is lower level which can be used by other higher level package managers
* Aptitude is smarter and will automatically remove unused packages or suggest installation of dependent packages
* Apt will only do explicitly what it is told to do in the command line
### What is AppArmor?
Linux security system that provides Mandatory Access Control (MAC) security. Allows the system admin to restrict the actions that processes can perform. It is included by default with Debian. Run aa-status to check if it is running.
### Password Rules
For the password rules, we use the password quality checking library and there are two files the common-password file which sets the rules like upper and lower case characters, duplicate characters etc and the login.defs file which stores the password expiration rules (30 days etc).
Sudo nano /etc/login.defs
Sudo nano /etc/pam.d/common-password
### What is LVM
Logical Volume Manager – allows us to easily manipulate the partitions or logical volume on a storage device.
### UFW (Uncomplicated Firewall)
UFW is a interface to modify the firewall of the device without compromising security. You use it to configure which ports to allow connections to and which ports to close. This is useful in conjunction with SSH, can set a specific port for it to work with.
### What is SSH?
SSH or Secure Shell is an authentication mechanism between a client and a host. It uses encryption techniques so that all communication between clients and hosts is done in encrypted form. User on Mac or Linux can use SSH the terminal to work on their server via SSH.
### What is Cron?
Cron or cron job is a command line utility to schedule commands or scripts to happen at specific intervals or a specific time each day. Useful if you want to set your server to restart at a specific time each day.
- `cd /usr/local/bin` – to show monitoring.sh
- `sudo crontab -u root -e` – to edit the cron job
- `change script to */1 * * * * sleep 30s && script path` – to run it every 30 seconds, delete the line to stop the job from running.
### Evaluation Commands for UFW, Group, Host, lsblk and SSH
- `sudo ufw status`
- `sudo systemctl status ssh`
- `getent group sudo`
- `getent group user42`
- `sudo adduser new username`
- `sudo groupadd groupname`
- `sudo usermod -aG groupname username`
- `sudo chage -l username` - check password expire rules
- `hostnamectl`
- `hostnamectl set-hostname new_hostname` - to change the current hostname
- Restart your Virtual Machine.
- `sudo nano /etc/hosts` - change current hostname to new hostname
- `lsblk` to display the partitions
- `dpkg -l | grep sudo –` to show that sudo is installed
- `sudo ufw status numbered`
- `sudo ufw allow port-id`
- `sudo ufw delete rule number`
- `ssh your_user_id@127.0.0.1 -p 4242` - do this in terminal to show that SSH to port 4242 is working