https://github.com/patlevin/face-detection-tflite
Face and iris detection for Python based on MediaPipe
https://github.com/patlevin/face-detection-tflite
face-detection machine-learning tensorflow-lite tensorflow-models
Last synced: 7 months ago
JSON representation
Face and iris detection for Python based on MediaPipe
- Host: GitHub
- URL: https://github.com/patlevin/face-detection-tflite
- Owner: patlevin
- License: mit
- Created: 2021-03-01T02:06:46.000Z (over 4 years ago)
- Default Branch: main
- Last Pushed: 2024-05-13T21:36:06.000Z (over 1 year ago)
- Last Synced: 2025-03-30T04:08:52.395Z (7 months ago)
- Topics: face-detection, machine-learning, tensorflow-lite, tensorflow-models
- Language: Python
- Homepage:
- Size: 6.73 MB
- Stars: 153
- Watchers: 7
- Forks: 29
- Open Issues: 4
-
Metadata Files:
- Readme: README.md
- License: LICENSE
Awesome Lists containing this project
README
# Face Detection For Python
This package implements parts of Google®'s [**MediaPipe**](https://mediapipe.dev/#!) models in pure Python (with a little help from Numpy and PIL) without `Protobuf` graphs and with minimal dependencies (just [**TF Lite**](https://www.tensorflow.org/lite/api_docs) and [**Pillow**](https://python-pillow.org/)).
## Models and Examples
The package provides the following models:
* Face Detection

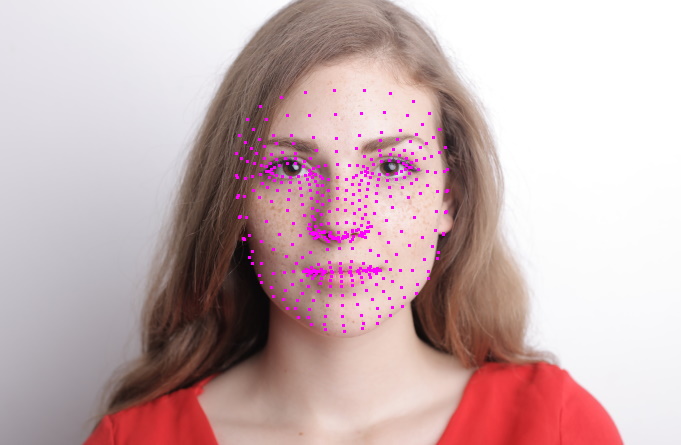
* Face Landmark Detection

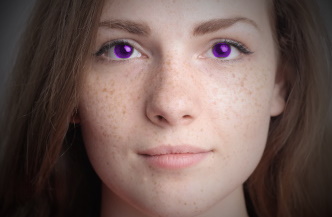
* Iris Landmark Detection

* Iris recoloring example

## Motivation
The package doesn't use the graph approach implemented by **MediaPipe** and
is therefore not as flexible. It is, however, somewhat easier to use and
understand and more accessible to recreational programming and experimenting
with the pretrained ML models than the rather complex **MediaPipe** framework.
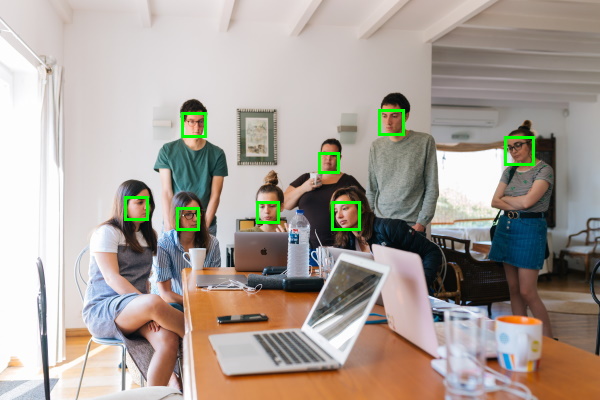
Here's how face detection works and an image like shown above can be produced:
```python
from fdlite import FaceDetection, FaceDetectionModel
from fdlite.render import Colors, detections_to_render_data, render_to_image
from PIL import Image
image = Image.open('group.jpg')
detect_faces = FaceDetection(model_type=FaceDetectionModel.BACK_CAMERA)
faces = detect_faces(image)
if not len(faces):
print('no faces detected :(')
else:
render_data = detections_to_render_data(faces, bounds_color=Colors.GREEN)
render_to_image(render_data, image).show()
```
While this example isn't that much simpler than the **MediaPipe** equivalent,
some models (e.g. iris detection) aren't available in the Python API.
Note that the package ships with five models:
* `FaceDetectionModel.FRONT_CAMERA` - a smaller model optimised for
selfies and close-up portraits; this is the default model used
* `FaceDetectionModel.BACK_CAMERA` - a larger model suitable for group
images and wider shots with smaller faces
* `FaceDetectionModel.SHORT` - a model best suited for short range images,
i.e. faces are within 2 metres from the camera
* `FaceDetectionModel.FULL` - a model best suited for mid range images,
i.e. faces are within 5 metres from the camera
* `FaceDetectionModel.FULL_SPARSE` - a model best suited for mid range images,
i.e. faces are within 5 metres from the camera
The `FaceDetectionModel.FULL` and `FaceDetectionModel.FULL_SPARSE` models are
equivalent in terms of detection quality. They differ in that the full model
is a dense model whereas the sparse model runs up to 30% faster on CPUs. On a
GPU, both models exhibit similar runtime performance. In addition, the dense
full model has slightly better [Recall](https://en.wikipedia.org/wiki/Precision_and_recall),
whereas the sparse model features a higher [Precision](https://en.wikipedia.org/wiki/Precision_and_recall).
If you don't know whether the image is a close-up portrait or you get no
detections with the default model, try using the `BACK_CAMERA`-model instead.
## Installation
The latest release version is available in [PyPI](https://pypi.org/project/face-detection-tflite/0.1.0/)
and can be installed via:
```sh
pip install -U face-detection-tflite
```
The package can be also installed from source by navigating to the folder
containing `setup.py` and running
```sh
pip install .
```
from a shell or command prompt.