https://github.com/patriciogonzalezvivo/ofxpulsesensor
openFrameworks addon of PulseSensor ( for Arduino and RaspberryPi )
https://github.com/patriciogonzalezvivo/ofxpulsesensor
Last synced: 2 months ago
JSON representation
openFrameworks addon of PulseSensor ( for Arduino and RaspberryPi )
- Host: GitHub
- URL: https://github.com/patriciogonzalezvivo/ofxpulsesensor
- Owner: patriciogonzalezvivo
- Created: 2013-03-12T05:16:38.000Z (about 12 years ago)
- Default Branch: master
- Last Pushed: 2014-04-28T12:49:35.000Z (almost 11 years ago)
- Last Synced: 2025-02-01T12:51:14.277Z (3 months ago)
- Language: C++
- Homepage:
- Size: 305 KB
- Stars: 8
- Watchers: 3
- Forks: 6
- Open Issues: 0
-
Metadata Files:
- Readme: README.md
Awesome Lists containing this project
README
[ ](http://patriciogonzalezvivo.com/2013/ofxpulsesensor/ )
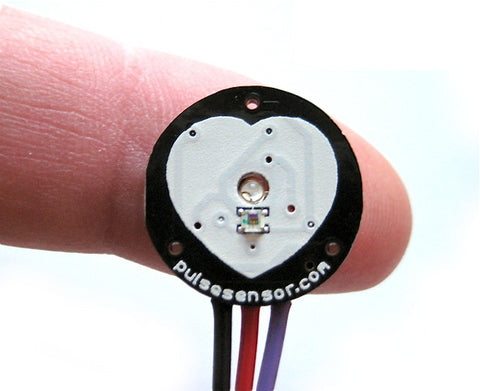
OpenFramework addon to read that from [PulseSensor](http://pulsesensor.myshopify.com/) develop by [Joel Murphy](http://www.joelmurphy.net/) and [Yury Gitman](http://www.mybeatingheart.com/yury/).
This addon helps you get the heartbeat (BPM and IBI) and use it in your openFrameworks project using the GPIO's of your RaspberryPi or by using an Arduino to send the signal by Serial connection.
# Installing
Clone [this addon repository](https://github.com/patriciogonzalezvivo/ofxPulseSensor) into your `openFrameworks/addons` folder:
cd openFrameworks/addons
git clone https://github.com/patriciogonzalezvivo/ofxPulseSensor
# Setting Up
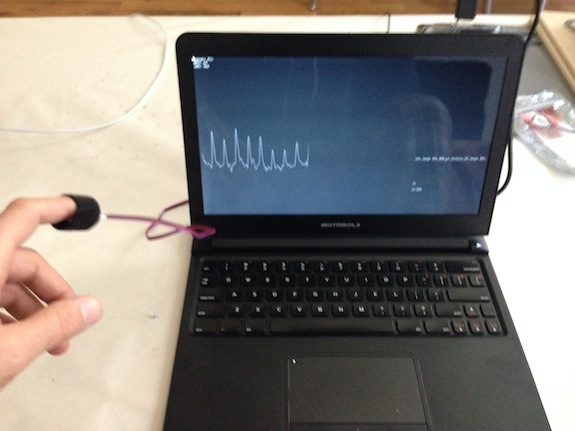
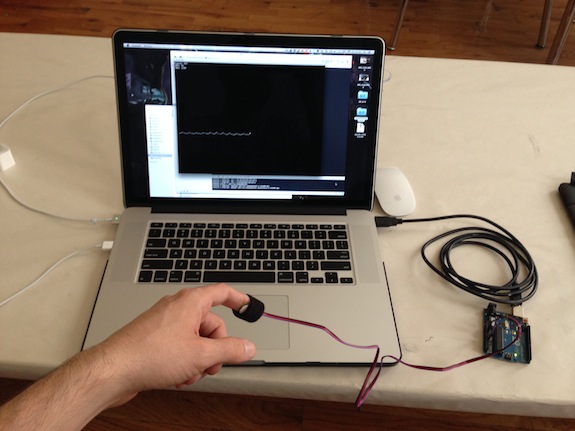
**On you computer through an Arduino**
Using Arduino as Server and your laptop (tested on OSX) as a client:
1. Flash your Arduino with this [firmware](http://pulse-sensor.googlecode.com/files/PulseSensorAmped_Arduino_1dot1.zip)
2. Connect the Arduino by USB to this computer and the PulseSensor to the arduino following this [guide](http://pulse-sensor.googlecode.com/files/PulseSensorAmpedGettingStartedGuide.pdf) or this [video](https://vimeo.com/58657081)
3. Add this addon to your program (see arduino-example) and compile
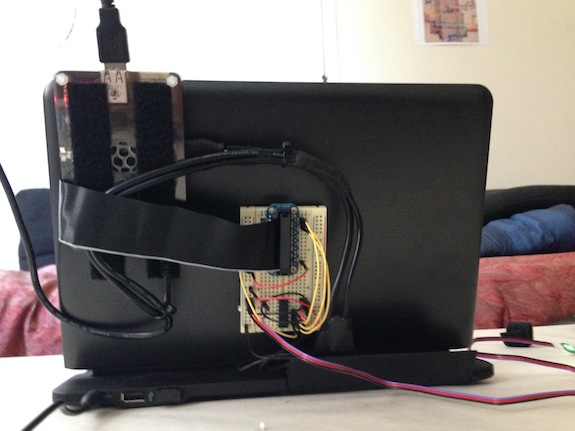
**In the RaspberryPi through the GPIOs**:
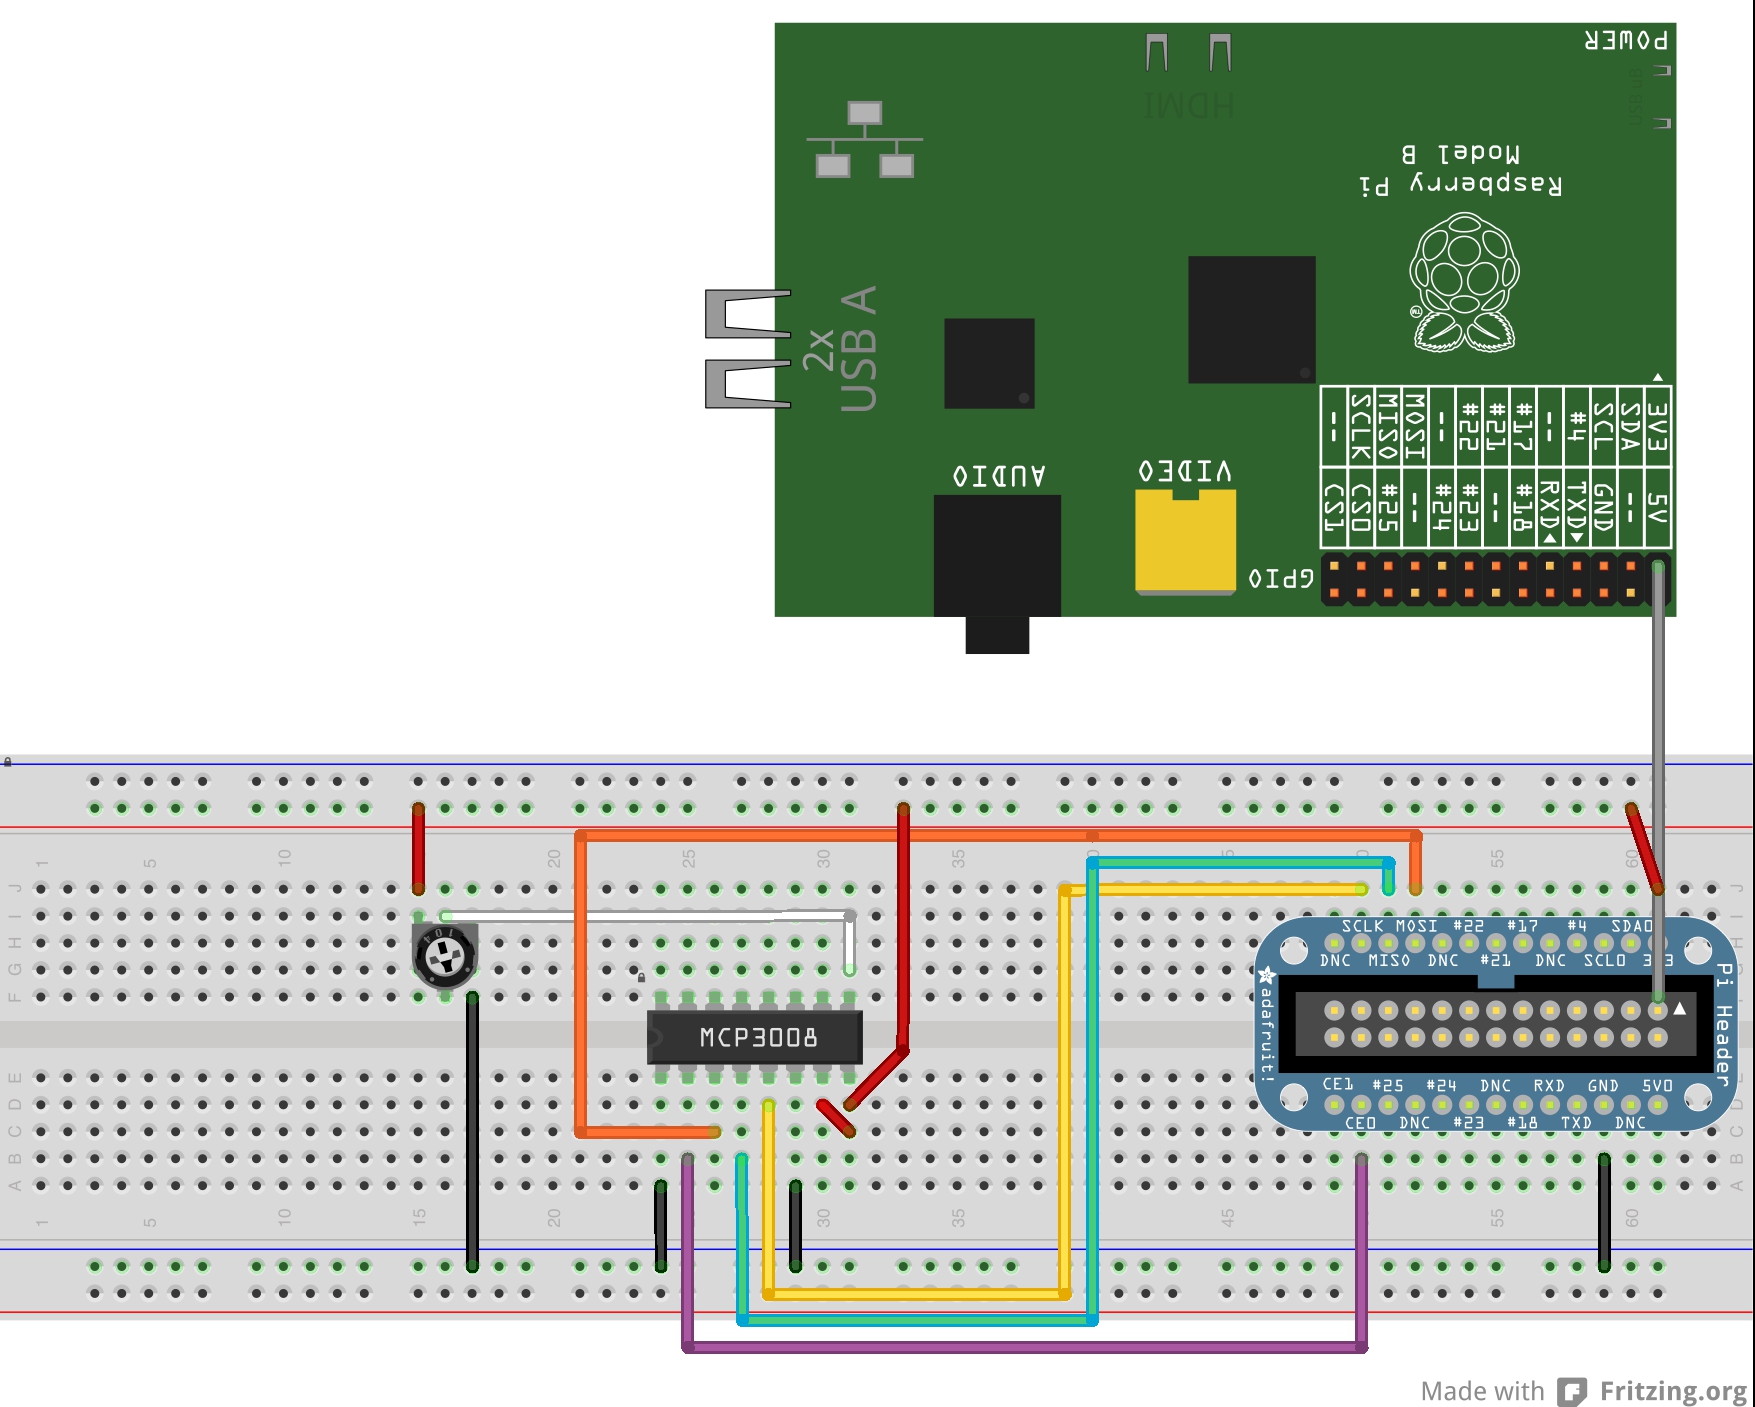
1. RaspberryPi don't have analog-in like Arduino. That's why we are going to use [**MCP3008**](https://www.adafruit.com/products/856) to transform the resistance of the photocell into pulse frequency. Maybe you also want to by the [Pi Cobbler breakout](http://www.adafruit.com/products/914) to make the connections easier.
2. Everything is almost like [this tutorial](http://learn.adafruit.com/send-raspberry-pi-data-to-cosm) except that we are not using ```#23```, ```#24``` and ```#25``` instead we are using SPI just like [Jason Van Cleave](https://github.com/jvcleave) and [Andreas Muller](https://github.com/andreasmuller) did in [this example](https://github.com/andreasmuller/RaspberryPiWorkshop/tree/master/wiringPiPotentiometerExample). Off course instead of using a potentiometer the PulseSensor.
3. Configure your RaspberryPi for wiringPi ( https://github.com/openFrameworks-RaspberryPi/openFrameworks/wiki/Raspberry-Pi-Using-the-GPIO-pins-with-Wiring-Pi-and-openFrameworks ).
sudo nano /etc/modprobe.d/raspi-blacklist.conf
Comment with # (or remove) those lines
sudo reboot
4. Add ofxPulseSensor to your addons.make file, compile and run as root. (Attention! Because the wiringPi the App need to be run in super user mode or sudo )
make
sudo make run
More References about Analog Inputs in RaspberryPi:
*
*