https://github.com/prettymuchbryce/roguelikeboard
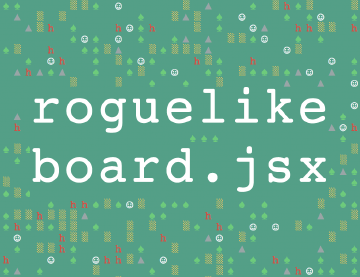
roguelikeboard.jsx is a simple react.js component for rendering ASCII inspired roguelike boards on the web
https://github.com/prettymuchbryce/roguelikeboard
Last synced: about 1 year ago
JSON representation
roguelikeboard.jsx is a simple react.js component for rendering ASCII inspired roguelike boards on the web
- Host: GitHub
- URL: https://github.com/prettymuchbryce/roguelikeboard
- Owner: prettymuchbryce
- License: mit
- Created: 2015-03-25T03:51:23.000Z (over 11 years ago)
- Default Branch: master
- Last Pushed: 2018-01-29T22:21:02.000Z (over 8 years ago)
- Last Synced: 2025-04-13T16:57:02.884Z (about 1 year ago)
- Language: JavaScript
- Size: 526 KB
- Stars: 9
- Watchers: 2
- Forks: 0
- Open Issues: 0
-
Metadata Files:
- Readme: README.md
- License: LICENSE
Awesome Lists containing this project
README
[ ](http://bryce.is/building/roguelikeboard)
#### Summary
roguelikeboard.jsx is a simple react.js component for rendering ASCII inspired roguelike boards on the web. A roguelike is a style of computer game usually characterized by procedural generation, permanent death, and ASCII graphics. If you want to learn more about roguelikes, visit [wikipedia](http://en.wikipedia.org/wiki/Roguelike).
#### Installation
First grab the source via `npm install roguelikeboard`, or download the project from github and snag `src/roguelikeboard.jsx`
Next, include `roguelikeboard.jsx` into your project. It supports require.js, browserify, or no dependency management system. (i.e. React should be a global)
### Setup
In your parent component you should add the board to your `render()` method, and maintain a `ref` to it.
```
var RoguelikeBoard = require('roguelikeboard');
React.createClass({
render: function() {
return (
)
}
})
```
### API
There are a few different operations you can perform on the board. Each will trigger a re-render (for now).
```
roguelikeboard.setViewportSize(widthInTiles, heightInTiles) [required]
roguelikeboard.setTileMap(2dArrayOfKeys) [required]
roguelikeboard.setCSSClassForTile(key, cssClassName)
roguelikeboard.setCSSClassForObject(key, cassClassName)
roguelikeboard.setObjects(array)
roguelikeboard.setCameraPosition(x, y)
```
Before jumping into details, there are a couple of concepts to explain.
#### TileMaps vs Objects
The tilemap is the "level" of your board. It is the background. It is assumed to be a 2D array, e.g.
```
var map = [[0,0,0],
[0,1,0],
[0,0,0]];
```
Objects are the players, items, monsters, in your game. It is assumed to be an array with objects that contain a `x` `y` and `type` properties.
```
var objects = [{x: 0, y: 0, type: 'player'}];
```
We could then call `setObjects(objects)`, and `setTileMap(map)` on our ref to render.
#### Symbols and colors
To render symbols and colors we just use regular css. In order to do this we need to associate our tiles, and objects with css classes. We can do this with `setCSSClassForObject('player', 'symbol-player')` and `setCSSClassForTile(0, 'symbol-grass')`.
Now we simply create some CSS to style these items.
```
.symbol-tree {
background-color: green;
color: green;
}
.symbol-tree:after {
content: " ";
}
.symbol-grass {
background-color: green;
color: #ffffff;
}
.symbol-grass:after {
content: "@";
}
```
You can also style `.rb-renderer` with styles that should affect the entire board such as a font. Speaking of font, make sure you use a fixed-width font, or things will get pretty ugly. I've used `Courier New` in the example as it is a common fixed-width font included in popular operating systems.
#### Running the demo
```
npm install
make rundemo
http://127.0.0.1:3006
```