https://github.com/primocms/primo
Primo is a visual CMS with a built-in code editor, Svelte blocks, and static site generator.
https://github.com/primocms/primo
cms component-library css html ide jamstack primo static-site static-site-generator svelte wordpress
Last synced: 12 months ago
JSON representation
Primo is a visual CMS with a built-in code editor, Svelte blocks, and static site generator.
- Host: GitHub
- URL: https://github.com/primocms/primo
- Owner: primocms
- License: mit
- Created: 2020-05-08T11:48:56.000Z (almost 6 years ago)
- Default Branch: master
- Last Pushed: 2025-02-04T23:36:54.000Z (about 1 year ago)
- Last Synced: 2025-02-15T13:09:55.477Z (about 1 year ago)
- Topics: cms, component-library, css, html, ide, jamstack, primo, static-site, static-site-generator, svelte, wordpress
- Language: Svelte
- Homepage: https://primocms.org
- Size: 50.4 MB
- Stars: 2,117
- Watchers: 21
- Forks: 588
- Open Issues: 61
-
Metadata Files:
- Readme: README.md
- Contributing: CONTRIBUTING.md
- License: LICENSE
Awesome Lists containing this project
- awesome-starred - primocms/primo - Primo is a visual CMS with a built-in code editor, Svelte blocks, and static site generator. (css)
README
The modern monolithic CMS
Primo makes it a blast to build pages, update content, and edit code - one block at a time.
Primocms.org •
Discord •
Docs •
Newsletter •
YouTube

## ⭐ Why Primo?
Traditional monolithic CMSs like WordPress, Drupal, and Joomla enable quick setup and easy content editing, but rely on antiquated and heavy development practices (often relying on plugins and third-party services to customize the site and add new components). Headless CMSs have popped up to modernize the view layer with modern development practices and frameworks, but have a poorer content editing experience due to their decoupling from the content layer.
Primo is a modern approach to the monolithic CMS that builds on the traditional monolith's benefits of a quick setup and easy content editing alongside the benefits of modern development (i.e. Svelte). These combine into a web publishing tool that is significantly easier and more fun to use for both technical and non-technical users and enables you to build faster, more secure, and more unique websites.
## ✨ Features
- Visual, on-page content editing
- Drag-and-drop page building with blocks
- Integrated development environment for blocks and pages
- Static site generation
- Real-time page collaboration
- Internationalization
- Multisite (1 server = infinity sites)
- Deploys to Github (i.e. any web host)
[Read more in the Docs](https://docs.primocms.org)
# How to self-host Primo
Primo depends on several [freemium] third-party services for easy hosting, authentication, database and storage, etc. Running your own Primo server is as easy as forking the [**Primo repo**]() and deploying it on a static host like Vercel or Netlify, which should only take a few minutes.
Third-party services (all can be signed into with Github):
- A modern web host like [**Vercel**]() or [**Netlify**]() to host the Primo application & published sites (note that Cloudflare Pages is currently [unsupported](https://github.com/primocms/primo/issues/365) for hosting Primo, but you can still use it for your sites).
- A [**Supabase**]() account to manage your server's authentication, database, and file storage.
- A [**Github**]() account to deploy your sites to (unless you plan on manually downloading/uploading your site files to a host).
## Installation
1. Ensure you have an account with all the services listed above.
2. Create a new Supabase project, go to the SQL editor, add a new query and provision your project by copying the [**schema**]() and pasting it into the editor.
3. Fork the [**Primo repository**]().
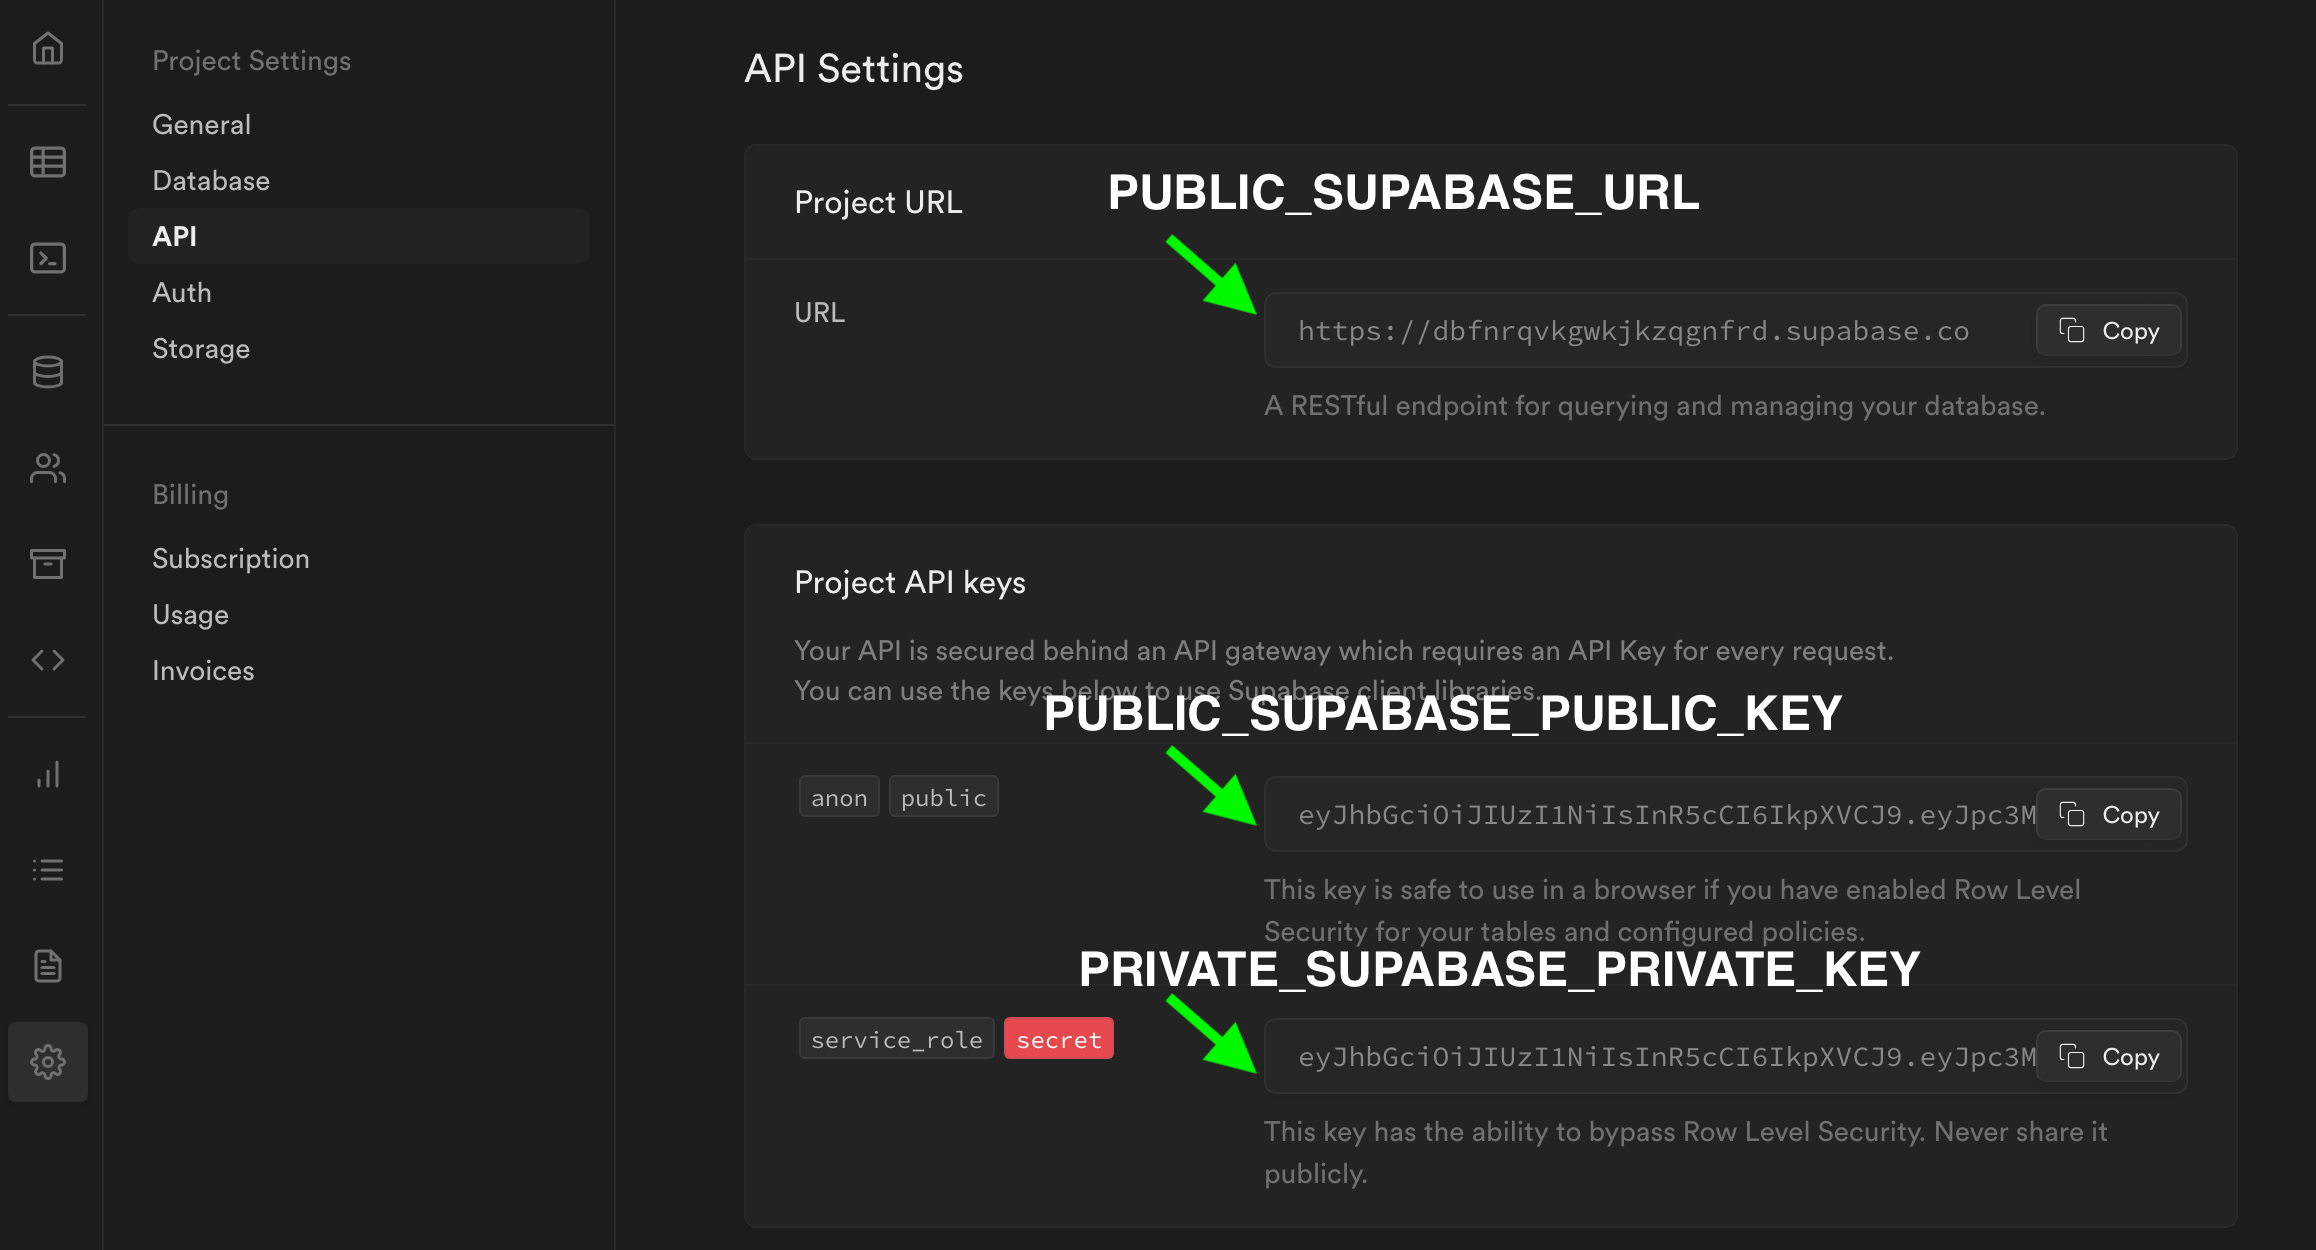
4. Go to your web host and create a new project from your new repository, inputting your Supabase details (go to the API settings) as environment variables.
- PUBLIC\_SUPABASE\_URL
- PUBLIC\_SUPABASE\_PUBLIC\_KEY
- PRIVATE\_SUPABASE\_PRIVATE\_KEY

5. Publish the project and navigate to the Primo authentication screen.
6. The user account you create will be the server owner. You can manage all your server's data from the Supabase project dashboard.
7. Finally, go back to your Supabase project & set the Site URL to the URL of your Primo site (under Authentication > URL Configuration > Site URL).

For more details see this step-by-step installation [video guide]()
## Updating
You can merge upstream updates by clicking 'Sync fork' on your forked repository. Your updates will automatically deploy to your web host.