https://github.com/push-protocol/push-frontend-sdk
Frontend SDK
https://github.com/push-protocol/push-frontend-sdk
Last synced: over 1 year ago
JSON representation
Frontend SDK
- Host: GitHub
- URL: https://github.com/push-protocol/push-frontend-sdk
- Owner: push-protocol
- License: other
- Created: 2021-08-25T14:39:08.000Z (almost 5 years ago)
- Default Branch: main
- Last Pushed: 2022-10-12T21:52:11.000Z (over 3 years ago)
- Last Synced: 2025-02-17T07:38:44.355Z (over 1 year ago)
- Language: TypeScript
- Size: 2.7 MB
- Stars: 3
- Watchers: 3
- Forks: 0
- Open Issues: 0
-
Metadata Files:
- Readme: README.md
- License: license-v1.md
Awesome Lists containing this project
README
## About
This module is used to parse notifications from [PUSH](http://www.epns.io/). It Provides an abstraction layer
It is written in typescript and requires node v10.0.0 or higher.
Most features will work with nodejs v6.0.0 and higher but using older versions than v10.0.0 is not recommended.
## There are two ways which the SDK can be installed
### Installation for General usage
In order to install this SDK on your existing web application or mobile application. If you want to use the SDK in your dapp or mobile application, this is the installation method to use.
It can be installed as an npm package via the following command.
`npm install @epnsproject/frontend-sdk`
### Installation for SDK Development
If as a developer, you feel the need to add more features to the frontend SDK, and wish to see your changes to the SDK's code immediately reflected, the following steps are for you.
In order to install, test and develop the SDK *locally*, the following steps are required to set it up for testing with a react application you have previously set up.
```javascript
- git clone https://github.com/ethereum-push-notification-service/epns-frontend-sdk.git
- cd epns-frontend-sdk // navigate to the project's directory
- npm install // to install all the packages
- npm start //to build the project and watch out for changes
- npm link // in order to test and be made available locally
// since we intend to test the functionality, we will assume that another react application is running which wants to leverage the components from the framework
- npm `link relative_path_to_react_application`/node_modules/react
- cd `relative_path_to_react_application`
- npm link epns-frontend-sdk
// then the library can be imported as normally would if installed using npm or yarn
```
More information on the local testing and development of NPM packages can be found [here]('https://blog.logrocket.com/the-complete-guide-to-publishing-a-react-package-to-npm/")
## Usage
The SDK comprises of three modules majorly, which are:
- Fetching the notifications from EPNS backend.
- Parsing the fetched notifications.
- Rendering the parsed notification on mobile and on web.
It is done this way in order to seperate the different layers from each other.
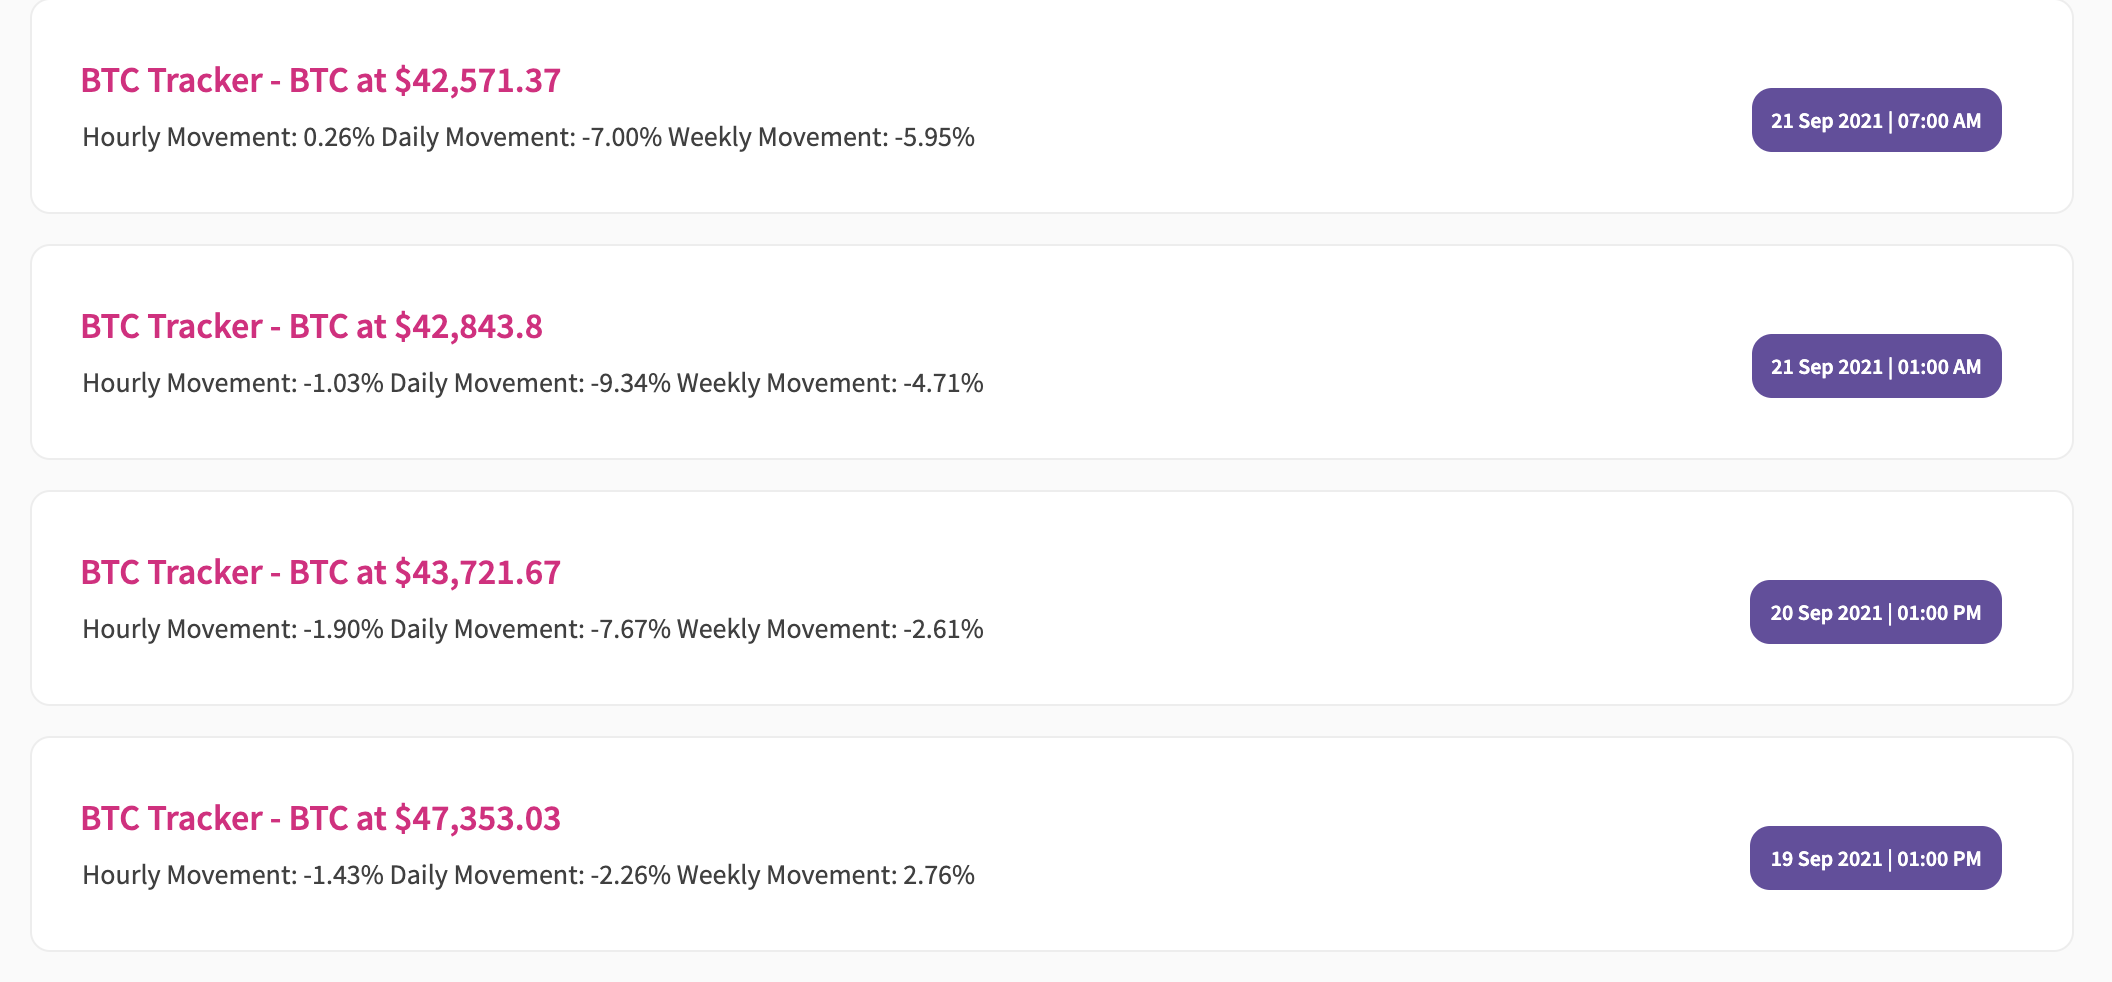
### Fetching and parsing notifications from the api
#### A more comprehensive demo can be located at `src/sample_codes/loadNotifications`.
```javascript
import { api, utils } from "@epnsproject/frontend-sdk";
// define the variables required to make a request
const walletAddress = "0x1234567890abcdcdefghijklmnopqrstuvwxyz123";
const pageNumber = 1;
const itemsPerPage = 20;
// define the variables required to make a request
//fetch the notifications
const fetchedNotifications = await api.fetchNotifications(walletAddress, itemsPerPage, pageNumber)
console.log({fetchedNotifications]);
//fetch the notifications
//parse the notification fetched
const parsedResponse = utils.parseApiResponse(fetchedNotifications);
console.log(parsedResponse);
//parse the notification fetched
```
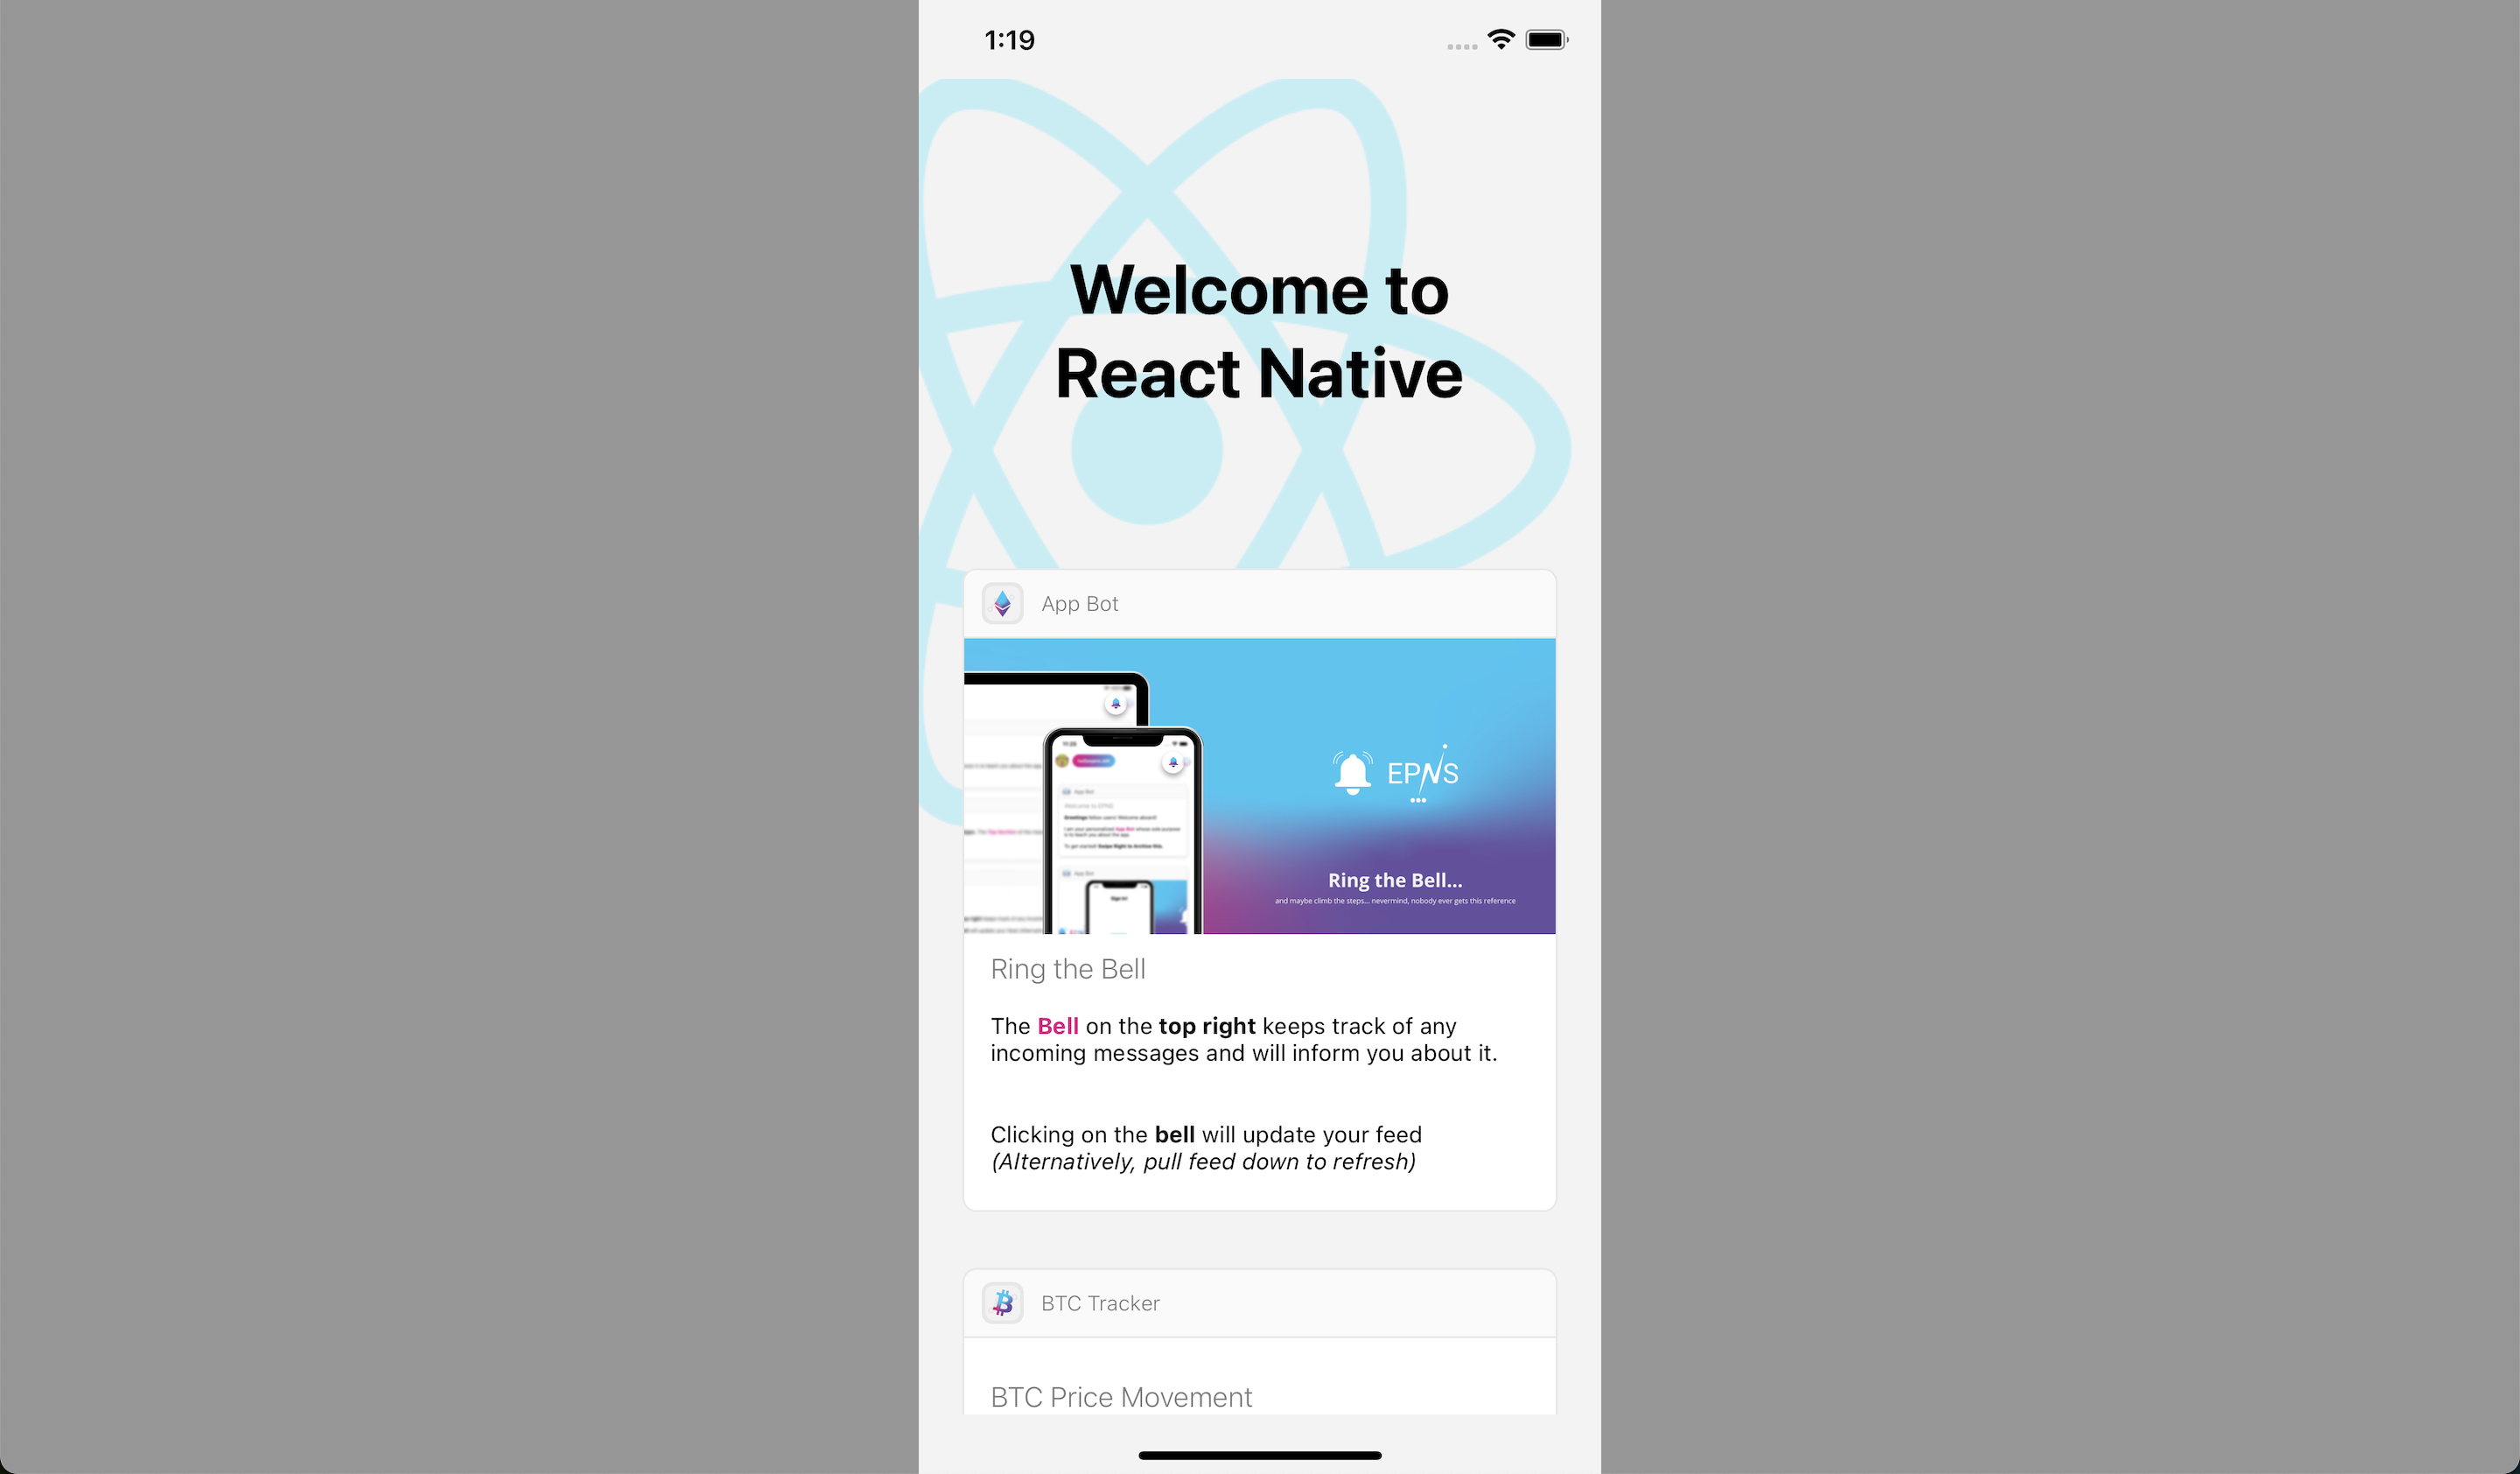
### Rendering the parsed notification on the web
```javascript
import { NotificationItem } from "@epnsproject/frontend-sdk";
// This is used to render the text present in a notification body as a JSX element
```
### Rendering the parsed notification on a react native mobile application.
```javascript
import { NotificationItem} from '@epnsproject/frontend-sdk/dist/native';
```
## Channel methods
### In order to implement signing, we take advantage of [EIP-712](https://eips.ethereum.org/EIPS/eip-712), more details on the `signer` parameter can be found [here](https://eips.ethereum.org/EIPS/eip-712), you can also take a look at our working [example](https://github.com/ethereum-push-notification-service/epns-frontend-sdk/blob/main/sample_codes/loadNotifications/src/App.js)
```javascript
import { channels } from "@epnsproject/frontend-sdk";
//get channel basic info
const details = await channels.getChannelByAddress(CHANNEL_ADDRESS)
//check if user is subscribed to channel
const isSubscribed = channels.isUserSubscribed(account, CHANNEL_ADDRESS)
//opt into a channel
channels.optIn(
signer,
channelAddress,
chainId,
userAccount,
{
onSuccess: () => // do something after a successfull subscription, like bring up a modal or a notification
}
);
//opt out of a channel
channels.optOut(
signer,
channelAddress,
chainId,
userAccount,
{
onSuccess: () => // do something after a successfull unsubscription, like bring up a modal or a notification
}
);
```
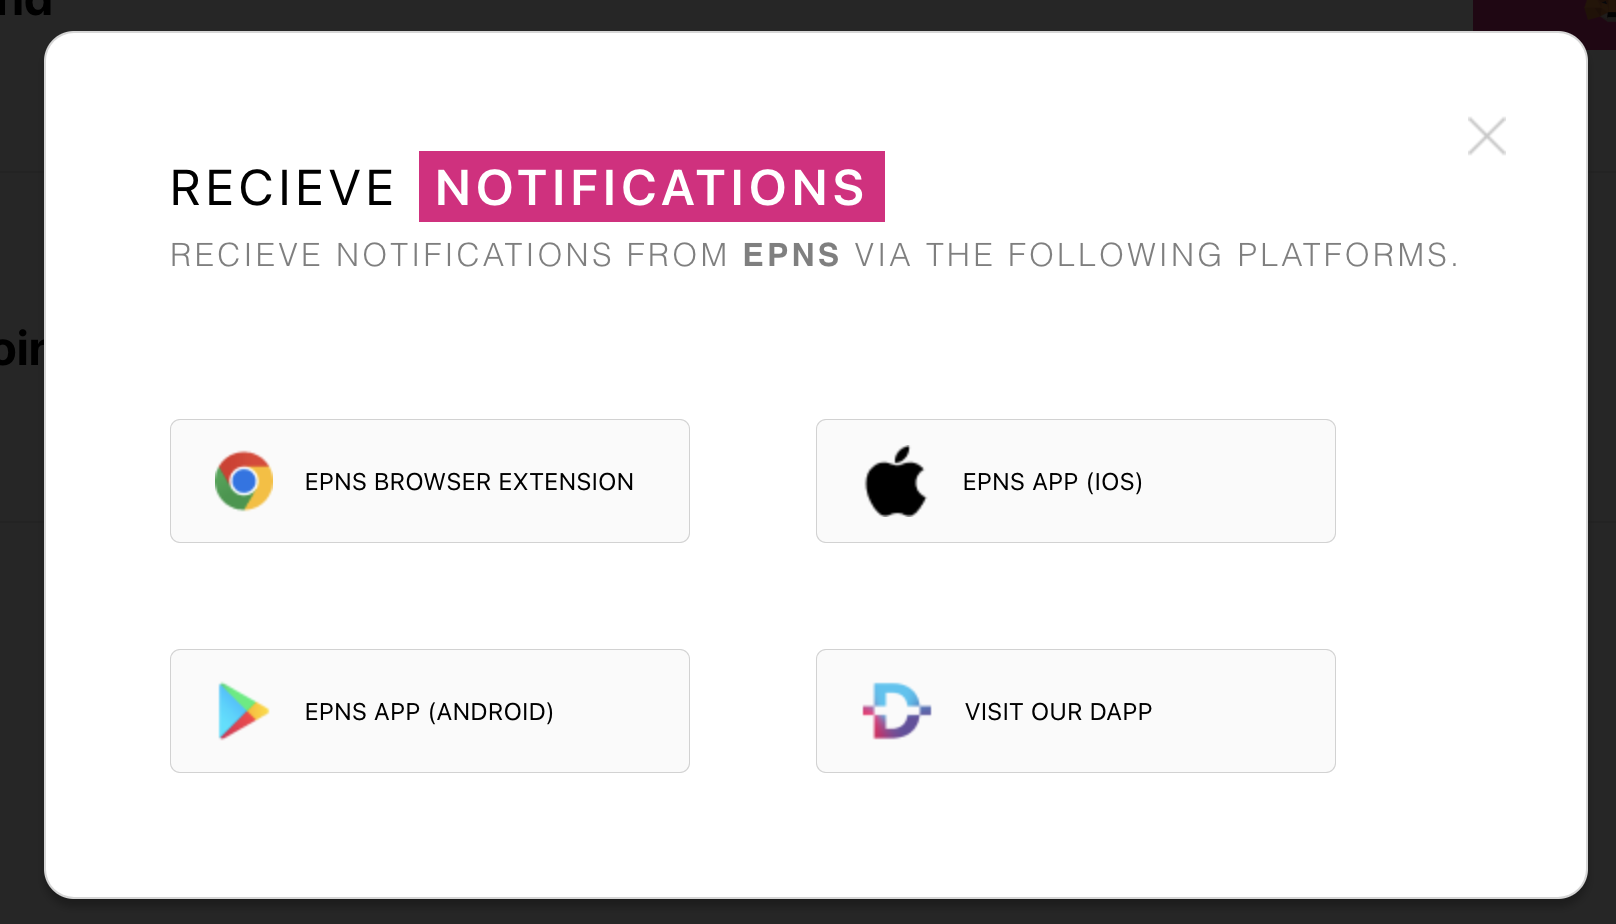
### Using the `onsubscription` modal
This is a modal that can be used to come up immediately after a channel has been subscribed to, its main purpose is to notify the subscriber that they have several options of recieving notifications from EPNS
```Javascript
import {
OnSubscribeModal,
} from "@epnsproject/frontend-sdk";
const [modalOpen, setModalOpen] = useState(false);
return (
{modalOpen && setModalOpen(false)} />}
)
```
### Customising the onSubscribe modal
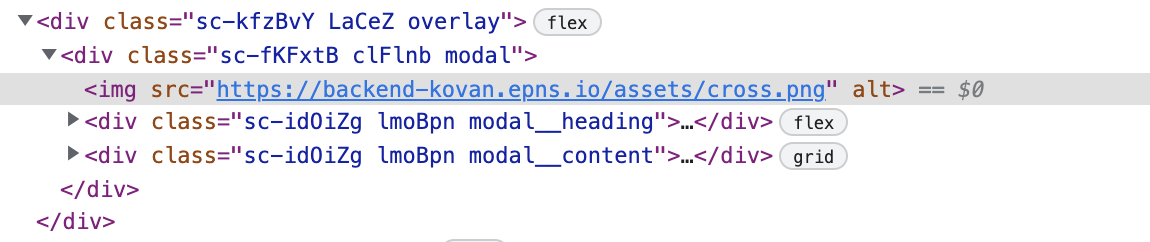
- Editing the entire modal itself can be done via adding styles to the `modal` class
- Editing the heading section can be done via adding styles to the `modal__heading` class
- Editing the body/content section can be done via adding styles to the `modal__content` class
##### However if you wish to create your own modal from scratch and just need the assets needed to make a similar modal.
```Javascript
import {
LINKS,
} from "@epnsproject/frontend-sdk/dist/src/web/components/subscribemodal/constants";
```
Sample of how the data looks like
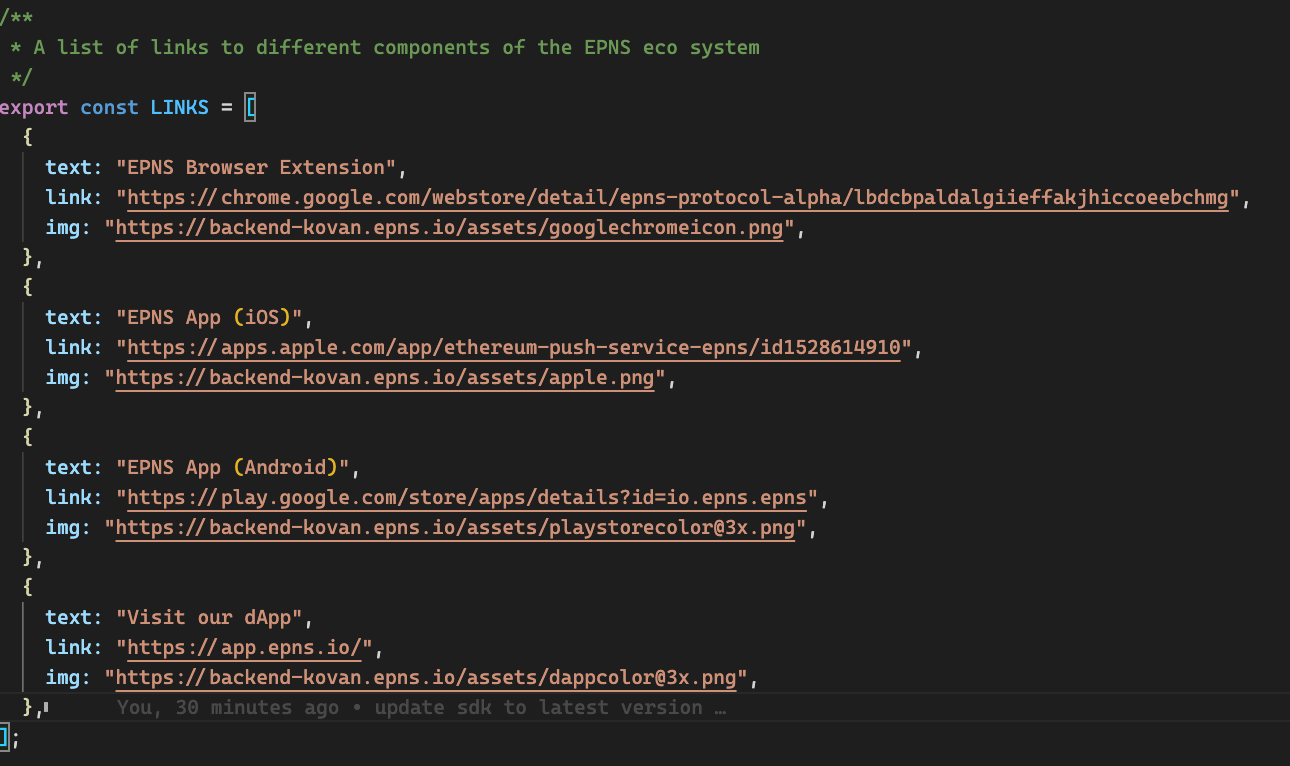
Using this data, you can proceed to create your own modals
## Markdown Reference
#### This section contains the several markdown formats available and how to use them. They can be viewed live by running the react application in `src/sample_codes/parseNotificationMarkdown`.
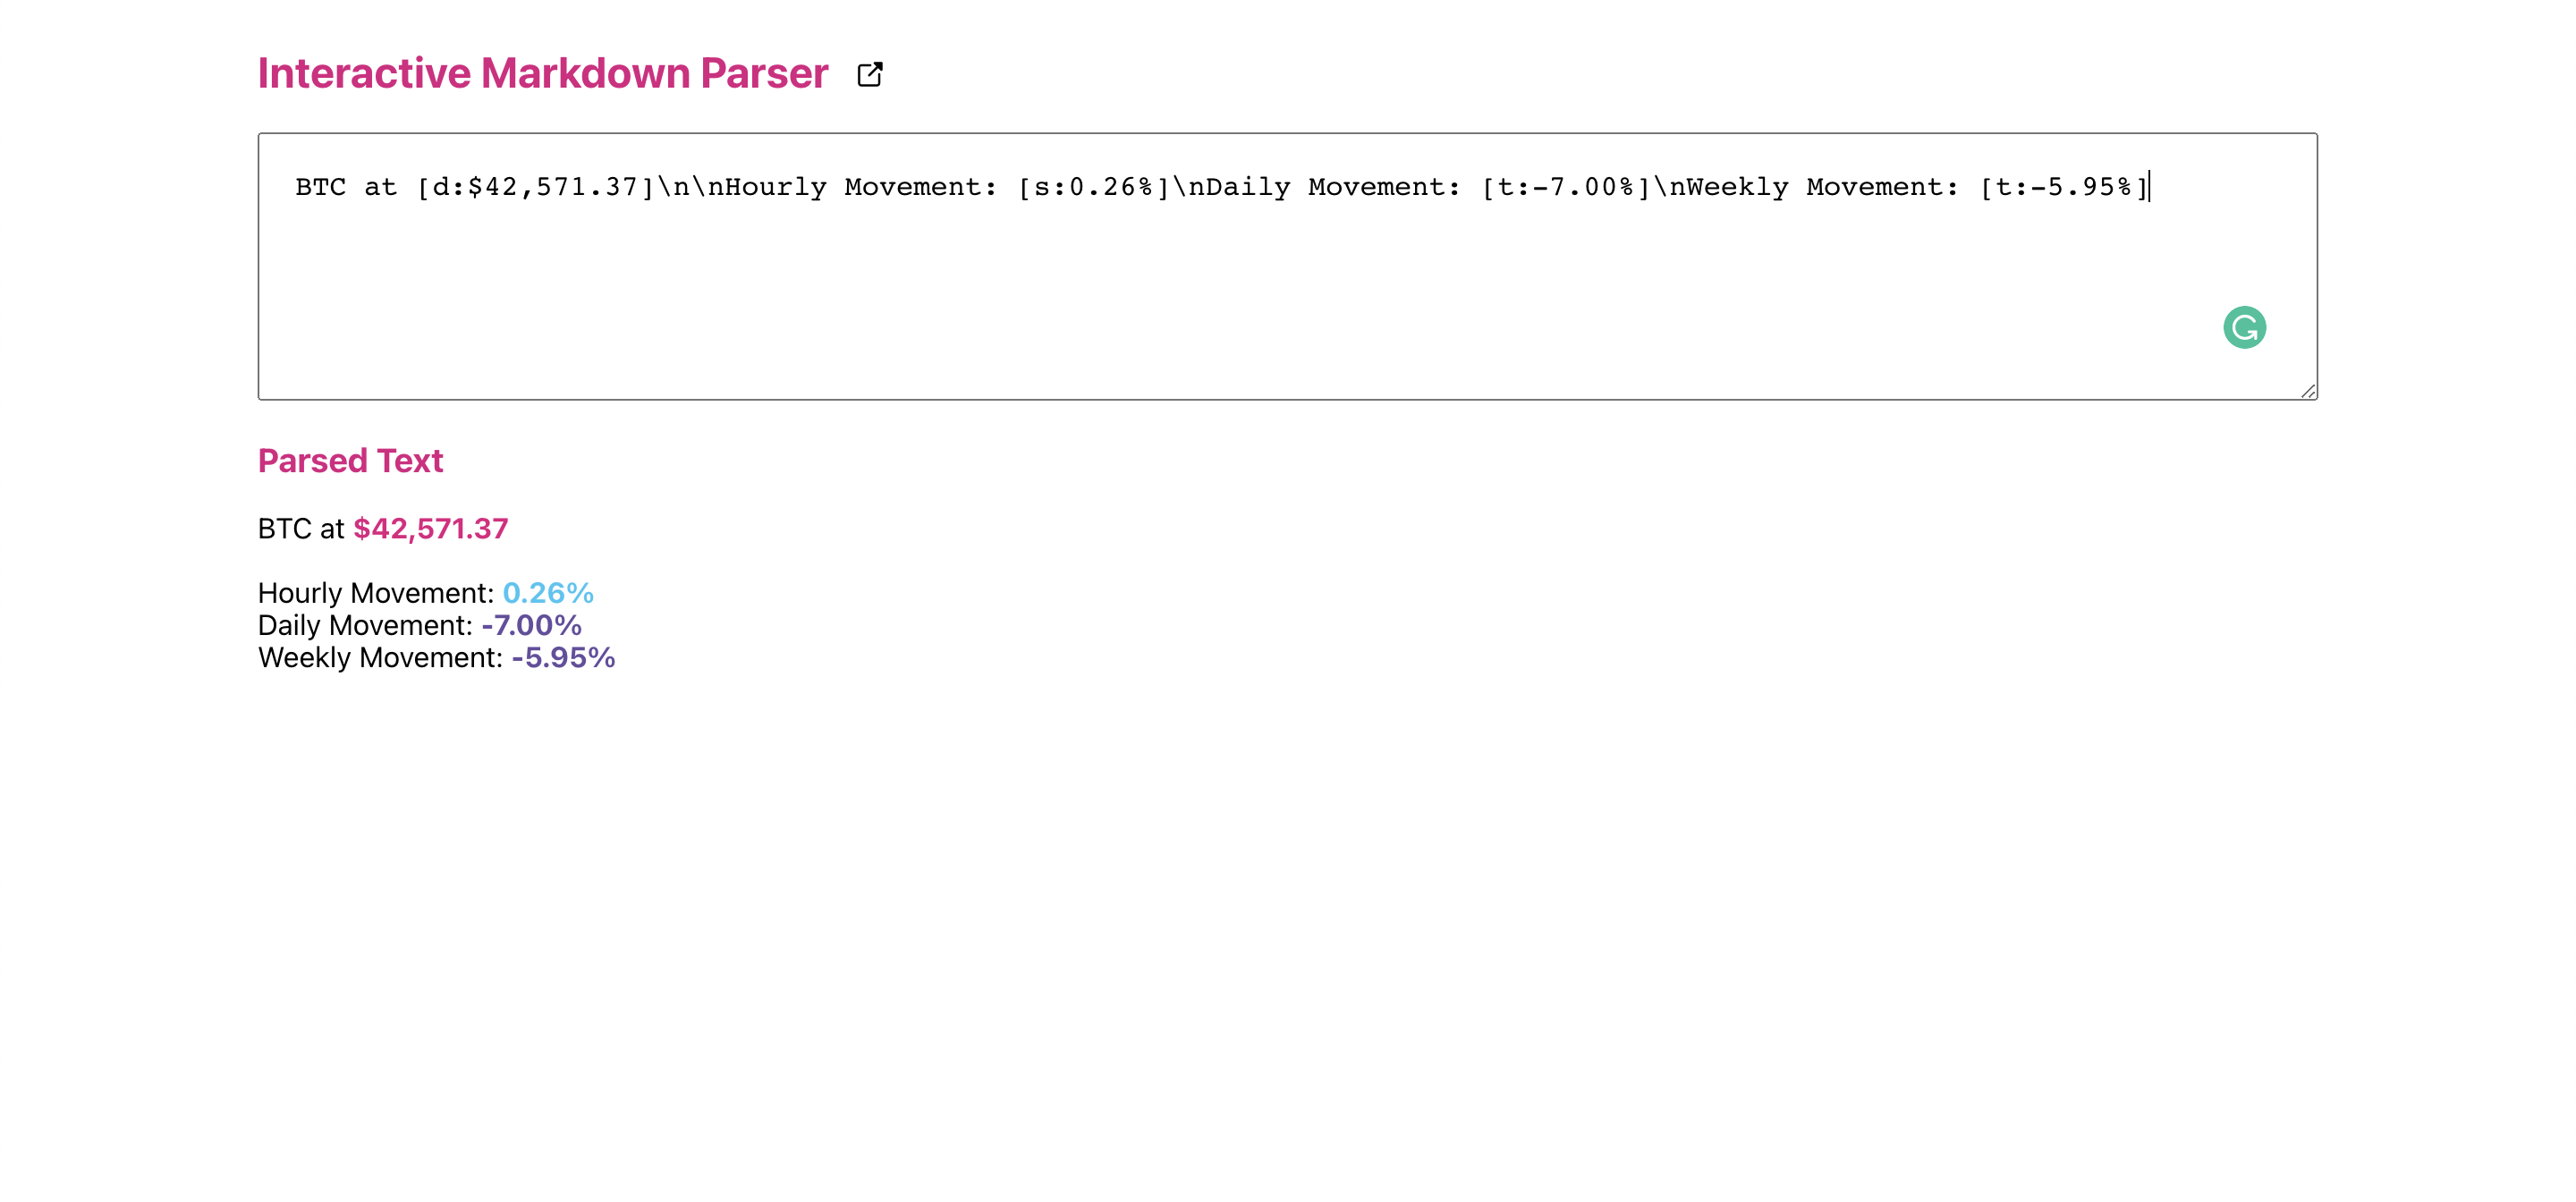
| Markdown | Styling Effect | Use case
|---|--|--|
| \n | New line | For Segregation
| [u: textcontent] | Underlined, Red Colored Text | For URLs
| [d: textcontent] | EPNS Primary colored Text | For colored text
| [s: textcontent] | EPNS Secondary colored Text | For colored text
| [t: textcontent] | EPNS Tetiary colored Text | For colored text
| [e: textcontent] | EPNS Secondary colored Text | For colored text
| [w: textcontent] | White colored Text | For colored text
| [mg: textcontent] | Medium grey colored Text | For colored text
| [dg: textcontent] | Dark grey colored Text | For colored text
| [b: textcontent] | Bold Text | For Emphasis
| [i: textcontent] | Italics Text | For Emphasis
| [bi: textcontent] | Bold and Italics Text | For Emphasis