https://github.com/queeniecplusplus/gke
vm, container, app, registry, cluster, pod, kubectl tool
https://github.com/queeniecplusplus/gke
kubectl-command kubernetes kubernetes-deployment
Last synced: 27 days ago
JSON representation
vm, container, app, registry, cluster, pod, kubectl tool
- Host: GitHub
- URL: https://github.com/queeniecplusplus/gke
- Owner: QueenieCplusplus
- Created: 2020-11-04T00:09:11.000Z (over 5 years ago)
- Default Branch: main
- Last Pushed: 2020-11-18T03:15:40.000Z (over 5 years ago)
- Last Synced: 2025-02-24T04:44:53.025Z (over 1 year ago)
- Topics: kubectl-command, kubernetes, kubernetes-deployment
- Homepage: https://github.com/QueenieCplusplus/QuickGoThru#gke
- Size: 163 KB
- Stars: 0
- Watchers: 2
- Forks: 0
- Open Issues: 0
-
Metadata Files:
- Readme: README.md
Awesome Lists containing this project
README
# GKE
vm, container, app, registry, cluster, pod, kubectl tool
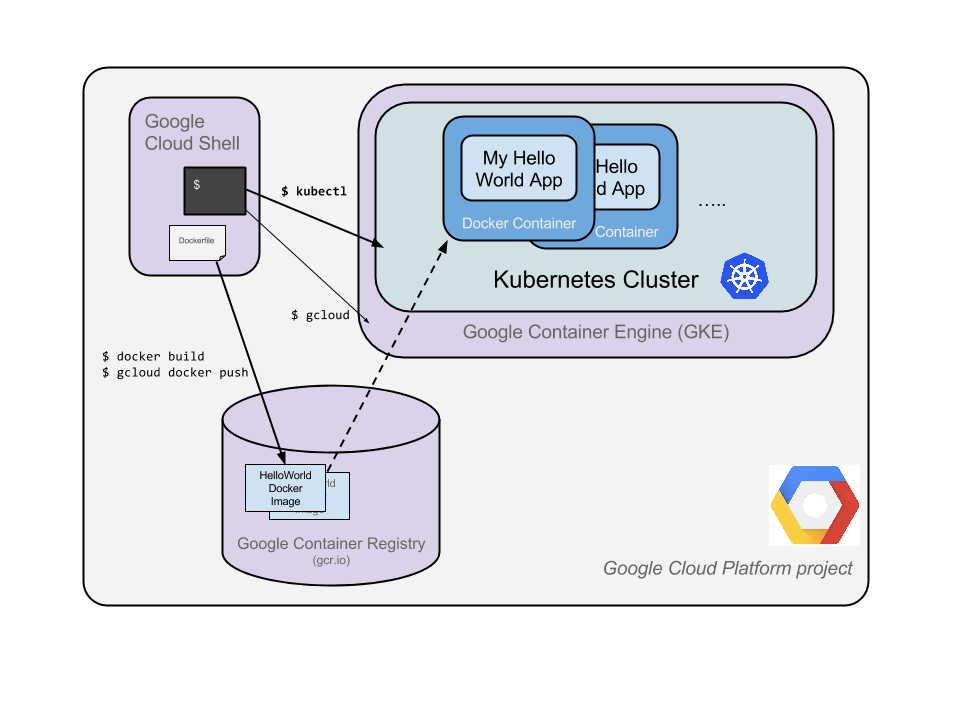
# core steps:
(1) create VM
(2) create APP, pack app into Container Image
(3) push Image to Container Registry
(4) create GKE Cluster
(5) create Pod (to include deployed containers)
(6) allow External Traffic
(7) scale up service
(8) upgrade service
start from step 2:
> create a Nodejs Server
* 2.1, in cloud shell, edit a js file
vi server.js
* 2.2, using editor
i
* 2.3, js file
var http = require('http');
var reqHandler = function(req, res){
res.writeHead(200);
res.end('hi');
}
var www = http.createServer(reqHandler);
www.listen(8080);
* 2.4, esc the file and save it
ESC
:wq
* 2.5, start server in shell
node server.js
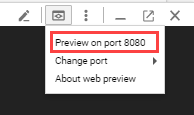
* 2.6, see result of display in Browser
Use the built-in Web preview feature of Cloud Shell to open a new browser tab and proxy a request to the instance you just started on port 8080.
start from step 3:
> copy code file to container image
the docker file is to describe the image you want to build,
it can extend from the other existing image, such as above mentioned nodejs file.
* 3.1, create Docker file image
vi Dockerfile
* 3.2, copy Node.js content to Docker file, press i firsly
FROM node:6.9.2
EXPOSE 8080
COPY server.js .
CMD node server.js
* 3.3, check project id
see connection detail in cloud console
* 3.4, build docker file and run it
docker built -t gcr.io//:v1
docker run -d -p 8080:8080 gcr.io//:v1
* 3.5, check result in web-preview feature in gcloud shell or type following cmd line
curl http://localhost:8080
* 3.6, find container id
docker ps
[output]
container id image cmd
xxxxxxx gcr.io//:v1 "/bin/sh -c"
* 3.7, push image to container registry
gcloud auth configure-docker
docker push gcr.io//:v1
[output]
The push refers to a repository [gcr.io//]
ba6ca48af64e: Pushed
381c97ba7dc3: Pushed
604c78617f34: Pushed
fa18e5ffd316: Pushed
0a5e2b2ddeaa: Pushed
53c779688d06: Pushed
60a0858edcd5: Pushed
b6ca02dfe5e6: Pushed
v1: digest: sha256:8a9349a355c8e06a48a1e8906652b9259bba6d594097f115060acca8e3e941a2 size: 2002
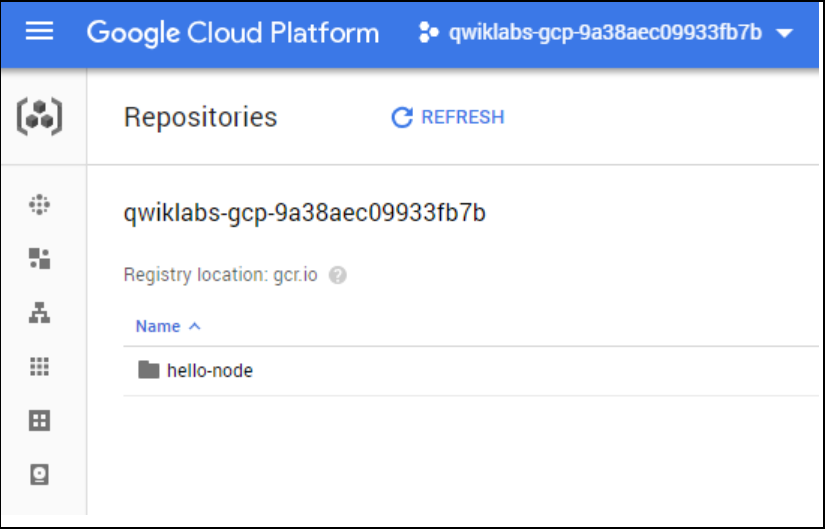
* 3.8, go to gcr to check display info in cloud console.
start from step 4:
> create container's Cluster and Pod
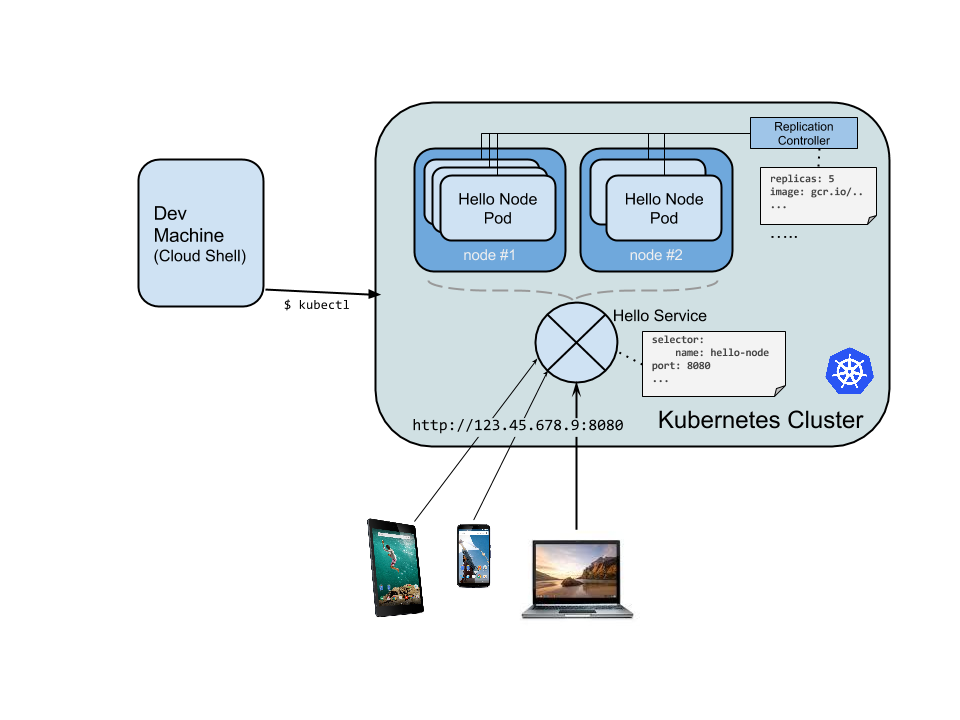
A cluster consists of a master (api) server hosted by google, and a set of worker nodes which are VMs (gce).
* 4.1,
gcloud config set project
* 4.2, create cluster with 2 nodes
gloud container cluster create \
--num-nodes 2\
--machine-type \
--zone
[output]
Creating cluster hello-world...done.
Created [https://container.googleapis.com/v1/projects/PROJECT_ID/zones/us-central1-a/clusters/hello-kate].
kubeconfig entry generated for hello-world.
NAME ZONE MASTER_VERSION MASTER_IP MACHINE_TYPE STATUS
hello-kate us-central1-a 1.5.7 146.148.46.124 n1-standard-1 RUNNING
* 4.3, check Navigation bar called GKE(kubernets Engine) in console

start from step 5:
> create Pod
A pod consists of single/multiple containers tiled together for adm/network purpose.
hereby, we use single container bult with above mentioned nodejs image (stored in GCR), which serves content on port 8080.
when calling deployment, the pod running containers image is created then.
* 5.1, to do deployment to create a (single container) Pod using kubectl tool
kubectl create deployment \
--image = gcr.io//:v1
[output]
deployment.apps/ created
* 5.2, to create and scale Pod (Replica) using kubectl tool
kubectl get deployments
[output]
NAME READY UP-TO-DATE AVAILABLE AGE
1/1 1 1 1m36s
kebectl get pods
[output]
NAME READY STATUS RESTARTS AGE
hello-node-714049816-ztzrb 1/1 Running 0 6m
// hello-node-714049816-ztzrb is a pod id and name
* 5.3 to check state of a cluster using kubectl tool
kubectl cluster info
kubectl config view
kubectl logd
// 可能如上為 或是 hello-node-714049816-ztzrb
* 5.4, to do trouble shoot
kubectl get events
# LB
The Kubernetes master creates the LB and related GCE VM (worker nodes)
forwarding rules, target pools, and firewall rules to make the service fully accessible from outside of Google Cloud.
start from step 6:
> to allow External traffic.
Without this step, the pod's network flow is connect with its cluter in inernal network.
* 6.1, to create a external ip for pod
kubectl expose deployment
kubectl expose deployment hello-node --type="LoadBalancer" --port=8080
// this flag matters with LB:
// This will cause the resulting service to LB traffic across all pods managed by the deployment (in this case only 1 pod, but you will add more replicas later).
[output]
service/ exposed
* 6.2, to find public/private (accessible) IP addr of the services
kubectl get services
[outputs]
NAME CLUSTER-IP EXTERNAL-IP PORT(S) AGE
10.3.250.149 104.154.90.147 8080/TCP 1m // public accessible ouside cloud
kubernetes 10.3.240.1 443/TCP 5m // visible only in cloud
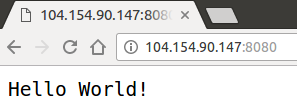
* 6.3, to check service is available to pubic by pointing browser to addr http://:8080
# Scale Up
start from step 7:
* 7.1, using RC to scale up App services
kubectl scale deployment --replicas=4
[output]
deployment.extensions/ scaled
# Upgarde Service
once the developer modifies the code file, devops & SRE shall roll out the upgrade then.
start from step 8:
* 8.1, build docker file and push it to GCR
docker built -t gcr.io//:v2
docker push gcr.io//:v2
* 8.2, to edit yaml file to change config, due to the changing deployed containers image.
// update the pod to new image
ubectl edit deployment
// Look for Spec > containers > image
# Please edit the object below. Lines beginning with a '#' will be ignored,
# and an empty file will abort the edit. If an error occurs while saving this file will be
# reopened with the relevant failures.
#
apiVersion: extensions/v1beta1
kind: Deployment
metadata:
annotations:
deployment.kubernetes.io/revision: "1"
creationTimestamp: 2016-03-24T17:55:28Z
generation: 3
labels:
run: hello-node
name: hello-node
namespace: default
resourceVersion: "151017"
selfLink: /apis/extensions/v1beta1/namespaces/default/deployments/hello-node
uid: 981fe302-f1e9-11e5-9a78-42010af00005
spec:
replicas: 4
selector:
matchLabels:
run: hello-node
strategy:
rollingUpdate:
maxSurge: 1
maxUnavailable: 1
type: RollingUpdate
template:
metadata:
creationTimestamp: null
labels:
run: hello-node
spec:
containers:
- image: gcr.io/PROJECT_ID/hello-node:v1 ## Update this line ##
imagePullPolicy: IfNotPresent
name: hello-node
ports:
- containerPort: 8080
protocol: TCP
resources: {}
terminationMessagePath: /dev/termination-log
dnsPolicy: ClusterFirst
restartPolicy: Always
securityContext: {}
terminationGracePeriodSeconds: 30
* 8.3, to leave the editor
ESC
:wq
[output]
deployment.extensions/ edited
* 8.4, to run pod with new image by running again deplotment
// New pods will be created with the new image and the old pods will be deleted.
kubectl get deployments
[output]
NAME DESIRED CURRENT UP-TO-DATE AVAILABLE AGE
4 4 4 4 1h
# Ref
https://kubernetes.io/docs/tutorials/kubernetes-basics/update/update-intro/
https://cloud.google.com/solutions/prep-kubernetes-engine-for-prod
# Ref code
66(container), 11765(kafka), 11777(microservice)