https://github.com/rahul-404/advanced_rag_using_groq
https://github.com/rahul-404/advanced_rag_using_groq
Last synced: 4 months ago
JSON representation
- Host: GitHub
- URL: https://github.com/rahul-404/advanced_rag_using_groq
- Owner: Rahul-404
- Created: 2024-11-11T17:50:17.000Z (8 months ago)
- Default Branch: main
- Last Pushed: 2024-11-12T06:08:49.000Z (8 months ago)
- Last Synced: 2025-02-01T22:13:55.853Z (5 months ago)
- Language: Python
- Size: 8.79 KB
- Stars: 0
- Watchers: 1
- Forks: 0
- Open Issues: 0
-
Metadata Files:
- Readme: README.md
Awesome Lists containing this project
README
# Advanced RAG Using Groq Inference Engine 🧠🚀
This project demonstrates the use of **Groq**'s Inference Engine for advanced **Retrieval-Augmented Generation (RAG)** with a Streamlit frontend. It integrates multiple LangChain components for document retrieval and processing, leveraging **Ollama embeddings** for semantic search and **ChatGroq** for inference. The system answers user queries based on context retrieved from web-based documents.
## Table of Contents 📑
1. [Installation](#installation)
2. [Project Structure](#project-structure)
3. [How to Run the Project](#how-to-run-the-project)
4. [Features](#features)
5. [Usage](#usage)
6. [How the App Works](#how-the-app-works)
7. [Documentation](#documentation)
8. [Logging and Error Handling](#logging-and-error-handling)
9. [Project Demo](#project-demo)
10. [Deployment](#deployment)
11. [Contributing](#contributing)
12. [License](#license)
---
## Installation 📥
To set up this project locally, follow these steps:
1. Clone the repository:
```bash
git clone https://github.com/Rahul-404/Advanced_RAG_Using_Groq.git
```
2. Install dependencies:
```bash
cd Advanced_RAG_Using_Groq
pip install -r requirements.txt
```
3. Set up environment variables:
- Create a `.env` file in the project root directory.
- Add your **Groq API key**:
```
GROQ_API_KEY=your-groq-api-key
```
4. Ensure you have Python 3.10+ installed.
---
## Project Structure 📁
Here's an overview of the project directory structure:
```
├── app.py # Streamlit frontend
├── logger.py # Logging utility
├── exception.py # Custom exceptions
├── requirements.txt # Python dependencies
├── .env # Environment variables (GROQ_API_KEY)
├── Dockerfile # Dockerfile for containerization
└── README.md # Project documentation
```
---
## How to Run the Project 🚀
1. After installing the dependencies and setting up the `.env` file, run the Streamlit app:
```bash
streamlit run app.py
```
2. The app will be accessible at `http://localhost:8501` in your browser.
---
## Features ✨
- **RAG Integration**: Combines retrieval and generation to answer queries.
- **Groq-powered Inference**: Utilizes Groq's inference engine for efficient processing.
- **Web-based Document Loader**: Fetches content from a specified URL.
- **Semantic Search**: Uses **Ollama embeddings** for document similarity.
- **Document Segmentation**: Splits large documents into smaller chunks for better processing.
- **Real-time Response**: Provides accurate, real-time answers to user queries.
---
## Usage 🖥️
### Input your query
The application allows users to input their questions, which will be answered using the retrieved context from the document(s).
1. Open the app in your browser.
2. Type a query into the input box.
3. The app will retrieve relevant documents and generate a response using the Groq-powered model.
### Document Similarity Search 🔍
Once the query is answered, the system shows relevant document segments that were used in the response. This can help you understand the context behind the answer.
---
## How the App Works ⚙️
1. **Document Retrieval**:
- The app loads documents from the provided URL (`https://docs.smith.langchain.com/`).
- It splits the document into smaller chunks using **RecursiveCharacterTextSplitter** to ensure efficient processing.
2. **Embedding Generation**:
- **OllamaEmbeddings** is used to convert the text chunks into vector embeddings.
- **FAISS** is used for storing and querying these vectors to find relevant chunks based on user input.
3. **Model Inference**:
- The app uses **ChatGroq**, which runs on the **Groq Inference Engine**, to generate answers based on the retrieved context.
4. **Query Answering**:
- The system generates answers by combining the retrieved context with the query using a **ChatPromptTemplate**.
---
## Documentation 📚
The app is built using the **LangChain** framework, which provides modular tools for creating advanced NLP systems. The core components used include:
- **WebBaseLoader**: Loads documents from a web URL.
- **RecursiveCharacterTextSplitter**: Splits large documents into manageable chunks.
- **FAISS**: A vector store for efficient similarity search.
- **ChatGroq**: A wrapper for the Groq Inference Engine, used for generating responses.
- **OllamaEmbeddings**: Generates semantic embeddings for the document chunks.
For detailed documentation on each of these components, refer to the respective links in the LangChain documentation.
---
## Logging and Error Handling 📝
- **logger.py**: Contains custom logging utility for capturing runtime information, including performance metrics and potential issues.
- **exception.py**: Defines custom exceptions to handle common errors in document loading, vector retrieval, and inference processes.
Errors and logs will be captured in the console output during execution.
---
## Project Demo Video 🎥
Check out the project demo in the YouTube video below for a step-by-step guide on how the app works and interacts with the Groq-powered inference engine:
[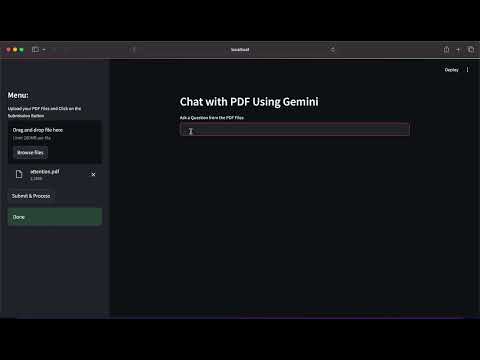](https://youtu.be/Z83Y36jqufg)
---
## Deployment 🌍
You can deploy this application using a **Dockerfile**. Here's a quick guide on how to deploy using Docker:
### Steps to Deploy Using Docker 🐳
1. **Build the Docker image**:
In the project root directory, where the `Dockerfile` is located, run:
```bash
docker build -t advanced-rag-groq .
```
2. **Run the Docker container**:
```bash
docker run -p 8501:8501 --env-file .env advanced-rag-groq
```
3. **Access the App**:
Open your browser and visit `http://localhost:8501` to access the deployed app.
### Deployment Summary
- The project uses Docker to containerize the application.
- You can deploy it to any platform supporting Docker containers, such as **Heroku**, **AWS**, or **Google Cloud**.
- After building the Docker image, push it to your desired platform and follow the deployment guidelines.
---
## Contributing 🤝
Contributions are welcome! If you'd like to contribute to the project, please follow these steps:
1. Fork the repository.
2. Create a new branch (`git checkout -b feature-name`).
3. Commit your changes (`git commit -am 'Add new feature'`).
4. Push to the branch (`git push origin feature-name`).
5. Open a pull request.
Please make sure to write tests for new features and ensure the code follows the existing style.
---
## License 📄
This project is licensed under the MIT License - see the [LICENSE](LICENSE) file for details.