Ecosyste.ms: Awesome
An open API service indexing awesome lists of open source software.
https://github.com/redgoose-dev/react-photo-layout-editor
Photo layout editor for react
https://github.com/redgoose-dev/react-photo-layout-editor
grid grid-layout layout photo react redux
Last synced: 3 months ago
JSON representation
Photo layout editor for react
- Host: GitHub
- URL: https://github.com/redgoose-dev/react-photo-layout-editor
- Owner: redgoose-dev
- License: mit
- Created: 2017-05-29T15:12:15.000Z (over 7 years ago)
- Default Branch: main
- Last Pushed: 2021-04-12T19:02:06.000Z (almost 4 years ago)
- Last Synced: 2024-10-14T15:14:55.823Z (3 months ago)
- Topics: grid, grid-layout, layout, photo, react, redux
- Language: JavaScript
- Homepage: https://redgoose-dev.github.io/react-photo-layout-editor/
- Size: 2.97 MB
- Stars: 122
- Watchers: 7
- Forks: 17
- Open Issues: 0
-
Metadata Files:
- Readme: README.md
- License: LICENSE
Awesome Lists containing this project
README
# react-photo-layout-editor

사진 레이아웃을 편집하는 웹 프로그램입니다.
This is photo layout editor for react
예전 Instagram blog( http://blog.instagram.com/ )에 있는 정렬된 이미지의 모습에 매료되어 저런 모습을 직접 편집하여 게시물로 올렸으면 좋겠다는 생각이 들어 만들게 되었습니다.
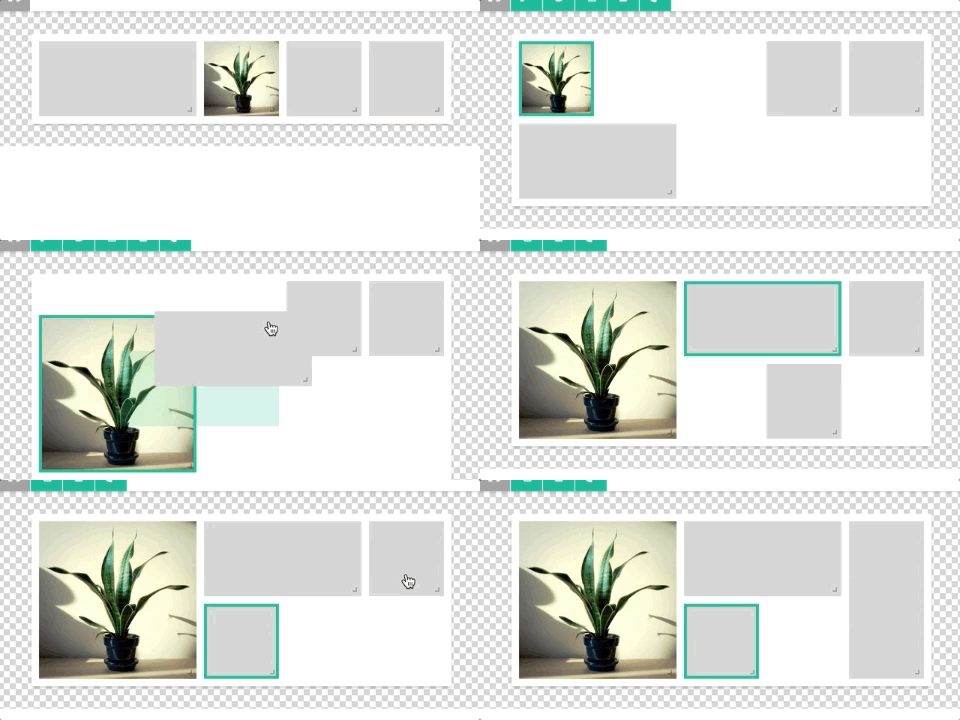
블럭을 드래그 앤 드롭으로 위치와 크기를 편집하여 모던하게 정렬된 이미지나 레이아웃 만들 수 있습니다.
## Demo
다음 링크를 통하여 기능을 체험해볼 수 있습니다.
https://redgoose-dev.github.io/react-photo-layout-editor/
## Feature
PLE는 이런 특징들을 가지고 있습니다.
### Management Images
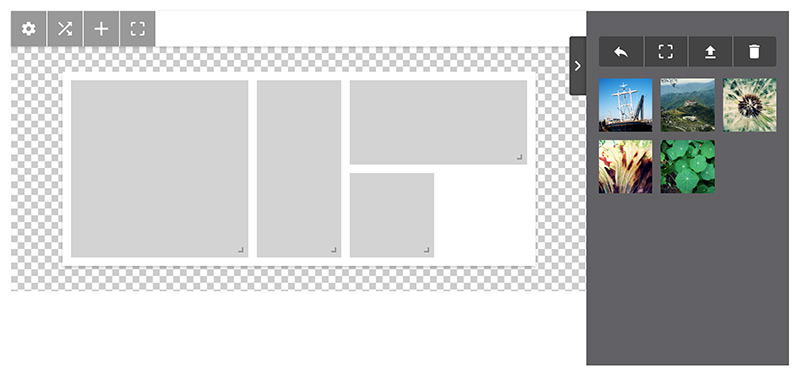
사이드바에 이미지를 업로드하여 사진을 배치하기 전에 이미지를 담아둘 수 있습니다.
### Edit Blocks
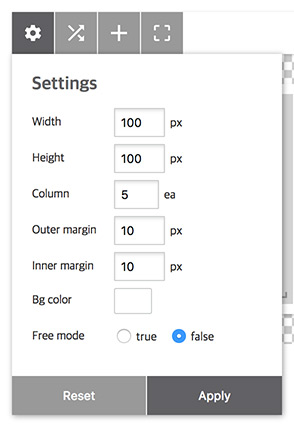
블럭의 갯수나 사이즈, 여백등을 조절할 수 있습니다.
### Drag \& Drop
이미지를 드래그하여 이미지를 블럭에 넣거나 블럭의 위치를 옮기거나 수정할 수 있습니다.
### Edit image area
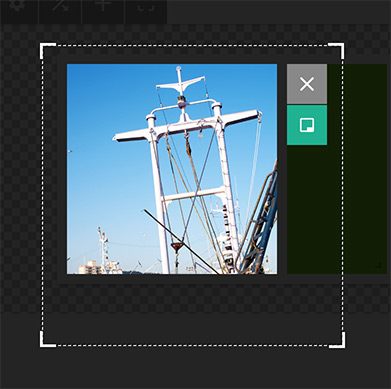
블럭을 선택하고 펜 모양의 툴바(edit block)를 선택하면 편집창이 뜨면서 영역을 변경할 수 있습니다.
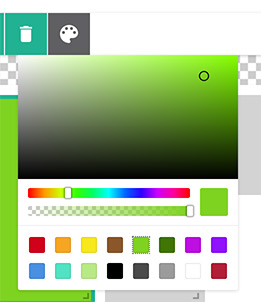
### Change color
블럭의 배경색을 바꿀 수 있습니다. 빈 블럭을 만들고 색상을 수정할 수 있습니다.
## Installation
cli로 설치할 프로젝트에서 다음과 같은 명령을 실행합니다.
### npm
`npm install --save react-photo-layout-editor`
### yarn
`yarn add react-photo-layout-editor`
## Usage
원하는곳에 컴포넌트를 삽입합니다.
한페이지에 단독으로 사용하는것을 권장합니다.
```
import PhotoLayoutEditor from 'react-photo-layout-editor';
{ ple = r }}/>
```
## Properties
컴포넌트를 마운트할때 설정값을 정의할 수 있습니다.
| Name | default | Type | Description |
| ---- | ------- | ---- | ----------- |
| body | {} | `object` | 툴바와 그리드를 편집하는 영역. 아래 [body 항목](https://github.com/redgoose-dev/react-photo-layout-editor#body)을 참고 |
| side | {} | `object` | 이미지를 관리하는 사이드 팔레트 영역. 아래 [side 항목](https://github.com/redgoose-dev/react-photo-layout-editor#side)을 참고 |
| uploadScript | null | `string` | 이미지를 서버로 업로드 처리하는 주소 |
| uploadParamsConvertFunc | null | `function` | 이미지를 서버로 업로드하고 그 결과값을 받아 `side.files`에 이미지를 등록할 수 있도록 값을 변경하는 콜백함수 |
| updateStoreFunc | null | `function` | store 데이터가 변경될때마다 실행하는 콜백함수 |
| callback | {} | `object` | 여러가지 행동에 대한 콜백 함수들의 모음 |
### body
툴바와 그리드 편집 영역
| Name | default | Type | Description |
| ---- | ------- | ---- | ----------- |
| setting | {} | `object` | 그리드 편집기의 설정값. [setting 섹션](https://github.com/redgoose-dev/react-photo-layout-editor#bodysetting) 참고 |
| blockColor | rgba(211,211,211,1) | `string` | 블럭 하나의 기본 배경색 |
| grid | [] | `array` | 블럭 데이터값 목록 |
#### body.setting
그리드 편집 영역의 설정값
| Name | default | Type | Description |
| ---- | ------- | ---- | ----------- |
| width | 100 | `number` | 기본 블럭 하나의 가로사이즈 |
| height | 100 | `number` | 기본 블럭 하나의 세로사이즈 |
| column | 5 | `number` | 한줄에 들어가는 기본 블럭의 갯수 |
| outerMargin | 10 | `number` | 그리드 겉부분의 여백값 |
| innerMargin | 10 | `number` | 블럭 사이의 여백값 |
| bgColor | rgba(255,255,255,1) | `string` | 그리드 배경색 |
### side
이미지를 관리하는 사이드 팔레트 영역
| Name | default | Type | Description |
| ---- | ------- | ---- | ----------- |
| files | [] | `array` | 이미지 목록 |
| visible | true | `boolean` | 팔레트 표시유무 |
### callback
컴포넌트 콜백 함수들
| Name | params | Description |
| ---- | ------ | ----------- |
| init | | 컴포넌트가 초기화 되었을때 호출합니다. |
| sideUploadStart | | 사이드 영역 이미지를 업로드를 시작할때 호출합니다. |
| sideUploadProgress | `loaded,total,percent` | 사이드 영역 이미지를 업로드중일때 호출합니다. |
| sideUploadComplete | `res` | 사이드 영역 이미지 하나를 업로드가 끝나면 호출합니다. |
| sideUploadCompleteAll | | 사이드 영역 모든 이미지 업로드를 완료하면 호출합니다. |
| sideUploadFail | | 사이드 영역 이미지 업로드를 실패하면 호출합니다. |
| sideRemove | `images` | 사이드 영역 이미지를 삭제할때 호출합니다. |
## API
`PhotoLayoutEditor`를 컨트롤할 수 있습니다. 먼저 컴포넌트를 접근할 수 있도록 인스턴스 변수로 만들어줍니다.
다음 컴포넌트와 같이 `ref`를 이용하여 `ple`이름의 변수를 이용하여 API를 사용할 수있습니다.
```
let ple = null;
{ ple = r }}/>
```
자세한 API의 내용은 다음 링크를 참고하세요.
- [Side](https://github.com/redgoose-dev/react-photo-layout-editor/wiki/API.Side)
- [Grid](https://github.com/redgoose-dev/react-photo-layout-editor/wiki/API.Grid)
- [Cropper](https://github.com/redgoose-dev/react-photo-layout-editor/wiki/API.Cropper)
- [Util](https://github.com/redgoose-dev/react-photo-layout-editor/wiki/API.Util)
## Development
이 프로그램을 개발하기 위하여 데모 페이지를 띄울 수 있습니다.
다음 과정을 통하여 브라우저에 개발에 사용되었던 데모 페이지를 열어볼 수 있습니다.
1. `git clone https://github.com/redgoose-dev/react-photo-layout-editor.git`
1. `cd react-photo-layout-editor`
1. `yarn install`
1. `yarn run dev`
1. in your browser, connect `http://localhost:3000`