https://github.com/replicatedhq/replicated-starter-helm
https://github.com/replicatedhq/replicated-starter-helm
Last synced: about 1 year ago
JSON representation
- Host: GitHub
- URL: https://github.com/replicatedhq/replicated-starter-helm
- Owner: replicatedhq
- Created: 2023-02-24T02:51:22.000Z (over 3 years ago)
- Default Branch: main
- Last Pushed: 2025-01-02T22:03:20.000Z (over 1 year ago)
- Last Synced: 2025-03-23T03:33:15.731Z (about 1 year ago)
- Size: 3.26 MB
- Stars: 3
- Watchers: 8
- Forks: 2
- Open Issues: 4
-
Metadata Files:
- Readme: README.md
Awesome Lists containing this project
README
Replicated Helm Starter
==================
Example project showcasing how power users can leverage the Replicated CLI Tools to manage a helm chart that can be delivered via Replciated.
This helm version of https://github.com/replicatedhq/replicated-starter-kots adds replicated manifests directly in a helm chart's working directory. To release:
```
helm package -u . -d manifests/
replicated release create --auto -y
```
**If you already have a helm chart, you should be aware of [Importing an Existing Chart](#already-have-a-helm-chart) before you start setup.**
## Get started
### Copy and Clone
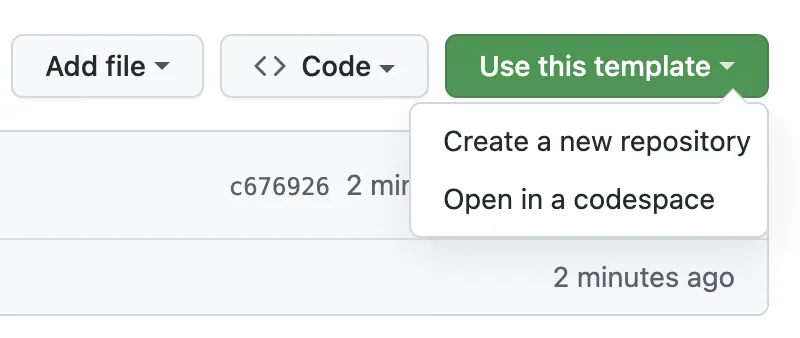
This repo is a [GitHub Template Repository](https://help.github.com/en/articles/creating-a-repository-from-a-template). You can create a private copy by using the "Use this Template" link in the repo:
You should use the template to create a new **private** repo in your org, for example `mycompany/replicated-helm` or `mycompany/replicated-starter-helm`.
Once you've created a repository from the template, you'll want to `git clone` your new repo and `cd` into it locally.
### 1. Install CLI
To start, you'll want to install the `replicated` CLI.
You can install with [homebrew](https://brew.sh) or grab the latest Linux or macOS version from [the replicatedhq/replicated releases page](https://github.com/replicatedhq/replicated/releases).
#### Brew
```shell script
brew install replicatedhq/replicated/cli
```
#### Manual
```shell script
curl -s https://api.github.com/repos/replicatedhq/replicated/releases/latest \
| grep "browser_download_url.*$(uname | tr '[:upper:]' '[:lower:]')_amd64.tar.gz" \
| cut -d : -f 2,3 \
| tr -d \" \
| cat <( echo -n "url") - \
| curl -fsSL -K- \
| tar xvz replicated
```
Then move `./replicated` to somewhere in your `PATH`:
```shell script
mv replicated /usr/local/bin/
```
#### Verifying
You can verify it's installed with `replicated version`:
```text
$ replicated version
```
```json
{
"version": "0.31.0",
"git": "c67210a",
"buildTime": "2020-09-03T18:31:11Z",
"go": {
"version": "go1.14.7",
"compiler": "gc",
"os": "darwin",
"arch": "amd64"
}
}
```
### Configure environment
You'll need to set up two environment variables to interact with vendor.replicated.com:
```
export REPLICATED_APP=...
export REPLICATED_API_TOKEN=...
```
`REPLICATED_APP` should be set to the app slug from the Settings page:

Next, create a Service Account API token from the vendor portal under [Service Accounts](https://vendor.replicated.com/team/serviceaccounts):

Ensure the token has the appropriate "Write" access in the selected [RBAC policy](https://vendor.replicated.com/team/policies) or you'll be unable create new releases. Once you have the values,
set them in your environment.
```
export REPLICATED_APP=...
export REPLICATED_API_TOKEN=...
```
You can ensure this is working with
```
replicated release ls
```
### Iterating on your release
Once you've made changes to your manifests, lint them with
```
replicated release lint --yaml-dir=manifests
```
You can push a new release to a channel with
```
replicated release create --auto
```
By default the `Unstable` channel will be used. You can override this with the `--promote` flag:
```
replicated release create --auto --promote=Beta
```
## Already Have a Helm Chart?
This is meant as a hello-world style starter where you'll just modify the templates/values/etc in this repo directly to develop your app, however you may already have a helm chart you want to use.
In this case you have a few options:
1. Grab the replicated-specific files from this repo and add them to your helm chart (`manifests/`, `.github/workflows/main.yml`, `kurl-installer.yml`, merge in `.helmignore`)
1. Remove the templates and values from this chart, and just use this repo as an umbrella chart that includes your main chart as a helm `dependency` in `Chart.yaml` (run `helm dependency update` before `helm package . -d manifests/`)
1. Remove all helm manifests from this repo, and configure a pipeline to manually new chart versions as `.tgz` archives into `manifests/` and then use `replicated release create` from there.
## Integrating with CI
This repo contains a [GitHub Actions](https://help.github.com/en/github/automating-your-workflow-with-github-actions/about-github-actions) workflow for ci at [./.github/workflows/main.yml](./.github/workflows/main.yml). You'll need to [configure secrets](https://help.github.com/en/github/automating-your-workflow-with-github-actions/virtual-environments-for-github-actions#creating-and-using-secrets-encrypted-variables) for `REPLICATED_APP` and `REPLICATED_API_TOKEN`. On every push this will:
- Ensure a channel exists for the branch that was pushed to
- Create a release based on the contents of `./manifests`
## Advanced Usage
### Integrating kurl installer yaml
There is a file `kurl-installer.yaml` that can be used to manage [kurl.sh](https://kurl.sh) installer versions for an embedded Kubernetes cluster. This will be automatically released in CI. You can create a release manually with
```
replicated installer create --auto
```
### Tools reference
- [replicated vendor cli](https://github.com/replicatedhq/replicated)
### License
MIT