https://github.com/rupeshs/diffusionmagic
Easy to use Stable diffusion workflows using diffusers
https://github.com/rupeshs/diffusionmagic
artificial-intelligence deep-learning diffusers huggingface illusiondiffusion python pytorch stable-diffusion stablediffuion stablediffusionxl texttoimage windows wuerstchen
Last synced: about 1 year ago
JSON representation
Easy to use Stable diffusion workflows using diffusers
- Host: GitHub
- URL: https://github.com/rupeshs/diffusionmagic
- Owner: rupeshs
- License: mit
- Created: 2023-02-05T17:04:47.000Z (over 3 years ago)
- Default Branch: main
- Last Pushed: 2023-10-31T18:13:31.000Z (over 2 years ago)
- Last Synced: 2024-05-02T01:38:41.252Z (about 2 years ago)
- Topics: artificial-intelligence, deep-learning, diffusers, huggingface, illusiondiffusion, python, pytorch, stable-diffusion, stablediffuion, stablediffusionxl, texttoimage, windows, wuerstchen
- Language: Python
- Homepage:
- Size: 22.4 MB
- Stars: 114
- Watchers: 7
- Forks: 14
- Open Issues: 3
-
Metadata Files:
- Readme: Readme.md
- License: LICENSE
Awesome Lists containing this project
README
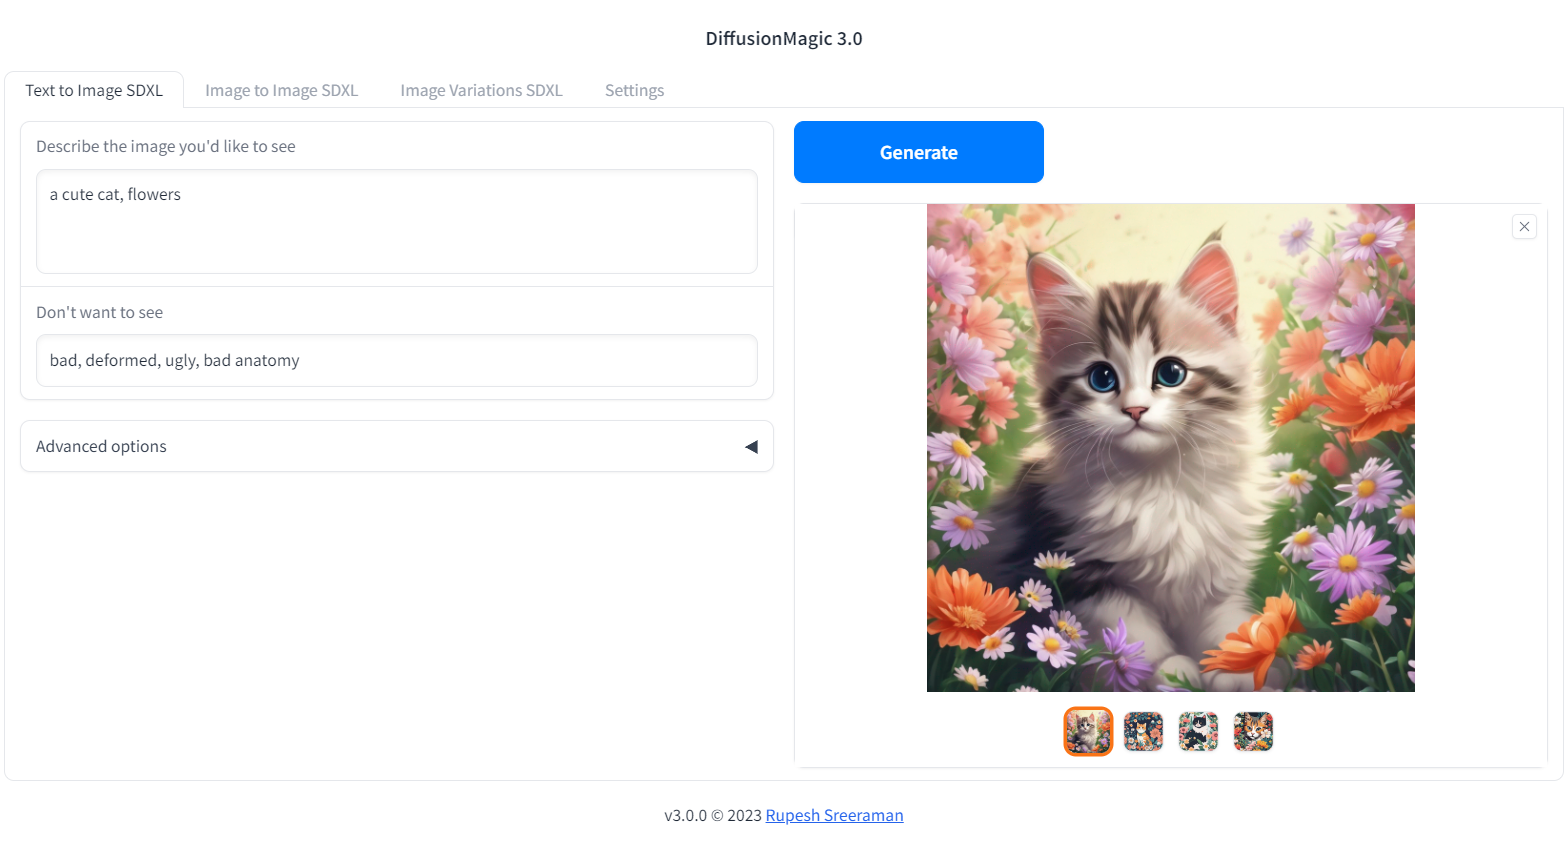
## DiffusionMagic
DiffusionMagic is simple to use Stable Diffusion workflows using [diffusers](https://github.com/huggingface/diffusers).
DiffusionMagic focused on the following areas:
- Easy to use
- Cross-platform (Windows/Linux/Mac)
- Modular design, latest best optimizations for speed and memory
## Segmind Stable Diffusion 1B (SSD-1B)
The Segmind Stable Diffusion Model (SSD-1B) is a smaller version of the Stable Diffusion XL (SDXL) that is 50% smaller but maintains high-quality text-to-image generation. It offers a 60% speedup compared to SDXL.
You can run SSD-1B on Google Colab
[](https://colab.research.google.com/drive/1z-3upaBQCqBw-QNeFYdNsLxbNE_pw1Rx?usp=sharing)
## Stable diffusion XL Colab
You can run StableDiffusion XL 1.0 on Google Colab
[](https://colab.research.google.com/drive/1eEZ_O-Fw87hoEsfSxUnGZhdqvMFEO5iV?usp=sharing)
## Würstchen Colab
You can run Würstchen 2.0 on Google Colab
[](https://colab.research.google.com/drive/1ib6W1CeK9V533Nc9MnoBe3TmU7Uaghtg?usp=sharing)
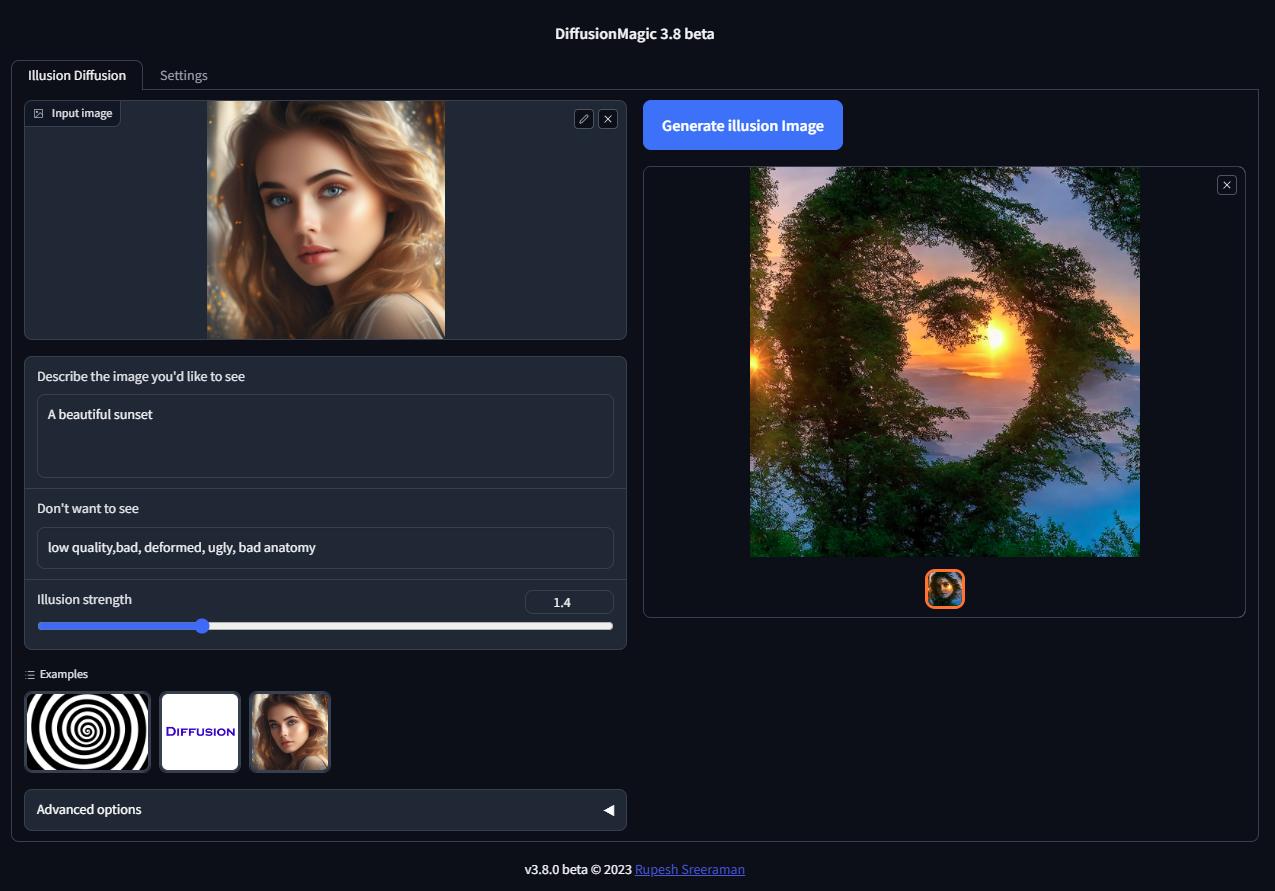
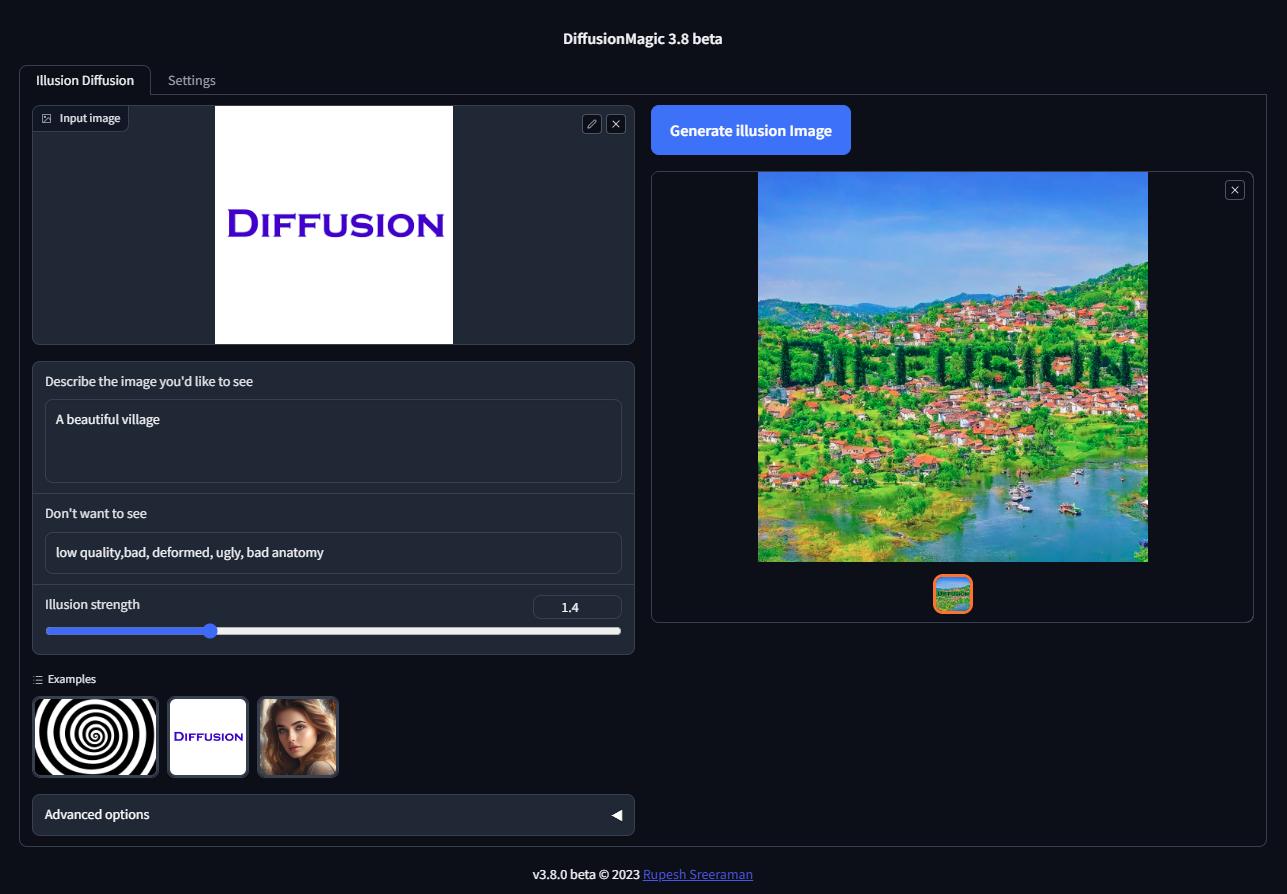
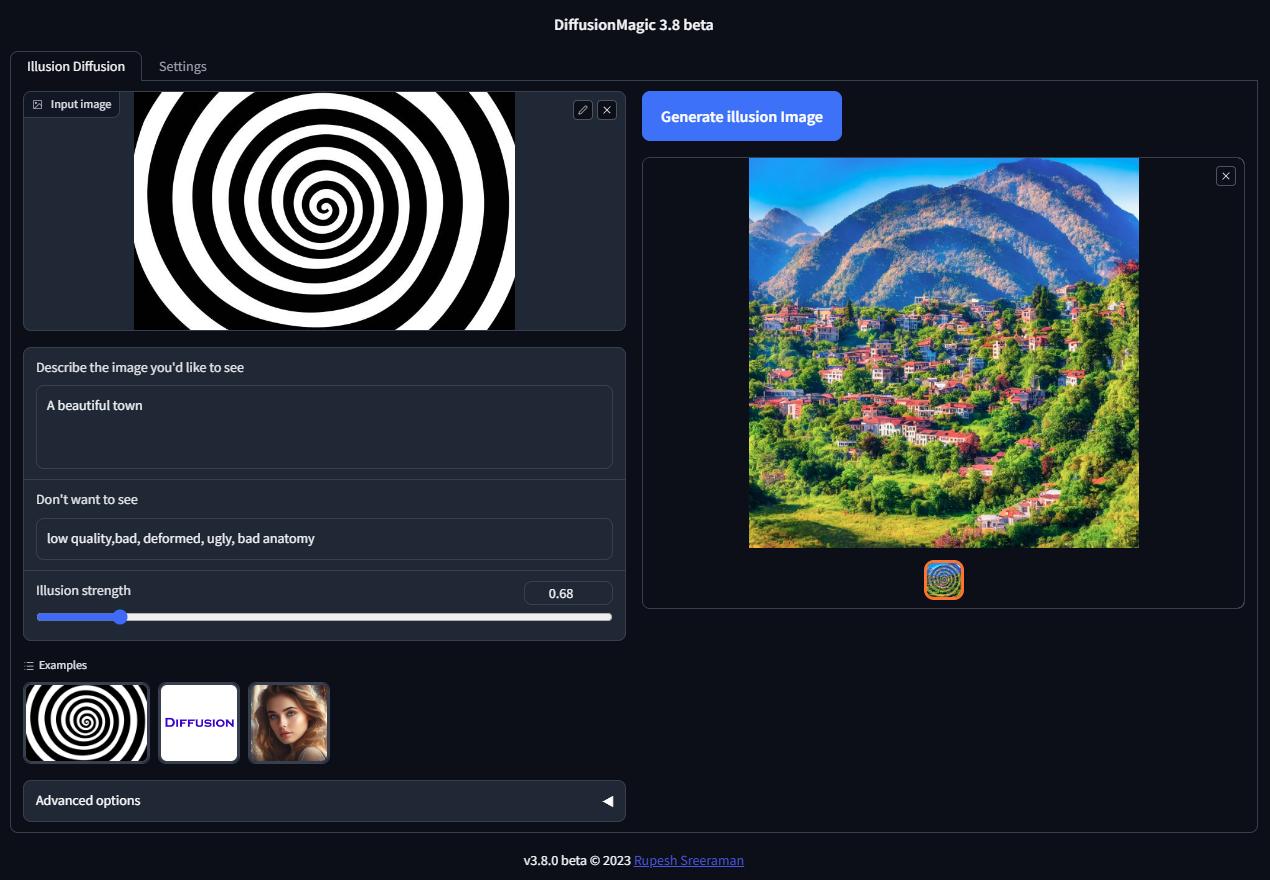
## Illusion Diffusion Colab (beta)
You can run Illusion Diffusion on Google Colab
[](https://colab.research.google.com/drive/1M3igyVklKkUh1Pgzy68JWms2KQy2z7s7?usp=sharing)
Illusion diffusion supports following types of input images as illusion control :
- Color images
- Text images
- Patterns
You need to adjust the illusion strength to get desired result.
## Features
- Supports Würstchen
- Supports Stable diffusion XL
- Supports various Stable Diffusion workflows
- Text to Image
- Image to Image
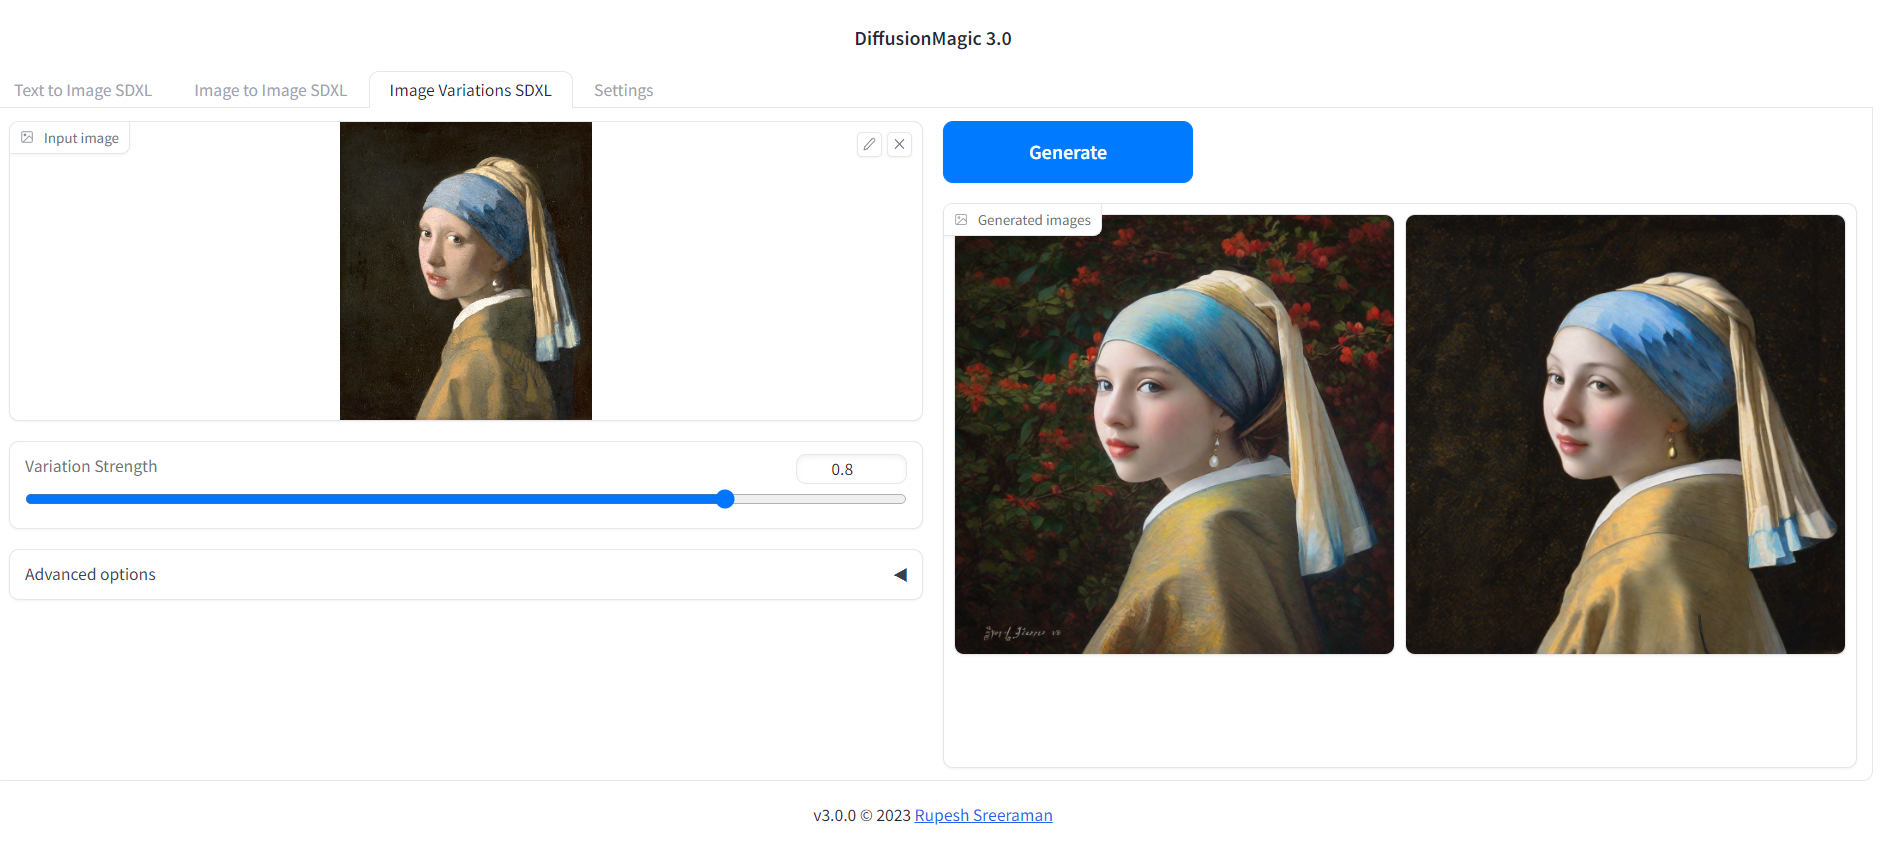
- Image variations
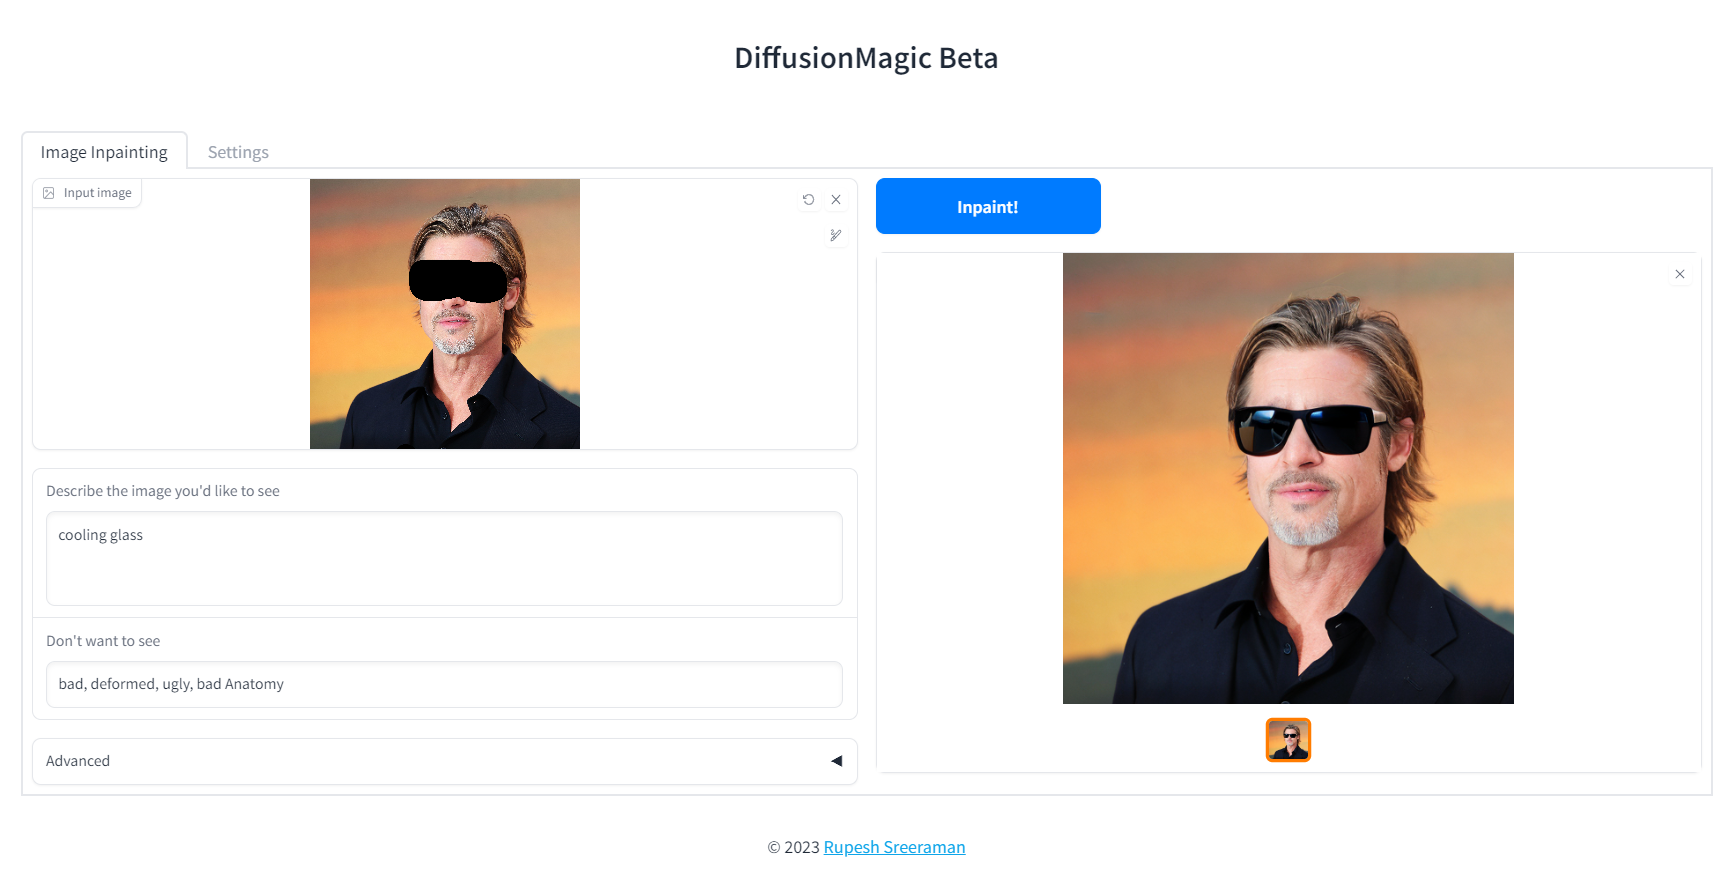
- Image Inpainting
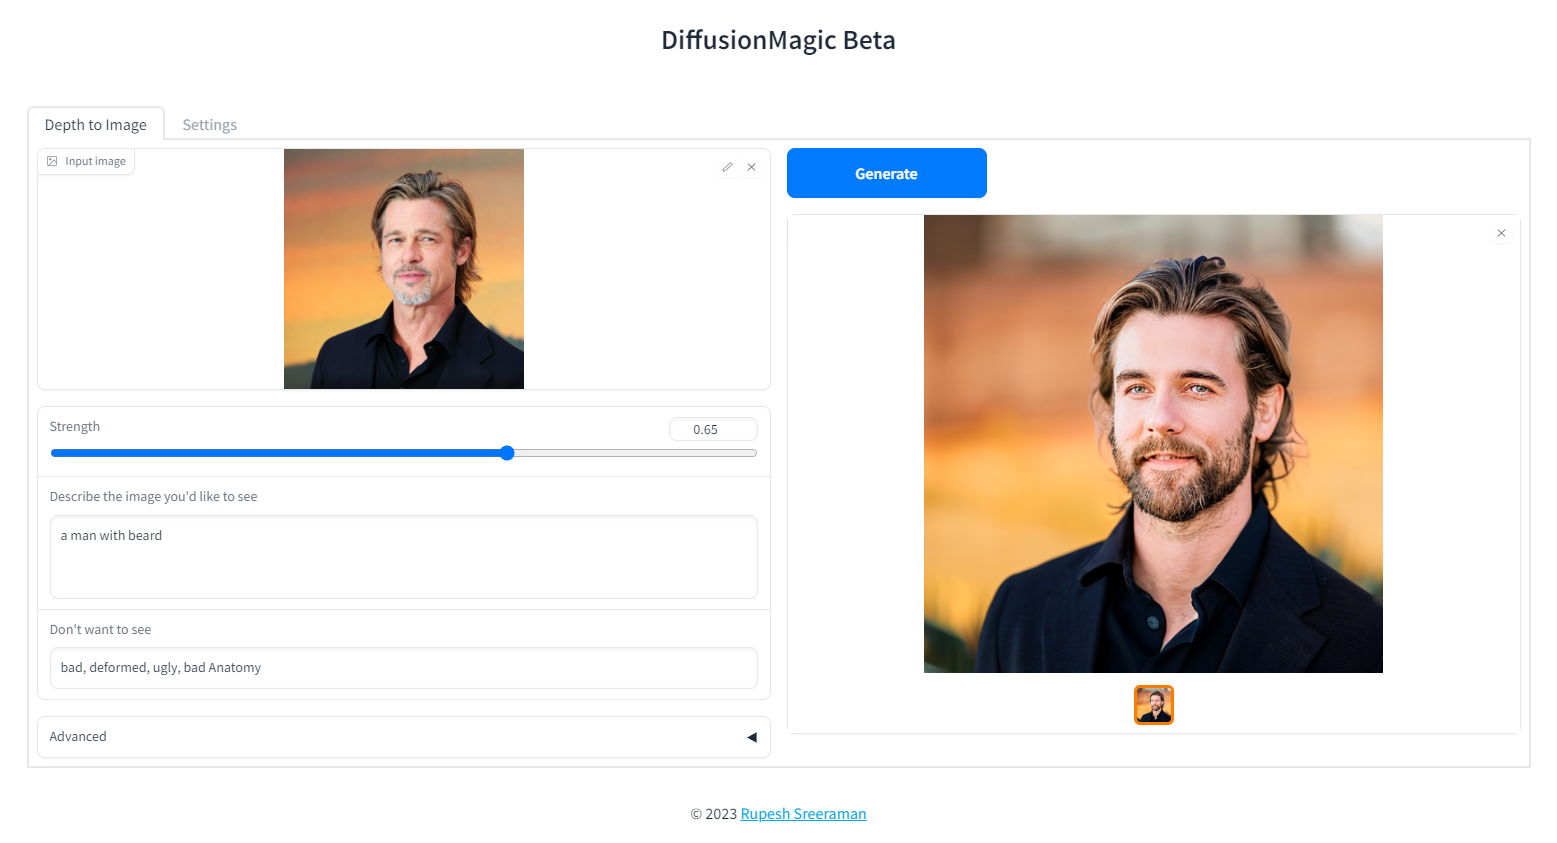
- Depth to Image
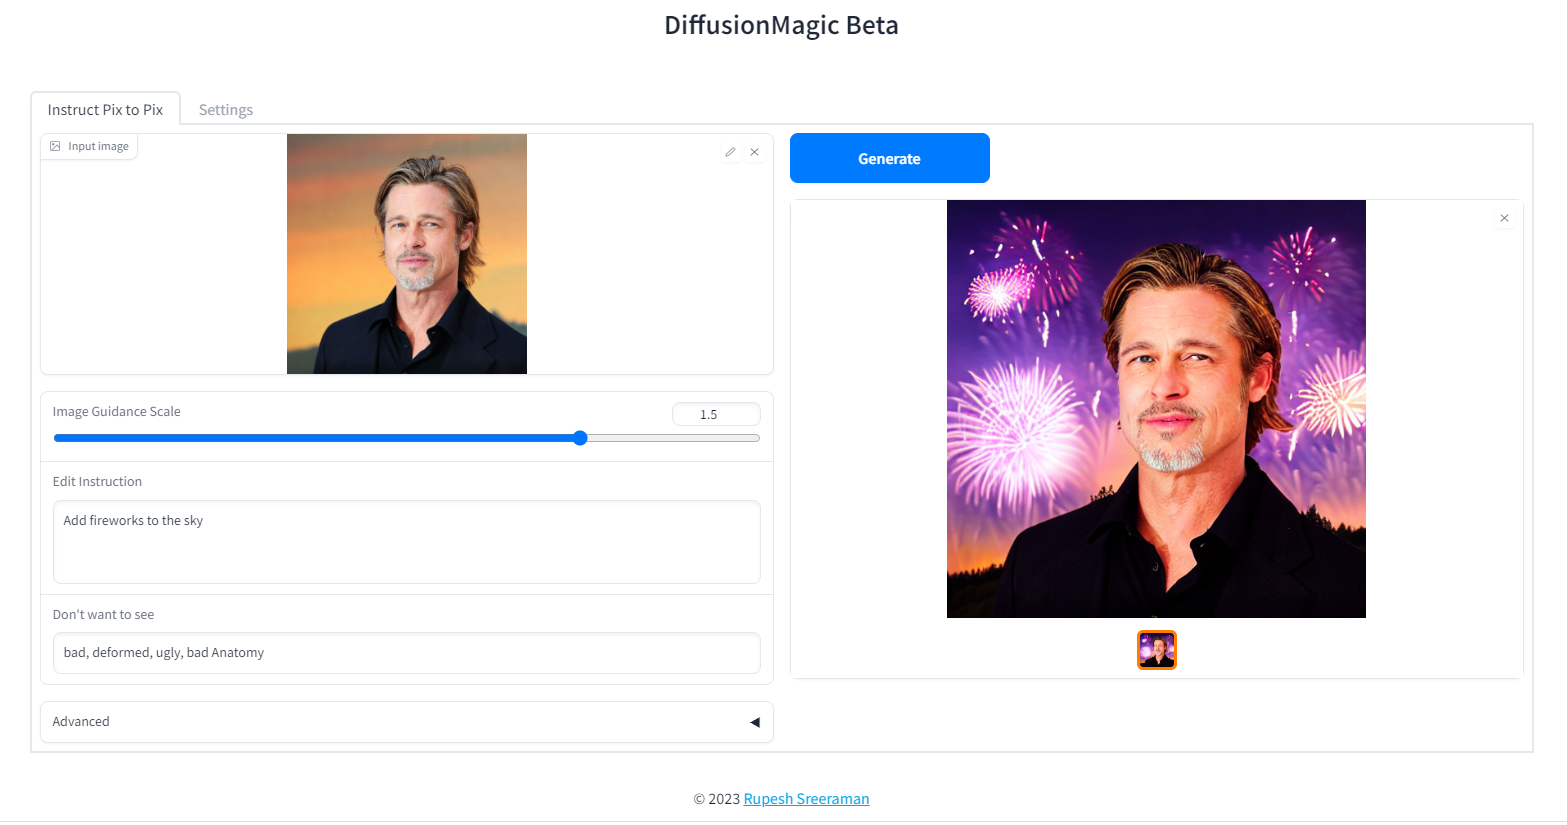
- Instruction based image editing
- Supports Controlnet workflows
- Canny
- MLSD (Line control)
- Normal
- HED
- Pose
- Depth
- Scribble
- Segmentation
- Pytorch 2.0 support
- Supports all stable diffusion Hugging Face models
- Supports Stable diffusion v1 and v2 models, derived models
- Works on Windows/Linux/Mac 64-bit
- Works on CPU,GPU(Recent Nvidia GPU),Apple Silicon M1/M2 hardware
- Supports DEIS scheduler for faster image generation (10 steps)
- Supports 7 different samplers with latest DEIS sampler
- LoRA(Low-Rank Adaptation of Large Language Models) models support (~3 MB size)
- Easy to add new diffuser model by updating stable_diffusion_models.txt
- Low VRAM mode supports GPU with RAM < 4 GB
- Fast model loading
- Supports Attention slicing and VAE slicing
- Simple installation using install.bat/install.sh
Please note that AMD GPUs are not supported.
## Screenshots
### Image variations
### Image Inpainting
### Depth to Image
### Instruction based image editing
## System Requirements:
- Works on Windows/Linux/Mac 64-bit
- Works on CPU,GPU,Apple Silicon M1/M2 hardware
- 12 GB System RAM
- ~11 GB disk space after installation (on SSD for best performance)
## Low VRAM mode < 4GB
DiffusionMagic runs on low VRAM GPUs.
[Here](https://nolowiz.com/easy-way-to-run-stable-diffusion-xl-on-low-vram-gpus/) is our guide to run StableDiffusion XL on low VRAM GPUs.
## Download Release
Download release from the github DiffusionMagic [releases](https://github.com/rupeshs/diffusionmagic/releases/).
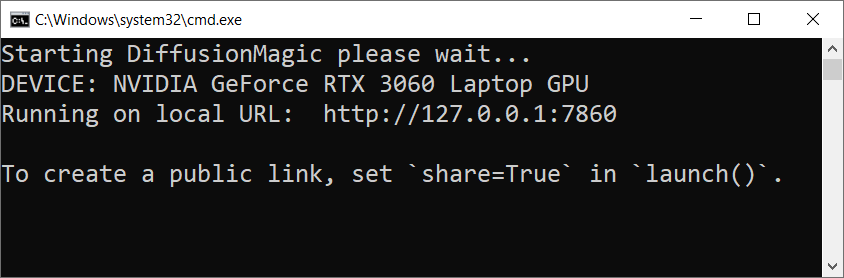
## How to install and run on Windows
Follow the steps to install and run the Diffusion magic on Windows.
- First we need to run(double click) the `install.bat` batch file it will install the necessary dependencies for DiffusionMagic.
(It will take some time to install,depends on your internet speed)
- Run the `install.bat` script.
- To start DiffusionMagic double click `start.bat`
## How to install and run on Linux
Follow the steps to install and run the Diffusion magic on Linux.
- Run the following command:
`chmod +x install.sh`
- Run the `install.sh` script.
` ./install.sh`
- To start DiffusionMagic run:
` ./start.sh`
## How to install and run on Mac (Not tested)
*Testers needed - If you have MacOS feel free to test and contribute*
#### prerequisites
- Mac computer with Apple silicon (M1/M2) hardware.
- macOS 12.6 or later (13.0 or later recommended).
Follow the steps to install and run the Diffusion magic on Mac (Apple Silicon M1/M2).
- Run the following command:
`chmod +x install-mac.sh`
- Run the `install-mac.sh` script.
`./install-mac.sh`
- To start DiffusionMagic run:
` ./start.sh`
Open the browser `http://localhost:7860/`
## Dark mode
To get dark theme :
`http://localhost:7860/?__theme=dark`
## How to switch models
Diffusion magic will change UI based on the model selected.
Follow the steps to switch the models() inpainting,depth to image or instruct pix to pix or any other hugging face stable diffusion model)
- Start the Diffusion Magic app, open the settings tab and change the model
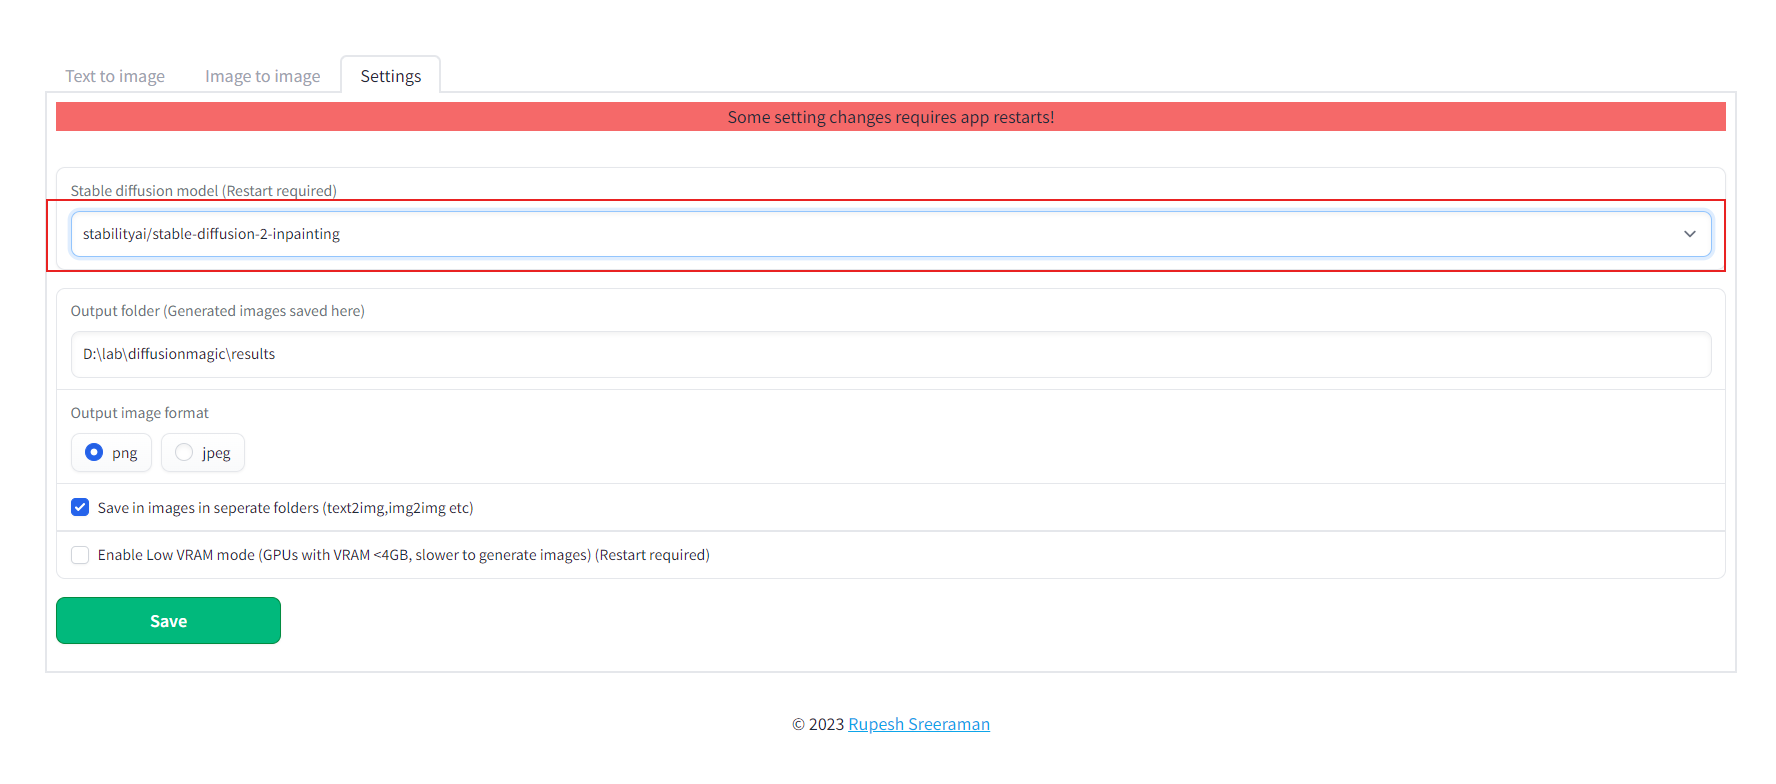
- Save the settings
- Close the app and start using start.bat/start.sh
## How to add new model
We can add any Hugging Face stable diffusion model to DiffusionMagic by
- Adding Hugging Face models id or local folder path to the configs/stable_diffusion_models.txt file
E.g `https://huggingface.co/dreamlike-art/dreamlike-diffusion-1.0`
Here model id is `dreamlike-art/dreamlike-diffusion-1.0`
Or we can clone the model use the local folder path as model id.
- Adding locally copied model path to configs/stable_diffusion_models.txt file
## Linting (Development)
Run the following commands from src folder
`mypy --ignore-missing-imports --explicit-package-bases .`
`flake8 --max-line-length=100 .`
## Contribute
Contributions are welcomed.