https://github.com/rwaldron/imp-io
Electric Imp IO Plugin for Johnny-Five
https://github.com/rwaldron/imp-io
Last synced: 6 months ago
JSON representation
Electric Imp IO Plugin for Johnny-Five
- Host: GitHub
- URL: https://github.com/rwaldron/imp-io
- Owner: rwaldron
- License: mit
- Created: 2014-11-15T01:53:07.000Z (almost 11 years ago)
- Default Branch: master
- Last Pushed: 2018-06-02T06:24:31.000Z (over 7 years ago)
- Last Synced: 2025-04-23T01:57:22.119Z (6 months ago)
- Language: JavaScript
- Homepage:
- Size: 327 KB
- Stars: 12
- Watchers: 4
- Forks: 6
- Open Issues: 1
-
Metadata Files:
- Readme: readme.md
- License: LICENSE-MIT
Awesome Lists containing this project
- awesome-nodebots - Imp-IO - Five IO compatibility plugin for the Electric Imp. (Libraries and Plugins / IO Compatibility Plugins)
README
# Imp-IO
[](https://gitter.im/rwaldron/imp-io?utm_source=badge&utm_medium=badge&utm_campaign=pr-badge&utm_content=badge)
[](https://travis-ci.org/rwaldron/imp-io)
Imp-io is a Firmata-compatibility IO class for writing node programs that interact with [Electric Imp devices](http://www.electricimp.com/docs/). Imp-io was built at [Bocoup](http://bocoup.com/)
### Getting Started
To communicate with an Electric Imp using Johnny-Five w/ Imp-IO, you will need to upload the special
[Tyrion](https://github.com/rwaldron/tyrion) **[agent](https://github.com/rwaldron/tyrion/blob/master/agent.nut)** and **[device](https://github.com/rwaldron/tyrion/blob/master/device.nut)** firmware through Electric Imp's [IDE](https://ide.electricimp.com/login). We recommend you review [Electric Imp's Getting Started](http://www.electricimp.com/docs/gettingstarted/) before continuing.
#### Tyrion Setup
1. Follow Electric Imp's [Getting Started](https://electricimp.com/docs/gettingstarted/) instructions to set up a wifi connection to your Electric Imp device.
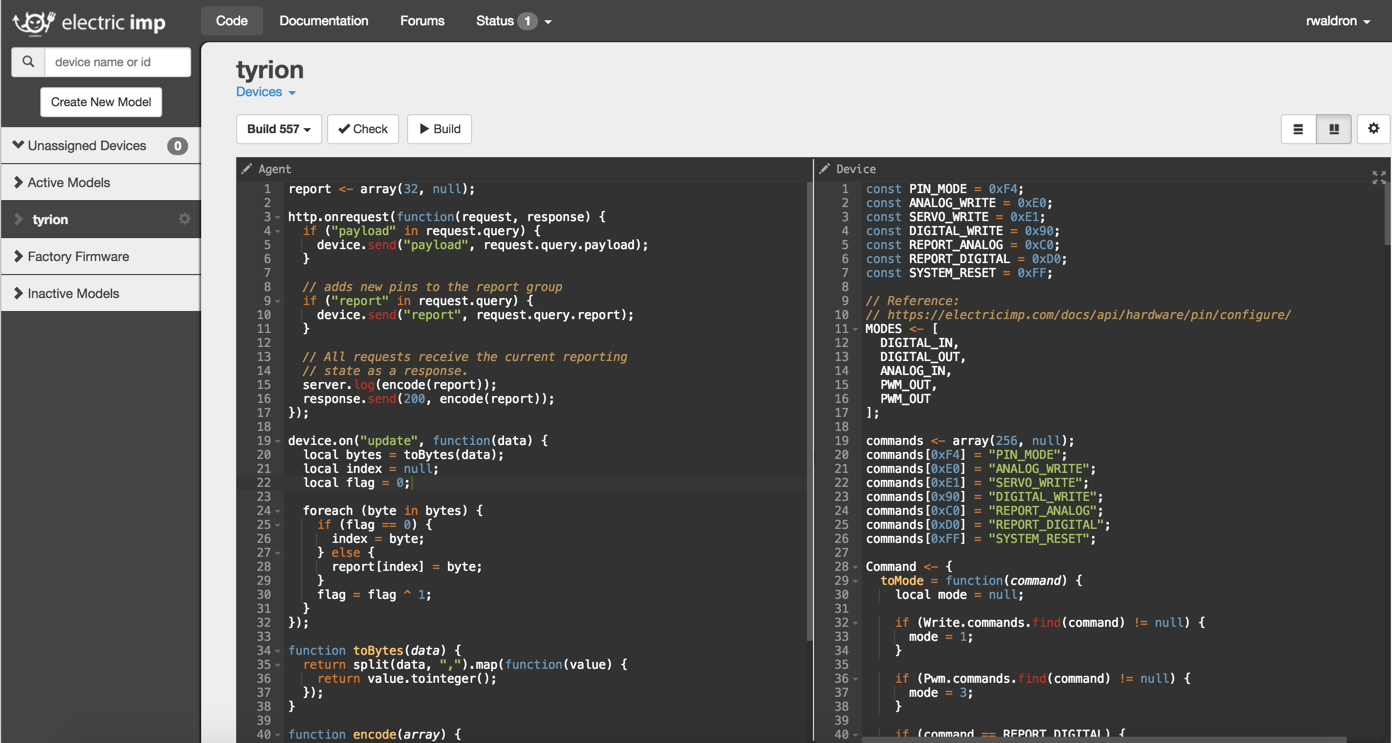
2. Once your Imp is setup, open the [IDE](https://ide.electricimp.com/ide) (familiarize yourself [here](https://electricimp.com/docs/gettingstarted/ide/)) and click **Create New Model**, give it a name and assign it to your device.
3. Paste the contents of [`agent.nut`](https://raw.githubusercontent.com/rwaldron/tyrion/master/agent.nut) into the **Agent** pane and [`device.nut`](https://raw.githubusercontent.com/rwaldron/tyrion/master/device.nut) into the **Device** pane:

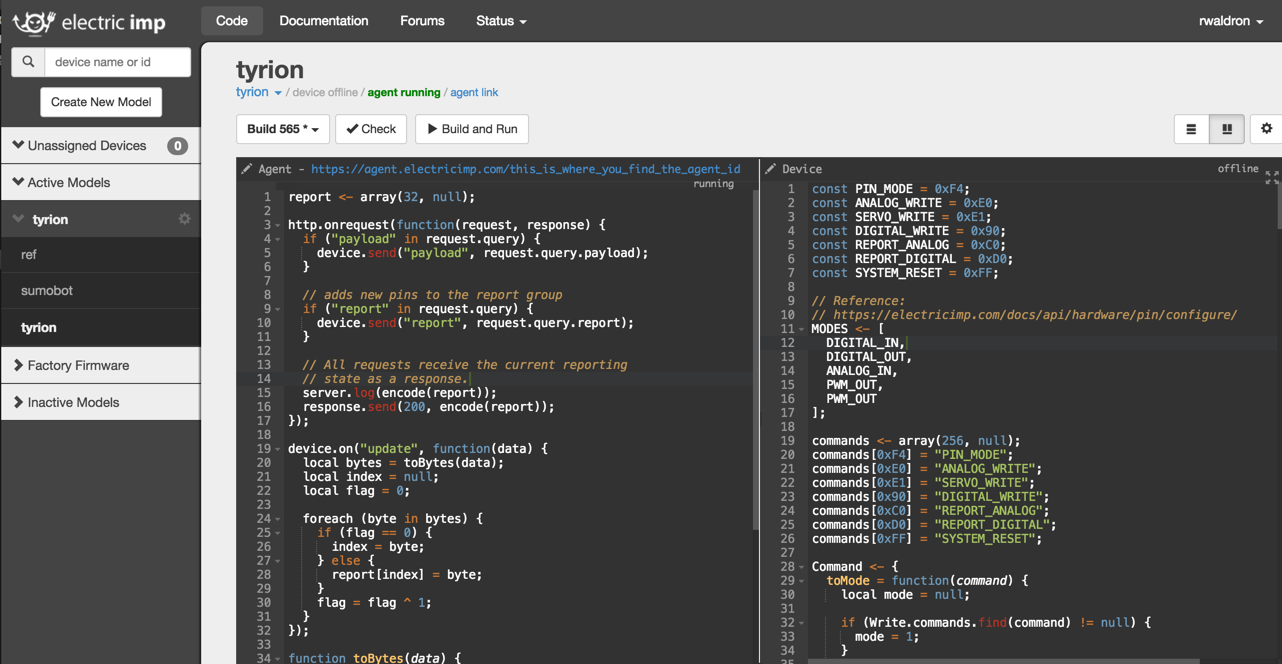
4. Expand the **Active Model** in the column on the left by click on the rightward arrow. The model will appear below, click on the model.
4. Click **Build and Run** to finish preparing your Electric Imp.
#### Imp-IO Setup
In the Electric Imp IDE, locate and copy the **agent id**, located in **agent url** Look for the agent id located in the agent url:

Store your agent ID in a dot file so it can be accessed as a property of `process.env`. Create a file in your home directory called `.imprc` that contains:
```sh
export IMP_AGENT_ID="your agent id"
```
Then add the following to your dot-rc file of choice:
```sh
source ~/.imprc
```
### Blink an Led
The "Hello World" of microcontroller programming:
```js
var Imp = require("imp-io");
var board = new Imp({
agent: process.env.IMP_AGENT_ID
});
board.on("ready", function() {
console.log("CONNECTED");
this.pinMode(9, this.MODES.OUTPUT);
var byte = 0;
// This will "blink" the on board led
setInterval(function() {
this.digitalWrite(9, (byte ^= 1));
}.bind(this), 1000);
});
```
### Johnny-Five IO Plugin
Imp-IO can be used as an [IO Plugin](https://github.com/rwaldron/johnny-five/wiki/IO-Plugins) for [Johnny-Five](https://github.com/rwaldron/johnny-five):
```js
var five = require("johnny-five");
var Imp = require("imp-io");
var board = new five.Board({
io: new Imp({
agent: process.env.IMP_AGENT_ID
})
});
board.on("ready", function() {
var led = new five.Led(9);
led.blink();
});
```
## License
See LICENSE file.