Ecosyste.ms: Awesome
An open API service indexing awesome lists of open source software.
https://github.com/ryotarai/waker
Wake someone up!
https://github.com/ryotarai/waker
Last synced: 9 days ago
JSON representation
Wake someone up!
- Host: GitHub
- URL: https://github.com/ryotarai/waker
- Owner: ryotarai
- License: mit
- Created: 2014-07-20T05:25:52.000Z (over 10 years ago)
- Default Branch: master
- Last Pushed: 2023-01-19T11:04:02.000Z (almost 2 years ago)
- Last Synced: 2024-12-12T18:52:53.026Z (16 days ago)
- Language: Ruby
- Size: 721 KB
- Stars: 134
- Watchers: 10
- Forks: 16
- Open Issues: 24
-
Metadata Files:
- Readme: README.md
- License: LICENSE.txt
Awesome Lists containing this project
README
# Waker [](https://travis-ci.org/ryotarai/waker)
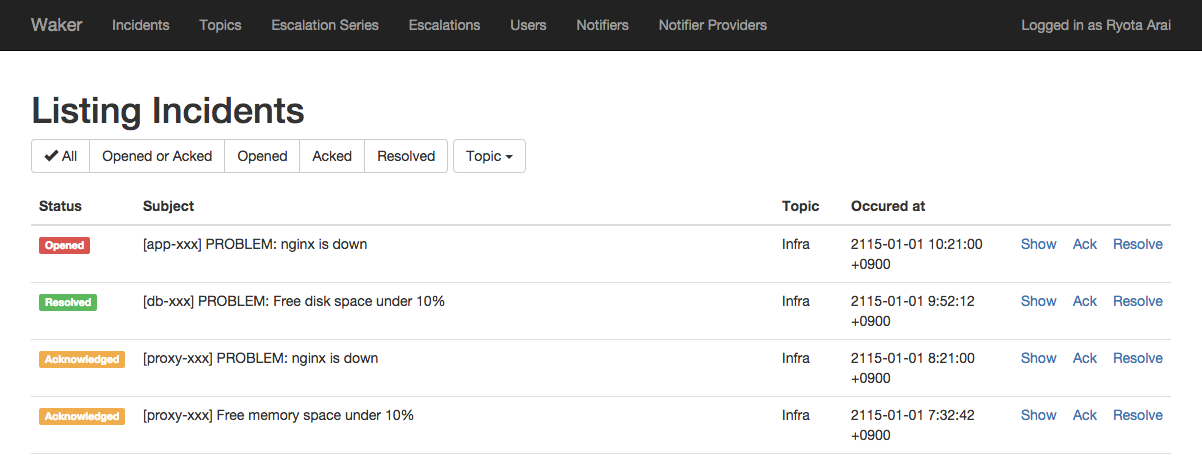
Alert Escalation System

## Overview


## Tutorial
### 1. (Optional) Configure auth provider
You can use external auth provider **optionally**. Currently, Google Auth is only supported (Patches are welcome :) )
```
$ echo 'GOOGLE_CLIENT_ID=...' >> .env
$ echo 'GOOGLE_CLIENT_SECRET=...' >> .env
$ echo 'GOOGLE_DOMAIN=...' >> .env # If you restrict to use Google Apps domain
```
### 2. Start the server
```
$ bundle install
$ foreman start
```
It starts an application server and a Sidekiq worker.
### 3. (If you uses auth provider) Log in
Visit [http://localhost:3000](http://localhost:3000) and log in with your credentials.
A new user account is automatically created and suspended by default. You can activate a user from [http://localhost:3000/users](http://localhost:3000/users) but you have to activate it from `rails console` because you are the first user:
```
$ bundle exec rails c
> User.first.update!(active: true)
```
### 4. Create users
Visit [http://localhost:3000/users/new](http://localhost:3000/users/new) and create new users.
### 5. Create a notifier provider
Visit [http://localhost:3000/notifier_providers/new](http://localhost:3000/notifier_providers/new) and create a notifier provider. See [Notifier Providers](https://github.com/ryotarai/waker#notifier-providers) section for detailed information.
### 6. Create a notifier
Visit [http://localhost:3000/notifiers/new](http://localhost:3000/notifiers/new) and create a notifier. See [Notifier](https://github.com/ryotarai/waker#notifiers) section for detailed information.
### 7. Create an escalation series
Visit [http://localhost:3000/escalation_series/new](http://localhost:3000/escalation_series/new) and create a escalation series. Escalation series is a series of escalations.
### 8. Create escalations
Visit [http://localhost:3000/escalations/new](http://localhost:3000/escalations/new) and create escalations.
- `Escalate to`: Who gets escalated incidents
- `Escalate after sec`: Seconds to escalate incidents since the incidents created
### 9. Create a topic
Visit [http://localhost:3000/topics/new](http://localhost:3000/topics/new) and create topics.
### 10. Send alerts to the topic
Suppoted alerts generaters are below:
- Mailgun ( `http://localhost:3000/topics/1/mailgun` )
- Mackerel ( `http://localhost:3000/topics/1/mackerel` )
- Alertmanager ( `http://localhost:3000/topics/1/alertmanager` )
- Slack( `http://localhost:3000/topics/1/slack` )
If you want to use Mailgun, you can configure Mailgun route setting with Mailgun endpoint you can see in [http://localhost:3000/topics/1/mailgun](http://localhost:3000/topics/1/mailgun)
## Configuration
### Notifier Providers
#### HipChat
- `api_token`
- `api_version`: `v1` or `v2`
#### Twilio
- `account_sid`
- `auth_token`
- `from`: Phone number
#### Mailgun
- `api_key`
- `from`: Email address
### Notifiers
#### Common fields
These are supported by all notifier provider
```
or_conditions:
- japanese_weekday: true
not_between: 9:30+0900-18:30+0900
- not_japanese_weekday: true
```
#### HipChat
- `room`: Room name or ID
#### Twilio
- `to`: Phone number
#### Mailgun
- `to`: Email address