https://github.com/sczerwinski/home-monitoring-master
Home Monitoring – Master Raspberry Pi
https://github.com/sczerwinski/home-monitoring-master
bluetooth dht22 iot raspberry-pi
Last synced: 4 months ago
JSON representation
Home Monitoring – Master Raspberry Pi
- Host: GitHub
- URL: https://github.com/sczerwinski/home-monitoring-master
- Owner: sczerwinski
- Created: 2020-04-04T18:53:19.000Z (over 5 years ago)
- Default Branch: develop
- Last Pushed: 2020-04-11T18:35:15.000Z (over 5 years ago)
- Last Synced: 2025-01-24T07:28:48.470Z (6 months ago)
- Topics: bluetooth, dht22, iot, raspberry-pi
- Language: Python
- Homepage:
- Size: 671 KB
- Stars: 0
- Watchers: 2
- Forks: 0
- Open Issues: 0
-
Metadata Files:
- Readme: README.md
Awesome Lists containing this project
README
# Home Monitoring – Master Raspberry Pi
## Dependencies
The script requires Python 3.6 and the following libraries:
```shell script
pip3 install adafruit-circuitpython-dht
pip3 install pygatt
pip3 install requests
pip3 install rx
```
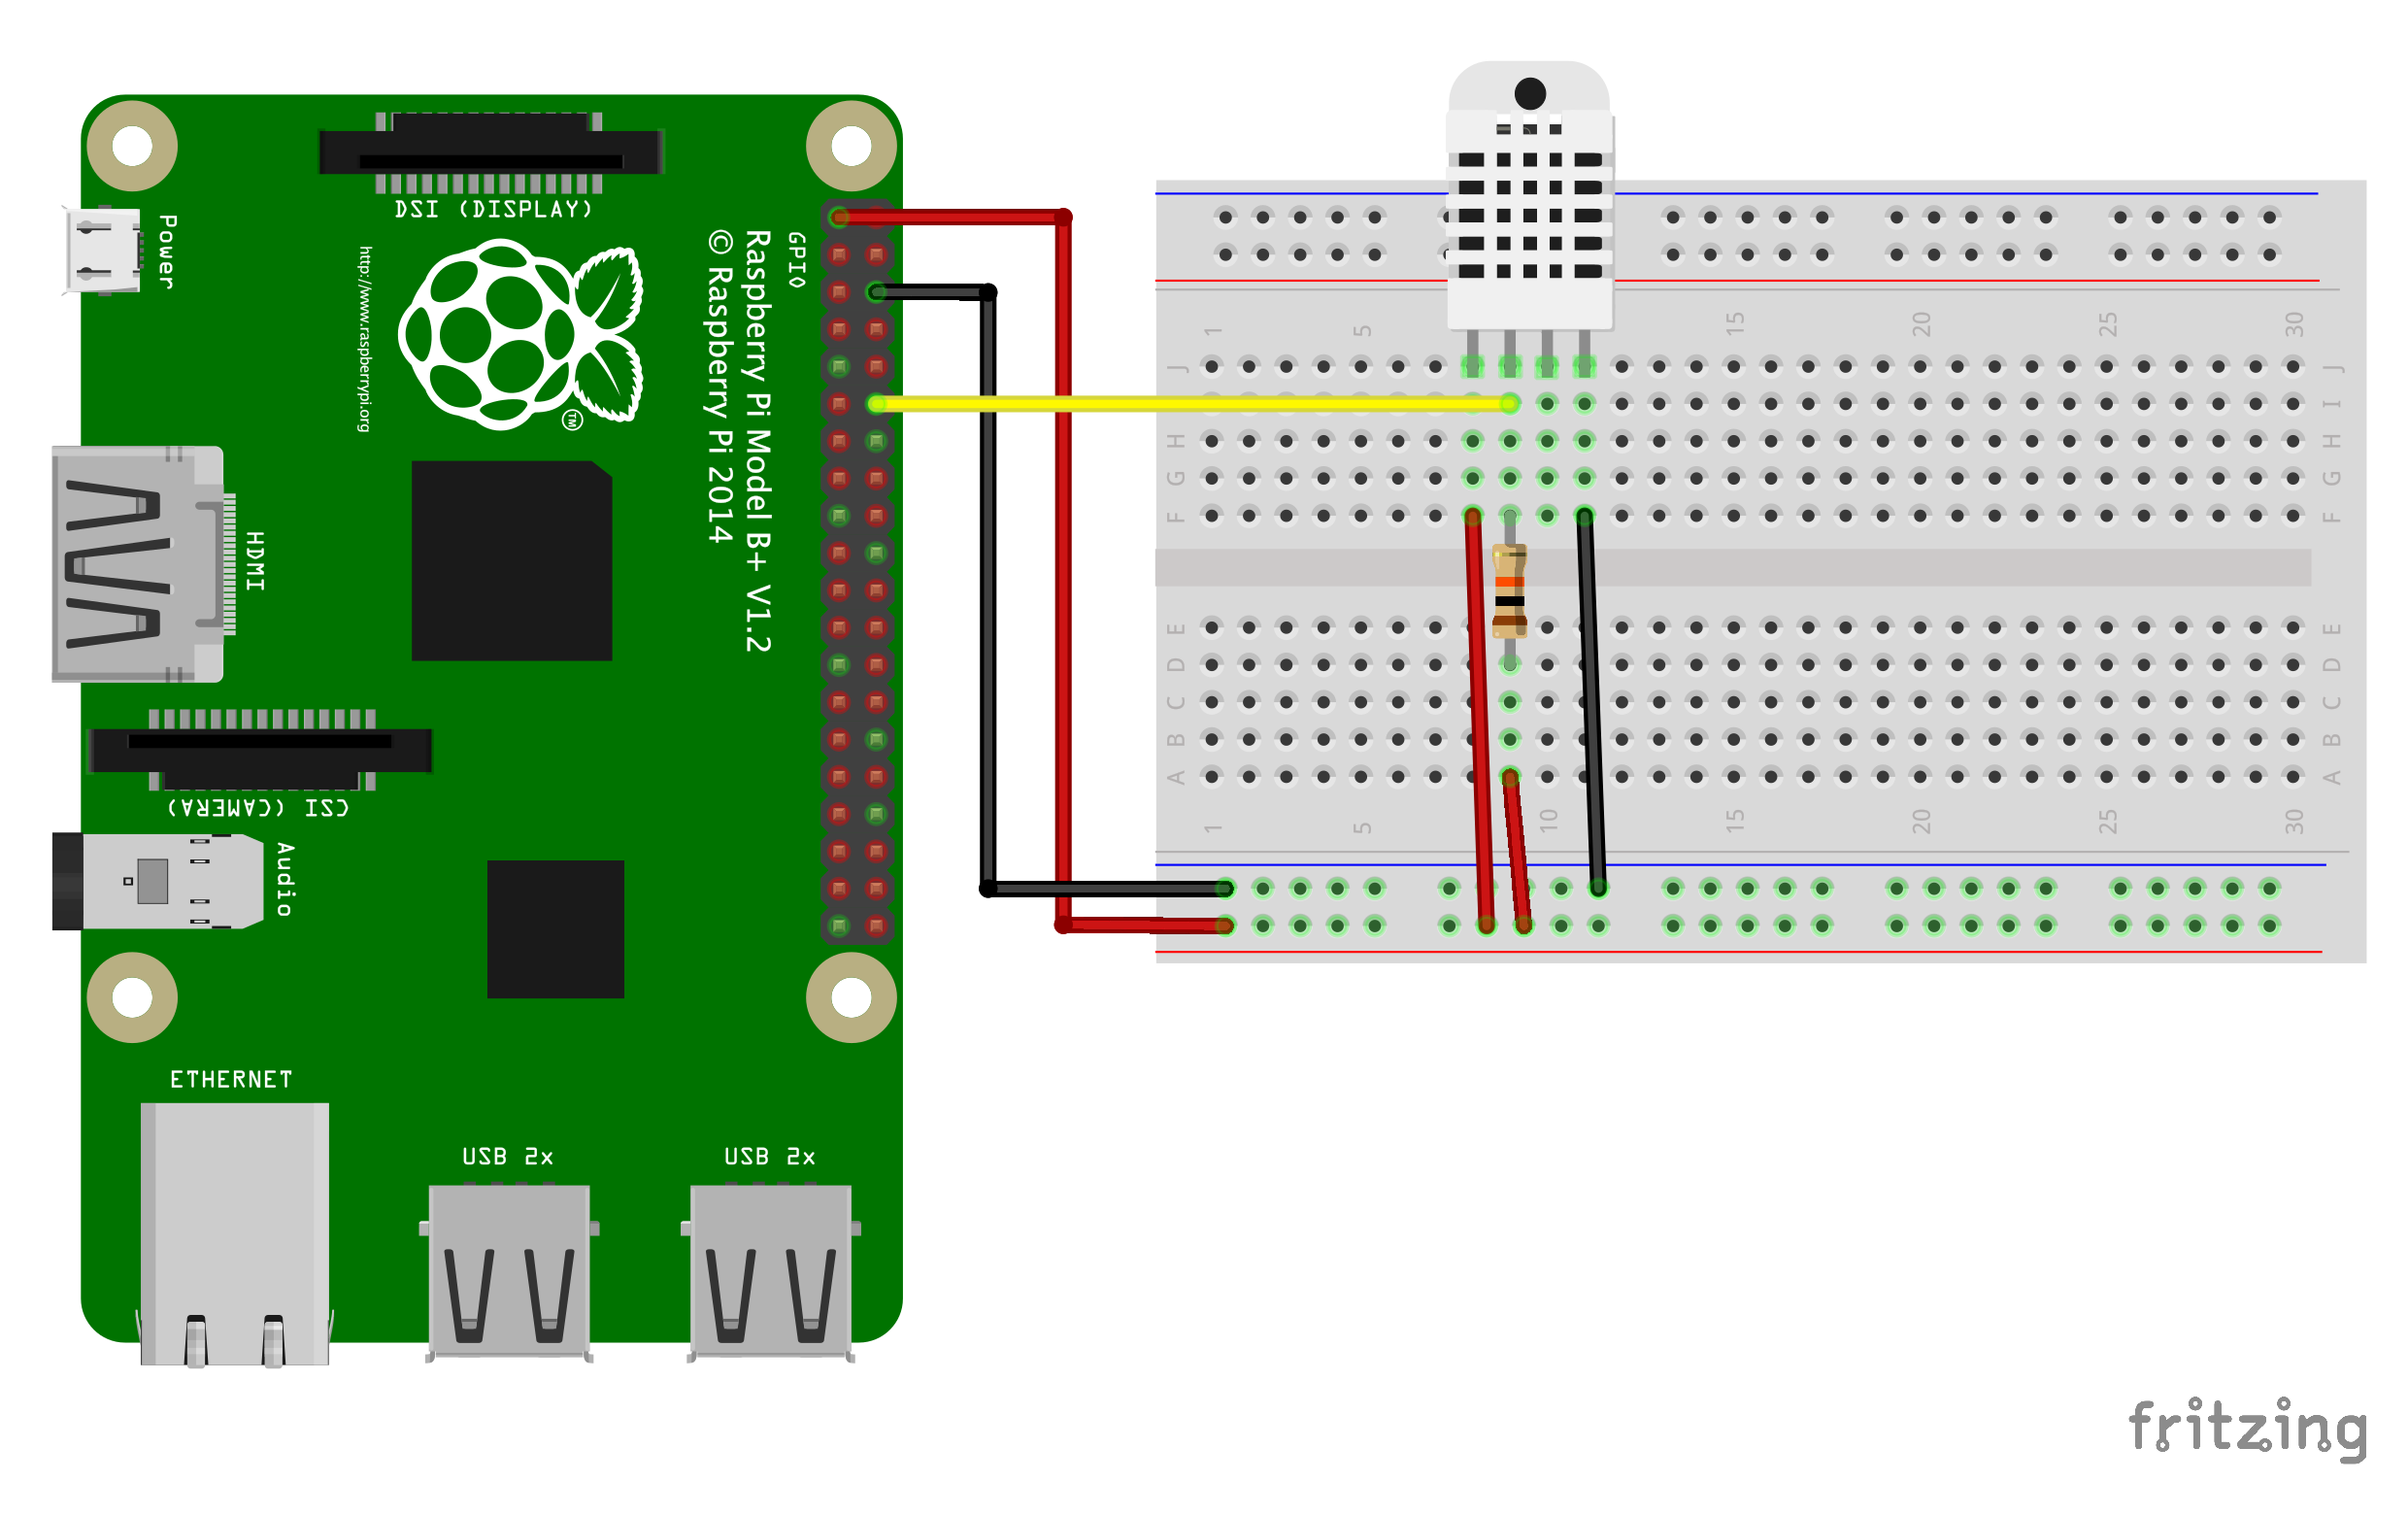
## Components
* Raspberry Pi 3 Model B+ (any model with Bluetooth on board will be sufficient)
* DHT22 humidity and temperature sensor
* 5~10k Ohm resistor (unless using 3-pin DHT22 circuit with integrated resistor)
## Configuration
Create file `app.conf` to set up the script, e.g.:
```properties
[main]
interval=60.0
bluetooth_name=Kitchen
gpio_name=Living room
[bluetooth]
address=00:15:83:00:9F:FA
uuid=0000ffe1-0000-1000-8000-00805f9b34fb
[server]
base_url=http://localhost/home-monitoring/api
```
`[main]`:
* `interval` – sensor readings interval (default `60.0`)
* `bluetooth_name` – name of the location for the [Arduino](https://github.com/sczerwinski/home-monitoring-slave)
* `gpio_name` – name of the location for the Raspberry Pi
`[bluetooth]`:
* `address` – BLE device address used to connect to the [Arduino](https://github.com/sczerwinski/home-monitoring-slave)
* `uuid` – BLE device characteristic UUID, used by [Arduino](https://github.com/sczerwinski/home-monitoring-slave)
to send sensor readings
`[server]`:
* `base_url` – base URL of the [REST API](https://github.com/sczerwinski/home-monitoring-server)
## Running Application
Start the application using command:
```shell script
python3 main.py
```
## Running Application On System Boot
To start the application on boot and stop it on shutdown,
create three files (run `chmod +x` on each script):
### start.sh
This script starts the application.
```shell script
#!/bin/bash
WORKING_DIR="$(dirname "$0")"
cd $WORKING_DIR
python3 main.py &
```
### stop.sh
This script stops the application.
```shell script
#!/bin/bash
pkill -SIGTERM -f main.py
```
### /etc/init.d/home-monitoring-master
This script defines how to start and stop the application.
Use `sudo` when creating/editing/changing access permissions for the script.
```shell script
#!/bin/sh
# /etc/init.d/home-monitoring-master
### BEGIN INIT INFO
# Provides: home-monitoring-master
# Required-Start: $local_fs $network home-monitoring-server
# Required-Stop: $local_fs $network
# Default-Start: 2 3 4 5
# Default-Stop: 0 1 6
# Short-Description: Home Monitoring Master Script
# Description: Home Monitoring Master Script
### END INIT INFO
SCRIPTS_PATH=/path/to/scripts
case $1 in
start)
/bin/bash ${SCRIPTS_PATH}/start.sh
;;
stop)
/bin/bash ${SCRIPTS_PATH}/stop.sh
;;
restart)
/bin/bash ${SCRIPTS_PATH}/stop.sh
/bin/bash ${SCRIPTS_PATH}/start.sh
;;
esac
exit 0
```
Remember to run:
```shell script
sudo chmod +x /etc/init.d/home-monitoring-master
```
### Init Script Configuration
To run the script automatically on system boot, execute commands:
```shell script
sudo update-rc.d home-monitoring-master defaults
sudo update-rc.d home-monitoring-master enable
```
## Attributions
Images exported from Fritzing editor shared under [CC BY-SA 3.0 License](https://creativecommons.org/licenses/by-sa/3.0/).