https://github.com/secretshardul/the-graph-celo
https://github.com/secretshardul/the-graph-celo
Last synced: 5 months ago
JSON representation
- Host: GitHub
- URL: https://github.com/secretshardul/the-graph-celo
- Owner: secretshardul
- License: mit
- Created: 2021-04-12T14:26:03.000Z (over 5 years ago)
- Default Branch: master
- Last Pushed: 2021-07-19T07:09:05.000Z (about 5 years ago)
- Last Synced: 2025-08-16T16:48:55.295Z (11 months ago)
- Language: Solidity
- Size: 336 KB
- Stars: 7
- Watchers: 1
- Forks: 1
- Open Issues: 0
-
Metadata Files:
- Readme: README.md
- License: LICENSE
Awesome Lists containing this project
README
# How to create subgraphs for Celo smart contracts
[](https://www.youtube.com/watch?v=OgIiySTRGQE)
## 1. What is the Graph Protocol?
The Graph protocol lets you create GraphQL APIs called subgraphs for your smart contracts. Sounds like a lot? We'll break it down.
### What is GraphQL?
GraphQL is a query language for web APIs. Instead of having multiple dumb endpoints, we can have a smart GraphQL endpoint which:
- Lets you view the API schema. Schemas are auto-generated, so say goodbye to writing swagger files.
- Lets you fetch exactly what you want in a single query.
[](http://www.youtube.com/watch?v=eIQh02xuVw4)
### I'm able to read my contract data. Why use another protocol?
Querying directly needs additional setup. For this you need access to a Celo node, plus a frontend library like `web3.js`.
In contrast, you can directly query GraphQL from your app or command line.
## 2. How does it work?
1. Blockchains store a permanent history of transactions. Graph protocol indexes the transactions for our contract, similar to how Google indexes the internet. We can query these transactions through a GraphQL schema.
2. Smart contracts let us define and trigger events. For example, when we transfer ERC20 tokens to someone, a `transfer` event is triggered. Graph protocol listens to these events in real time and updates it's data. This way, we always get the latest data.
3. Graph protocol is decentralized. We don't need to worry about API server going down.
## 3. Show me the code
Resources:
1. [Source code](https://github.com/secretshardul/the-graph-celo)
2. [Deployed subgraph](https://thegraph.com/explorer/subgraph/secretshardul/celo-subgraph-tutorial)
3. [Deployed Celo contract](https://explorer.celo.org/address/0x56d04968f959ae609a32c8eadb8cd3db90490a7f/transactions)
We will create a subgraph for a gravatar contract deployed on the Celo mainnet. This is a fork of the official Graph tutorial with modifications made for Celo.
1. Visit the Graph Protocol website and sign in with Github.
2. Go to your dashboard and click on **Add Subgraph**. Fill in the required details and click on **Create subgraph**.
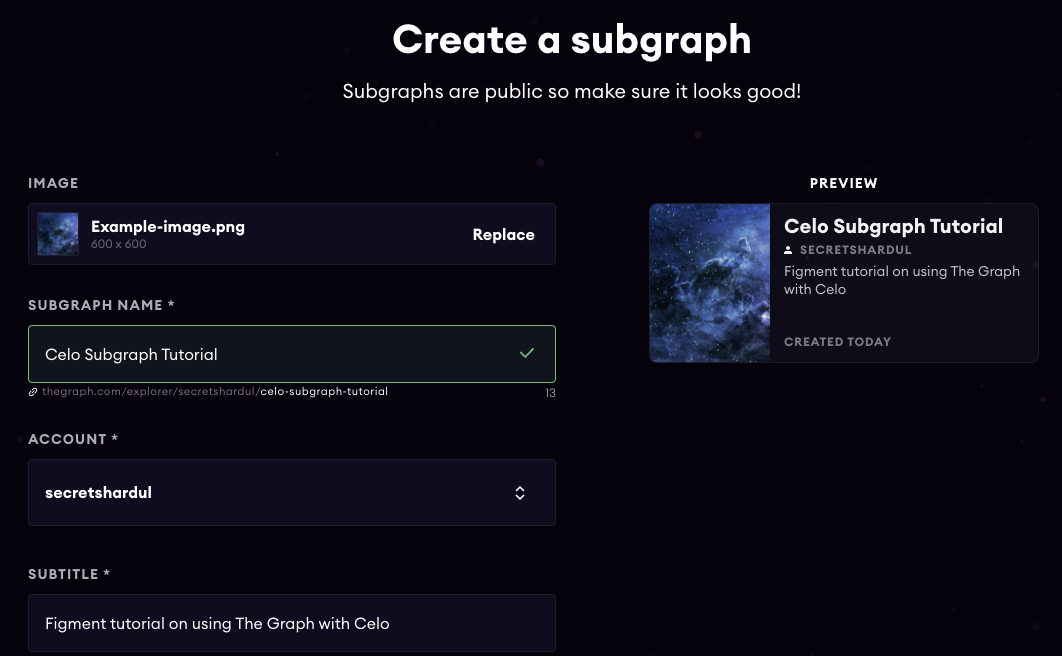
3. We will follow the steps shown on the dashboard with a small variation.
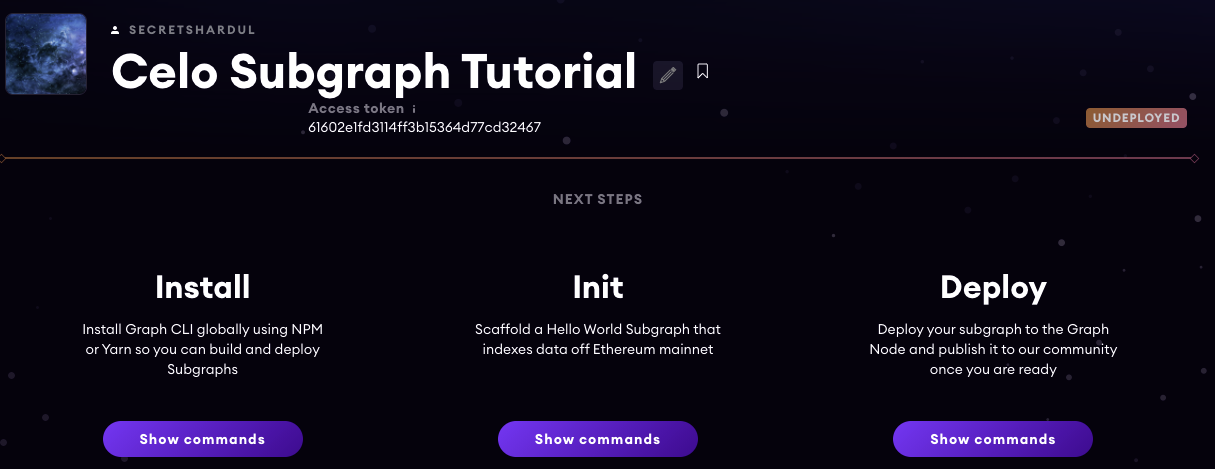
1. Install Graph CLI using NPM or Yarn.
```sh
npm install -g @graphprotocol/graph-cli
# or
yarn global add @graphprotocol/graph-cli
```
2. Initialize the Celo starter project. We have diverged from the instructions because we're building on Celo.
```sh
git clone https://github.com/secretshardul/the-graph-celo.git
# Install node dependencies using
yarn
# or
npm install
```
3. Deploying
```sh
# Authenticate Graph CLI. The access token is displayed on your subgraph dashboard.
graph auth https://api.thegraph.com/deploy/
# Deploy
graph deploy \
--debug \
--node https://api.thegraph.com/deploy/ \
--ipfs https://api.thegraph.com/ipfs/ \
```
4. Refresh the page to see your deployed subgraph. It can take some hours for data to be synced, after which our queries will return the desired results.
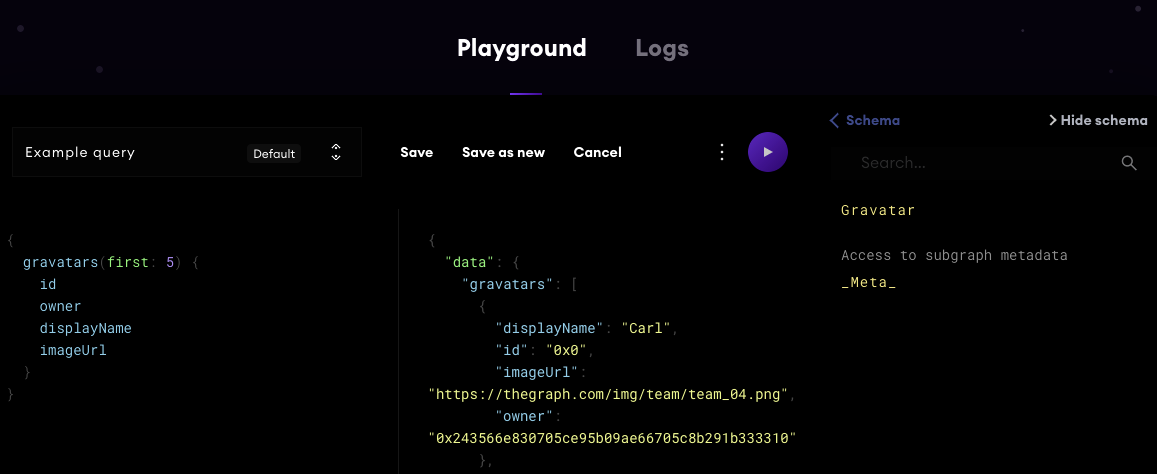
5. Time to run a GraphQL query. A default query is given which gets data of the first five gravatars. Press the run button. Here's the query again for reference.
```graphql
{
gravatars(first: 5) {
id
owner
displayName
imageUrl
}
}
```
You will get a result similar to
```json
{
"data": {
"gravatars": [
{
"displayName": "Carl",
"id": "0x0",
"imageUrl": "https://thegraph.com/img/team/team_04.png",
"owner": "0x243566e830705ce95b09ae66705c8b291b333310"
}
]
}
}
```
**Note**: Wait for the syncing to complete, otherwise you will see an empty result.
6. How to use subgraphs in our apps? I've created a Postman public workspace for demonstration.
1. [Visit the Celo subgraph workspace](https://www.postman.com/cloudy-firefly-3880/workspace/the-graph-celo/request/9305744-4a75a867-c2b3-446b-be18-864c7e6550eb). You can try out the predefined queries by pressing the run button.
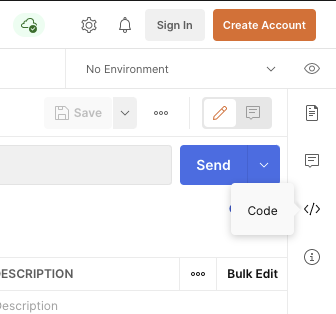
2. Press the code button on the right side. Select the language of your choice to get the generated code. For example we get this snippet for cURL. Paste it in your terminal (Mac or Linux) to see the result.
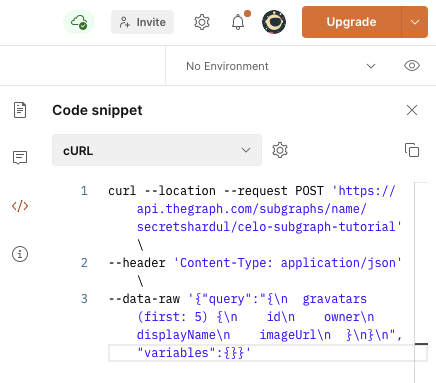
```sh
curl --location --request POST 'https://api.thegraph.com/subgraphs/name/secretshardul/the-graph-celo' \
--header 'Content-Type: application/json' \
--data-raw '{"query":"{\n gravatars(first: 5) {\n id\n owner\n displayName\n imageUrl\n }\n}\n","variables":{}}'
```
## 4. Explanation
1. We have a predeployed contract `GravatarRegistry`.
```sol
pragma solidity ^0.4.0;
contract GravatarRegistry {
event NewGravatar(uint id, address owner, string displayName, string imageUrl);
event UpdatedGravatar(uint id, address owner, string displayName, string imageUrl);
struct Gravatar {
address owner;
string displayName;
string imageUrl;
}
Gravatar[] public gravatars;
mapping (uint => address) public gravatarToOwner;
mapping (address => uint) public ownerToGravatar;
function createGravatar(string _displayName, string _imageUrl) public {
require(ownerToGravatar[msg.sender] == 0);
uint id = gravatars.push(Gravatar(msg.sender, _displayName, _imageUrl)) - 1;
gravatarToOwner[id] = msg.sender;
ownerToGravatar[msg.sender] = id;
emit NewGravatar(id, msg.sender, _displayName, _imageUrl);
}
function getGravatar(address owner) public view returns (string, string) {
uint id = ownerToGravatar[owner];
return (gravatars[id].displayName, gravatars[id].imageUrl);
}
function updateGravatarName(string _displayName) public {
require(ownerToGravatar[msg.sender] != 0);
require(msg.sender == gravatars[ownerToGravatar[msg.sender]].owner);
uint id = ownerToGravatar[msg.sender];
gravatars[id].displayName = _displayName;
emit UpdatedGravatar(id, msg.sender, _displayName, gravatars[id].imageUrl);
}
function updateGravatarImage(string _imageUrl) public {
require(ownerToGravatar[msg.sender] != 0);
require(msg.sender == gravatars[ownerToGravatar[msg.sender]].owner);
uint id = ownerToGravatar[msg.sender];
gravatars[id].imageUrl = _imageUrl;
emit UpdatedGravatar(id, msg.sender, gravatars[id].displayName, _imageUrl);
}
// the gravatar at position 0 of gravatars[]
// is fake
// it's a mythical gravatar
// that doesn't really exist
// dani will invoke this function once when this contract is deployed
// but then no more
function setMythicalGravatar() public {
require(msg.sender == 0x8d3e809Fbd258083a5Ba004a527159Da535c8abA);
gravatars.push(Gravatar(0x0, " ", " "));
}
}
```
Note the events `NewGravatar` and `UpdatedGravatar` in the above code.
2. Look at [subgraph.yaml](https://github.com/secretshardul/the-graph-celo/blob/master/subgraph.yaml).
```yml
specVersion: 0.0.2
description: Gravatar contract subgraph for Celo
repository: https://github.com/secretshardul/the-graph-celo
schema:
file: ./schema.graphql
dataSources:
- kind: ethereum/contract
name: Gravity
network: celo
source:
address: '0x56d04968f959ae609a32c8eadb8cd3db90490a7f' # Deployed contract address
abi: Gravity
mapping:
kind: ethereum/events
apiVersion: 0.0.4
language: wasm/assemblyscript
entities:
- Gravatar
abis:
- name: Gravity
file: ./abis/Gravity.json
eventHandlers:
- event: NewGravatar(uint256,address,string,string)
handler: handleNewGravatar
- event: UpdatedGravatar(uint256,address,string,string)
handler: handleUpdatedGravatar
file: ./src/mapping.ts
```
Note how we have defined handlers `handleNewGravatar` and `handleUpdatedGravatar` for our contract events. They're defined in [src/mapping.ts](https://github.com/secretshardul/the-graph-celo/blob/master/src/mapping.ts). They perform indexing in response to contract events.
3. Look at [schema.graphql](https://github.com/secretshardul/the-graph-celo/blob/master/schema.graphql). The generated subgraph will follow this schema.
4. Look at [migrations/3_create_gravatars.js](https://github.com/secretshardul/the-graph-celo/blob/master/migrations/3_create_gravatars.js). When this contract was created, we created a gravatar for Carl for demonstration purposes.
## 5. Creating subgraphs for your own contracts
1. Make changes to the contracts
2. Create a file `.env` which will contain environment variables. Look at [.env-template](https://github.com/secretshardul/the-graph-celo/blob/master/.env-template) for the required format. We need two variables:
1. `DATAHUB_API_KEY`: Sign up for Datahub and pick Celo from the available protocols. Copy the API key and paste it here. Datahub provides private RPCs for popular blockchains, letting us create high performance apps. We get a free tier of 100l requests per day.
2. `PRIVATE_KEY`: Private key of a Celo account. This is different from your Mnemonic. You will need real CELO tokens on this account since we are deploying to the mainnet.
You can optionally look at [truffle.js](https://github.com/secretshardul/the-graph-celo/blob/master/truffle.js) to see how these parameters are used in code.
```js
require('babel-register')
require('babel-polyfill')
require('dotenv').config()
const HDWalletProvider = require('truffle-hdwallet-provider')
const ContractKit = require('@celo/contractkit')
const Web3 = require('web3')
function getCeloProvider(network) {
const web3 = new Web3(`https://celo-${network}--rpc.datahub.figment.io/apikey/${process.env.DATAHUB_API_KEY}/`)
const account = web3.eth.accounts.privateKeyToAccount(process.env.PRIVATE_KEY)
const client = ContractKit.newKitFromWeb3(web3)
client.addAccount(account.privateKey)
return client.web3.currentProvider
}
const alfajoresProvider = getCeloProvider('alfajores')
const celoMainnetProvider = getCeloProvider('mainnet')
module.exports = {
networks: {
development: { // Local development
host: '127.0.0.1',
port: 9545,
network_id: '*',
},
// Change network to celo-alfajores in subgraph.yaml for testnet support
celo-alfajores: {
provider: alfajoresProvider,
network_id: '44787',
skipDryRun: true,
},
celo: {
provider: celoMainnetProvider,
network_id: '42220'
},
},
compilers: {
solc: {
version: '0.4.25'
}
}
}
```
3. Run the deployment script. This will build your contract and deploy it on Celo mainnet. Ensure that you have Celo tokens on your address.
```
truffle migrate --network celo
```
3. Note the address of the deployed contract. Replace the address field in [subgraph.yaml](https://github.com/secretshardul/the-graph-celo/blob/master/subgraph.yaml) with this field.
4. Depending on your contract, you may need to edit the handler code and GraphQL schema.
5. Generate Graph build files using
```sh
yarn codegen
# or
npm run codegen
```
6. Run the Graph protocol [deployment script mentioned earlier](#3-show-me-the-code).
## 5. Caveats and considerations
1. Deployed subgraphs can't be renamed or deleted, although they can be updated.
2. Subgraphs only support reads/queries. You can't send transactions to update the blockchain state.
## 6. Futher reading
- [The Graph documentation](https://thegraph.com/docs/)
- [graphql.org](https://graphql.org/)