https://github.com/sh3d0ww01f/waterdragon
WaterDragon:用GithubAction实现代理功能。红队,cve,代理池,隐匿,攻防,对抗,hackone,src,proxy,CVE-2020,CVE-2021,CVE-2022
https://github.com/sh3d0ww01f/waterdragon
gfw gfw-breaker github-actions proxy python redteam
Last synced: about 1 year ago
JSON representation
WaterDragon:用GithubAction实现代理功能。红队,cve,代理池,隐匿,攻防,对抗,hackone,src,proxy,CVE-2020,CVE-2021,CVE-2022
- Host: GitHub
- URL: https://github.com/sh3d0ww01f/waterdragon
- Owner: sh3d0ww01f
- Created: 2022-06-20T15:38:53.000Z (about 4 years ago)
- Default Branch: main
- Last Pushed: 2023-02-14T14:02:27.000Z (over 3 years ago)
- Last Synced: 2025-03-30T20:31:48.749Z (over 1 year ago)
- Topics: gfw, gfw-breaker, github-actions, proxy, python, redteam
- Language: Python
- Homepage:
- Size: 2.33 MB
- Stars: 142
- Watchers: 3
- Forks: 27
- Open Issues: 1
-
Metadata Files:
- Readme: README.md
Awesome Lists containing this project
README
# WaterDragon 水龙 v1.0
和水一样 灵活多变,
# 建议用小号跑 大号容易封号
# 如果手头有多余邮箱的 可以多注册几个github号来跑这个
像龙一样 来去自如
## 用Github Action实现IP代理功能 也可翻墙
### 核心
这个项目的**核心是NPS[https://github.com/ehang-io/nps] + Github Action**
Github Action和SCF实现代理池的方式不一样:**SCF可以用网关触发,但是Action不是**,Action是给你提供了一台可出不可入的如同私人电脑一般的一个虚拟环境,所以我们如果要想用代理到Action然后去访问 就要我们的**vps 帮忙,先做个穿透,然后转发**
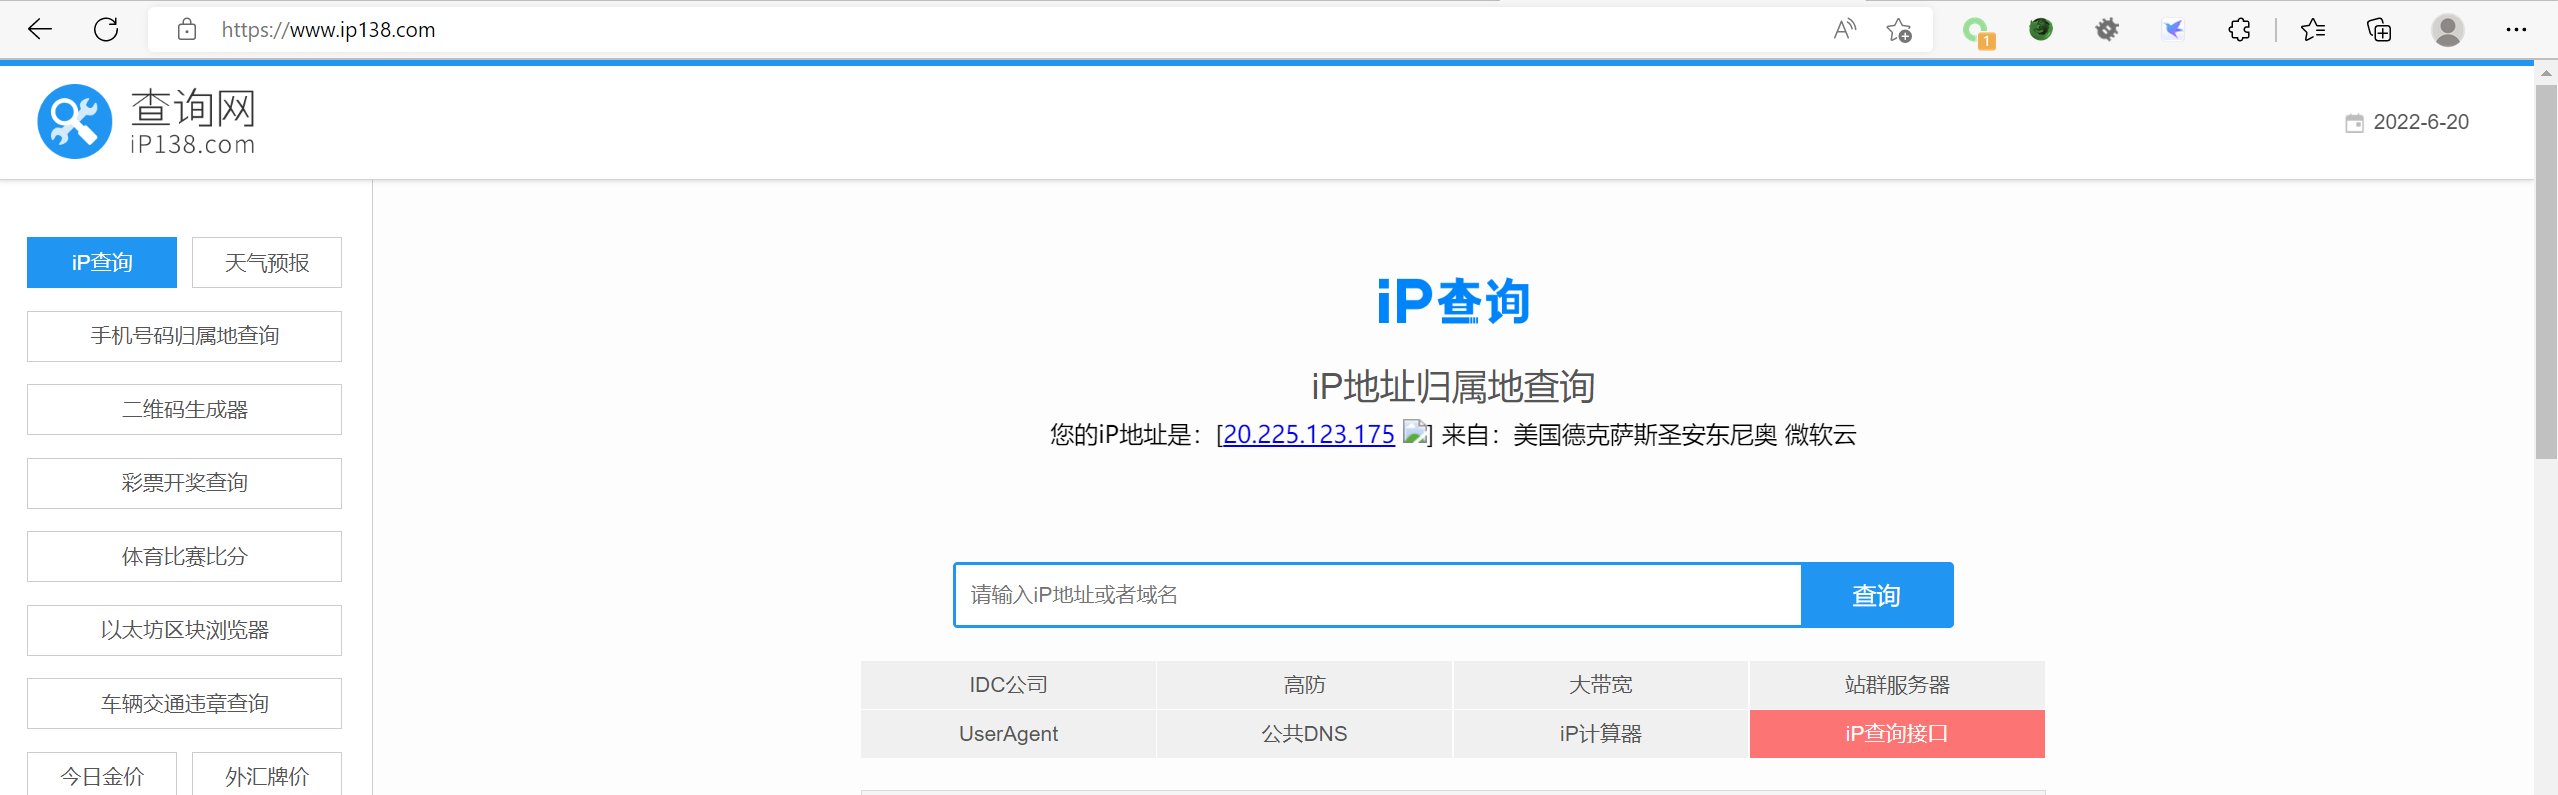
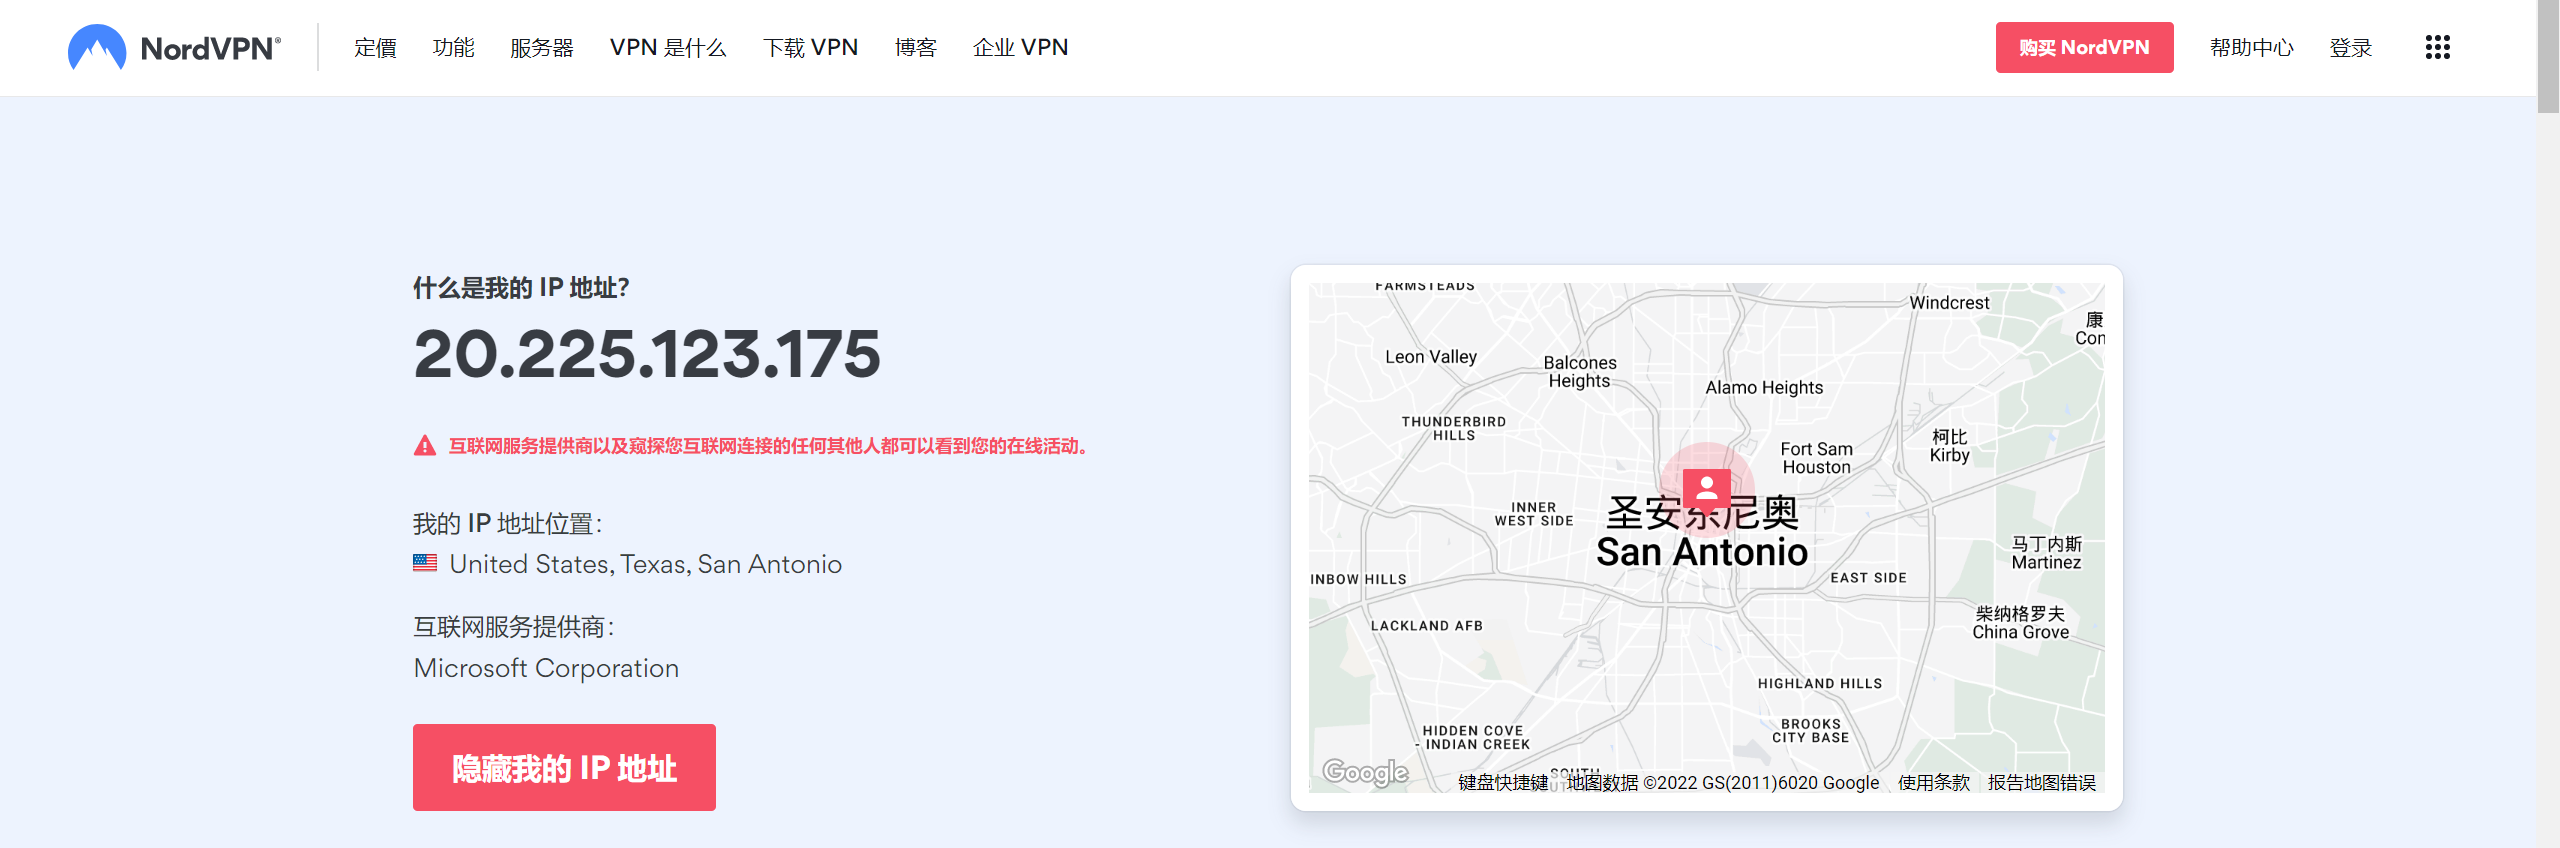
## Tips:代理出去的IP是微软云的 而且IP众多 也不容易被ban
# 使用方法
#### 1.在vps上装nps并配置
下载地址 [https://github.com/ehang-io/nps/releases/tag/v0.26.10](https://github.com/ehang-io/nps/releases/tag/v0.26.10)
下载合适的版本 这里下载的是linux_amd64_server.tar.gz
执行`tar -axvf linux_amd64_server.tar.gz`进行解压
#### 2.然后去修改配置
`cd conf`
`vim nps.conf`
我们修改一共2个东西
###### ①.首先是 web_password
**这个改的越复杂越好** 是nps的管理面板 不过这里不用gui的 用的是webapi,用不到gui的密码,如果是默认的123,会被有心人搞破坏
###### ②.然后是这里

把`auth_key`前面的注释去掉,然后修改auth_key的值
然后把`auth_crypt_key`修改为别的16位长度的一个字符串 (默认也可以
**然后把auth_key 记住备用**
##### ③.http_proxy_port
可改可不改 **改了是防止http监听端口与apache,nginx这些服务冲突**
##### ④.web_port
**api的地址**,监听的是8080端口 如果8080与本地软件有冲突则更改(按需更改),如果改过就是 vps的ip:web_port
然后回到上级目录`cd .. `
随后让nps运行` ./nps`
如果正常未出现问题 就可以把nps挂后台然后进行 下一步了
`nohup ./nps &`
#### 3.获取github_token
##### 前往[https://github.com/settings/tokens](https://github.com/settings/tokens)
### 里面勾勾要全勾上哦
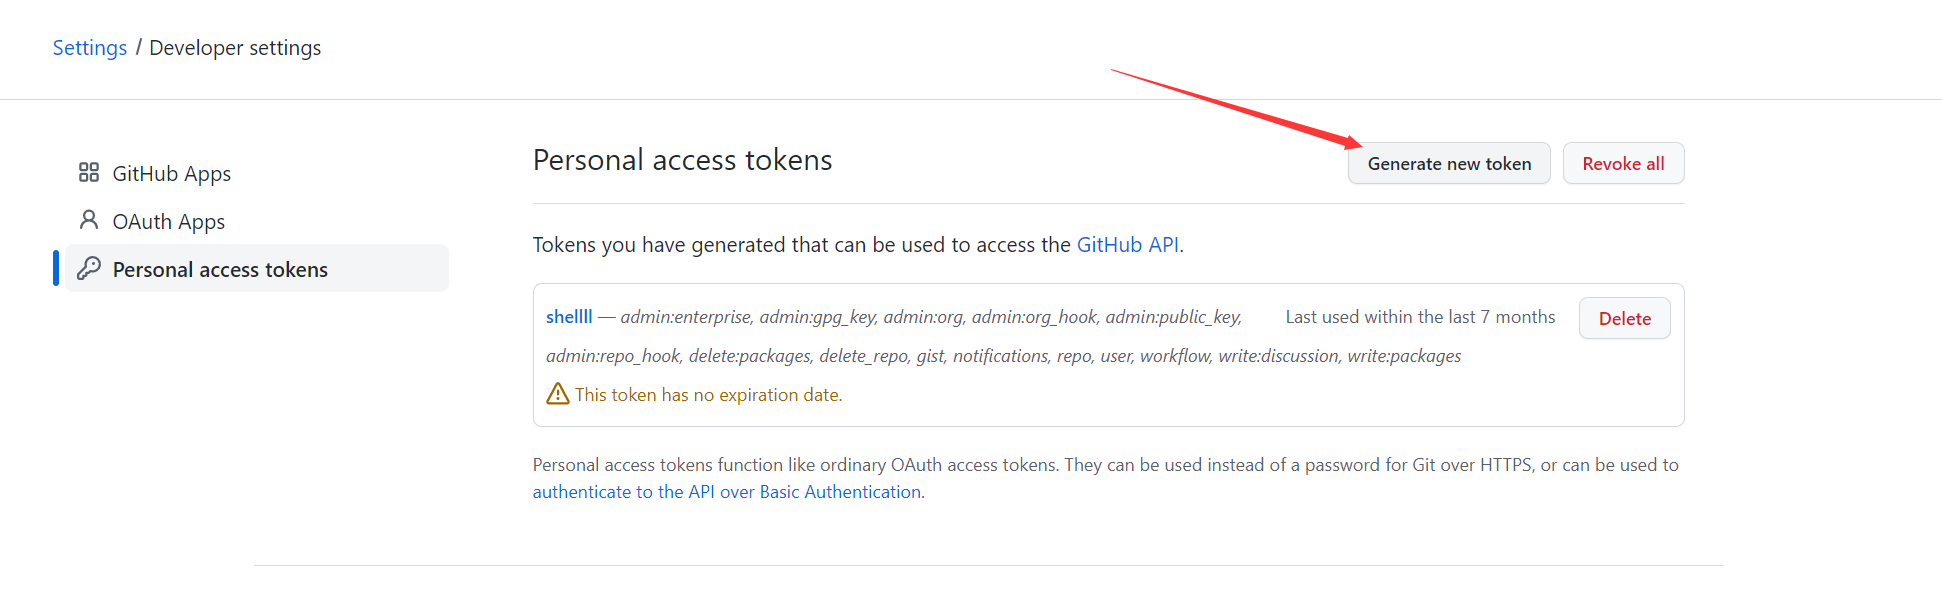
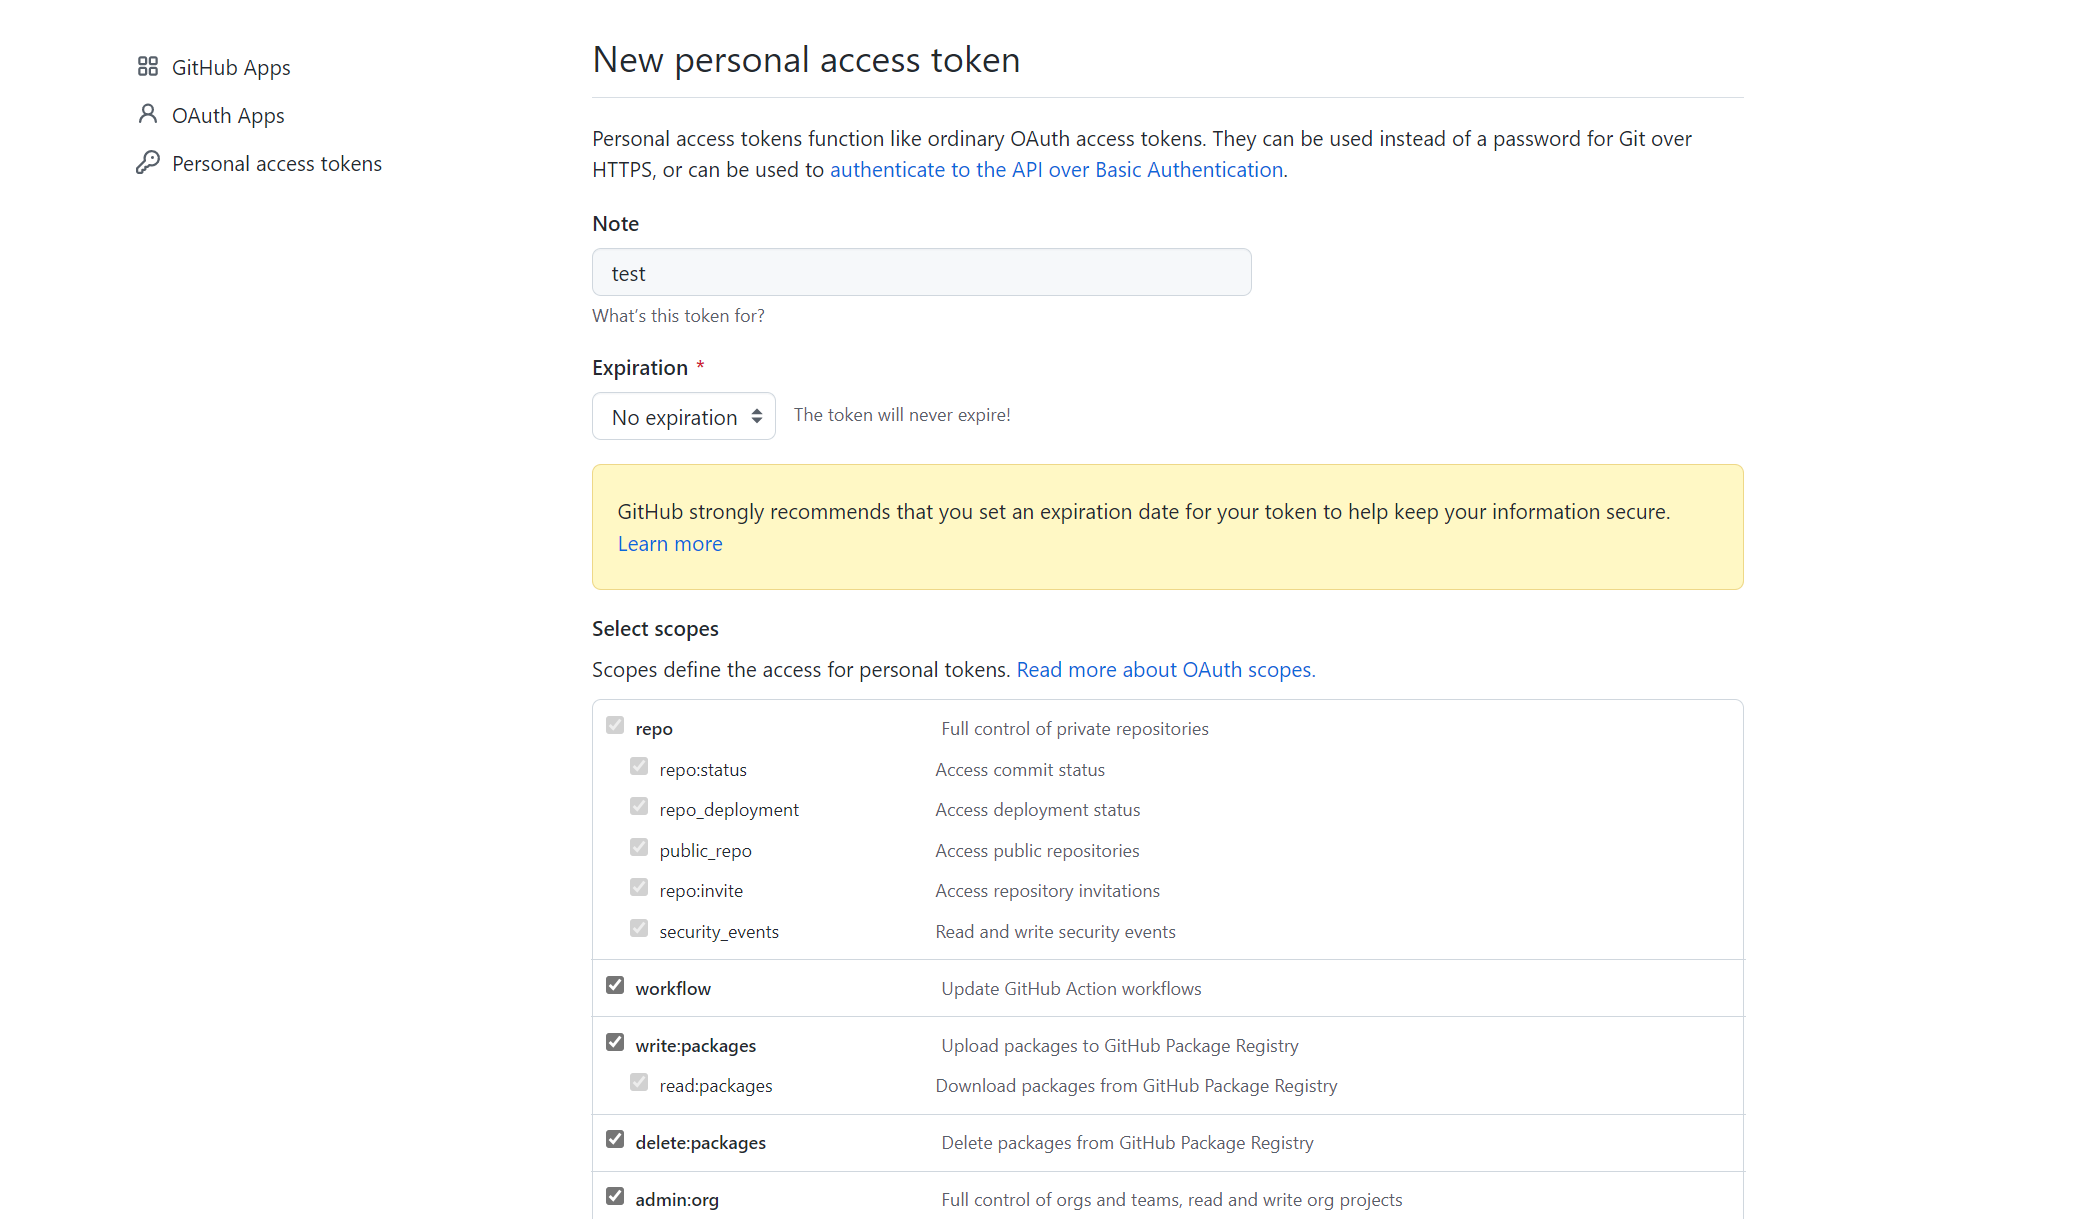
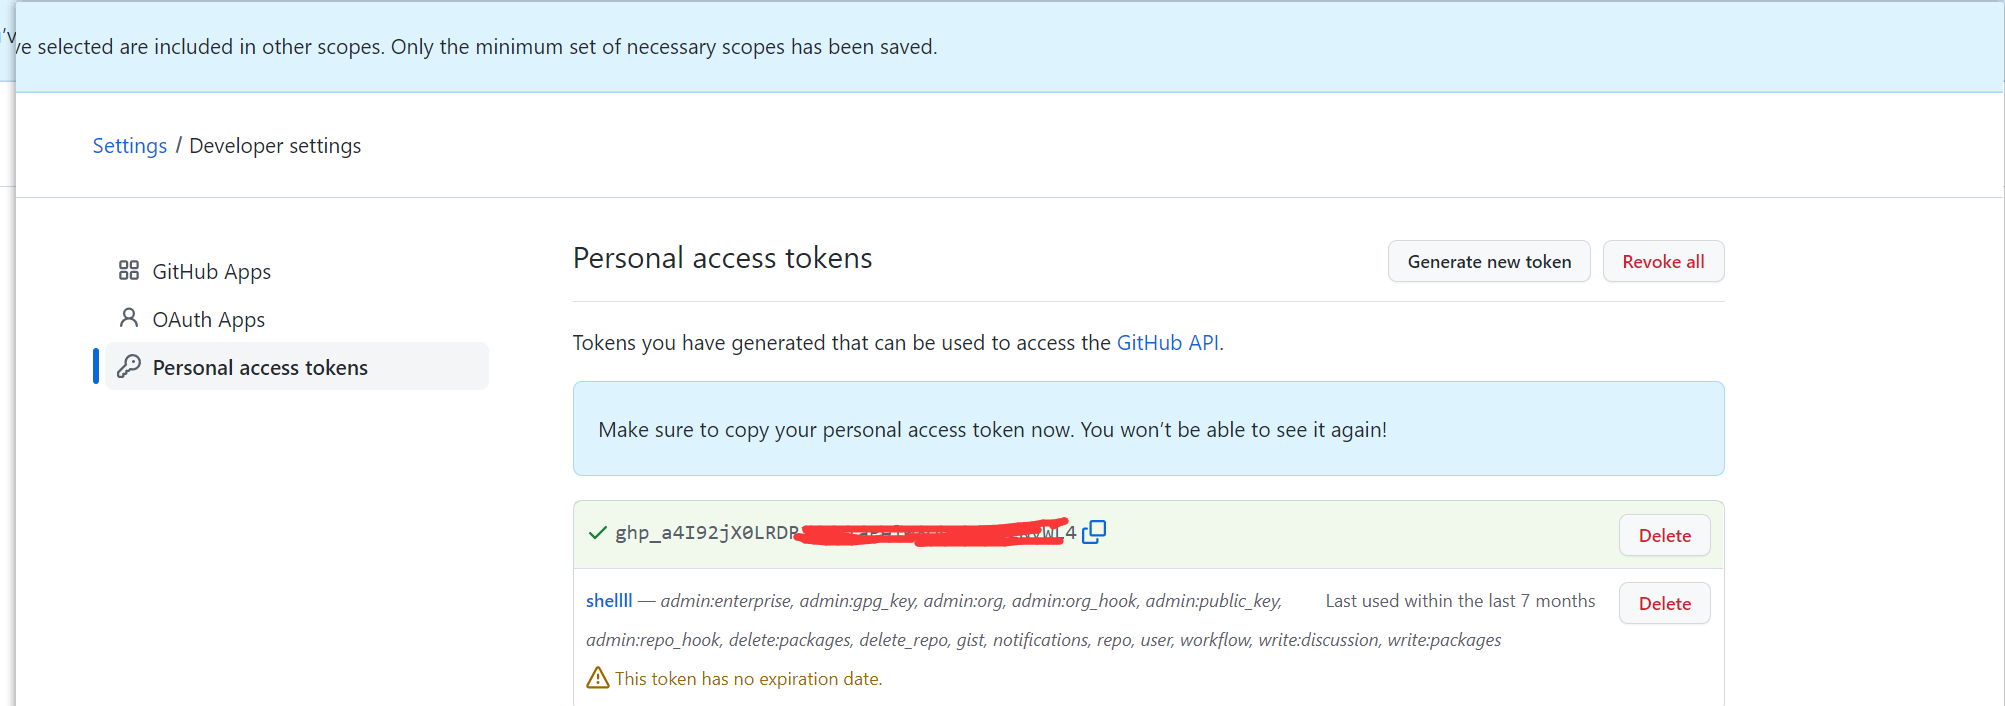
**记住备用**
#### 配置脚本
首先下载脚本
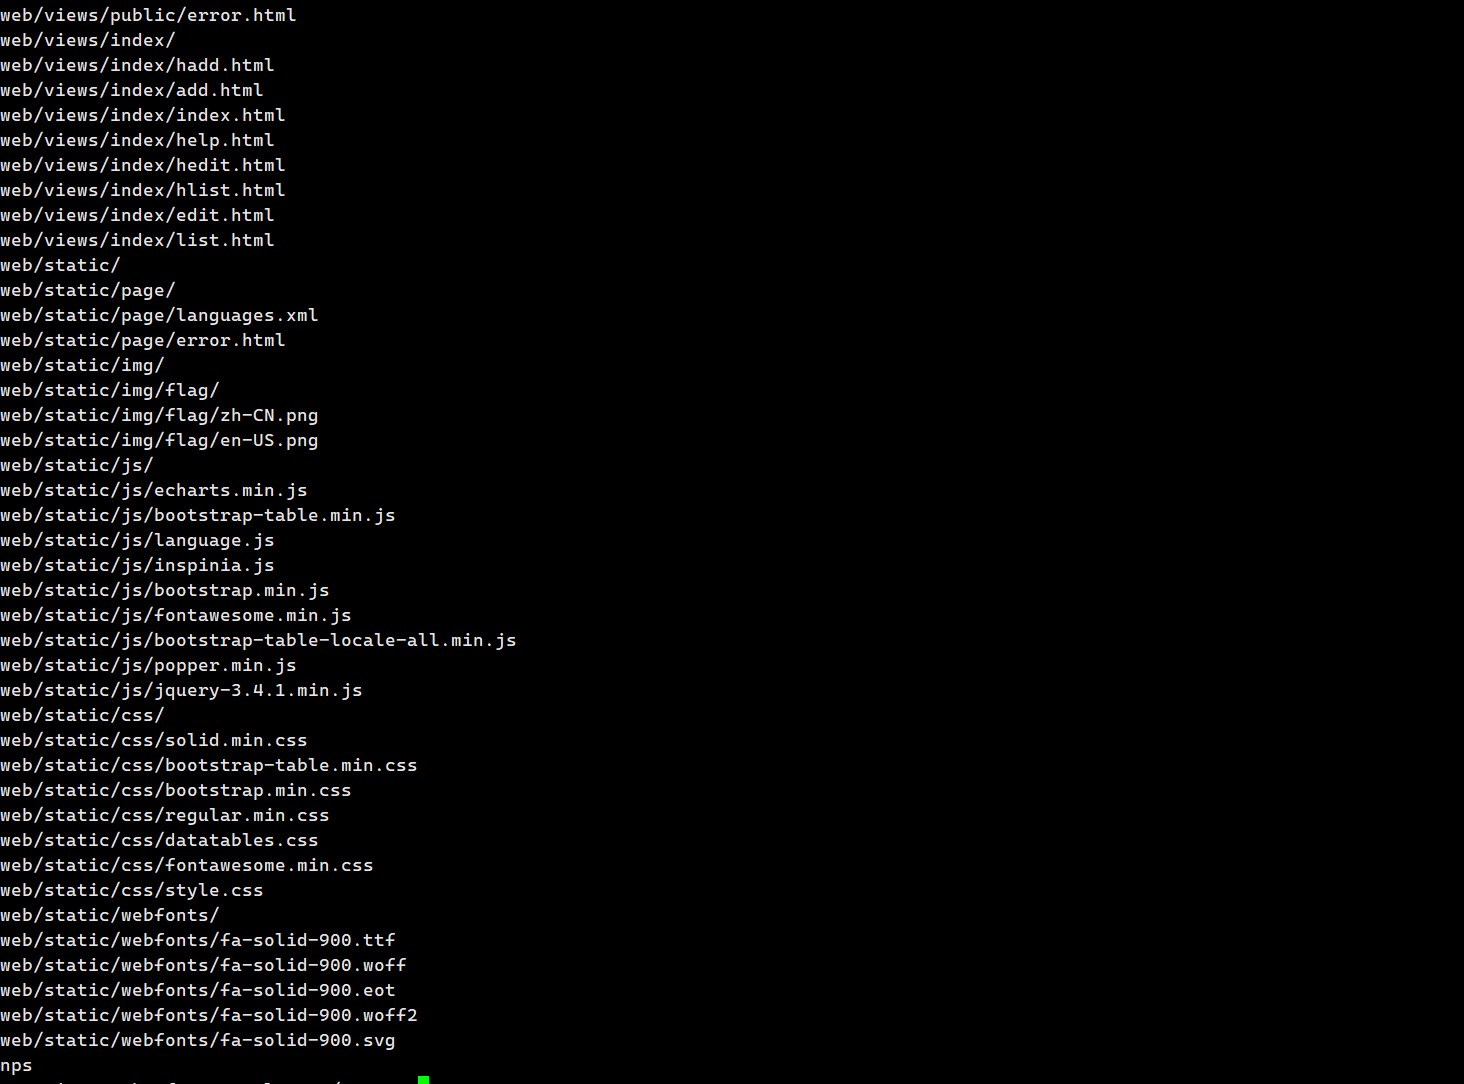
`git clone https://github.com/sh3d0ww01f/WaterDragon.git`
然后修改`main.py`文件
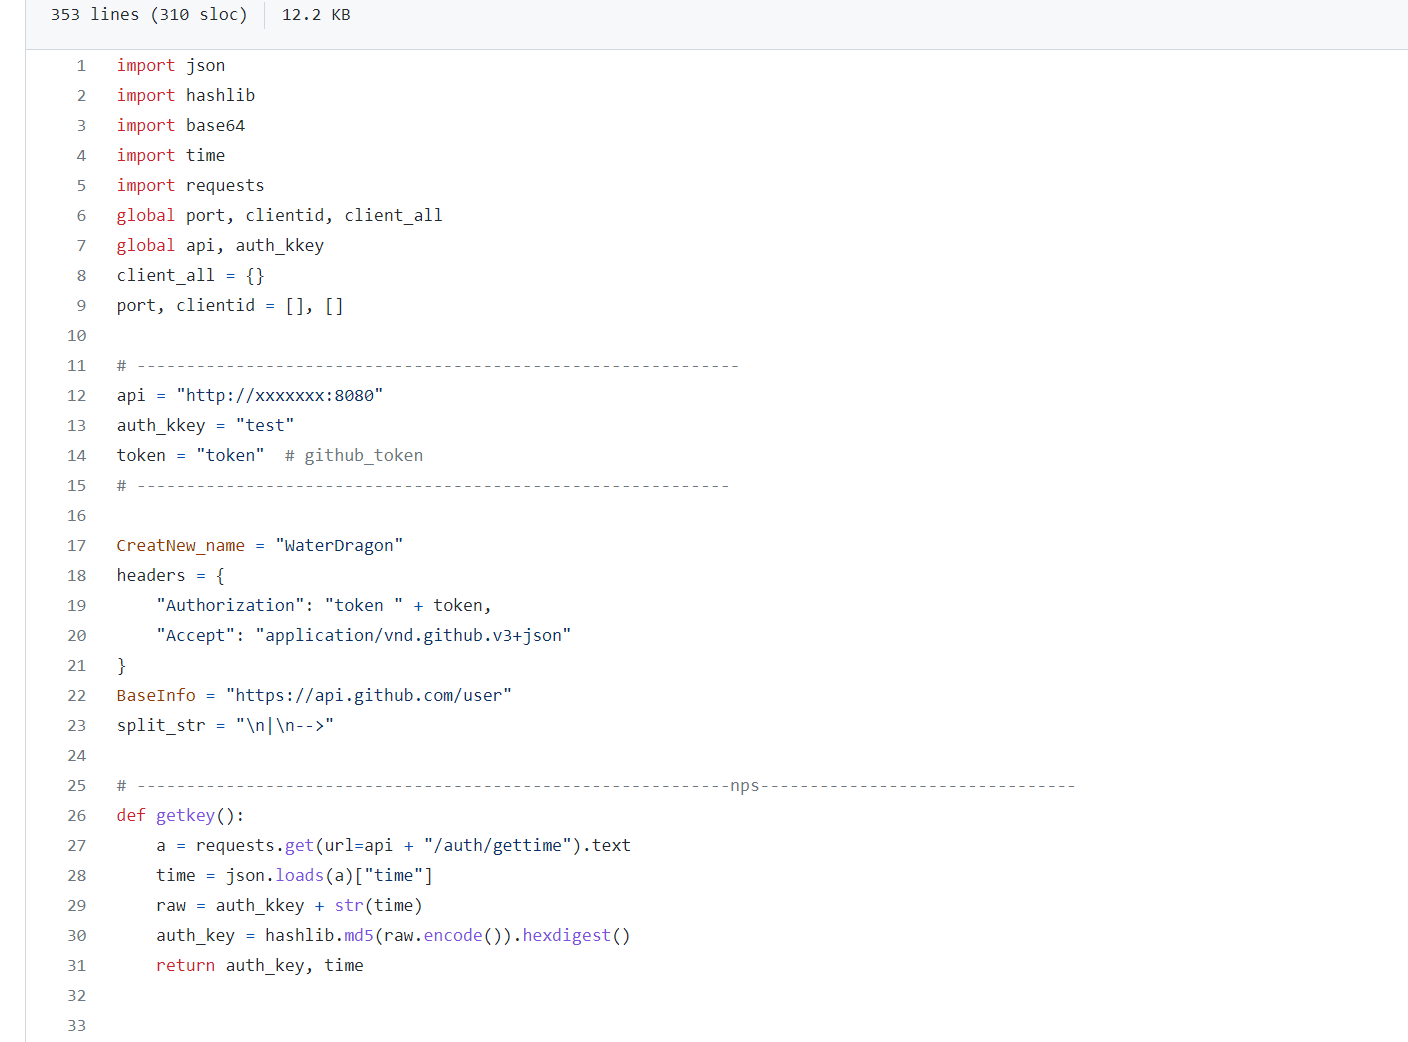
①**api的位置填上自己的api地址(http://vps_ip:web_port,如果没改过前面的web_port 则就是http://vps_ip:8080)**
②**auth_key 写上更改过的auth_key**
③**token写github获取的token**
# 运行脚本
`python3 main.py`

**①.输入socks5 进入隧道管理 我们需要先加一个**
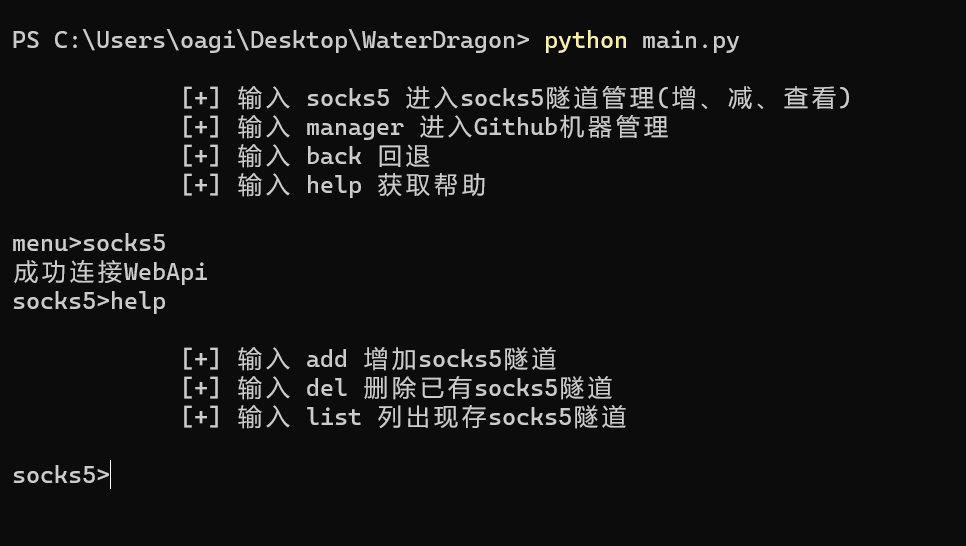
出现成功连接WebApi则说明api配置正确
**②.输入add 增加socks5隧道**
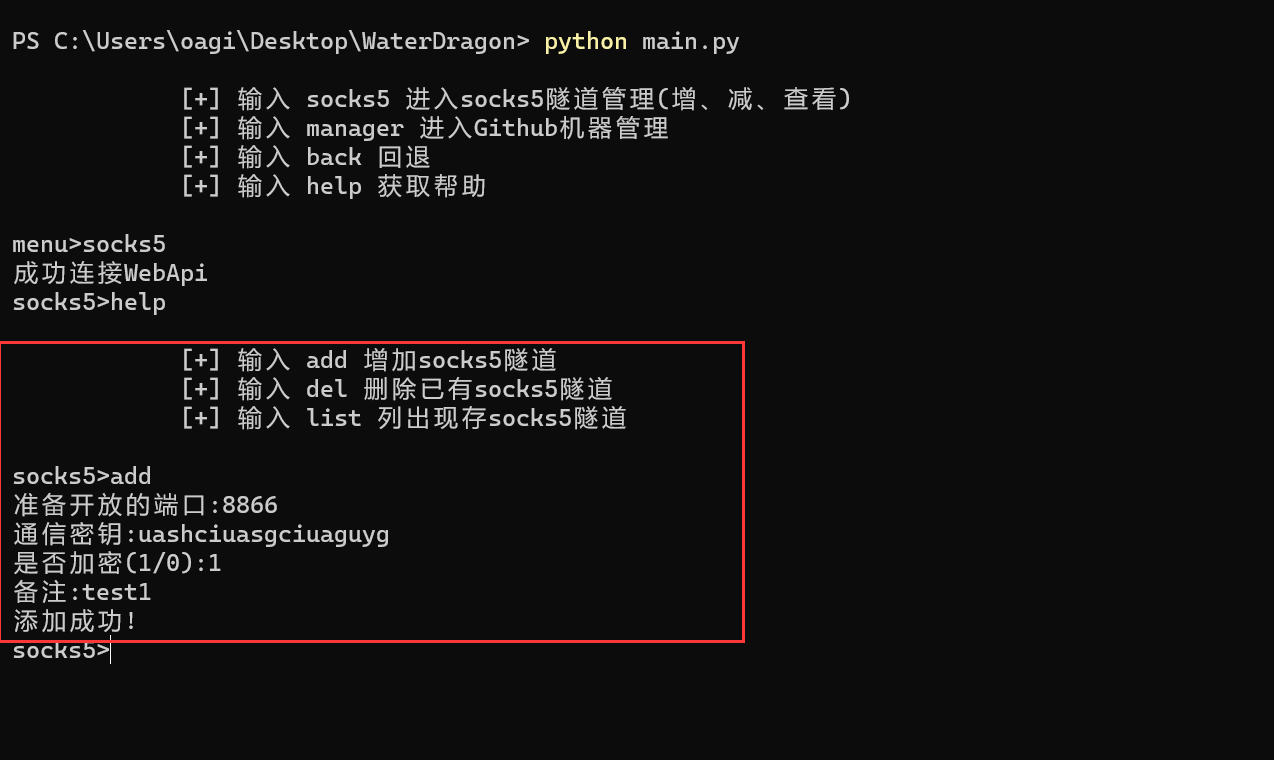
**密钥随意写,端口只要外网能通就可以,加密的话1代表要加密,0代表不加密**
**③.配置好了新隧道,我们回到菜单使用**
输入 `back` 回到菜单,然后**键入`manager`进入Github Action管理**
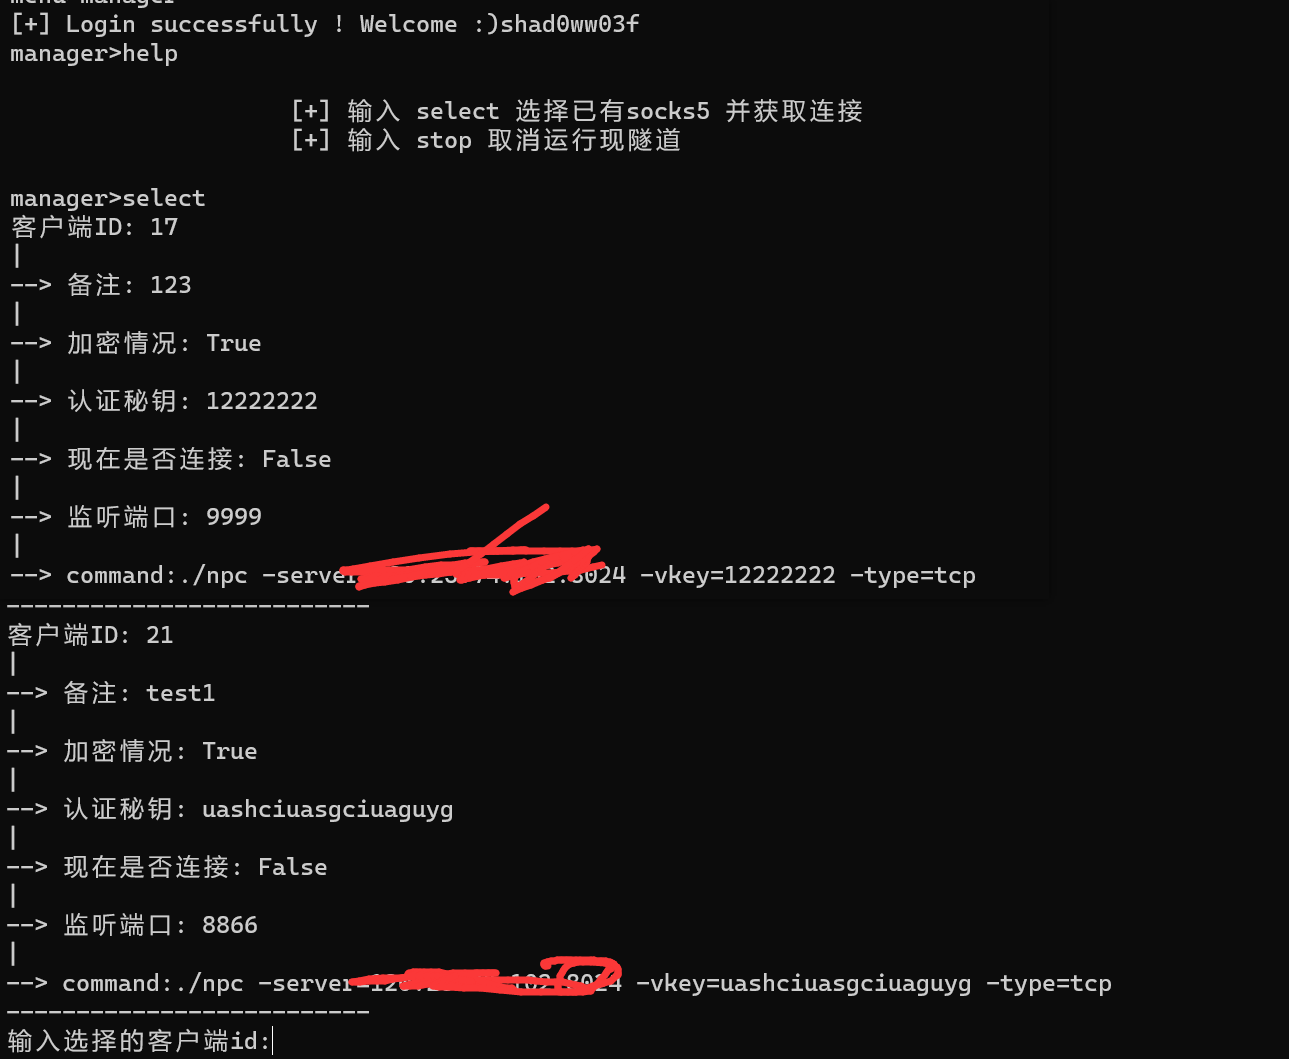
输入`select`选择要连接的socks5隧道
这里选择新增的 客户端ID为21的
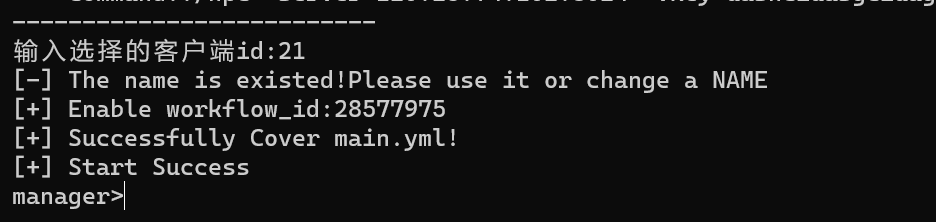
出现`start success`即为启动成功
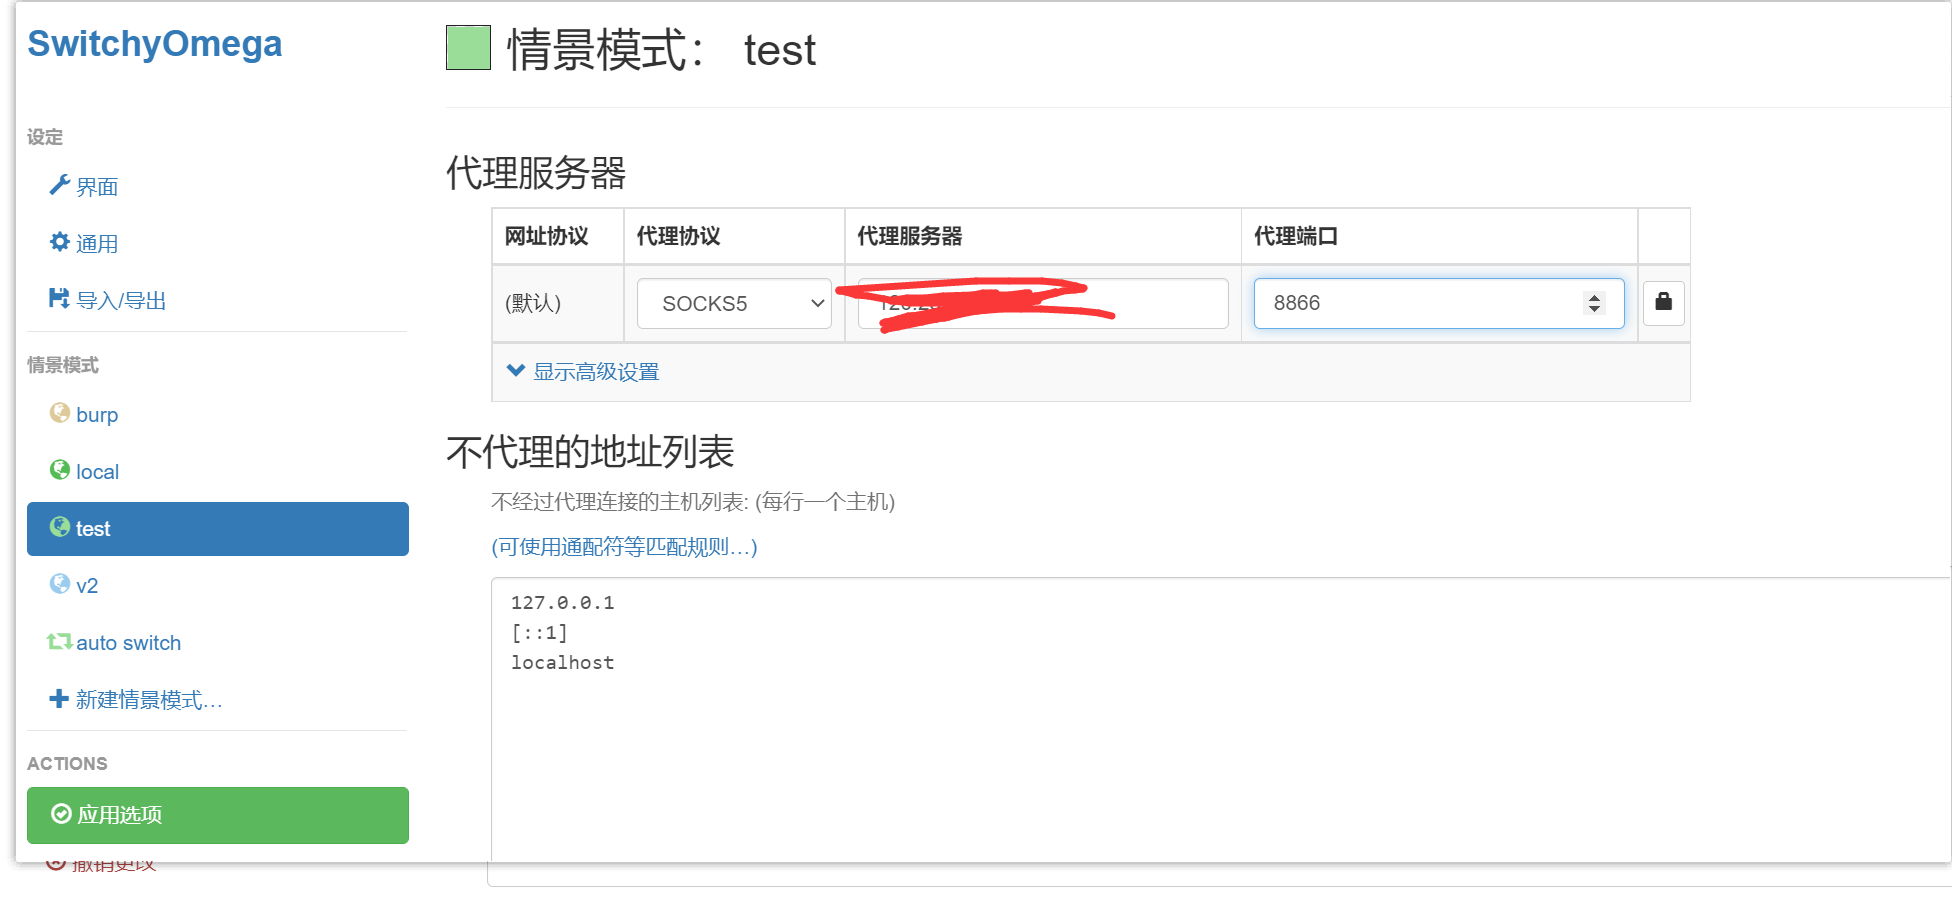
配置一下 配置好 就可以用这个代理了
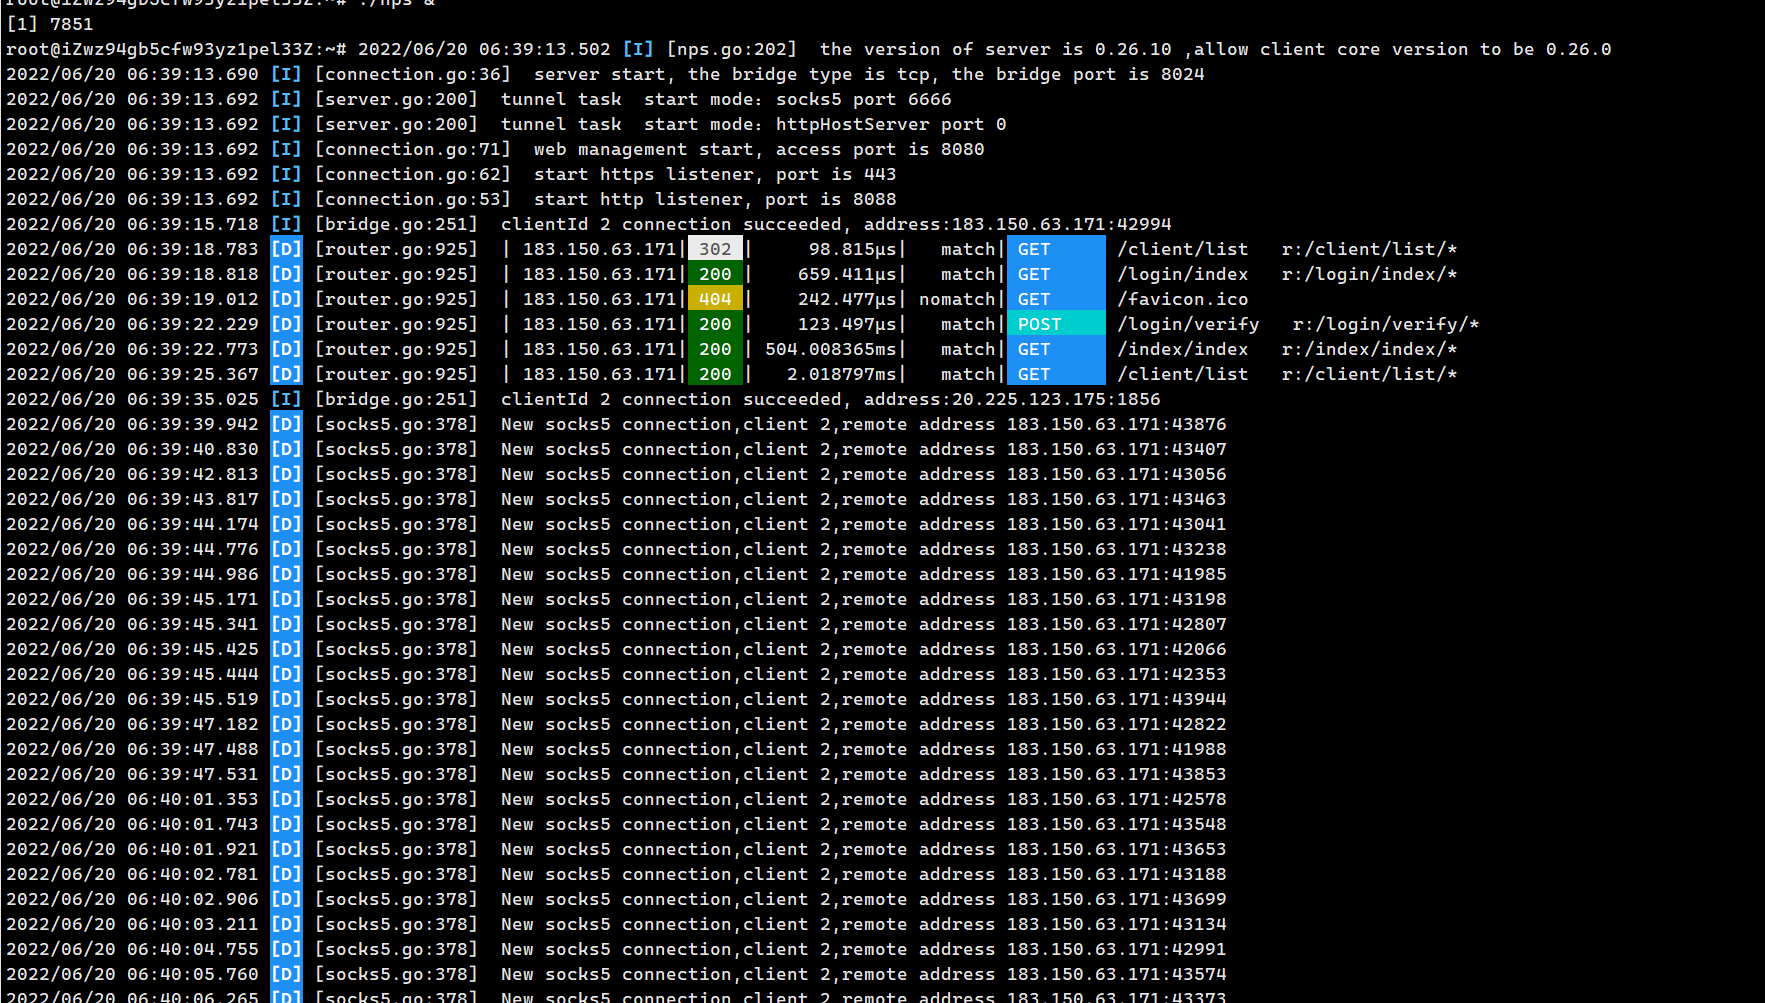
# 效果

# 停止Action
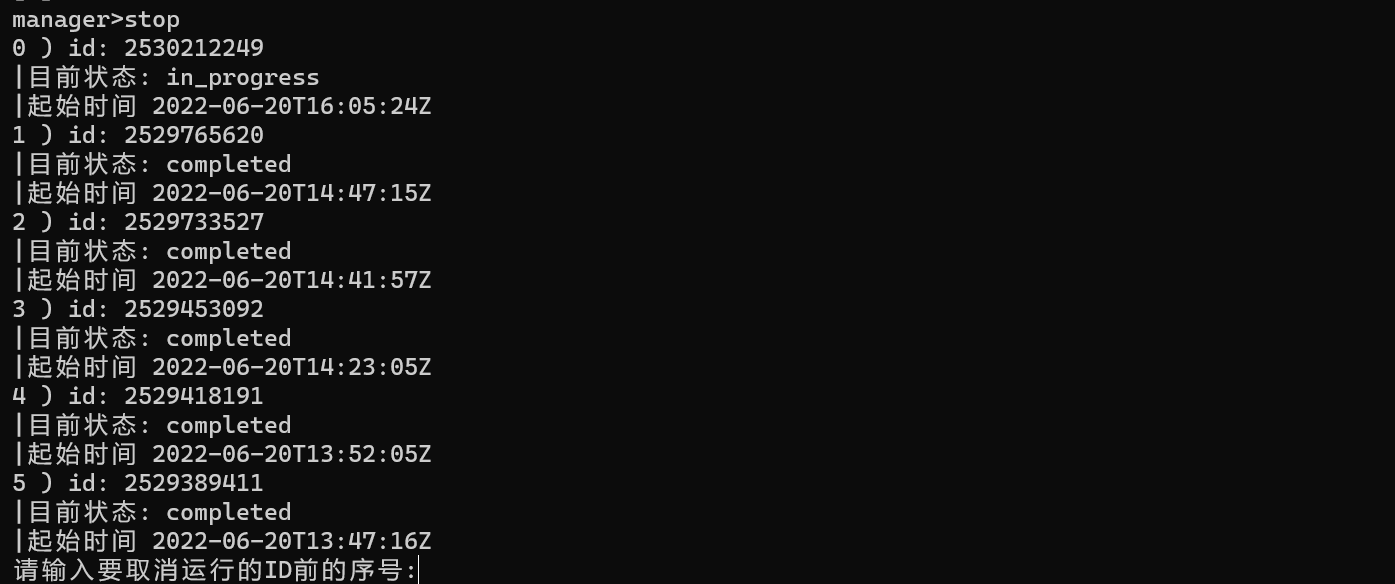
然后键入0 即可暂停现在运行中的GithubAction机子
出现“取消运行成功” 则代表成功暂停运行
# 后序
Action和SCF不一样 没有多出口 但是可以多开Action,然后实现多ip访问的目的