https://github.com/shukerullah/react-native-naughty-math
Enhance Your Math Skills and Have Fun!
https://github.com/shukerullah/react-native-naughty-math
game-development open-source react-native
Last synced: 3 months ago
JSON representation
Enhance Your Math Skills and Have Fun!
- Host: GitHub
- URL: https://github.com/shukerullah/react-native-naughty-math
- Owner: shukerullah
- Created: 2024-05-28T21:04:46.000Z (about 1 year ago)
- Default Branch: main
- Last Pushed: 2024-09-11T09:44:44.000Z (9 months ago)
- Last Synced: 2024-09-11T13:34:17.741Z (9 months ago)
- Topics: game-development, open-source, react-native
- Language: TypeScript
- Homepage: https://www.gameologist.app/
- Size: 1.82 MB
- Stars: 1
- Watchers: 1
- Forks: 0
- Open Issues: 0
-
Metadata Files:
- Readme: README.md
Awesome Lists containing this project
README
# Naughty Math

**Enhance Your Math Skills and Have Fun!**
Naughty Math is a mobile application developed using React Native. It offers a playful and interactive way to improve your math skills while enjoying an engaging gaming experience.
## How to Play
Become naughty with Naughty Math and challenge yourself in two exciting game modes:
- **Normal Mode:**
Race against the clock to solve math problems. The difficulty increases as you score more points.
- **Practice Mode:**
Take your time to solve problems without any time pressure. Perfect for practice and improving your skills.
## Targets
- Reach for the highest score and prove your mathematical prowess.
- Challenge your friends and compete for the top spot on the leaderboard.
- Unlock various achievements and showcase your accomplishments.
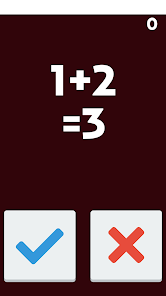
## Screenshots
##### Home:

##### Gameplay:
## App Links
- **Download from [Google Play Store](https://play.google.com/store/apps/details?id=com.gamestoodio.naughtymath)**
- **Coming soon on the App Store**
## Getting Started
> **Note**: Make sure you have completed the [React Native - Environment Setup](https://reactnative.dev/docs/environment-setup) instructions till "Creating a new application" step before proceeding.
To run this project on your local machine, follow these steps:
### Step 1: Clone the Repository
```bash
git clone https://github.com/shukerullah/react-native-naughty-math.git
cd react-native-naughty-math
```
## Step 2: Install node modules
```bash
# using npm
npm install
# OR using Yarn
yarn install
```
## Step 3: Start the Metro Server
First, you will need to start **Metro**, the JavaScript _bundler_ that ships _with_ React Native.
To start Metro, run the following command from the _root_ of your React Native project:
```bash
# using npm
npm start
# OR using Yarn
yarn start
```
## Step 4: Start your Application
Let Metro Bundler run in its _own_ terminal. Open a _new_ terminal from the _root_ of your React Native project. Run the following command to start your _Android_ or _iOS_ app:
### For Android
```bash
# using npm
npm run android
# OR using Yarn
yarn android
```
### For iOS
```bash
# using npm
npm run ios
# OR using Yarn
yarn ios
```
If everything is set up _correctly_, you should see your new app running in your _Android Emulator_ or _iOS Simulator_ shortly provided you have set up your emulator/simulator correctly.
This is one way to run your app — you can also run it directly from within Android Studio and Xcode respectively.
## Congratulations! :tada:
You've successfully run and modified your React Native App. :partying_face:
---
> **Note**: The steps provided are for Android only. iOS setup steps will be added later once the app is published to the App Store.
---
### Setting Up AdMob
1. **Create a Google AdMob Account:**
- Sign up for an account at [Google AdMob](https://apps.admob.com/).
2. **Add Your App:**
- In the AdMob dashboard, navigate to the "Apps" section.
- Add a new app or select an existing app for the Android platform.
- Note the unique app ID for your Android app.
3. **Update `app.json` with App ID:**
- Open the `app.json` file located at the root of your React Native project.
- Add the `android_app_id` key with the ID obtained from the AdMob console:
```json
// /app.json
{
"react-native-google-mobile-ads": {
"android_app_id": "ca-app-pub-xxxxxxxx~xxxxxxxx"
}
}
```
4. **Set Interstitial and Banner Ad Unit IDs:**
- Open the `./src/libs/Admob/index.tsx` file.
- Add your Interstitial and Banner Ad Unit IDs obtained from the AdMob console:
```typescript
// /src/libs/Admob/index.tsx
export const HOME_BANNER_UNIT_ID = "your_banner_unit_1_id";
export const GAME_PLAY_BANNER_UNIT_ID = "your_banner_unit_2_id";
export const GAME_PLAY_INTERSTITIAL_UNIT_ID = "your_interstitial_id";
```
### Setting Up Firebase Analytics
1. **Obtain `google-services.json`:**
- Generate the `google-services.json` file from your Firebase project settings.
- For detailed instructions on setting up Firebase Analytics with React Native, refer to the [React Native Firebase documentation](https://rnfirebase.io/#2-react-native-cli---android-setup).
2. **Place the `google-services.json` File:**
- Place the `google-services.json` file in your project at the following location:
```plaintext
/android/app/google-services.json
```
3. **Uncomment Firebase Analytics Code:**
- Once you have successfully added `google-services.json`, uncomment the following lines in `./src/libs/Analytics/index.ts`:
```typescript
// /src/libs/Analytics/index.tsx
...
// line#42
analytics().logEvent(name, params, options);
...
// line#69
analytics().logScreenView(params);
```
### Setting Up OneSignal
1. **Create a OneSignal Account:**
- Go to [OneSignal](https://www.onesignal.com) and sign up for an account.
2. **Create a New Application:**
- After logging in, create a new application in the OneSignal Dashboard.
- Note down the `App ID` provided for the application.
3. **Configure OneSignal in Your Project:**
- Open your project directory and navigate to `./src/libs/OneSignal/index.tsx`.
- Paste the copied `App ID` into the file as shown below:
```typescript
// /src/libs/OneSignal/index.tsx
export const ONESIGNAL_APP_ID = "your-app-id-here";
```
4. **Set Up Android Firebase Credentials:** (Same as Step: 1 in Setting Up Firebase Analytics)
- Ensure that you've followed this guide to set up your [Android Firebase Credentials](https://documentation.onesignal.com/docs/android-firebase-credentials).
- Generate the `google-services.json` file from your Firebase project.
- Place the `google-services.json` file in the `./android/app/` directory of your project:
```plaintext
/android/app/google-services.json
```
### Setting Up Google Play Games Leaderboard & Achievements
1. **Configure Your Game in the Google Play Developer Console:**
- Navigate to the [Google Play Developer Console](https://developers.google.com/games/services/console/enabling).
- Follow the steps to add a new game and obtain your app ID.
2. **Link Your App:**
- Ensure your app is correctly linked in the Google Play Console. Missing this step will cause the library to fail silently.
3. **Create Leaderboards and Achievements:**
- Create leaderboards and achievements in the Google Play Console.
- Note down their IDs for use in your project.
4. **Update `GameServices` Configuration:**
- Open the `./src/libs/GameServices/index.ts` file.
- Add your leaderboard ID and achievement IDs:
```typescript
// /src/libs/GameServices/index.ts
const LEADERBOARD_ID = 'your_leaderboard_id';
const achievementIds = [
'achievement_1',
'achievement_2',
'achievement_3',
'achievement_4',
'achievement_5',
'achievement_6',
'achievement_7',
'achievement_8',
'achievement_9',
'achievement_10',
];
// Scores required to unlock achievements
const achievementRequiredScore = [1, 5, 10, 20, 30, 50, 75, 100, 150, 200];
```
5. **Update `strings.xml`:**
- Open the `android/app/src/main/res/values/strings.xml` file.
- Add your game services project ID:
```xml
Naughty Math
{your_project_id}
```
_Note: Achievements used in Naughty Math are placed within the ./assets/achievements directory._
## Feedback and Issues
For feedback, suggestions, or reporting issues, please open an [issue](https://github.com/shukerullah/react-native-naughty-math/issues).
### Follow me on Twitter: [@shukerullah](https://twitter.com/shukerullah)
