https://github.com/slack-samples/bolt-js-slack-connect
This project aims to speed up the time to understand & implement automations with Slack Connect APIs. This project aims to be the baseline on which a few different automations can be built.
https://github.com/slack-samples/bolt-js-slack-connect
Last synced: about 1 year ago
JSON representation
This project aims to speed up the time to understand & implement automations with Slack Connect APIs. This project aims to be the baseline on which a few different automations can be built.
- Host: GitHub
- URL: https://github.com/slack-samples/bolt-js-slack-connect
- Owner: slack-samples
- License: mit
- Created: 2022-02-22T22:49:58.000Z (over 4 years ago)
- Default Branch: main
- Last Pushed: 2024-03-02T01:46:28.000Z (over 2 years ago)
- Last Synced: 2025-05-07T22:44:06.282Z (about 1 year ago)
- Language: JavaScript
- Homepage: https://api.slack.com/apis/connect
- Size: 38.1 KB
- Stars: 9
- Watchers: 1
- Forks: 7
- Open Issues: 1
-
Metadata Files:
- Readme: README.md
- License: LICENSE
Awesome Lists containing this project
README
# 🤖 Bolt JS Slack Connect Admin 🤖
[](https://user-images.githubusercontent.com/10428517/155399298-a7784e0a-3b13-42b3-a3e4-96217efbd0d9.gif)
> **Note:🚨** Because this app can approve Slack Connect invites, apps with this feature can only be installed by a workspace owner or admin. Read more about the `conversations.connect:manage` scope [here](https://slack.com/create). 🚨
This project aims to speed up the time to understand & implement automations with [Slack Connect APIs](https://api.slack.com/apis/connect). This project aims to be the baseline
on which a few different automations can be built, such as:
* Disconnect channels automatically (based on a date picked at channel creation time)
* Customize org settings for auto approval to speed up creating multiple
channels between the same two organizations
# Steps
1. [App Configuration](#step-1-app-configuration)
2. [Install the App](#step-2-install-the-app)
3. [Add the App to a Channel](#step-3-add-the-app-to-a-channel)
4. [Send a Slack Connect Invite](#step-4-send-a-slack-connect-invite)
5. [(Optional) Send a Slack Connect Invite using User ID](#step-5-optional-send-a-slack-connect-invite-using-user-id)
6. [(Optional) Create Custom Slack Connect Settings to Never Require Approval](#step-6-optional-create-custom-slack-connect-settings-to-never-require-approval)
7. [Accept the Slack Connect Invite](#step-7-accept-the-slack-connect-invite)
8. [Approve the Slack Connect Invite](#step-8-approve-the-slack-connect-invite)
9. [Disconnect the Channel](#step-9-disconnect-the-channel)
10. [Conclusion](#conclusion)
## App Configuration
Before getting started, make sure you have a development workspace where you have permissions to install apps. If you don’t have one setup, go ahead and [create one](https://slack.com/create).
## Installation
#### Create a Slack App
1. Open [https://api.slack.com/apps/new](https://api.slack.com/apps/new) and choose "From an app manifest"
2. Choose the workspace you want to install the application to
3. Copy the contents of [manifest.json](./manifest.json) into the text box that says `*Paste your manifest code here*` (within the JSON tab) and click _Next_. Make sure to change the URLs on the `manifest.json` in three
specific places, as shown in the screenshot below.

4. Review the configuration and click _Create_
5. Click _Install to Workspace_ and _Allow_ on the screen that follows. You'll then be redirected to the App Configuration dashboard.
6. Click on `Manage Distribution` and then make sure all boxes have
green check marks. Select `Remove Hard Coded Information`, check the box
and then `Activate Public Distribution`.

#### Environment Variables
Before you can run the app, you'll need to store some environment variables.
1. Copy `.env.sample` to `.env`
2. Click _Basic Information_ from the left hand menu. There, in the `App Credentials` you should see your `SLACK_CLIENT_ID`, `SLACK_CLIENT_SECRET`, and `SLACK_SIGNING_SECRET`. Click on `Show` and copy and paste those values into your `.env` file.
3. This app uses (the free version of) MongoDB. You'll need to provide your MongoDB username, password, and database name in the `.env` file: `DB_USERNAME`, `DB_PASSWORD`, and `DB_NAME`. You can
feel free to leave the DB_NAME as `slack_connect_test`.
4. Lastly, you'll need to set the `CLUSTER` env variable. To do this, you'll need your connection info to be able to connect to your MongoDB cluster. Please follow the below screenshots to see your cluster information to be able to set the `CLUSTER` env variable.
First, click on `Database` from the left side bar, under `Deployments`.

Next, click on `Connect` next to `Cluster0`. Note that your cluster may be named differently. You should see the following after you click on `Connect`.

Lastly, click on `connect your application`.

There you should see your cluster info. Mine is `cluster0.yvswg`. Yours should look different. Copy your connection string as and paste it in your
`.env` file. See my example of my cluster info in `env.sample` [here](https://github.com/slack-samples/bolt-js-slack-connect/blob/main/env.sample#L9).
Below, you can see a screenshot of my database configuration. The `DB_NAME` is `slack_connect_test`
and the collection is named `users`.

#### Source your Env Variables
That's it! You now have all the info to set your environmental variables to connect to your MongoDB cluster.
> Don't forget to save your `.env` and then run
```source .env``` to set your env variables.
#### Install Dependencies
`npm install`
#### Run Bolt Server
`npm start`
## Project Structure
### `manifest.json`
`manifest.json` is a configuration for Slack apps. With a manifest, you can create an app with a pre-defined configuration, or adjust the configuration of an existing app.
### `app.js`
`app.js` is the entry point for the application and is the file you'll run to start the server. This project aims to keep this file as thin as possible, primarily using it as a way to route inbound requests.
### `/listeners`
Every incoming request is routed to a "listener". Inside this directory, we group each listener based on the Slack Platform feature used, so `/listeners/shortcuts` handles incoming [Shortcuts](https://api.slack.com/interactivity/shortcuts) requests, `/listeners/views` handles [View submissions](https://api.slack.com/reference/interaction-payloads/views#view_submission) and so on.
Great job! You're now ready to install the app using Slack's OAuth process.
## Step 1. Configure Interactivity, Events, and Redirect URLs
Follow the steps below based on if you plan to use Ngrok or Glitch as a way to host your app. Either will work.
If you are using [Ngrok](www.ngrok.com), make sure you have started up ngrok, and have updated your app with the ngrok forwarding address in the following places:
1. Update your event subscriptions request URL. It should look like the following: `https://3cb89939.ngrok.io/slack/events`. Save this.
2. Update your interactivity request URL. It should look like the following: `https://3cb89939.ngrok.io/slack/events`. Save this.
3. Go to OAuth & Permissions -> Redirect URLs. Add a new redirect URL. It should look like the following: `https://3cb89939.ngrok.io/slack/oauth_redirect`. Save the URL.
## App Distribution / OAuth
This app uses app distribution / OAuth by default. When using OAuth, Slack requires a public URL where it can send requests. In this template app, we've used [`ngrok`](https://ngrok.com/download). Checkout [this guide](https://ngrok.com/docs#getting-started-expose) for setting it up.
Start `ngrok` to access the app on an external network and create a redirect URL for OAuth.
## Step 2. Install the App
> **Note:🚨** Because this app can approve Slack Connect invites, apps with this feature can only be installed by a worksapce owner or admin. Read more about the `conversations.connect:manage` scope [here](https://slack.com/create). 🚨
Watch the video below **(sound on)** to understand how to install the app. Note that the video is showing the install path from a Ngrok URL.
The base URL will always we different, based on if you are using Ngrok or Glitch, and depending on what your app is named on Glitch / what forwarding address is used in Ngrok.
[](https://user-images.githubusercontent.com/10428517/155203611-ffa7b69a-9b6d-40d1-a33e-9ba622c0dfcf.mov)
Next, navigate to your install endpoint. Since we are using Bolt, this endpoint is automatically created for us from the Bolt package.
1. If you are using Glitch (and assuming your app is hosted at `https://bolt-template-slack-connect.glitch.me`), you can navigate to `https://bolt-template-slack-connect.glitch.me/slack/install`
If you are using Ngrok, it should look something like `https://3cb89939.ngrok.io/slack/install`
2. Click on the `Add to Slack` button.
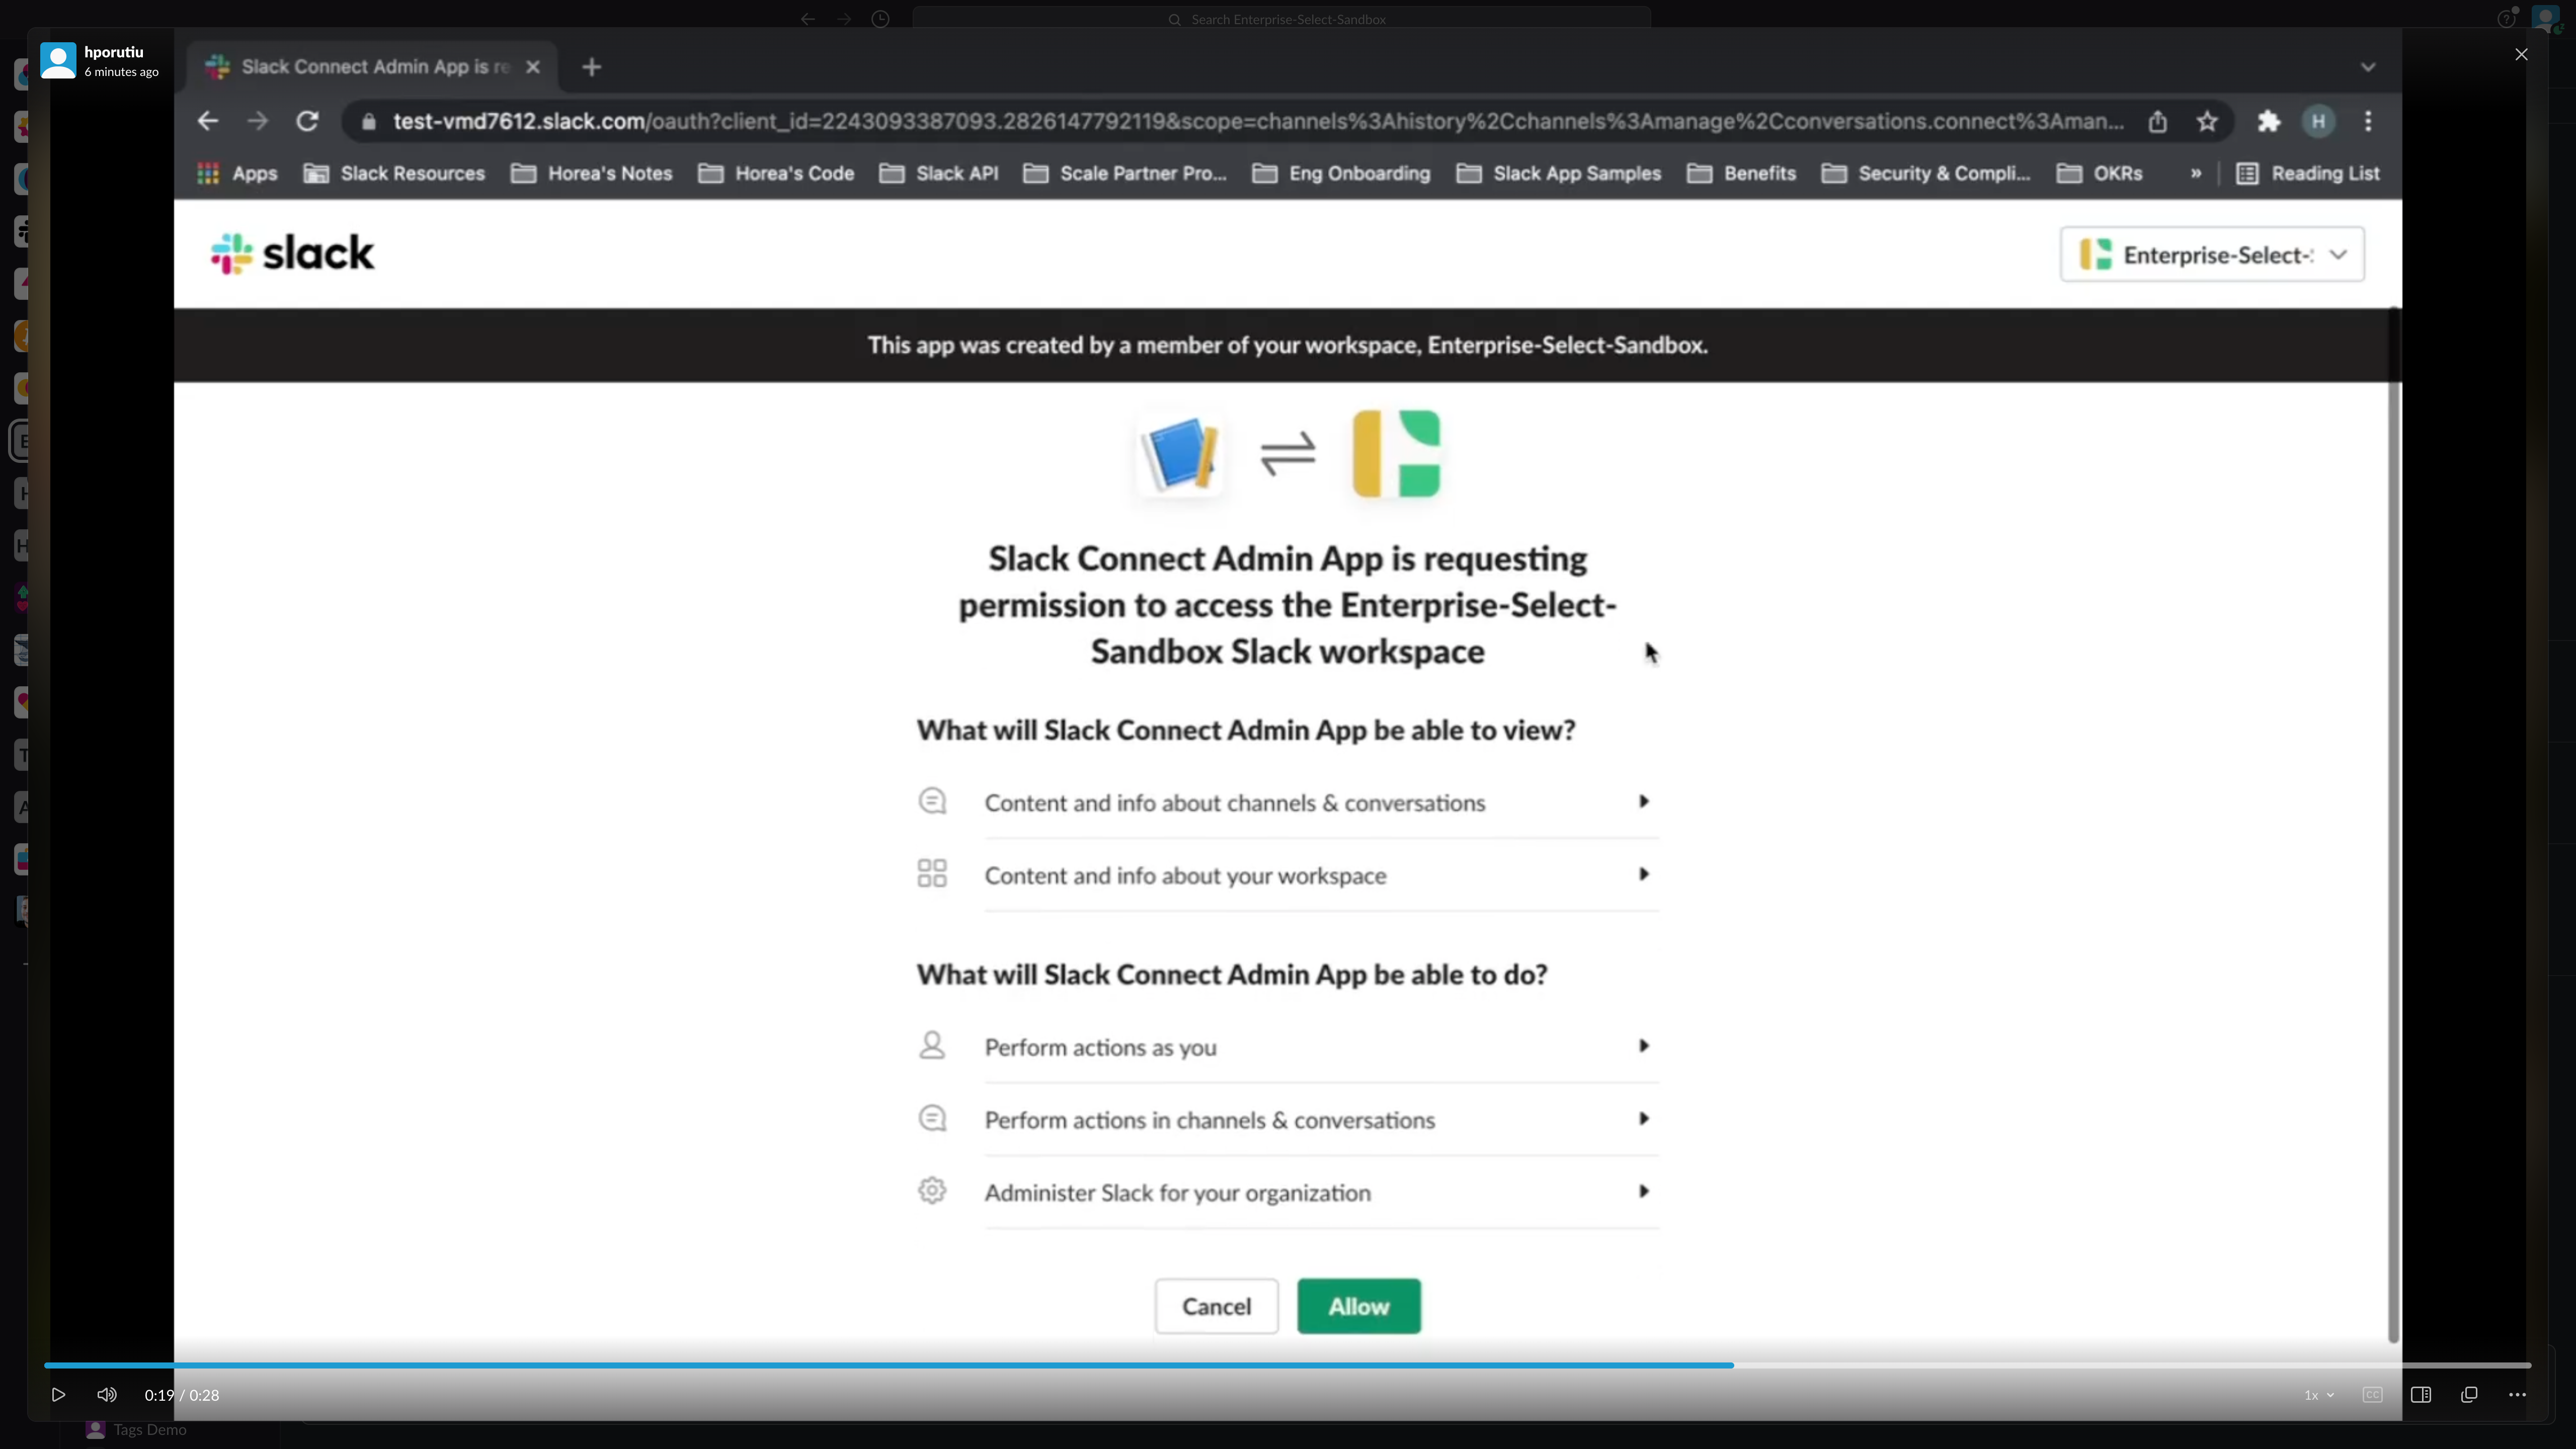
3. Pick a workspace to install the app to from the top-right corner.
4. Click on the green `Allow` button.
5. You will be redirected to the Redirect URL. Click on "Open Slack".
6. Once you click on "Open Slack" your browser, you will be taken to the messages tab of your new Slack Connect Admin app! 🎉
## Step 3. Add the App to a Channel
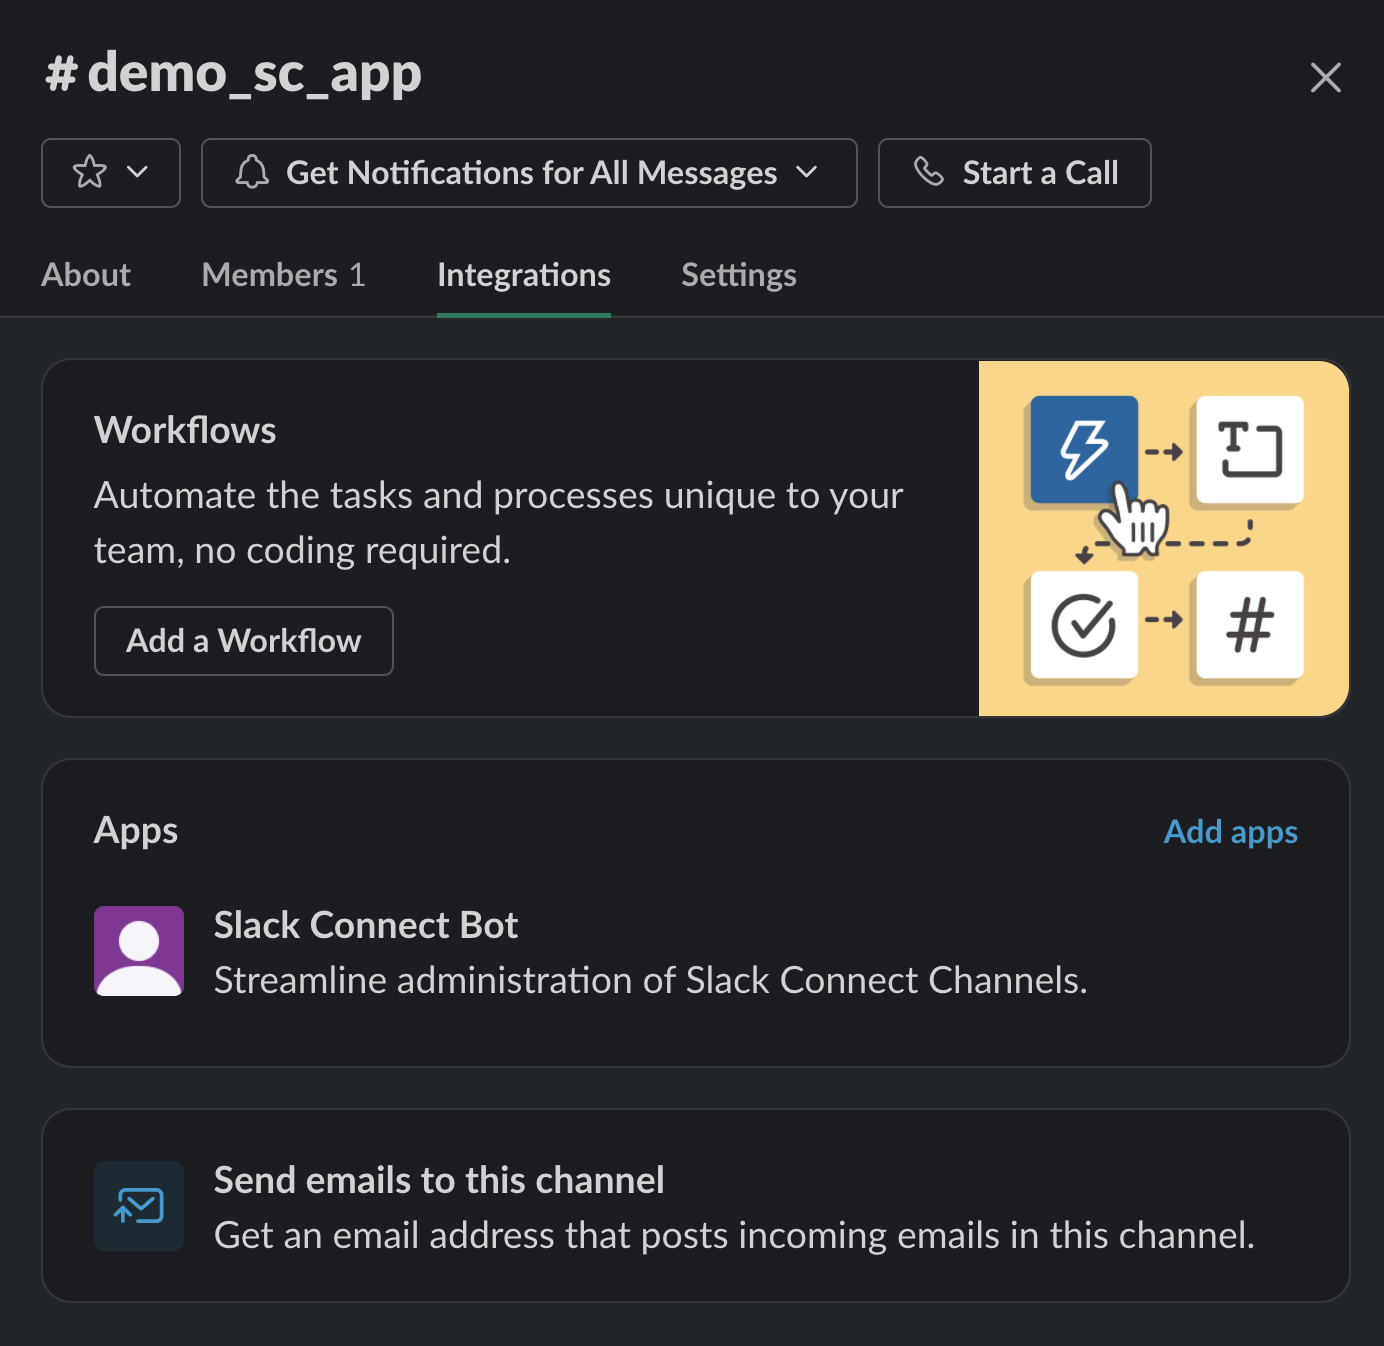
Watch the video below **(sound on)** to understand how to add the app to a channel. First, we
create a new channel, then we add the app to that channel.
[](https://user-images.githubusercontent.com/10428517/155204315-2fa1b888-d479-494d-ae80-ebe59da02868.mov)
## Step 4. Send a Slack Connect Invite
Watch the video below **(sound on)** to understand how to send an invite to a user outside of your current organization.
[](https://user-images.githubusercontent.com/10428517/155223009-e03aa7c6-ba0c-46e6-9803-db90906e0138.mov)
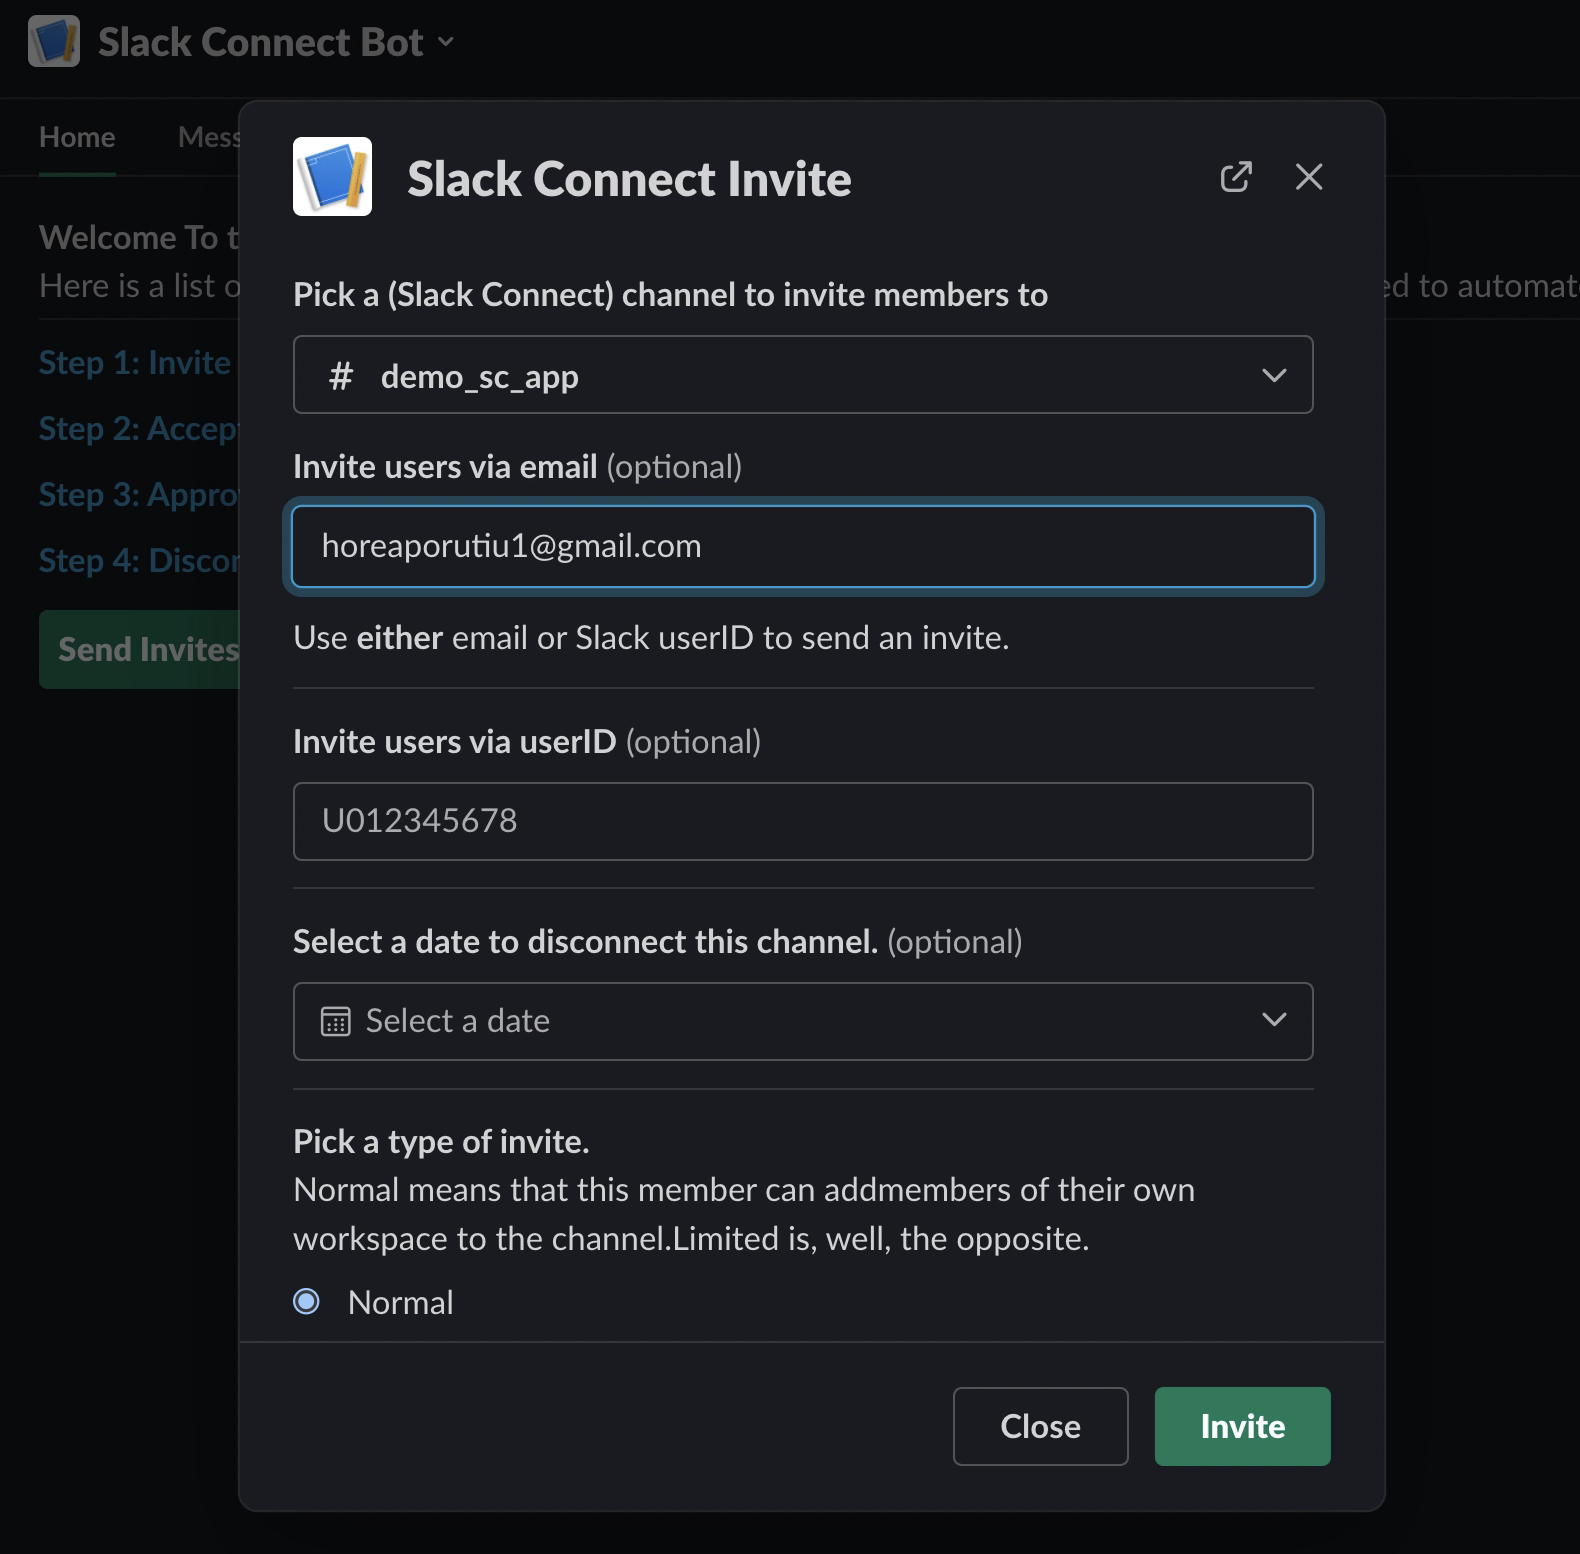
First, click on the `Send Invites` button.
Then, in the modal which pops up, choose the channel which you've just added the Slack Connect Admin App to.
In the email section, choose the email which coressponds to the workspace which you want to start a shared channel with.
Leave the rest of the sections blank and click on `Invite`. Lastly, click on `View Invitations` and you should see your
newly created inviation.
## Step 5. (Optional) Send a Slack Connect Invite using User ID
[](https://user-images.githubusercontent.com/10428517/170152797-c8a784b9-22f7-45ea-8140-1c1c54df30d4.mov)
> **Note:🚨** A tip about sending invites using the `user_id` field. If your app is already installed on both the inviting and the target organization, you can invite the app via User ID directly. This will
result in the automatic accepting of the invite.
Simply grab the `user_id` field. This is recommended for orgs that you have a close working relationship with. Read more [here](https://api.slack.com/apis/connect#invite). 🚨
First, click on the Send Invites button.
Then, in the modal which pops up, choose the channel which you've just added the Slack Connect Admin App to.
In the `user_id` section, choose the `user_id` which coressponds to the bot
which has been installed on the target Organization (i.e. Organization which
will receive the invite).
> **Note:🚨** To find the `user_id` of the app, simply click on the app's
home (make sure it is the app which is installed on the target Organization), and then click on the App's name. From there, you should see the `Member ID` which starts with a `U`. That is the `user_id` which you can use in the invite. 🚨
Leave the rest of the sections blank and click on Invite. Lastly, click on View Invitations and you should see your newly created inviation.
## Step 6. (Optional) Create Custom Slack Connect Settings to Never Require Approval
[](https://user-images.githubusercontent.com/10428517/170152824-80389b26-54da-48c4-9547-bb7215369bc1.mov)
Now - if you've also created special rules in the Admin console of your
Grid Organization, you can have it so that any accepted invite will be
auto-approved from a specific organization. This is the way to make Slack
Connect channels seamlessly be approved between trusted Organizations.
## Step 7. Accept the Slack Connect Invite
Watch the video below **(sound on)** to understand how to accept the invite.
> **Note:🚨** The invite must be accepted from a user from a different workspace / organization than the workspace / org from which the invite was sent. 🚨
[](https://user-images.githubusercontent.com/10428517/155225771-184cca6d-f715-45ca-9ba6-452c3a86216b.mov)
Click on the Invite ID at the top of the invitation to be taken to the invite. Select the email account
associated with the workspace you want to accept the invite from. For me that is the account with `horeaporutiu1@gmail.com`.
Click through the following two pages. You can leave the defaults as is (Public channel, same channel name). Lastly,
click on `Join Channel`. Now, if you click on `View Invitations again` you should see that the buttons have changed. Instead of seeing `Accept` and `Ignore`you will
now see `Approve` and `Deny`.
## Step 8. Approve the Slack Connect Invite
Watch the video below **(sound on)** to understand how to approve the invite.
[](https://user-images.githubusercontent.com/10428517/155228571-f4a10314-f5bb-4af2-803e-3bcfd41145a9.mov)
Click on the green `Approve` button next to the invite. After a few seconds, you should see that invite dissapear and then the `demo_sc_app` channel will be added under the `Connections` tab, which means it's been shared outside of your own organization!
## Step 9. Disconnect the Channel
Watch the video below **(sound on)** to understand how to disconnect your shared channel. This will involve installing the app again, but this
time at the org level. 🚨You need to be **logged in as an org owner / admin** to be able to use this feature.🚨
[](https://user-images.githubusercontent.com/10428517/155230983-046ff198-6017-410a-97d1-5ba311496b77.mp4)
To disconnect a channel, we will need a special, [admin scope](https://api.slack.com/scopes/admin.conversations:write). The main difference between
this scope and the other scopes we've requested in the past is that this endpoint reaches across
an entire Enterprise Grid organization, not individual workspaces. This means it has a lot more
power than the traditional scopes.
Once you are ready to install, navigate to the following endpoint: `www.example.com/slack/install/orgadmin`. Since I am using ngrok currently, my endpoint is: https://3015-98-51-61-120.ngrok.io/slack/install/orgadmin. Your base path will look different than mine.
Once you navigate to that endpoint, you should see a purple Add to Slack button. Once you click on that, you should be able to install the app **at the org level**. This means that it is normal to
see organizations in the drop down, in addition to workspaces. This install will ONLY work on a valid
organization which you are a Owner or admin of. Watch the video below to see the process in action.
After you've sucessfully installed the app at the org level, click on the
`Disconnect Channels` button. Select the channel `demo_sc_app` and then
click on `Disconnect`.
Within a few seconds, you should see that channel move from the `Connections` section of the sidebar, to the `Channels` section. This means
that this channel has now been disconnected from the organization it was previously connected to.
## 🎊 Conclusion 🎊
Great job! You've learned how the Slack Connect APIs work! You've learned how to send an invite, accept and invite, approve an invite, and
also disconnect a shared channel!
Another thing you may want to try is to edit settings for your organization's Slack Connect use case. If you want to auto approve all
channels between a certain organization you may do that. This will speed up the creation of Slack Connect channels.
Thanks so much for learning with me. Please file any issues in this GitHub repo!