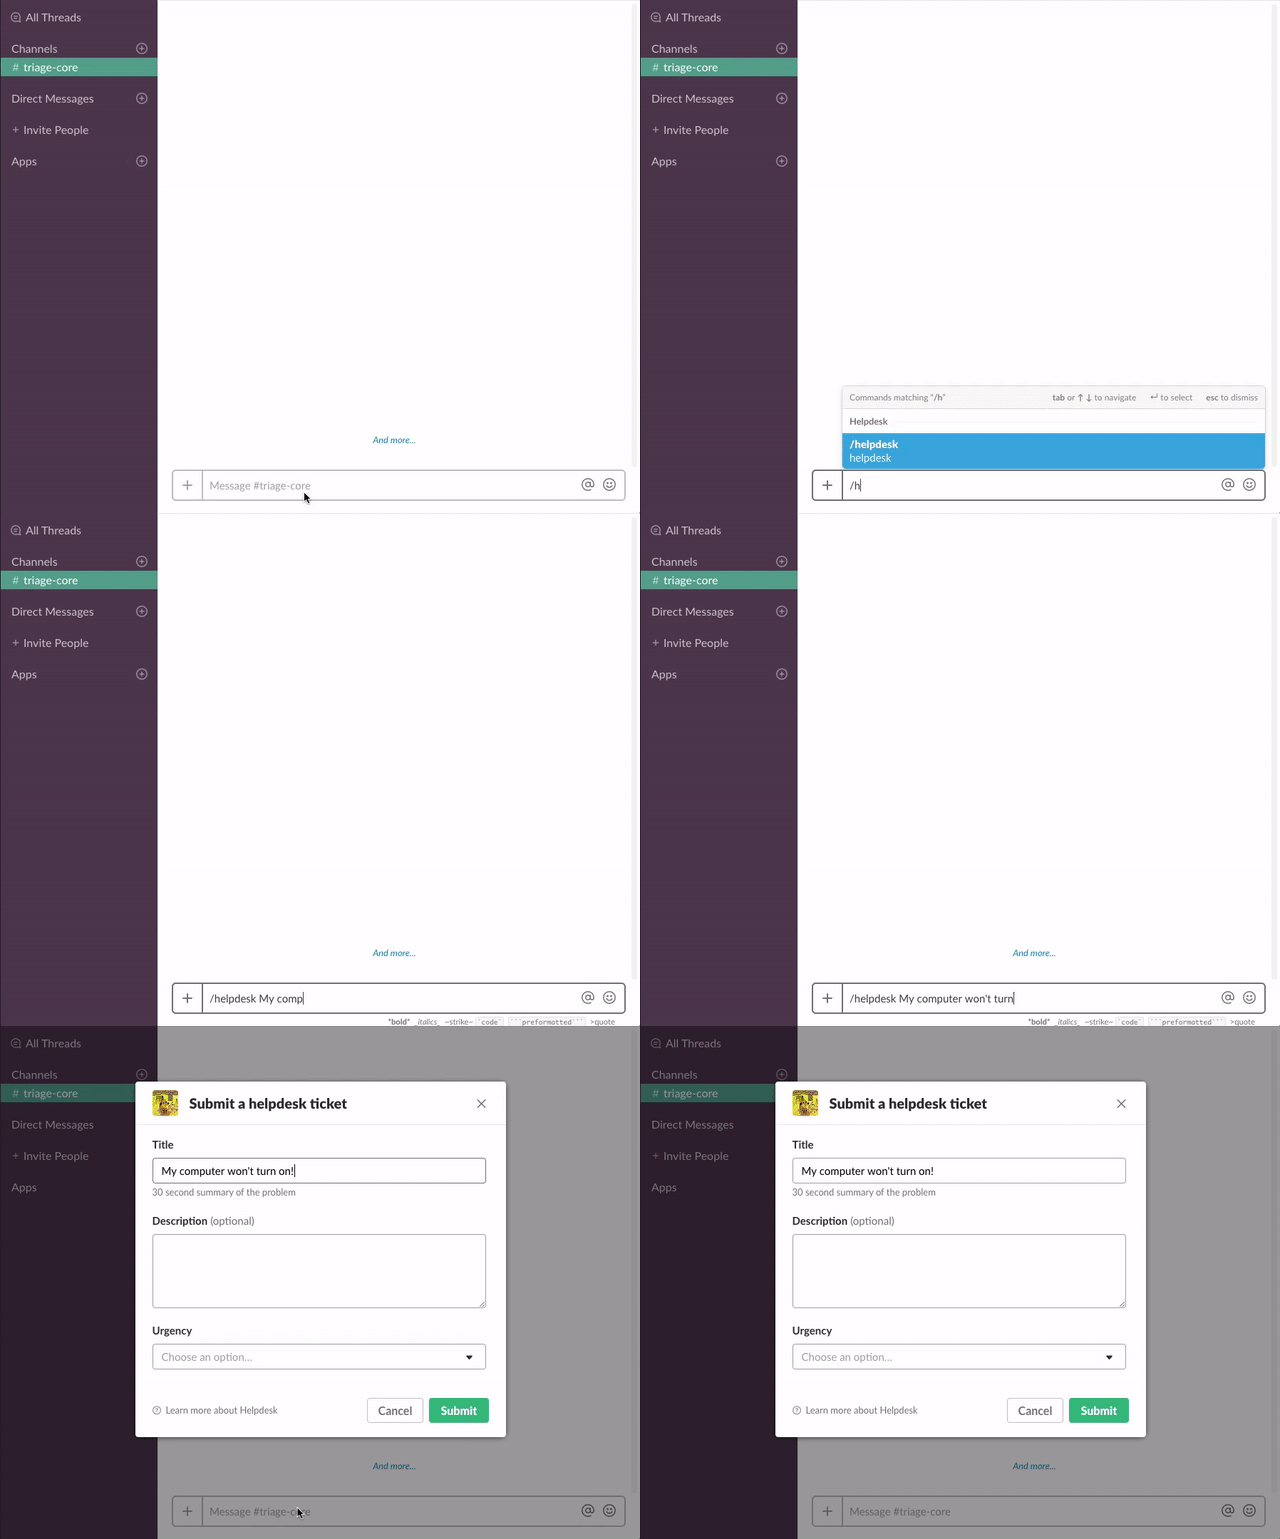
https://github.com/slackapi/template-slash-command-and-dialogs
Sample Slack app that uses a Slash Command and interactive message to create helpdesk tickets
https://github.com/slackapi/template-slash-command-and-dialogs
slack slack-blueprint slack-tutorial slack-workflow-sample slash-commands
Last synced: 10 months ago
JSON representation
Sample Slack app that uses a Slash Command and interactive message to create helpdesk tickets
- Host: GitHub
- URL: https://github.com/slackapi/template-slash-command-and-dialogs
- Owner: slackapi
- License: mit
- Created: 2017-09-10T01:34:40.000Z (over 8 years ago)
- Default Branch: master
- Last Pushed: 2023-11-13T21:05:34.000Z (about 2 years ago)
- Last Synced: 2025-03-24T08:35:57.292Z (10 months ago)
- Topics: slack, slack-blueprint, slack-tutorial, slack-workflow-sample, slash-commands
- Language: JavaScript
- Size: 47.9 KB
- Stars: 143
- Watchers: 4
- Forks: 75
- Open Issues: 7
-
Metadata Files:
- Readme: README.md
- Contributing: .github/CONTRIBUTING.md
- License: LICENSE
- Code of conduct: .github/CODE_OF_CONDUCT.md
Awesome Lists containing this project
README
# Slash Command and ~~Dialogs~~ Modals blueprint
> :sparkles: *Updated October 2019: As we have introduced some new features, this tutorial and the code samples have been updated! All the changes from the previous version of this example, read the [DIFF.md](DIFF.md)*
## Creating a helpdesk ticket using a Slash Command and a ~~Dialog~~ Modal
Use a slash command and a dialog to create a helpdesk ticket in a 3rd-party system. Once it has been created, send a message to the user with information about their ticket.

## Setup
### Create a Slack app
1. Create an app at [https://api.slack.com/apps](https://api.slack.com/apps)
2. Add a Slash command (See *Add a Slash Command* section below)
3. Enable Interactive components (See *Enable Interactive Components* below)
4. Navigate to the **OAuth & Permissions** page and select the following bot token scopes:
* `commands`
* `chat:write`
* `users:read`
* `users:read.email`
* `im:write`
5. Click 'Save Changes' and install the app (You should get an OAuth access token after the installation)
#### Add a Slash Command
1. Go back to the app settings and click on Slash Commands.
1. Click the 'Create New Command' button and fill in the following:
* Command: `/helpdesk`
* Request URL: Your server or Glitch URL + `/command`
* Short description: `Create a helpdesk ticket`
* Usage hint: `[the problem you're having]`
If you did "Remix" on Glitch, it auto-generate a new URL with two random words, so your Request URL should be like: `https://fancy-feast.glitch.me/command`.
#### Enable Interactive Components
1. Go back to the app settings and click on Interactive Components.
1. Set the Request URL to your server or Glitch URL + `/interactive`.
1. Save the change.
### Set Your Credentials
1. Set the following environment variables to `.env` (see `.env.sample`):
* `SLACK_ACCESS_TOKEN`: Your bot token, `xoxb-` (available on the **OAuth & Permissions** once you install the app)
* `SLACK_SIGNING_SECRET`: Your app's Signing Secret (available on the **Basic Information** page)
2. If you're running the app locally, run the app (`npm start`). Or if you're using Glitch, it automatically starts the app.
#### Run the app
1. Get the code
* Clone this repo and run `npm install`
2. Set the following environment variables to `.env` (see `.env.sample`):
* `SLACK_ACCESS_TOKEN`: Your bot token, `xoxb-` (available on the **OAuth & Permissions** once you install the app)
* `SLACK_SIGNING_SECRET`: Your app's Signing Secret (available on the **Basic Information** page)
3. If you're running the app locally, run the app (`npm start`).
If you want to run it locally, I recommend creating a localhost tunnel with [ngrok](https://ngrok.com)!
### App Flow Diagram
