https://github.com/softchris/fx-demo
https://github.com/softchris/fx-demo
Last synced: 3 months ago
JSON representation
- Host: GitHub
- URL: https://github.com/softchris/fx-demo
- Owner: softchris
- Created: 2023-09-06T01:01:42.000Z (almost 2 years ago)
- Default Branch: main
- Last Pushed: 2023-09-06T15:45:13.000Z (almost 2 years ago)
- Last Synced: 2025-02-08T13:14:32.520Z (5 months ago)
- Language: Java
- Size: 7.81 KB
- Stars: 0
- Watchers: 1
- Forks: 0
- Open Issues: 0
-
Metadata Files:
- Readme: README.md
Awesome Lists containing this project
README
# Running this repo
Three ways to run this repo:
- Run JavaFX from the command line
- Run JavaFX from VS Code
- Run JavaFX from VS Code as a Maven project
## References
- https://code.visualstudio.com/docs/java/java-gui
- https://openjfx.io/openjfx-docs/#introduction
## Run JavaFX from the command line
1. First, you need to install a runtime for [JavaFX](https://gluonhq.com/products/javafx/). Once you've downloaded it, make a note of the install path, the full pathto the *lib* folder, for example:
```bash
C:\Users\\Downloads\openjfx-20.0.2_windows-x64_bin-sdk\javafx-sdk-20.0.2\lib
```
1. Create an app by creating a file *JavaFX.java* with the following content:
```java
import javafx.application.Application;
import javafx.scene.Scene;
import javafx.scene.control.Label;
import javafx.scene.layout.StackPane;
import javafx.stage.Stage;
public class HelloFX extends Application {
@Override
public void start(Stage stage) {
String javaVersion = System.getProperty("java.version");
String javafxVersion = System.getProperty("javafx.version");
Label l = new Label("Hello, JavaFX " + javafxVersion + ", running on Java " + javaVersion + ".");
Scene scene = new Scene(new StackPane(l), 640, 480);
stage.setScene(scene);
stage.show();
}
public static void main(String[] args) {
launch();
}
}
```
1. Now let's compile this from the terminal:
```bash
javac --module-path C:\Users\\Downloads\openjfx-20.0.2_windows-x64_bin-sdk\javafx-sdk-20.0.2\lib --add-modules javafx.controls,javafx.fxml HelloFX.java
```
> Replace the value of `--module--path` to reflect your install path of JavaFX.
> Note also how we add the modules `javafx.controls` and `javafx.fxml` to the `--add-modules` option and how the final argument is the name of the file we want to compile.
1. Let's run our app with:
```bash
java --module-path C:\Users\\Downloads\openjfx-20.0.2_windows-x64_bin-sdk\javafx-sdk-20.0.2\lib --add-modules javafx.controls HelloFX
```
> Replace the value of `--module--path` to reflect your install path of JavaFX.
You should now see a window with the text "Hello, JavaFX 15.0.1, running on Java 15.0.1.".
## Run JavaFX from VS Code
> To run JavaFX from VS Code, we need to ensure we got the [Java project extension](https://marketplace.visualstudio.com/items?itemName=vscjava.vscode-java-pack) installed.
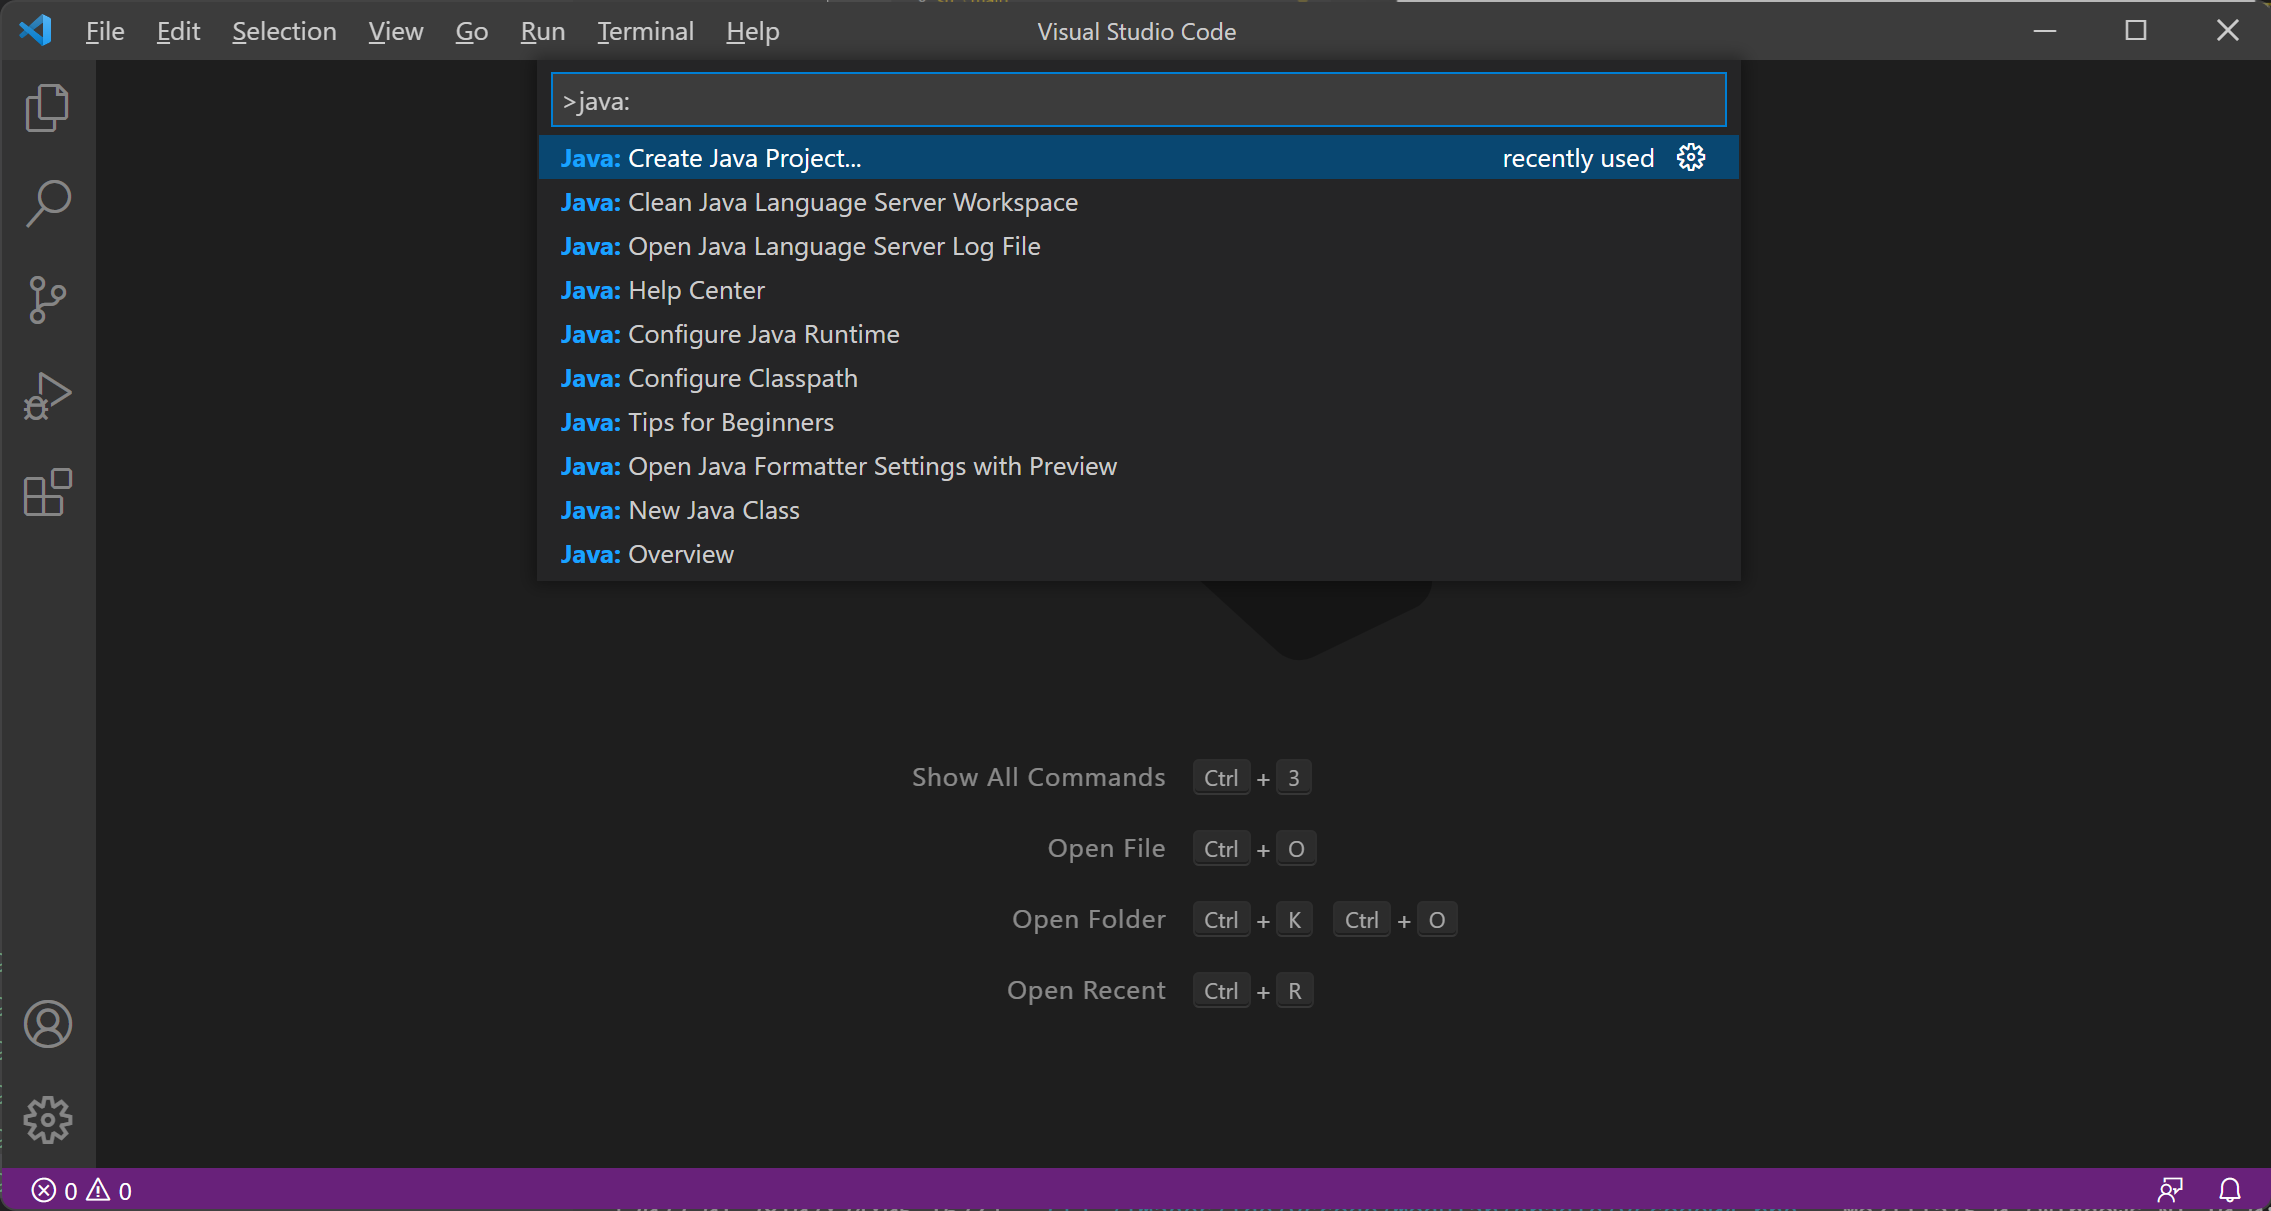
1. Select `Help -> Show All Commands`, in the dropdown list, enter **Java: Create Java project...**, and select it.

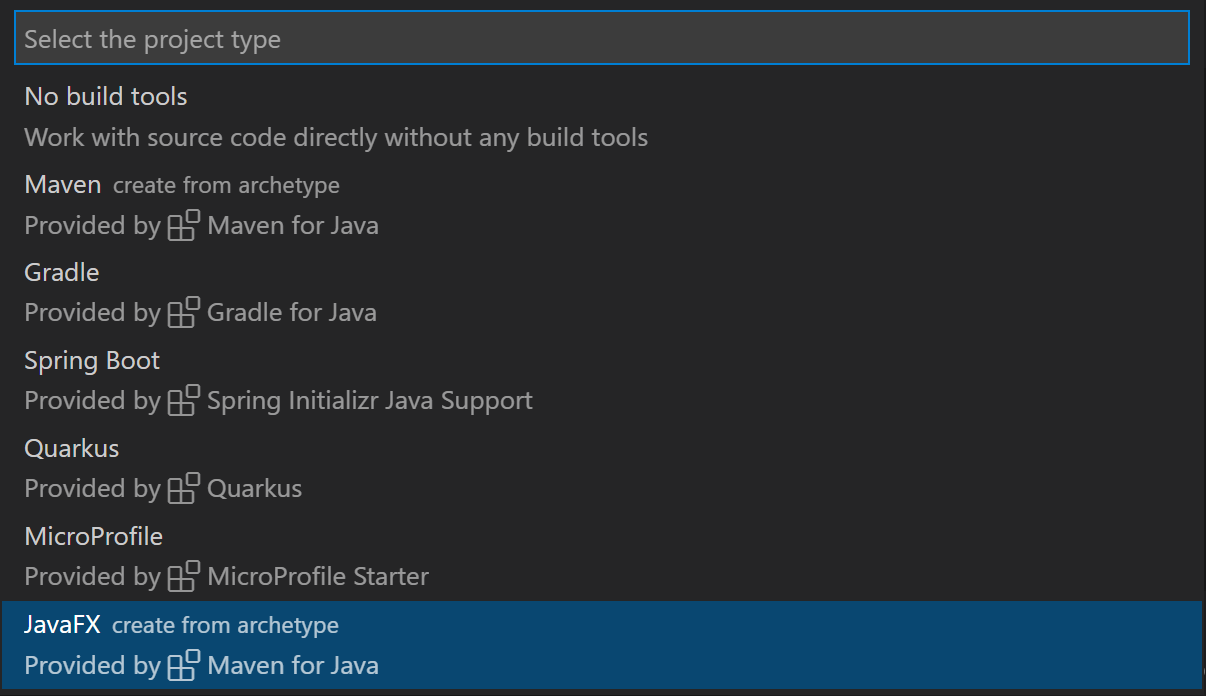
1. Select `No build tools` in the list as the project type.
1. Then select the target location (the directory you're in usually) you want to store the new project in the file explorer. Provide a name to the project, like **HelloFX**.
### Add dependencies
At this point, we have a project, but we need to add the JavaFX dependencies to it.
To add JavaFX as dependencies to your project, you can simply copy all the jar files from the *lib* folder of your downloaded JavaFX SDK, for instance *C:\Users\\Downloads\openjfx-20.0.2_windows-x64_bin-sdk\javafx-sdk-20.0.2\lib* to the lib folder of your project. Or alternatively, you can add them via the Java Projects explorer.
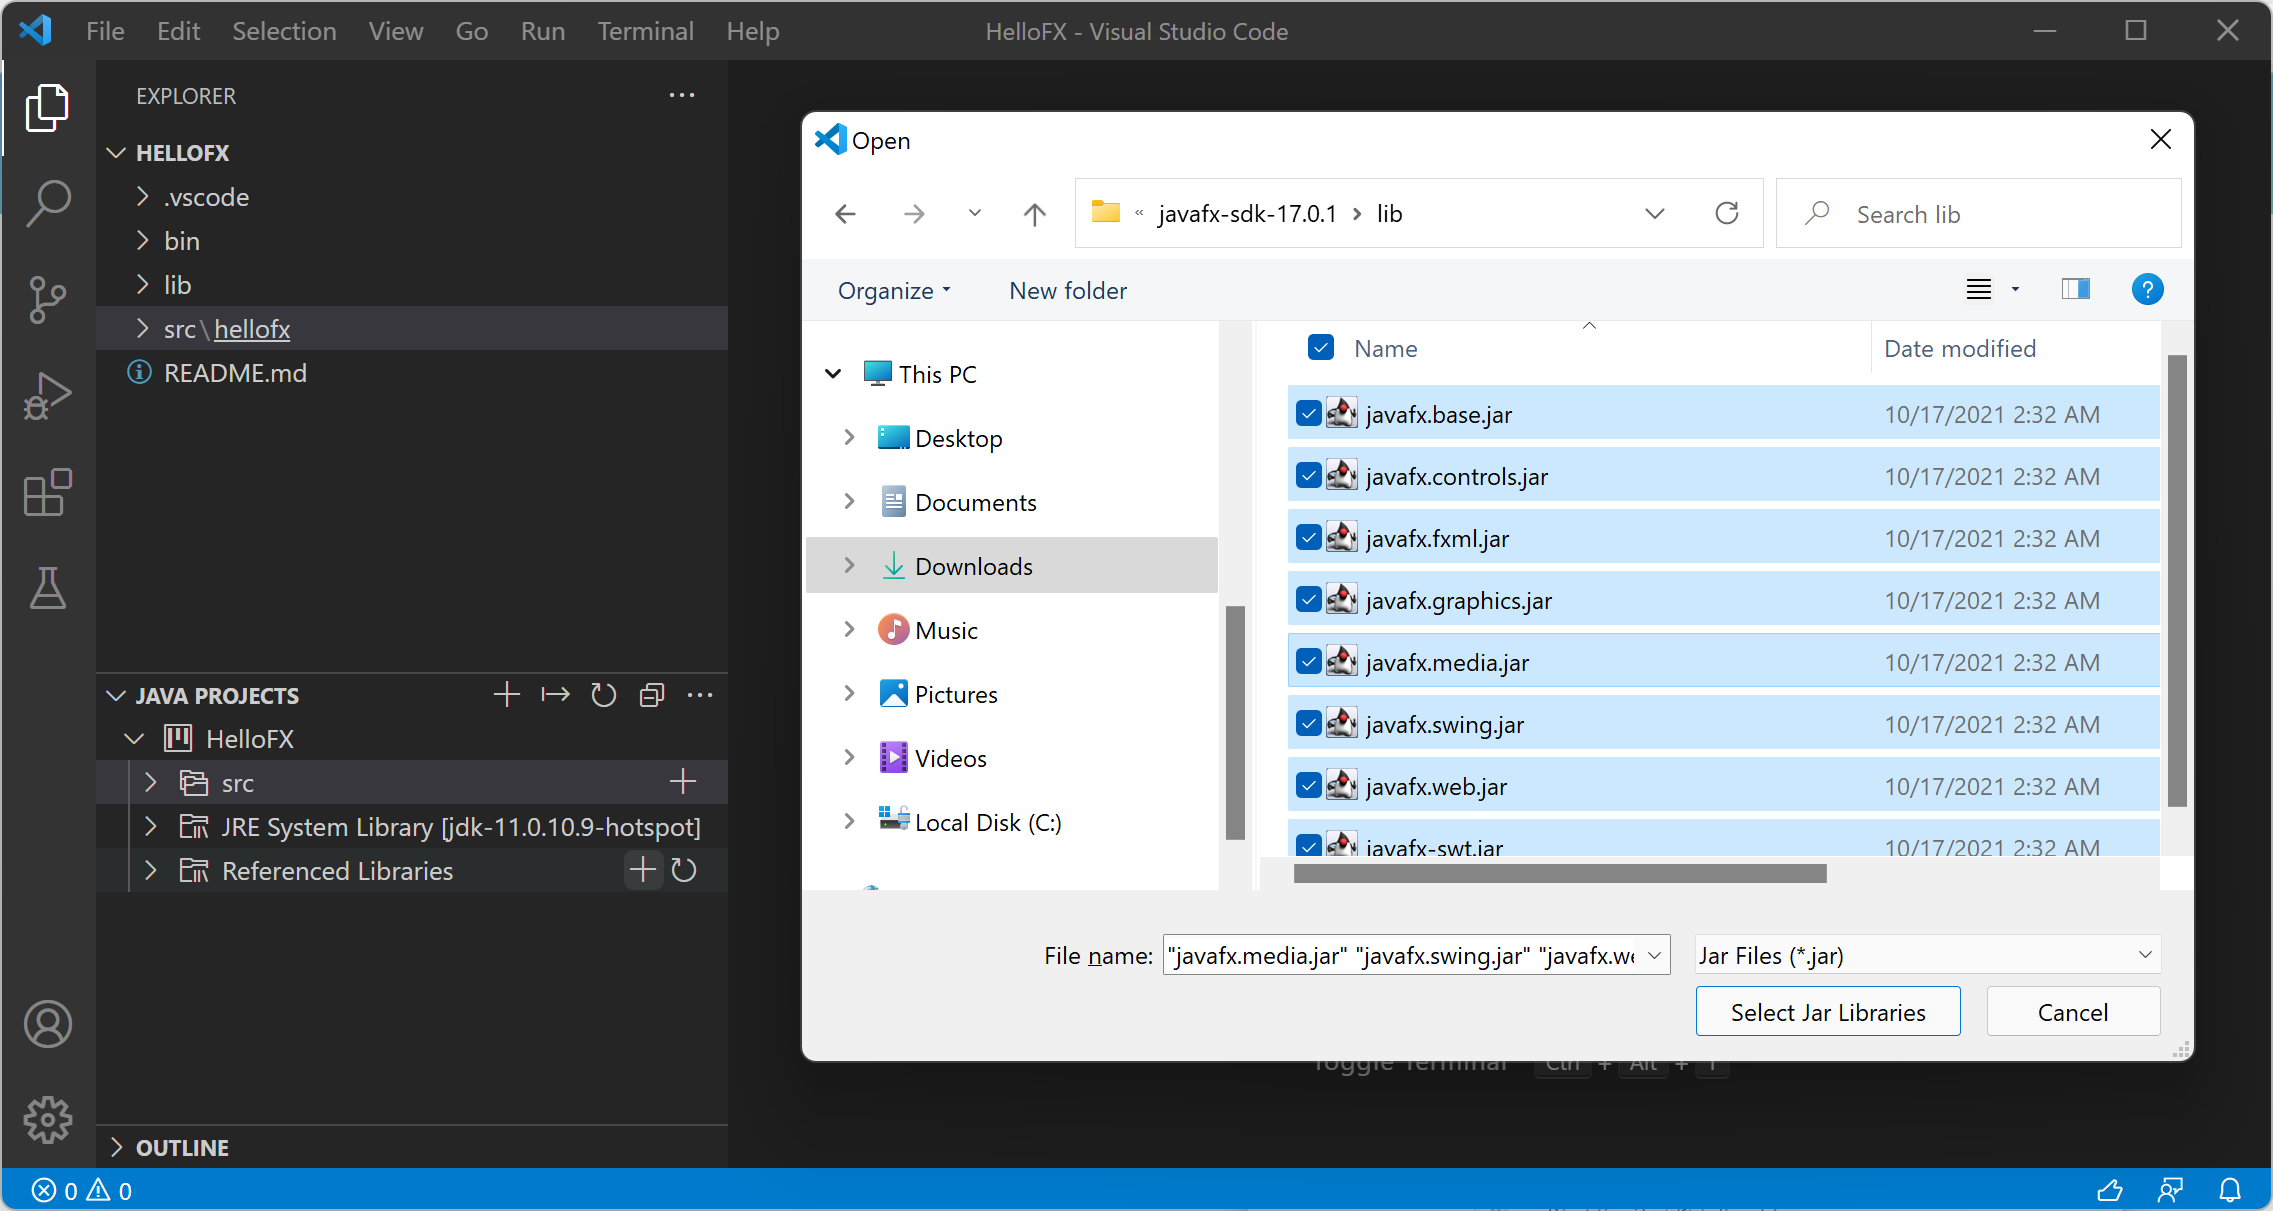
1. Click the + button beside the *Referenced Libraries* (in the bottom left menu), select the JavaFX library jars to add them.
It should look like so when you select the .jar files and add them as references libraries:

### Create the app
You're all setup, time to build the app.
1. Add the following files *Main.java*, *Controller.java*, *hellofx.fxml*.
**Main.java** content:
```java
package hellofx;
import javafx.application.Application;
import javafx.fxml.FXMLLoader;
import javafx.scene.Parent;
import javafx.scene.Scene;
import javafx.stage.Stage;
public class Main extends Application {
@Override
public void start(Stage primaryStage) throws Exception{
Parent root = FXMLLoader.load(getClass().getResource("hellofx.fxml"));
primaryStage.setTitle("Hello World");
primaryStage.setScene(new Scene(root, 400, 300));
primaryStage.show();
}
public static void main(String[] args) {
launch(args);
}
}
```
Our entry point for the app.
**Controller.java**
```java
package hellofx;
import javafx.fxml.FXML;
import javafx.scene.control.Label;
public class Controller {
@FXML
private Label label;
public void initialize() {
String javaVersion = System.getProperty("java.version");
String javafxVersion = System.getProperty("javafx.version");
label.setText("Hello, JavaFX " + javafxVersion + "\nRunning on Java " + javaVersion + ".");
}
}
```
This is the controller layer where we interact with the UI and for example respond to events triggered.
**hellofx.fxml**
```xml
```
this is the UI expressed as XML.
### Run the app
You know have an app. Let's run it.
1. Select the `Run and debug` menu option on the left.
1. Select to run the app, that should generate a *launch.json* file in the *.vscode* folder. OR you can also define your own *launch.json* file with the following content:
```json
{
// Use IntelliSense to learn about possible attributes.
// Hover to view descriptions of existing attributes.
// For more information, visit: https://go.microsoft.com/fwlink/?linkid=830387
"version": "0.2.0",
"configurations": [
{
"type": "java",
"name": "Launch App",
"request": "launch",
"mainClass": "hellofx.Main",
"vmArgs": "--module-path C:/Users//Downloads/openjfx-20.0.2_windows-x64_bin-sdk/javafx-sdk-20.0.2/lib --add-modules javafx.controls,javafx.fxml",
}
]
}
```
Note two important things here:
- The `vmArgs` option, which is the path to the JavaFX SDK and the modules we want to add.
- The `mainClass` option, which is the entry point of our app.
## Run JavaFX from VS Code as a Maven project
1. Select `Help -> Show All Commands`, in the dropdown list, enter Java: Create Java project..., and select it.

1. Select JavaFX in the list as the project type.

1. Input `group` id, like **org.openjfx** and `artifact id`, like **hellofx** and select the project location in the file explorer (the directory you're in).
> Then a command will be sent and executed in the terminal, which creates a JavaFX project via the Maven Archetype for you. You will use this later to run the project.
1. Ensure the *pom.xml* looks like so:
```xml
4.0.0
org.openjfx
hellofx
0.0.1-SNAPSHOT
UTF-8
11
17.0.1
0.0.8
org.openjfx
javafx-controls
${javafx.version}
org.openjfx
javafx-fxml
${javafx.version}
org.apache.maven.plugins
maven-compiler-plugin
3.8.1
${maven.compiler.release}
org.openjfx
javafx-maven-plugin
${javafx.maven.plugin.version}
${maven.compiler.release}
hellofx
launcher
hellofx.Main
```
and your *Main.java* file should look like so:
```java
package hellofx;
import javafx.application.Application;
import javafx.scene.Scene;
import javafx.scene.control.Label;
import javafx.scene.layout.StackPane;
import javafx.stage.Stage;
public class Main extends Application {
@Override
public void start(Stage stage) {
String javaVersion = System.getProperty("java.version");
String javafxVersion = System.getProperty("javafx.version");
Label l = new Label("Hello, JavaFX " + javafxVersion + ", running on Java " + javaVersion + ".");
Scene scene = new Scene(new StackPane(l), 640, 480);
stage.setScene(scene);
stage.show();
}
public static void main(String[] args) {
launch();
}
}
```
and *Main.java* should be located in the following folder: *src/main/java/hellofx/Main.java*. This is because Maven expects app files to be located in *src/main/java*.
### Run the app
In the Maven menu in the bottom left of VS Code, expand the `javafx` section and select the play icon on the `javafx:run` option. This should build and run the app.