https://github.com/spaceteam/space-trace
Covid tracing service for the Space Team and Racing Team.
https://github.com/spaceteam/space-trace
Last synced: about 1 year ago
JSON representation
Covid tracing service for the Space Team and Racing Team.
- Host: GitHub
- URL: https://github.com/spaceteam/space-trace
- Owner: SpaceTeam
- License: mit
- Created: 2021-11-03T13:54:30.000Z (over 4 years ago)
- Default Branch: main
- Last Pushed: 2022-03-20T22:37:56.000Z (about 4 years ago)
- Last Synced: 2025-03-24T19:21:44.927Z (about 1 year ago)
- Language: Python
- Homepage:
- Size: 1.53 MB
- Stars: 3
- Watchers: 4
- Forks: 3
- Open Issues: 4
-
Metadata Files:
- Readme: README.md
- License: LICENSE
Awesome Lists containing this project
README
# space-trace
Tracing service for the [TU Wien Space Team](https://spaceteam.at/?lang=en) and [TU Wien Racing Team](https://en.tuwienracing.at/).
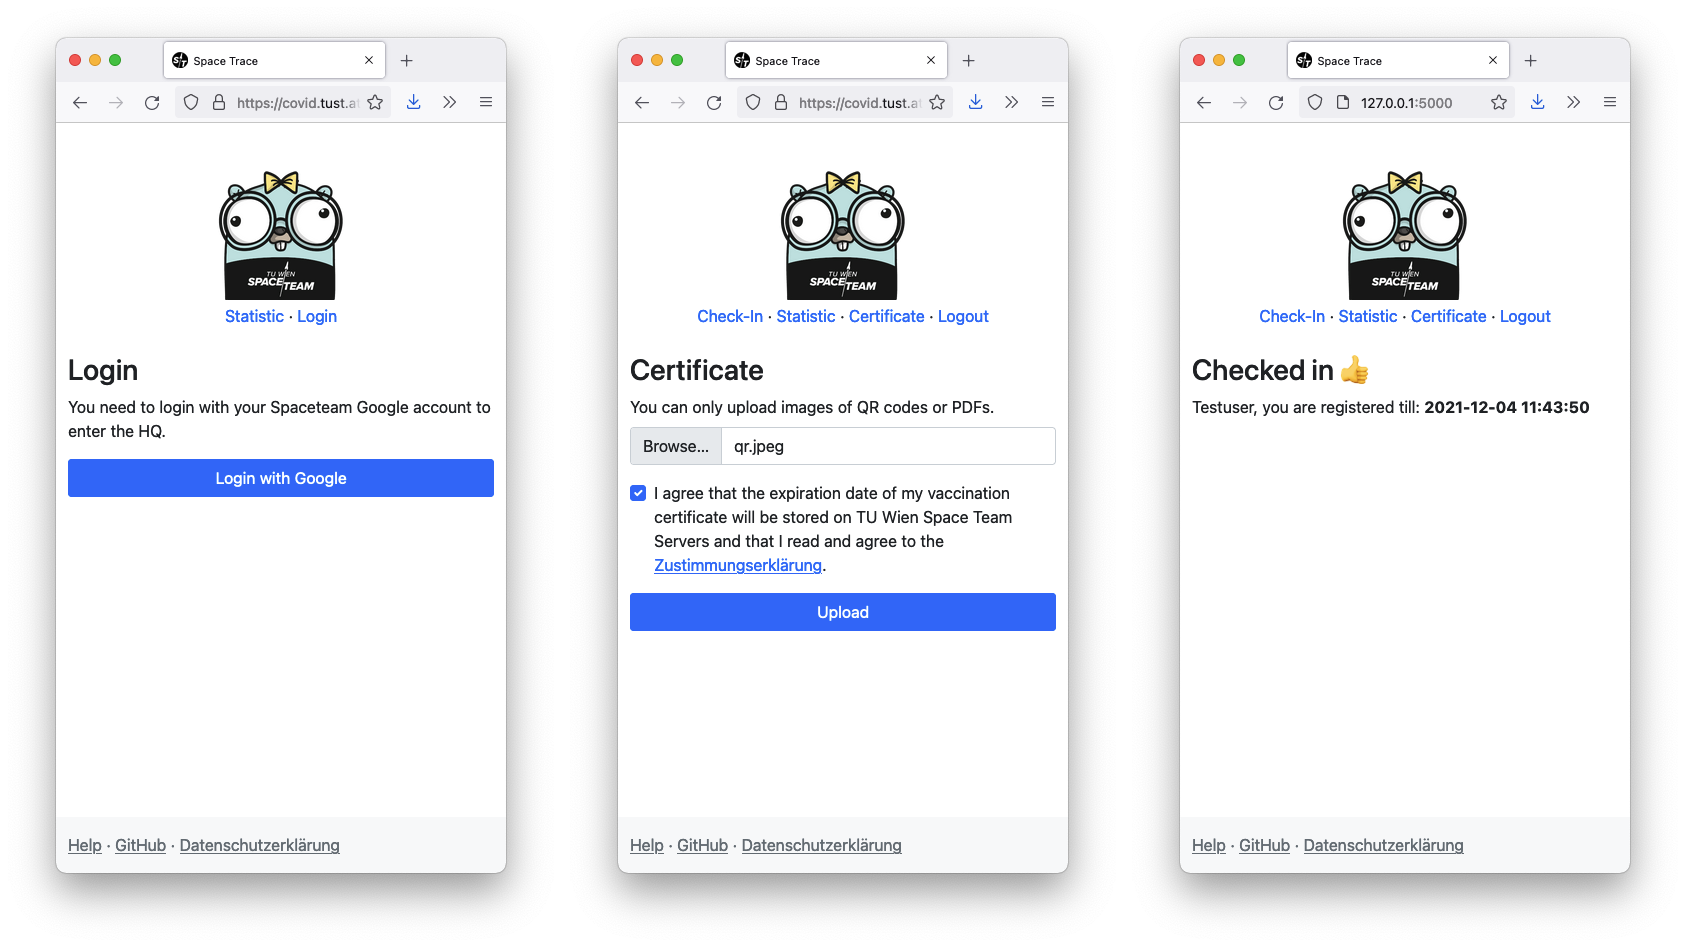
## Features
- Login with Space / Racing Team Google account (SAML).
- Decode and verify [EU Digital COVID Certificates](https://en.wikipedia.org/wiki/EU_Digital_COVID_Certificate)
- Upload certificates as PDF or Image.
- Export contacts in day range
- Smart Export by defining time range and person.
## Getting started
You can either set up the environment yourself or use the VSCode Docker environment. Some dependencies, such as `zbar`, are platform-specific and therefore cause potential installation issues (e.g. on Windows and Mac M1 Apple Silicon). With the Docker VSCode setup, you should not encounter such issues.
### Without Docker
1. Install Python3.8 (or higher), `zbar`, `popper`, `libxml2`
2. Install all dependencies with:
```bash
python3 -m venv venv
source venv/bin/activate
pip install -r requirements.txt
```
3. Setup the config by copying `instance/config_example.toml` to
`instance/config.toml` and editing the new config
(the comments in the file will guide you).
4. Start the server with:
```
export FLASK_APP=space_trace FLASK_ENV=development
flask run
```
This launces a simple webserver which can only be accessed from the localhost.
**Note:** Don't use this server in production, it is insecure and low performance.
### With Docker and VSCode
The project has a VSCode remote container development environment, so you don't have to deal with platform-specific program installations.
1. Open this project in VSCode
2. Install the [Remote-Containers](https://marketplace.visualstudio.com/items?itemName=ms-vscode-remote.remote-containers) extension
3. Press `CMD + SHIFT + P` (macOS) or `CTRL + SHIFT + P` (Linux & Windows)
4. Run `Remote-Containers: Rebuild and Reopen in Container`
5. Setup the config by copying `instance/config_example.toml` to
`instance/config.toml` and editing the new config
(the comments in the file will guide you).
6. Run `flask run` in container
### Notes on the development environment
The login does not work in the development environment as SAML would redirect
to the production service. To work around this limitation you can can visit
`/login-debug` which will log you in as the user defined by the `DEBUG_EMAIL`
key in the `config.toml`. However this, only works when `FLASK_ENV=development`.
Be sure to also add that email to the `ADMINS` list if you want to test the admin
interface, and if you want to test certificate upload the email must be in the
format: `.@` because the service will verify
with the email that the certificate belongs to the user that uploaded it.
In the development environment the templates are hot reloadable, as is the
python backend, however editing `config.toml` requires a restart.
## Development
- Use [`black`](https://github.com/psf/black) to format code
- Try to follow the python style guide [PEP 8](https://www.python.org/dev/peps/pep-0008/)
- Run all tests before committing with: `python3 -m pytest`
## Deployment
How we deploy this app on Ubuntu.
Install the requirements with:
```bash
sudo apt -y install python3-venv python3-pip libzbar0 libxml2-dev libxmlsec1-dev libxmlsec1-openssl poppler-utils
```
Create a virtual env with:
```bash
python3 -m venv venv
```
Copy `instance/config_example.toml` to `instance/config.toml` and edit all
the fields in it.
Clone `instance/saml_example` into `instance/saml_st` and `instance/saml_rt`
and fill out your SAML configuration. For saml we use the python library
[python3-saml](https://github.com/onelogin/python3-saml) and documentation to
setup SAML can be found [here](https://github.com/onelogin/python3-saml#how-it-works).
Open `space-trace.service` and edit the username and all paths to the working
directory.
Start the systemd service with:
```bash
sudo cp space-trace.service /etc/systemd/system
sudo systemctl daemon-reload
sudo systemctl enable space-trace.service
sudo systemctl start space-trace.service
```
The service should now be up and running 🎉
To stop the service run:
```bash
sudo systemctl stop space-trace.service
```
To update the service to a new version (commit) run:
```bash
git pull
sudo systemctl restart space-trace.service
```
## Resources
Some links I found helpful in dealing with the certificate:
- [What's Inside the EU Green Pass QR Code?](https://gir.st/blog/greenpass.html)
- [Decoding the EU Digital Covid Certificate QR code](https://www.bartwolff.com/Blog/2021/08/08/decoding-the-eu-digital-covid-certificate-qr-code)
- [DSC TrustList Update API](https://github.com/Digitaler-Impfnachweis/certification-apis/blob/master/dsc-update/README.md)
- [Austrian implementation of the EU Digital COVID Certificates](https://github.com/Federal-Ministry-of-Health-AT/green-pass-overview#details-on-trust-listsbusiness-rulesvalue-sets)
- [inofficial hcert-trustlist-mirror dcc (covid trustlist)](https://github.com/section42/hcert-trustlist-mirror)
- [lazka / pygraz-covid-cert](https://github.com/lazka/pygraz-covid-cert)