https://github.com/sponsfreixes/htmx-flask
https://github.com/sponsfreixes/htmx-flask
Last synced: 8 months ago
JSON representation
- Host: GitHub
- URL: https://github.com/sponsfreixes/htmx-flask
- Owner: sponsfreixes
- License: mit
- Created: 2022-10-04T04:58:22.000Z (about 3 years ago)
- Default Branch: main
- Last Pushed: 2024-04-29T17:30:25.000Z (over 1 year ago)
- Last Synced: 2025-03-25T13:39:14.158Z (9 months ago)
- Language: Python
- Size: 131 KB
- Stars: 31
- Watchers: 1
- Forks: 0
- Open Issues: 1
-
Metadata Files:
- Readme: README.md
- Changelog: CHANGELOG.md
- License: LICENSE
Awesome Lists containing this project
- awesome-python-htmx - htmx-Flask - Flask-a9bbcc?style=flat&logo=flask&logoColor=black" alt="Flask"></a> <br/> (Third Party Packages 📦 <a name = "tools"></a> / Helper Libraries)
README
# htmx-Flask
htmx-Flask is an extension for Flask that adds support for [htmx](https://htmx.org) to
your application. It simplifies using htmx with Flask by enhancing the global `request`
object and providing a new `make_response` function.
## Install
It's just `pip install htmx-flask` and you're all set. It's a pure Python package that
only needs [`flask`](https://flask.palletsprojects.com) (for obvious reasons!).
## Usage
### Htmx Request
Before using the enhanced `request`, you need to initialize the extension with:
```python
from flask import Flask
from htmx_flask import Htmx
htmx = Htmx()
app = Flask(__name__)
htmx.init_app(app)
```
After that, you can use `htmx_flask.request.htmx` to easily access
[htmx request headers](https://htmx.org/reference/#request_headers). For example,
instead of:
```python
from flask import request
from my_app import app
@app.route("/")
def hello_workd():
if request.headers.get("HX-Request") == "true":
is_boosted = "Yes!" if request.headers.get("HX-Boosted") == "true" else "No!"
current_url = request.headers.get("HX-Current-URL")
return (
"
Hello World triggered from a htmx request.
"
f"Boosted: {is_boosted}
"
f"The current url is {current_url}."
)
else:
return "
Hello World triggered from a regular request.
"
```
You can do:
```python
from htmx_flask import request
from my_app import app
@app.route("/")
def hello_workd():
if request.htmx:
is_boosted = "Yes!" if request.htmx.boosted else "No!"
current_url = request.htmx.current_url
return (
"
Hello World triggered from a htmx request.
"
f"Boosted: {is_boosted}
"
f"The current url is {current_url}."
)
else:
return "
Hello World triggered from a regular request.
"
```
### Htmx response
You might be interested on adding
[htmx response headers](https://htmx.org/reference/#response_headers) to your response.
Use `htmx_flask.make_response` for that. For example, instead of:
```python
import json
from flask import make_response
from my_app import app
@app.route("/hola-mundo")
def hola_mundo():
body = "Hola Mundo!"
response = make_response(body)
response.headers["HX-Push-URL"] = "false"
trigger_string = json.dumps({"event1":"A message", "event2":"Another message"})
response.headers["HX-Trigger"] = trigger_string
return response
```
You can do:
```python
from htmx_flask import make_response
from my_app import app
@app.route("/hola-mundo")
def hola_mundo():
body = "Hola Mundo!"
return make_response(
body,
push_url=False,
trigger={"event1": "A message", "event2": "Another message"},
)
```
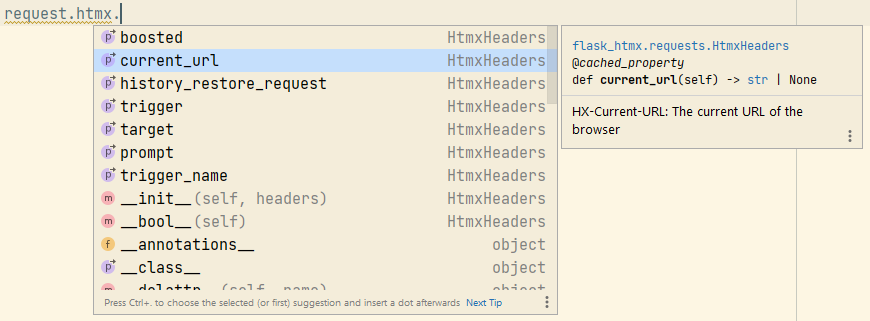
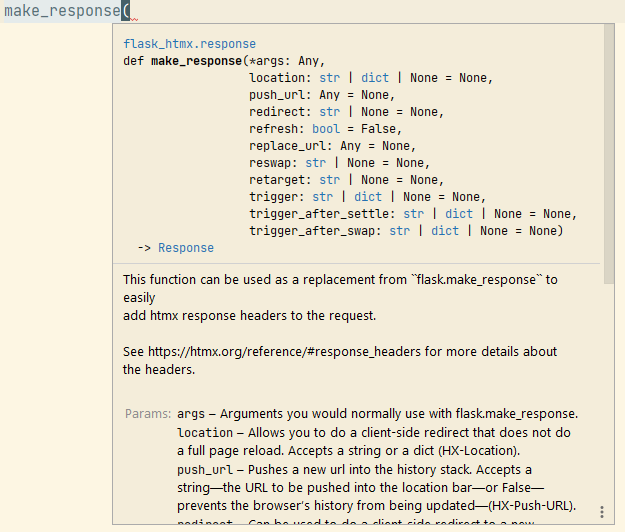
# IntelliSense
By using htmx-Flask you will also get the benefits of code completion, parameter info
and quick info on your IDE. Check out these screenshots from PyCharm:


## How to contribute
This project uses pre-commit hooks to run black, isort, pyupgrade and flake8 on each commit. To have that running
automatically on your environment, install the project with:
```shell
pip install -e .[dev]
```
And then run once:
```shell
pre-commit install
```
From now one, every time you commit your files on this project, they will be automatically processed by the tools listed
above.
## How to run tests
You can install pytest and other required dependencies with:
```shell
pip install -e .[tests]
```
And then run the test suite with:
```shell
pytest
```