https://github.com/stefan-wr/croppy
A simple Python UI for quickly cropping and resizing many images.
https://github.com/stefan-wr/croppy
image-cropping image-resizing python
Last synced: 12 months ago
JSON representation
A simple Python UI for quickly cropping and resizing many images.
- Host: GitHub
- URL: https://github.com/stefan-wr/croppy
- Owner: stefan-wr
- License: mit
- Created: 2018-06-07T15:02:01.000Z (about 8 years ago)
- Default Branch: master
- Last Pushed: 2019-01-08T09:24:38.000Z (over 7 years ago)
- Last Synced: 2025-06-04T20:17:31.243Z (about 1 year ago)
- Topics: image-cropping, image-resizing, python
- Language: Python
- Homepage:
- Size: 52.7 KB
- Stars: 1
- Watchers: 1
- Forks: 0
- Open Issues: 0
-
Metadata Files:
- Readme: README.md
- License: LICENSE
Awesome Lists containing this project
README
# CropPy
CropPy is a simple Python UI for cropping and/or resizing all images in a selected directory.
## Prerequisites
CropPy was developed and tested with Python 2.7. The following modules are needed
- Tkinter for the GUI
- [pillow](https://github.com/python-pillow/Pillow) for the image processig
## Usage
Run `cropPy.pyw` like any other Python script on your system.\
I used the `.pyw` file extension for easy usage on Windows where CropPy can be launched by double-clicking the file.
Now, you should see the following user interface.
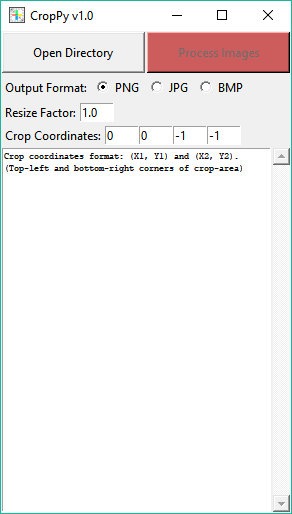
Click the **Open Directory** button and select the directory where the images you want to crop/resize are located.
If CropPy finds supported images in the selected directory **(supported are JPG, PNG and BMP)**, they will be listed in the console part of the UI.
The **Process Images** button changes its color to green like in the example screenshot below.
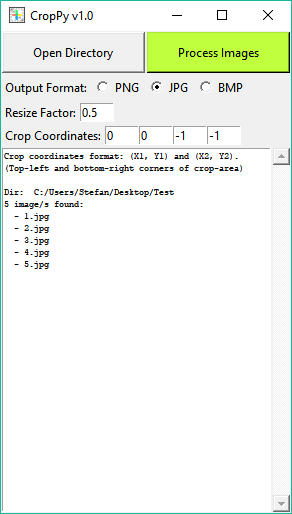
Now you can:
1. Choose the output image format. Supported formats are **JPG**, **PNG** and **BMP**
2. Choose the factor by which your images shall be resized. This factor is applied **after** cropping. A factor of `1.0` does not resize the images.
3. Define the rectangular cropping area by entering the **X- and Y-coordinates** of the **top-left** and **bottom-right corner** of the cropping area in pixels. On a multitude of images this only works well if all images are of the same size. Relative cropping is not supported. The first two input fields take the X- and Y-coordinates of the top-left corner. The third and fourth input fields are for the bottom-right corner. Choose the coordinates `0, 0, -1, -1` if you don't want to crop your images.
Start processing the images by clicking the **Process Images** button.
The processed images will be saved in the same directory with their original filenames prefixed by `crop_`. If such processed images already exist in the directory they will be overwritten.
### Default Configuration
The default values of the cropping coordinates, resize factor, initial directory and supported image formats can be changed at the top of the script:
```python
# Default Configuration
# ---------------------
# Initial Directory
initial_dir = os.path.normpath(r"~")
# Crop coordinates: upper left corner of crop area
crop_from_x = 0
crop_from_y = 0
# Crop coordinates: bottom right corner of crop area
crop_to_x = -1
crop_to_y = -1
# Resize factor, will be applied on dimensions of the cropped image:
resize_factor = 1.0
# Supported input file types:
supported_types = ['jpg', 'png', 'bmp']
```