https://github.com/stla/shinyChakraUI
A wrapper of the React library 'Chakra UI' for usage in Shiny.
https://github.com/stla/shinyChakraUI
r react reactr shiny
Last synced: 7 months ago
JSON representation
A wrapper of the React library 'Chakra UI' for usage in Shiny.
- Host: GitHub
- URL: https://github.com/stla/shinyChakraUI
- Owner: stla
- License: gpl-3.0
- Created: 2021-05-20T18:05:08.000Z (over 4 years ago)
- Default Branch: main
- Last Pushed: 2022-01-05T14:02:25.000Z (almost 4 years ago)
- Last Synced: 2025-04-14T14:34:51.120Z (8 months ago)
- Topics: r, react, reactr, shiny
- Language: JavaScript
- Homepage:
- Size: 14.9 MB
- Stars: 22
- Watchers: 5
- Forks: 1
- Open Issues: 0
-
Metadata Files:
- Readme: README.Rmd
- License: LICENSE.md
Awesome Lists containing this project
- awesome-shiny-extensions - shinyChakraUI - Chakra UI for Shiny. (Theming / Generic Theming)
- jimsghstars - stla/shinyChakraUI - A wrapper of the React library 'Chakra UI' for usage in Shiny. (JavaScript)
README
---
title: "shinyChakraUI"
output: github_document
---
```{r setup, include=FALSE}
knitr::opts_chunk$set(echo = TRUE, eval = FALSE)
```
```{r package}
library(shiny)
library(shinyChakraUI)
```
The `shinyChakraUI` package is a wrapper of the React library `Chakra UI`. A
very good documentation of this library is available at
.
# Basics
- Use `chakraPage` to define your Shiny UI.
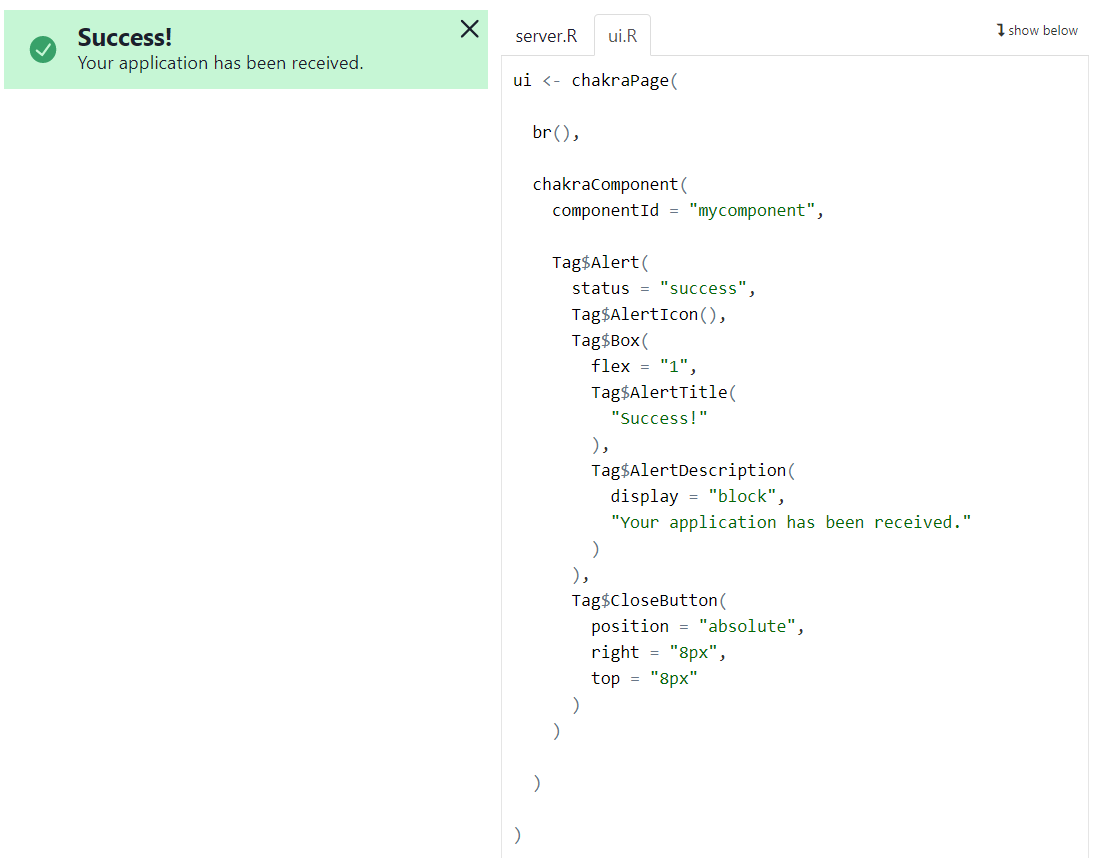
- Use `chakraComponent` to define a Chakra component.
For example, here is a Chakra alert component:

# React states
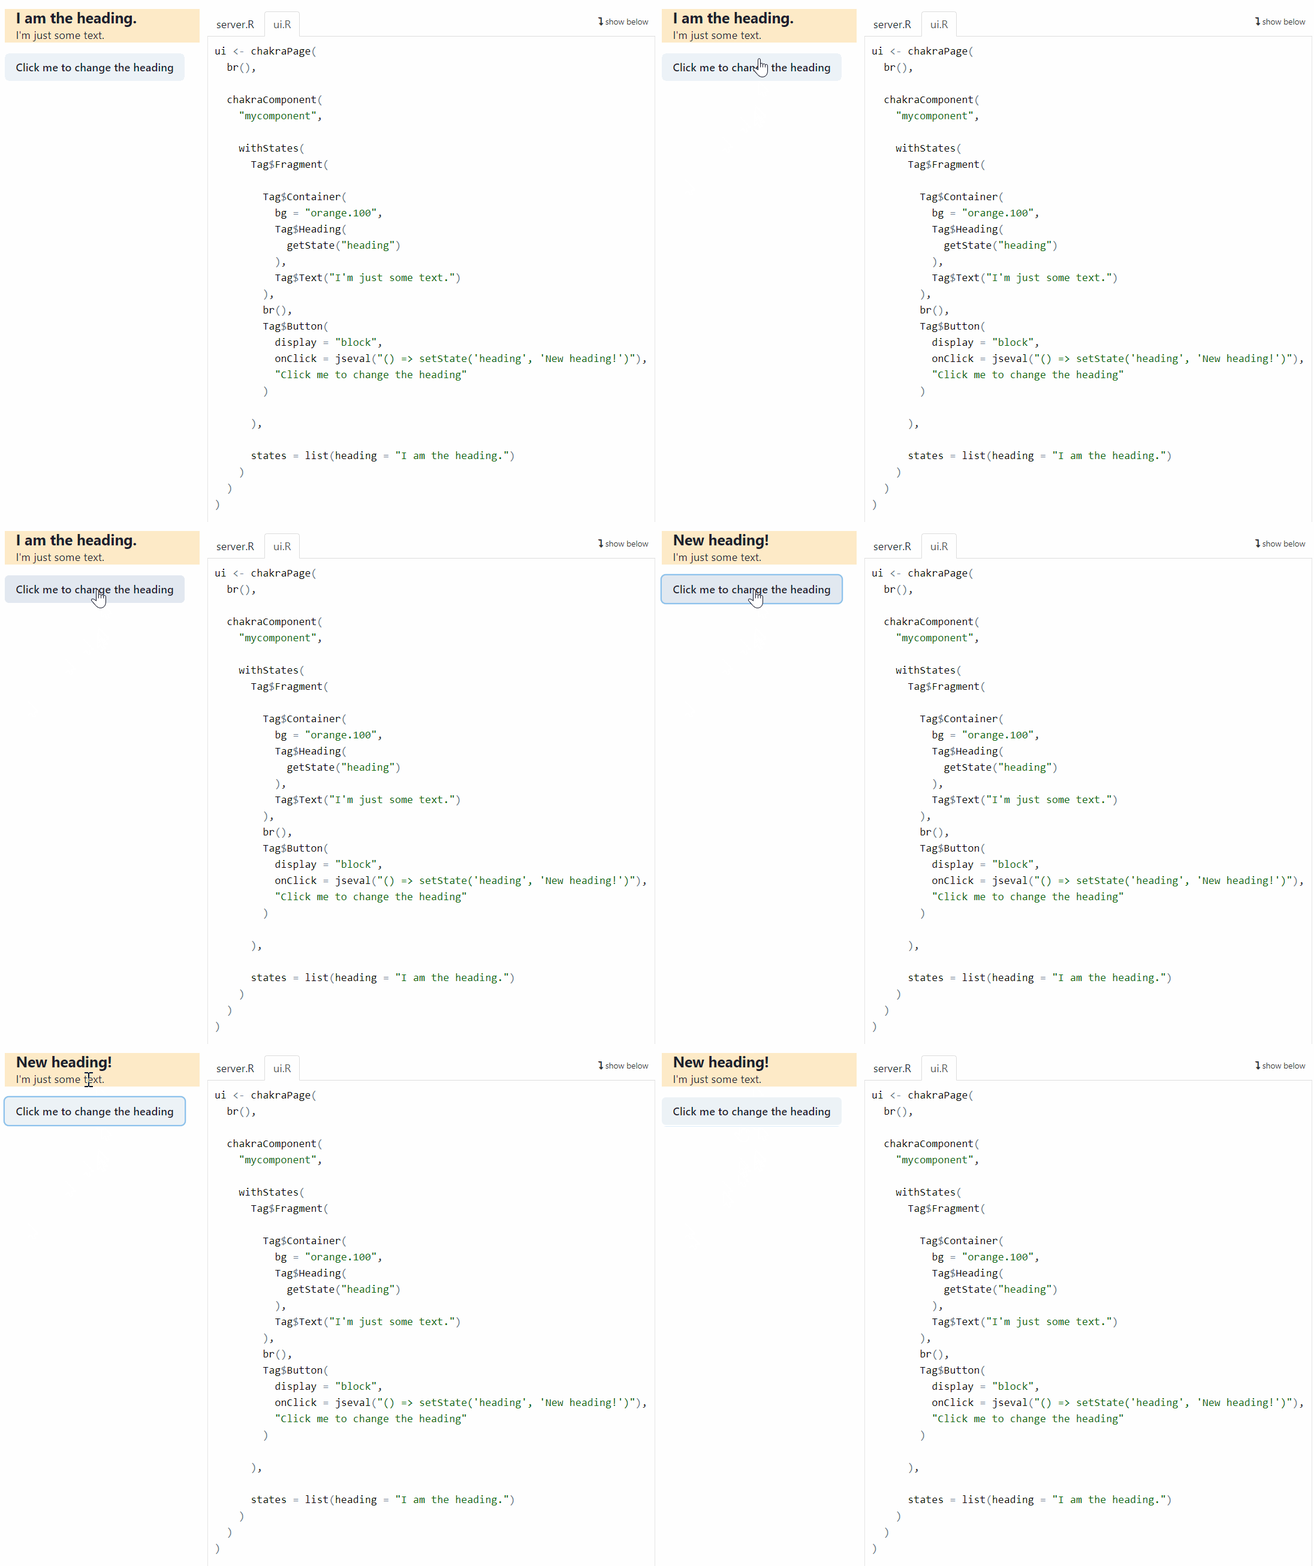
You can use React states with the help of the `withStates` function. Here is an
example:

The states are defined in the second argument of the `withStates` function, in
a list. Here one state is defined: `heading = "I am the heading."`. The state
is obtained in the Chakra component with the help of the R function `getState`.
To change the value of a state, you have to resort to JavaScript. The JavaScript
code must be given as a character string in the R function `jseval`. Here it is
given in the `onClick` attribute of the Chakra button:
`jseval("() => setState('heading', 'New heading!')")`. When the button is
clicked, the `'heading'` state takes the new value `'New heading!'`.
# Writing JSX code
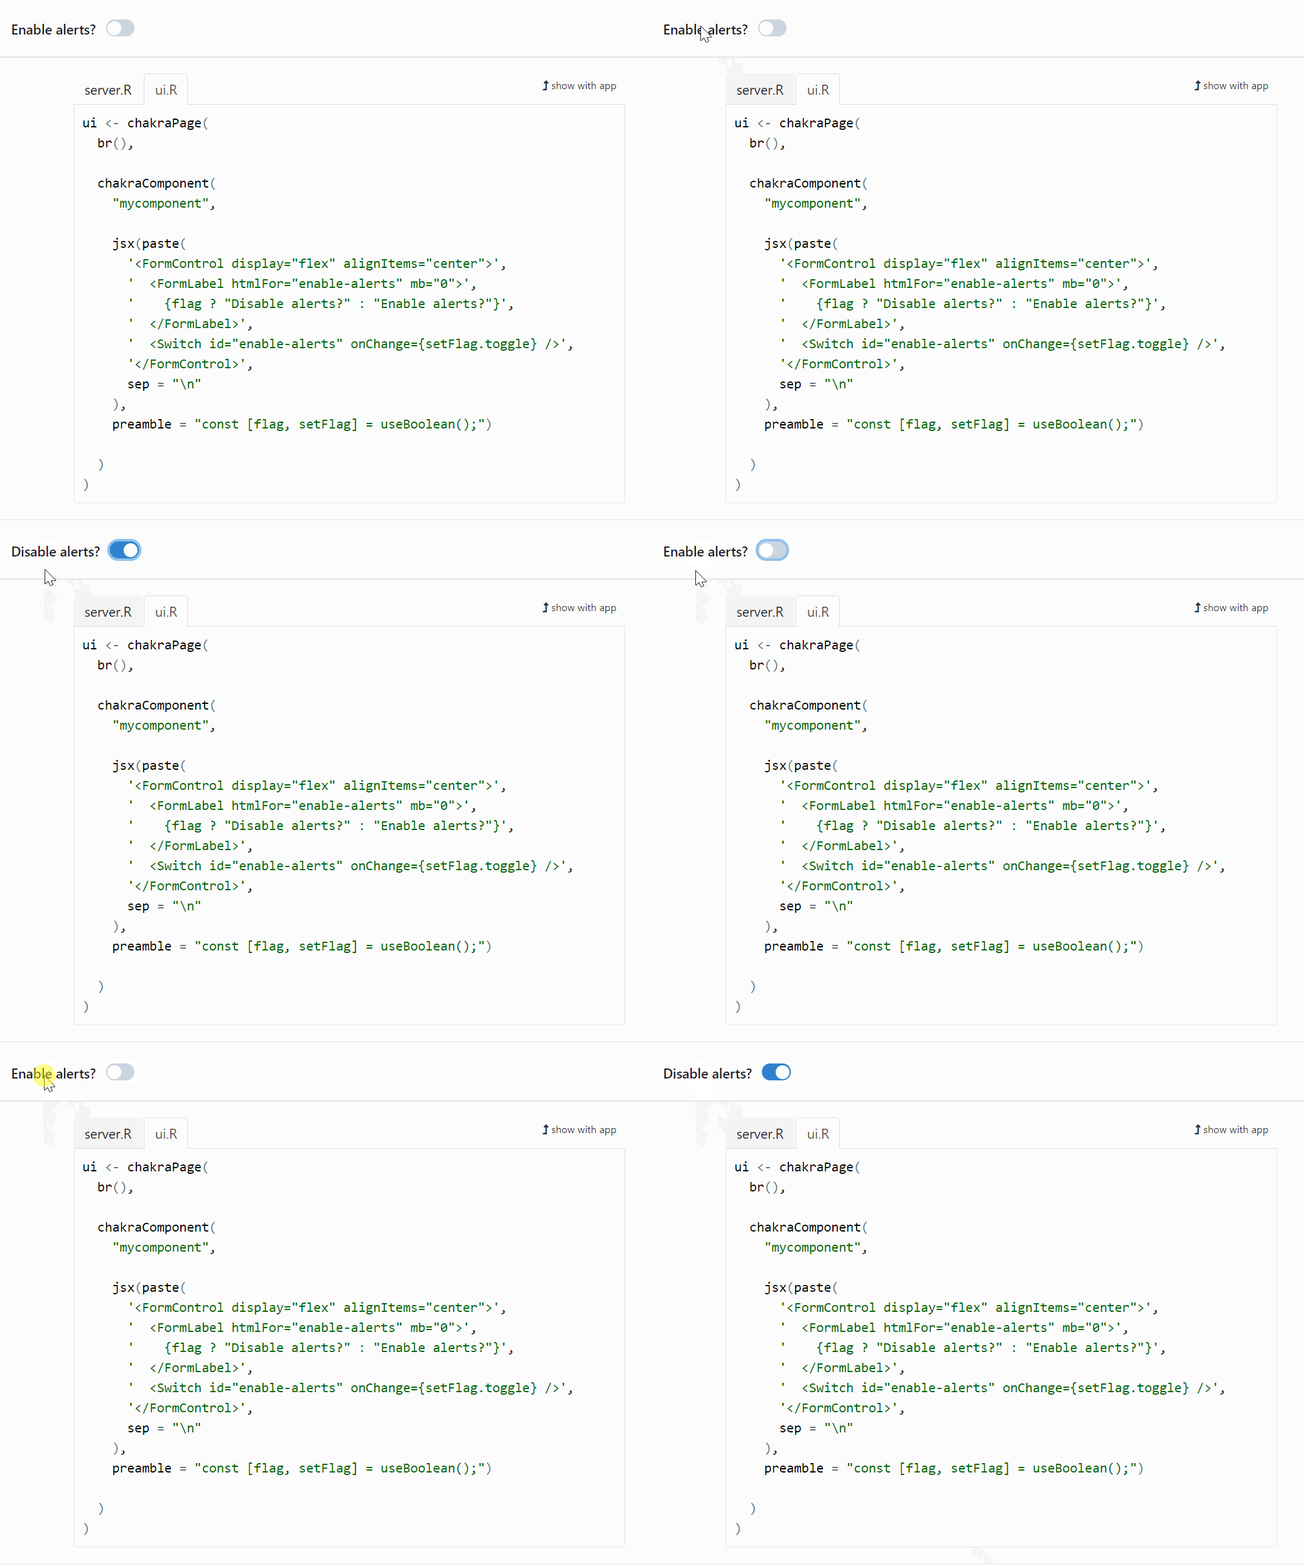
So far, we built React components with the help of the `Tag` constructor. It is
also possible to build a React component by writing its JSX code, with the help
of the `jsx` function. Here is an example:

The `jsx` function takes two arguments. The first one is the JSX element and
the second one, named `preamble`, is some JavaScript code to be executed at first.
# Setting a React state from Shiny server
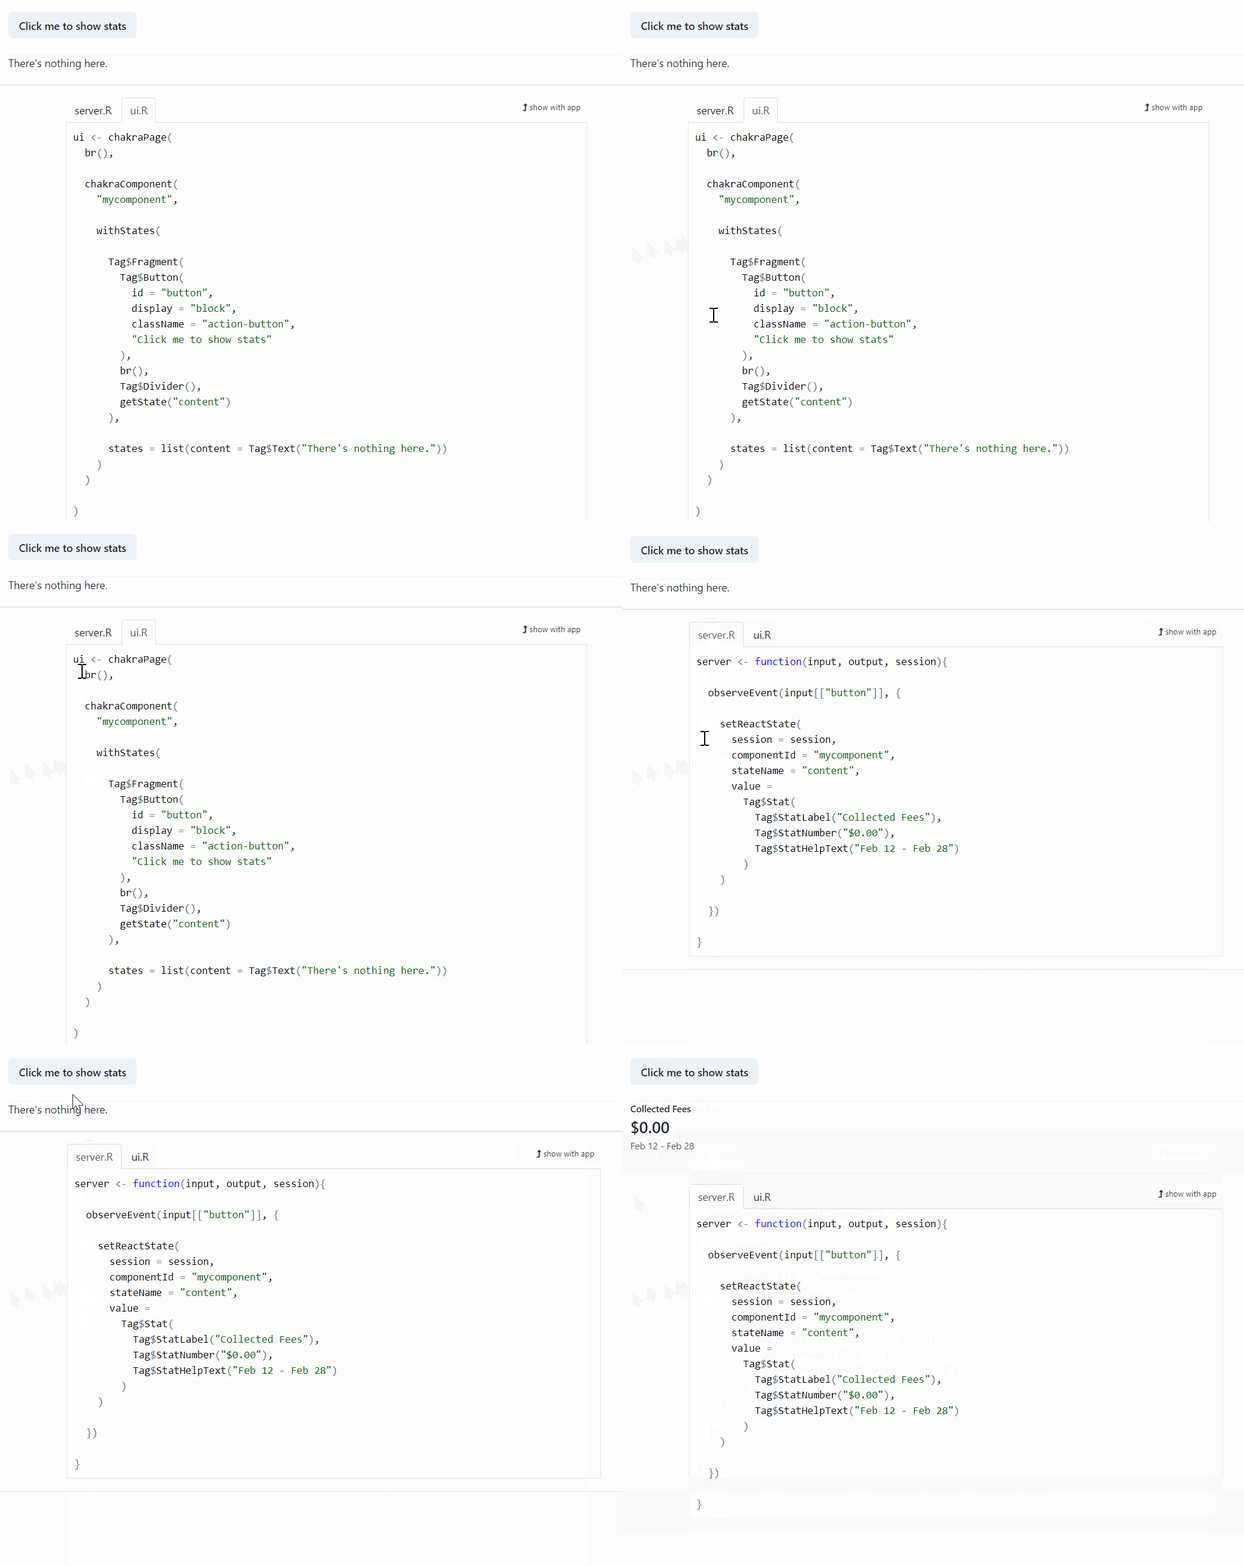
In the `'heading'` React state example, we set the new value of the state with
the help of the JavaScript function `setState`, executed from the R function
`jseval`. It is also possible to set a React state from the Shiny server function,
with the `setReactState` function. It offers more possibilities: it allows to
set as a new value a React component, a JSX element, a Shiny widget, or some
HTML code. Here is an example:

# More examples
Run `chakraExamples()` to get the list of available examples provided in the
package. See also the examples of the built-in widgets `chakraAlertDialog`,
`chakraCheckboxWithChildren`, `chakraDrawer`, `chakraSlider`,
`chakraCombinedSlider`, and `chakraModal`.
# The 'JSX parser' RStudio addin
The package provides a RStudio addin which allows to convert some JSX code to
the corresponding R code to use in the `chakraComponent` function. For example,
consider this JSX code:
```jsx
Naruto
Sasuke
kakashi
```
Copy it to your clipboard, and then select the 'JSX parser' addin in the
RStudio Addins menu. You'll get this R code:
```r
Tag$CheckboxGroup(
colorScheme = "green", defaultValue = list("naruto", "kakashi"),
Tag$HStack(
Tag$Checkbox(value = "naruto", "Naruto"),
Tag$Checkbox(value = "sasuke", "Sasuke"),
Tag$Checkbox(value = "kakashi", "kakashi")
)
)
```
This JSX parser is not perfect. It may fail, or you may have to manually modify
the output.