https://github.com/strrl/cloudflare-tunnel-ingress-controller
🚀 Expose the website directly into the internet! The Kuberntes Ingress Controller based on Cloudflare Tunnel.
https://github.com/strrl/cloudflare-tunnel-ingress-controller
cloudflare cloudflare-tunnel ingress ingress-controller kubernetes selfhosted
Last synced: 5 months ago
JSON representation
🚀 Expose the website directly into the internet! The Kuberntes Ingress Controller based on Cloudflare Tunnel.
- Host: GitHub
- URL: https://github.com/strrl/cloudflare-tunnel-ingress-controller
- Owner: STRRL
- License: mit
- Created: 2023-05-26T04:49:25.000Z (over 2 years ago)
- Default Branch: master
- Last Pushed: 2025-04-28T19:38:22.000Z (5 months ago)
- Last Synced: 2025-05-08T06:54:36.119Z (5 months ago)
- Topics: cloudflare, cloudflare-tunnel, ingress, ingress-controller, kubernetes, selfhosted
- Language: Go
- Homepage:
- Size: 656 KB
- Stars: 845
- Watchers: 9
- Forks: 50
- Open Issues: 36
-
Metadata Files:
- Readme: README.md
- Funding: .github/FUNDING.yml
- License: LICENSE
Awesome Lists containing this project
README
# Cloudflare Tunnel Ingress Controller
TLDR; This project simplifies exposing Kubernetes services to the internet easily and securely using Cloudflare Tunnel.
## Prerequisites
To use the Cloudflare Tunnel Ingress Controller, you need to have a Cloudflare account and a domain configured on Cloudflare. You also need to create a Cloudflare API token with the following permissions: `Zone:Zone:Read`, `Zone:DNS:Edit`, and `Account:Cloudflare Tunnel:Edit`.
Additionally, you need to fetch the Account ID from the Cloudflare dashboard.
Finally, you need to have a Kubernetes cluster with public Internet access.
## Get Started
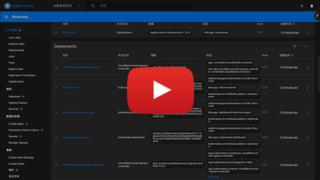
Take a look on this video to see how smoothly and easily it works:
[](http://www.youtube.com/watch?v=e-ARlEnS4zQ "Less than 4 minutes! Bootstrap a Kubernetes Cluster and Expose Kubernetes Dashboard to the Internet.")
Want to DIY? The following instructions would help your bootstrap a minikube Kubernetes Cluster, then expose the Kubernetes Dashboard to the internet via Cloudflare Tunnel Ingress Controller.
- You should have a Cloudflare account and a domain configured on Cloudflare.
- Create a Cloudflare API token with the following:
- `Zone:Zone:Read`
- `Zone:DNS:Edit`
- `Account:Cloudflare Tunnel:Edit`
- Fetch the Account ID from the Cloudflare dashboard, follow the instructions [here](https://developers.cloudflare.com/fundamentals/get-started/basic-tasks/find-account-and-zone-ids/).
- Bootstrap a minikube cluster
```bash
minikube start
```
- Add Helm Repository;
```bash
helm repo add strrl.dev https://helm.strrl.dev
helm repo update
```
- Install with Helm:
```bash
helm upgrade --install --wait \
-n cloudflare-tunnel-ingress-controller --create-namespace \
cloudflare-tunnel-ingress-controller \
strrl.dev/cloudflare-tunnel-ingress-controller \
--set=cloudflare.apiToken="",cloudflare.accountId="",cloudflare.tunnelName=""
```
> if the tunnel does not exist, controller will create it for you.
- Then enable some awesome features in minikube, like kubernetes-dashboard:
```bash
minikube addons enable dashboard
minikube addons enable metrics-server
```
- Then expose the dashboard to the internet by creating an `Ingress`:
```bash
kubectl -n kubernetes-dashboard \
create ingress dashboard-via-cf-tunnel \
--rule="/*=kubernetes-dashboard:80"\
--class cloudflare-tunnel
```
> for example, I would use `dash.strrl.cloud` as my favorite domain here.
- At last, access the dashboard via the domain you just created:

- Done! Enjoy! 🎉
## Alternative
There is also an awesome project which could integrate with Cloudflare Tunnel as CRD, check it out [adyanth/cloudflare-operator](https://github.com/adyanth/cloudflare-operator)!
## Contributing
Contributions are welcome! If you find a bug or have a feature request, please open an issue or submit a pull request.
## License
This project is licensed under the MIT License. See the LICENSE file for details.