https://github.com/sxyu/volrend
PlenOctree Volume Rendering (supports CUDA & fragment shader backends)
https://github.com/sxyu/volrend
octree rendering spherical-harmonics volume-rendering
Last synced: about 1 year ago
JSON representation
PlenOctree Volume Rendering (supports CUDA & fragment shader backends)
- Host: GitHub
- URL: https://github.com/sxyu/volrend
- Owner: sxyu
- License: other
- Created: 2021-01-24T00:28:12.000Z (over 5 years ago)
- Default Branch: master
- Last Pushed: 2024-10-22T05:34:14.000Z (over 1 year ago)
- Last Synced: 2025-04-14T19:59:29.610Z (about 1 year ago)
- Topics: octree, rendering, spherical-harmonics, volume-rendering
- Language: C++
- Homepage:
- Size: 7.44 MB
- Stars: 613
- Watchers: 27
- Forks: 84
- Open Issues: 17
-
Metadata Files:
- Readme: README.md
- License: LICENSE.md
Awesome Lists containing this project
README
# PlenOctree Volume Rendering
This is a real-time PlenOctree volume renderer written in C++ using OpenGL,
constituting part of the code release for:
PlenOctrees for Real Time Rendering of Neural Radiance Fields
Alex Yu, Ruilong Li, Matthew Tancik, Hao Li, Ren Ng, Angjoo Kanazawa
https://alexyu.net/plenoctrees
```
@inproceedings{yu2021plenoctrees,
title={{PlenOctrees} for Real-time Rendering of Neural Radiance Fields},
author={Alex Yu and Ruilong Li and Matthew Tancik and Hao Li and Ren Ng and Angjoo Kanazawa},
year={2021},
booktitle={ICCV},
}
```
The project has several repositories:
- NeRF-SH training and PlenOctree extraction
- PyTorch PlenOctree rendering CUDA extension
- General NeRF visualization library
More will be released soon, we are taking a short break now.
## Building
Please install a recent version of CMake
### Linux
```sh
mkdir build && cd build
cmake ..
make -j12
```
- If you do not have CUDA-capable GPU, pass `-DVOLREND_USE_CUDA=OFF` after `cmake ..` to use fragment shader backend, which is also used for the web demo.
It is slower and does not support mesh-insertion and dependent features such as lumisphere probe.
The main real-time PlenOctree rendererer `volrend` and a headless version `volrend_headless` are built. The latter requires CUDA.
There is also an animation maker `volrend_anim`, which I used to make some of the video animations; don't worry about it unless interested.
You should be able to build the project as long as you have GLFW.
On Ubuntu, you will need X-server; you can try
`sudo apt-get install libgl1-mesa-dev libxi-dev libxinerama-dev libxcursor-dev libxrandr-dev libgl1-mesa-dev libglu1-mesa-dev`
### macOS
For macOS, we assume you have the homebrew package manager, and no CUDA-capable GPU.
```sh
brew install cmake
brew install glfw
mkdir build && cd build
cmake .. -DVOLREND_USE_CUDA=OFF
export LIBRARY_PATH=$LIBRARY_PATH:/usr/local/lib; export CPLUS_INCLUDE_PATH="/usr/local/Cellar/glfw/3.3.4/include"; make -j8
```
### Windows 10
Install Visual Studio (I am using 2019 here). Then
```sh
mkdir build && cd build
cmake .. -G"Visual Studio 16 2019"
cmake --build . --config Release
```
- If you do not have CUDA-capable GPU, pass `-DVOLREND_USE_CUDA=OFF` after `cmake ..` to use fragment shader backend, which is also used for the web demo.
It is slower and does not support mesh-insertion and dependent features such as lumisphere probe.
The main real-time PlenOctree rendererer `volrend` and a headless version `volrend_headless` are built. The latter requires CUDA.
There is also an animation maker `volrend_anim`, which I used to make some of the video animations; don't worry about it unless interested.
### Dependencies
- C++17
- OpenGL
- any dependencies of GLFW
- libpng-dev (only for writing image in headless mode and saving screenshot)
#### Optional
- CUDA Toolkit, I tried on both 11.0 and 10.2
- Pass `-DVOLREND_USE_CUDA=OFF` to disable it.
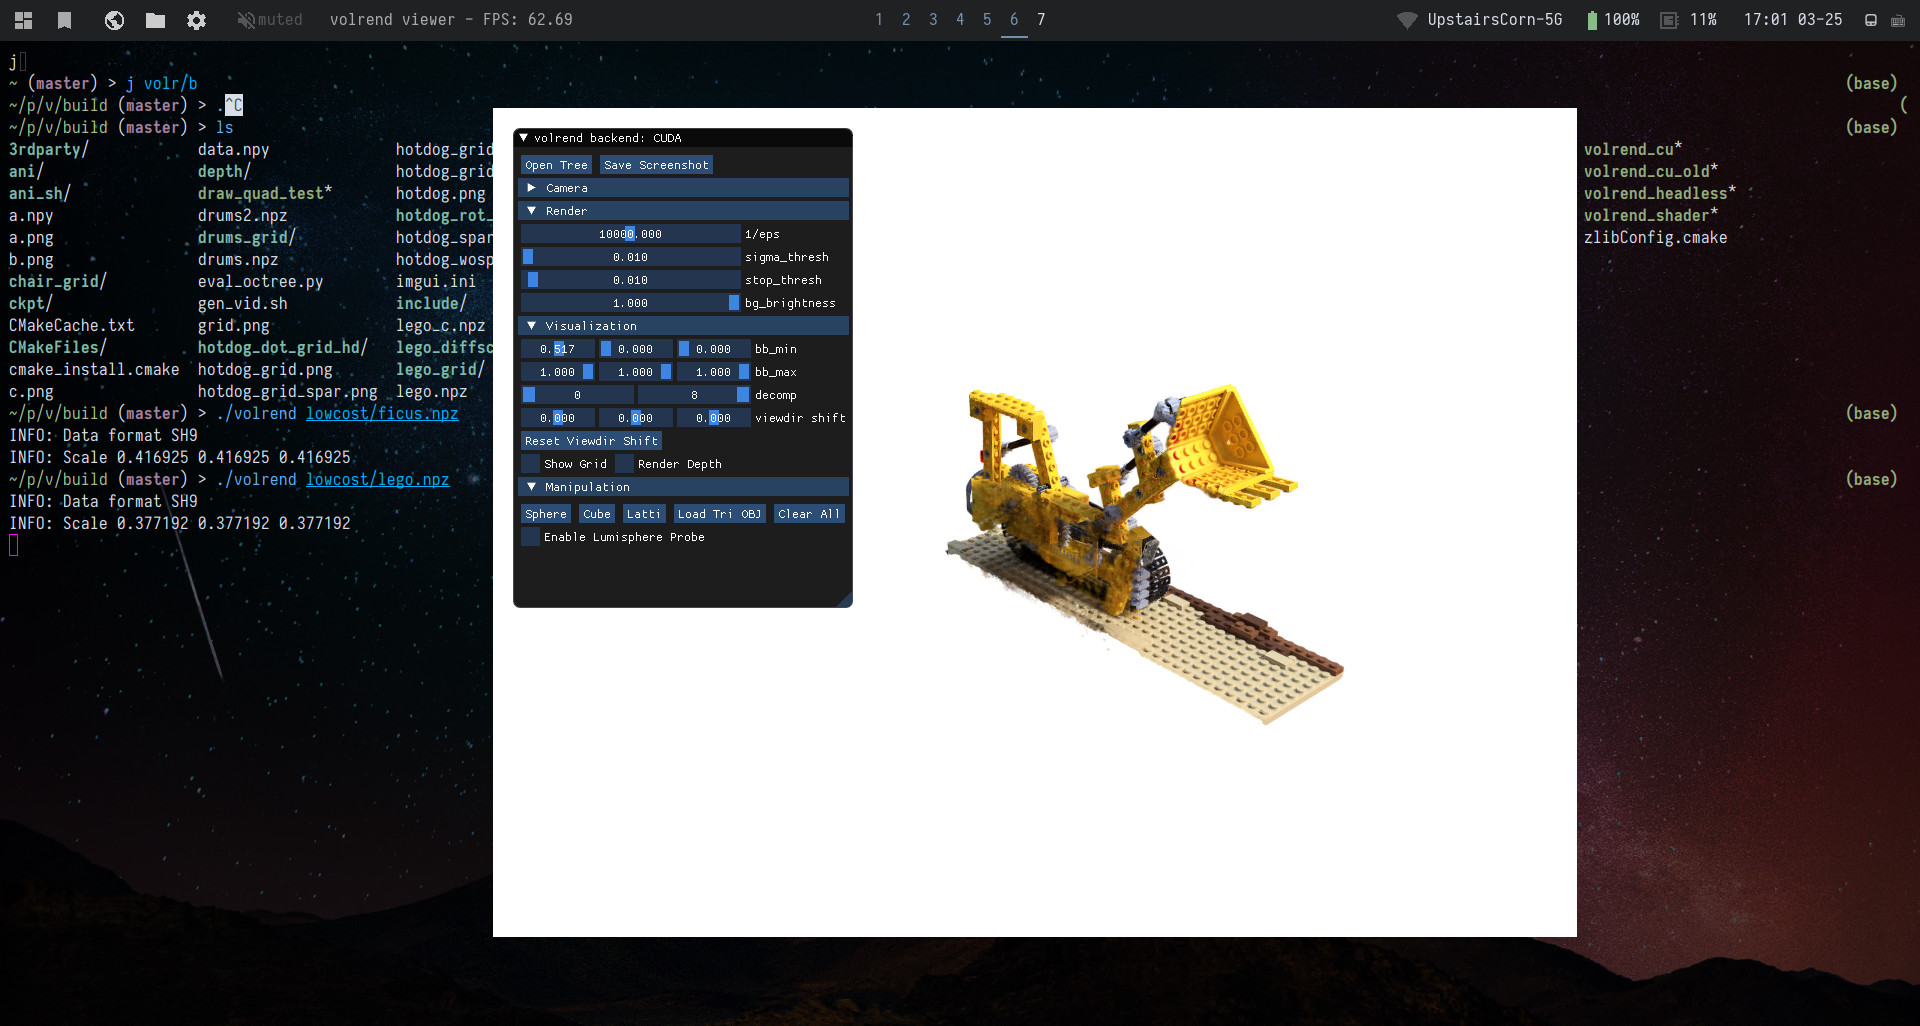
## Run
```sh
./volrend .npz
```
See `--help` for flags.
There is an ImGui window which exposes rendering options as well as interactive features mentioned in the paper + video.
For the mesh insertion, only OBJ files optionally with vertex coloring are supported. Texturing mapping is not implemented right now.
Some example meshes are in `sample_obj`, and a program to generate SH meshes (just for fun) is in `sample_obj/sh/gen_sh.cpp`.
Please use meshlab to triangulate other mesh.
### Keyboard + Mouse Controls (Desktop GUI)
- Left mouse btn + drag: rotate about camera position
- Right mouse btn + drag: rotate about origin point (can be moved)
- Middle mouse btn + drag: pan camera
- Shift + Left mouse btn + drag: pan camera (alt)
- Shift + middle mouse btn + drag: pan camera AND move origin point simultaneously
- Scroll with wheel: move forward/back in z
- WASDQE: move; Shift + WASDQE to move faster
- 123456: preset `world_up` directions, sweep through these keys if scene is using different coordinate system.
- 0: reset the focal length to default, if you messed with it
- Z: cycle gizmo operations translate/rotate/scale (only visible if mesh is opened in Manipulate section)
- X: toggle gizmo space local/world (applies to mesh translation/rotation)
Lumisphere probe:
- IJKLUO: move the lumisphere probe; Hold shift to move faster
### Offscreen Rendering
The program `volrend_headless` allows you to perform offscreen rendering on a server.
Usage: `./volrend_headless tree.npz -i intrinsics.txt pose1 pose2... [-o out_dir]`
intrinsics.txt should be a 4x4 intrinsics matrix.
pose1, pose2 ... should contain 3x4 or 4x4 c2w pose matrices,
or multiple matrices in a 4Nx4 format.
Add `-r` to use OpenCV camera space instead of NeRF.
The following zip file contains intrinsics and pose files for each scene of NeRF-synthetic,
Example to render out images:
`./volrend_headless drums/tree.npz -i data/nerf_synthetic/drums/intrinsics.txt data/nerf_synthetic/drums/pose/* -o tree_rend/drums`
The PNG writing is a huge bottleneck. Example to compute the FPS:
`./volrend_headless drums/tree.npz -i data/nerf_synthetic/drums/intrinsics.txt data/nerf_synthetic/drums/pose/*`
See `./volrend_headless --help` for more options such as setting rendering options.
## Precomputed PlenOctree Files
The full resolution tree files for NeRF-synthetic reported in the paper may be found at:
The uncompressed NeRF-synthetic files used for the web demo are here:
The compression script used to turn this in to the web version is in `scripts/compress_octree.py`.
More to come soon.
## PyTorch Extension: svox
You can find a (mostly) compatible PlenOctree library called `svox`, which we use to build the tree;
`pip install svox`.
- Code:
- Documentation:
More information to be added soon.
## Building the Web Demo
The backend of the web demo is built from the shader version of the C++ source using emscripten.
Install emscripten per instructions here:
https://emscripten.org/docs/getting_started/downloads.html
Then use
```sh
mkdir embuild && cd embuild
emcmake cmake ..
make -j12
```
The full website should be written to `embuild/build`.
Some CMake scripts even write the html/css/js files.
To launch it locally for previewing, you can use the make target:
```sh
make serve
```
Which should launch a server at http://0.0.0.0:8000/.
NEW: You may load local files and OBJs by using `Load Local` in the navbar.
Open `Layers` in the top right and click the camera layer to show cameras.