https://github.com/t-geindre/php-gpio
PHP lib to read/write Raspberry PI Gpio
https://github.com/t-geindre/php-gpio
gpio php raspberry-pi
Last synced: about 1 year ago
JSON representation
PHP lib to read/write Raspberry PI Gpio
- Host: GitHub
- URL: https://github.com/t-geindre/php-gpio
- Owner: t-geindre
- License: mit
- Created: 2016-05-30T14:43:37.000Z (about 10 years ago)
- Default Branch: master
- Last Pushed: 2016-06-15T08:46:07.000Z (about 10 years ago)
- Last Synced: 2024-10-19T09:16:50.517Z (over 1 year ago)
- Topics: gpio, php, raspberry-pi
- Language: PHP
- Size: 132 KB
- Stars: 2
- Watchers: 4
- Forks: 3
- Open Issues: 0
-
Metadata Files:
- Readme: README.md
- License: LICENSE
Awesome Lists containing this project
README
# PHP-GPIO 
A simple library to read/write Raspberry PI GPIOs with PHP.
Forked from [ronanguilloux/php-gpio](https://github.com/ronanguilloux/php-gpio) and tested with [Atoum](http://atoum.org/).
## Install
This library can be installed using [Composer](https://getcomposer.org/):
```sh
$ composer require tgeindre/php-gpio
```
## Read/Write Raspberry Pi GPIOs
To read/write Raspberry Pi GPIOs, use the `PhpGpio\Gpio` class. The instanciation of this class requires an array of pins numbers you will use.
You can define a specific list of pins numbers, according to your usage and your Rasberry Pi version, or you can use the `PhpGpio\Utils\Pi` class to automaticly find all availables pins:
```php
getAvailablePins(); // int array
```
Accessing to the GPIOs requires root permissions, so make sure your code is running with enought permissions. __Remember__: you should never run your webserver as root.
Here is a simple example of Gpio class usage:
```php
setup(PIN_IN, GpioInterface::DIRECTION_IN) // Makes it readable
->setup(PIN_OUT, GpioInterface::DIRECTION_OUT) // Writeable
;
// read PIN_IN value and display it
$value = $gpio->read(PIN_IN);
var_dump($value); // string
// write 1 on PIN_OUT
$gpio->write(PIN_OUT, GpioInterface::IO_VALUE_ON);
sleep(1);
// After 1 second, write 0 on PIN_OUT
$gpio->write(PIN_OUT, GpioInterface::IO_VALUE_OFF);
// Then free all pins
// (use the unexport() method to free pins one by one)
$gpio->unexportAll();
```
Check [this page](http://www.raspberrypi-spy.co.uk/2012/06/simple-guide-to-the-rpi-gpio-header-and-pins/) if you need a complete list of availables pins on your Raspberry Pi version.
### Demo
Here is a simple demo using a Raspberry Pi 3 and some LED (click on the image to see the video):
[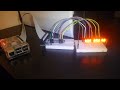](https://www.youtube.com/watch?v=ON8dwxP4-fY)
[Source code](https://gist.github.com/t-geindre/674280ad12f364c4ce386ff73cfe57fc)
## Sensors
Currently, this library only supports MCP analogic to digital converter (ADC) with 4 or 8 channels:
### MCP3002, MCP3004 & MCP3008

Given that the Rapsberry Pi supports only digital inputs, an ADC, such as a MCP, is required to read analogic data.
MCP3002, MCP3004 and MCP3008 work the same way but have dedicated classes for each version:
* `PhpGpio\Sensor\Mcp\Mcp3002`
* `PhpGpio\Sensor\Mcp\Mcp3004`
* `PhpGpio\Sensor\Mcp\Mcp3008`
It use a SPI interface wich requires, at least, 4 pins:
* __MISO__ - Master Input Slave Ouput,
* __MOSI__ - Master Output Slave Input,
* __CLK__ - Clock,
* __CS__ - Channel Select (one dedicated pin for each component using the same SPI interface).
Provided classes use a software communication system so you can use any pins you wich.
Here is the connection schema of those 3 versions of MCP ADC:

Wiring:
* __VDD__ (power supply) on 3.3V,
* __VREF__ on 3.3v,
* __AGND__ on ground (GND),
* __CLK__ on clock pin,
* __DOUT__ (digital output) on MISO pin,
* __DIN__ (digital input) on MOSI pin,
* __CS__ (channel select) on CS pin,
* __DGND__ on ground (GND).
Now you are ready to read some data:
```php
namespace MyProject;
use PhpGpio\Gpio;
use PhpGpio\Sensor\Mcp\Mcp3008;
// Defining pins mapping according to your setup
$pinsMapping = [
'MISO' => 17,
'MOSI' => 8,
'CLK' => 23,
'CS' => 24,
];
// Setup a Gpio class
$gpio = new Gpio(array_values($pins));
// Then we can instanciate the MCP class
$mcp = new Mcp3008(
$gpio
$mapping['CLK'],
$mapping['MOSI'],
$mapping['MISO'],
$mapping['CS']
);
// Now let's read some data on the first channel
while (true) {
echo $mcp->read(['channel' => 0]), "\n";
// every second
sleep(1);
}
```