https://github.com/tekyaygilfethi/googlespeechtotextpythonimplementation
Google API Sppech To Text Python Implementation
https://github.com/tekyaygilfethi/googlespeechtotextpythonimplementation
google python speech-to-text
Last synced: 12 months ago
JSON representation
Google API Sppech To Text Python Implementation
- Host: GitHub
- URL: https://github.com/tekyaygilfethi/googlespeechtotextpythonimplementation
- Owner: TekyaygilFethi
- Created: 2022-05-11T13:53:55.000Z (about 4 years ago)
- Default Branch: main
- Last Pushed: 2022-05-11T15:35:35.000Z (about 4 years ago)
- Last Synced: 2023-03-06T05:42:44.145Z (over 3 years ago)
- Topics: google, python, speech-to-text
- Language: Python
- Homepage:
- Size: 9.77 KB
- Stars: 2
- Watchers: 0
- Forks: 0
- Open Issues: 0
-
Metadata Files:
- Readme: README.md
Awesome Lists containing this project
README
# Google Speech To Text Python Implementation
This module is implementation of Google Speech To Text API. Google Speech To Text supports multiple languages such as English, Turkish, German while converting speeches into text.
# SETUP
## Setting Up The Google Cloud Platform
NOTE: If you have your JSON credential file for your GCP, skip to the step 17!
### GCP Access
1. Login or Sign in to Google Cloud Platform Console through here
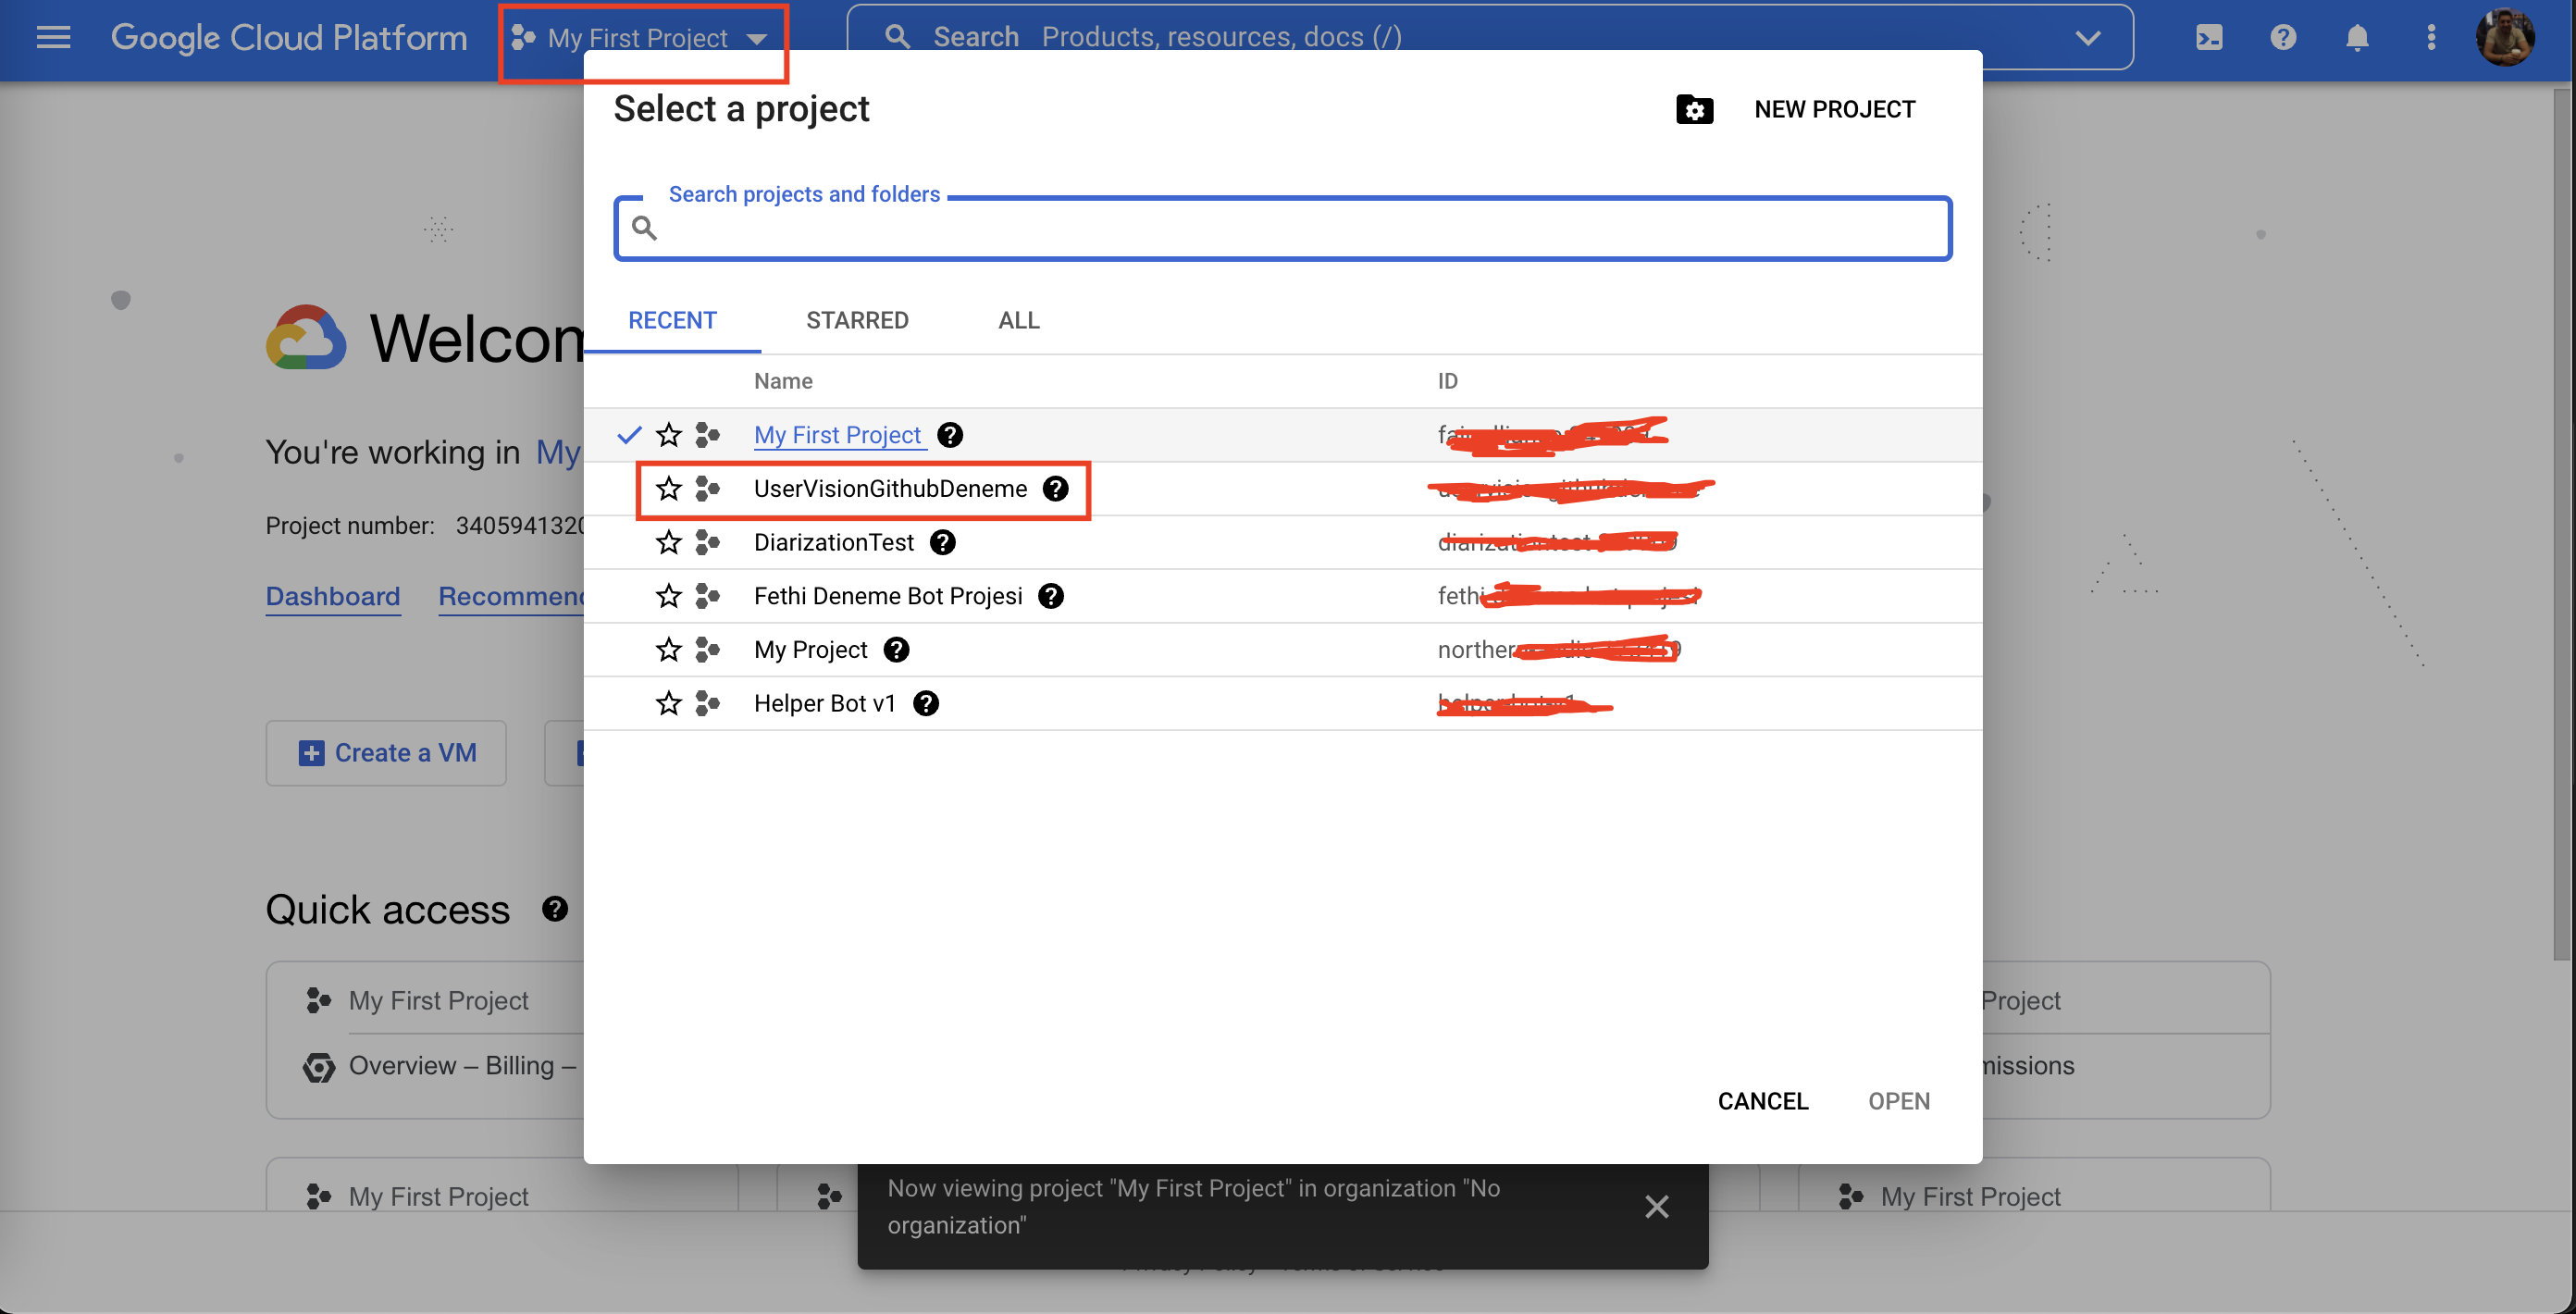
### Creating New Project
2. Create a new project:

### Enabling Speech To Text API
3. Navigate to your newly created project:
4. Navigate to APIs & Services:

5. Click ENABLE APIS AND SERVICES button:

6. Search for Cloud Speech To Text API and click it:

7. Click enable (You need to add payment to enable this service but don't worry Google gives you free credits at the beginning):

### Creating a New Service Account and Gathering The JSON file for Authorization
8. Navigate to the IAM & Admin -> Service Accounts:

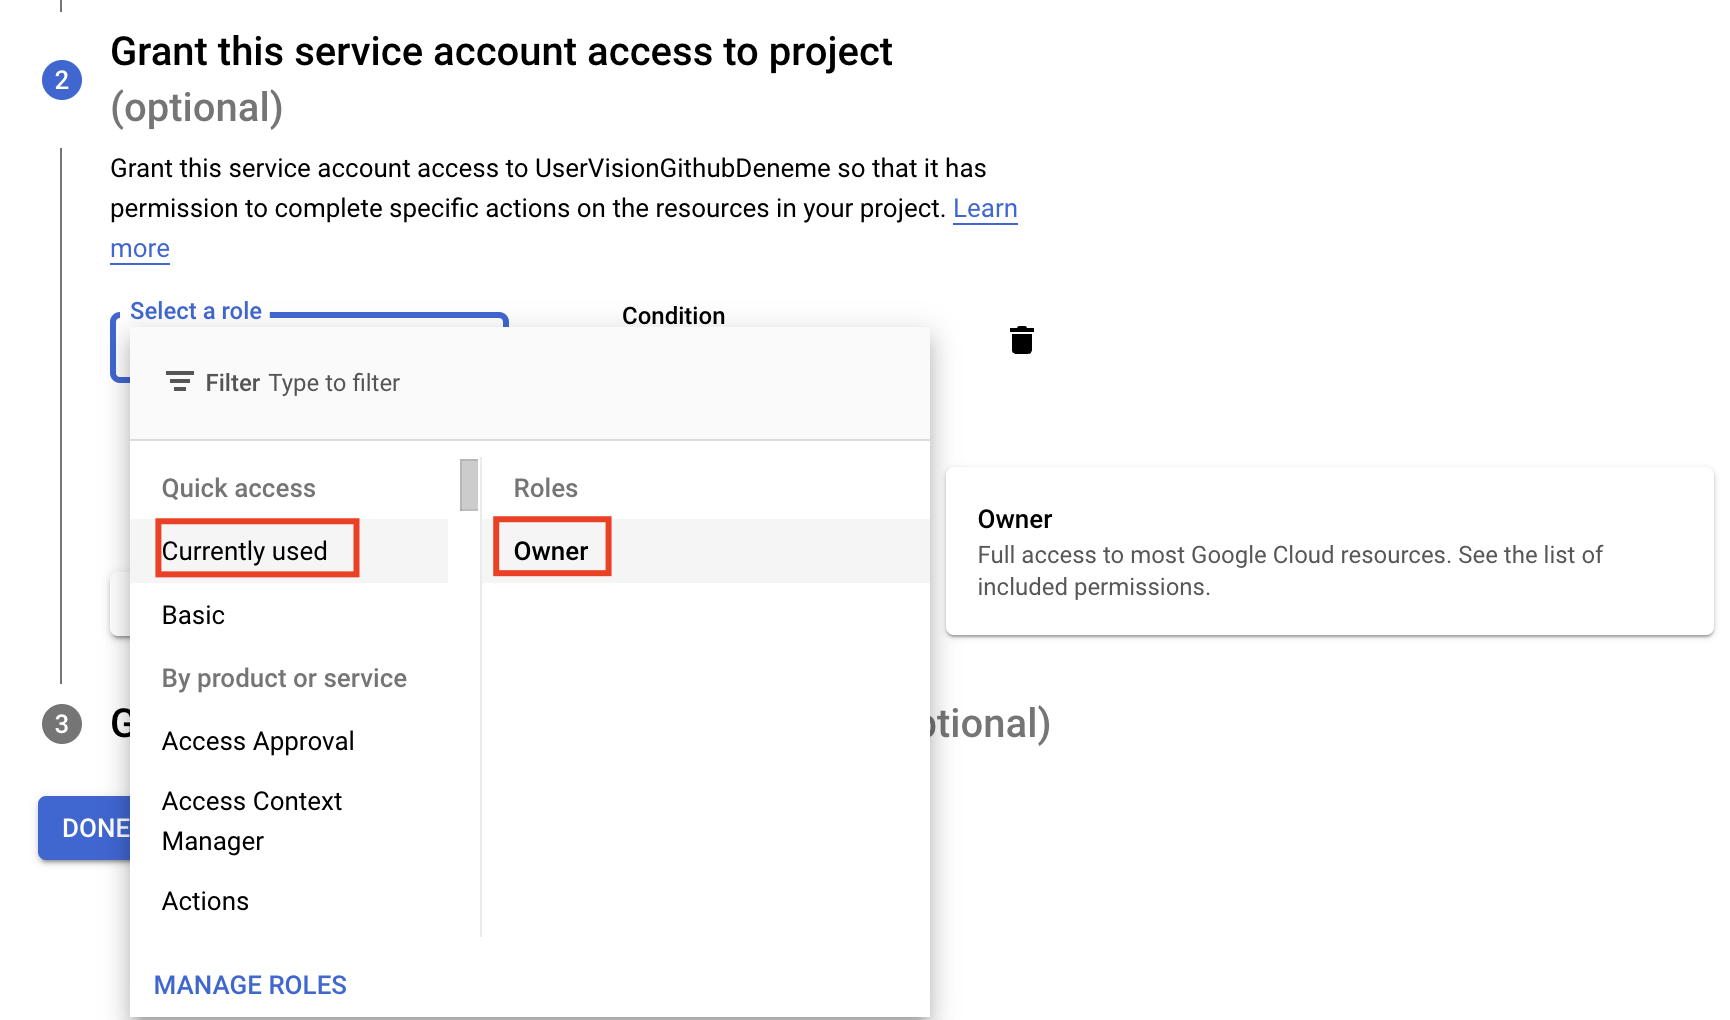
9. Click to Create Service Account button:

10. You can give any name you want as service account name. For 2nd step of service account creation, you may give "Owner" role as the image suggests but you can give any desired role of course of this service account:
11. For 3rd step, after writing yout service account's name you can clearly see Google suggeste you the mail address that is related to yout newly created service account. You should fill two fields with this email address:

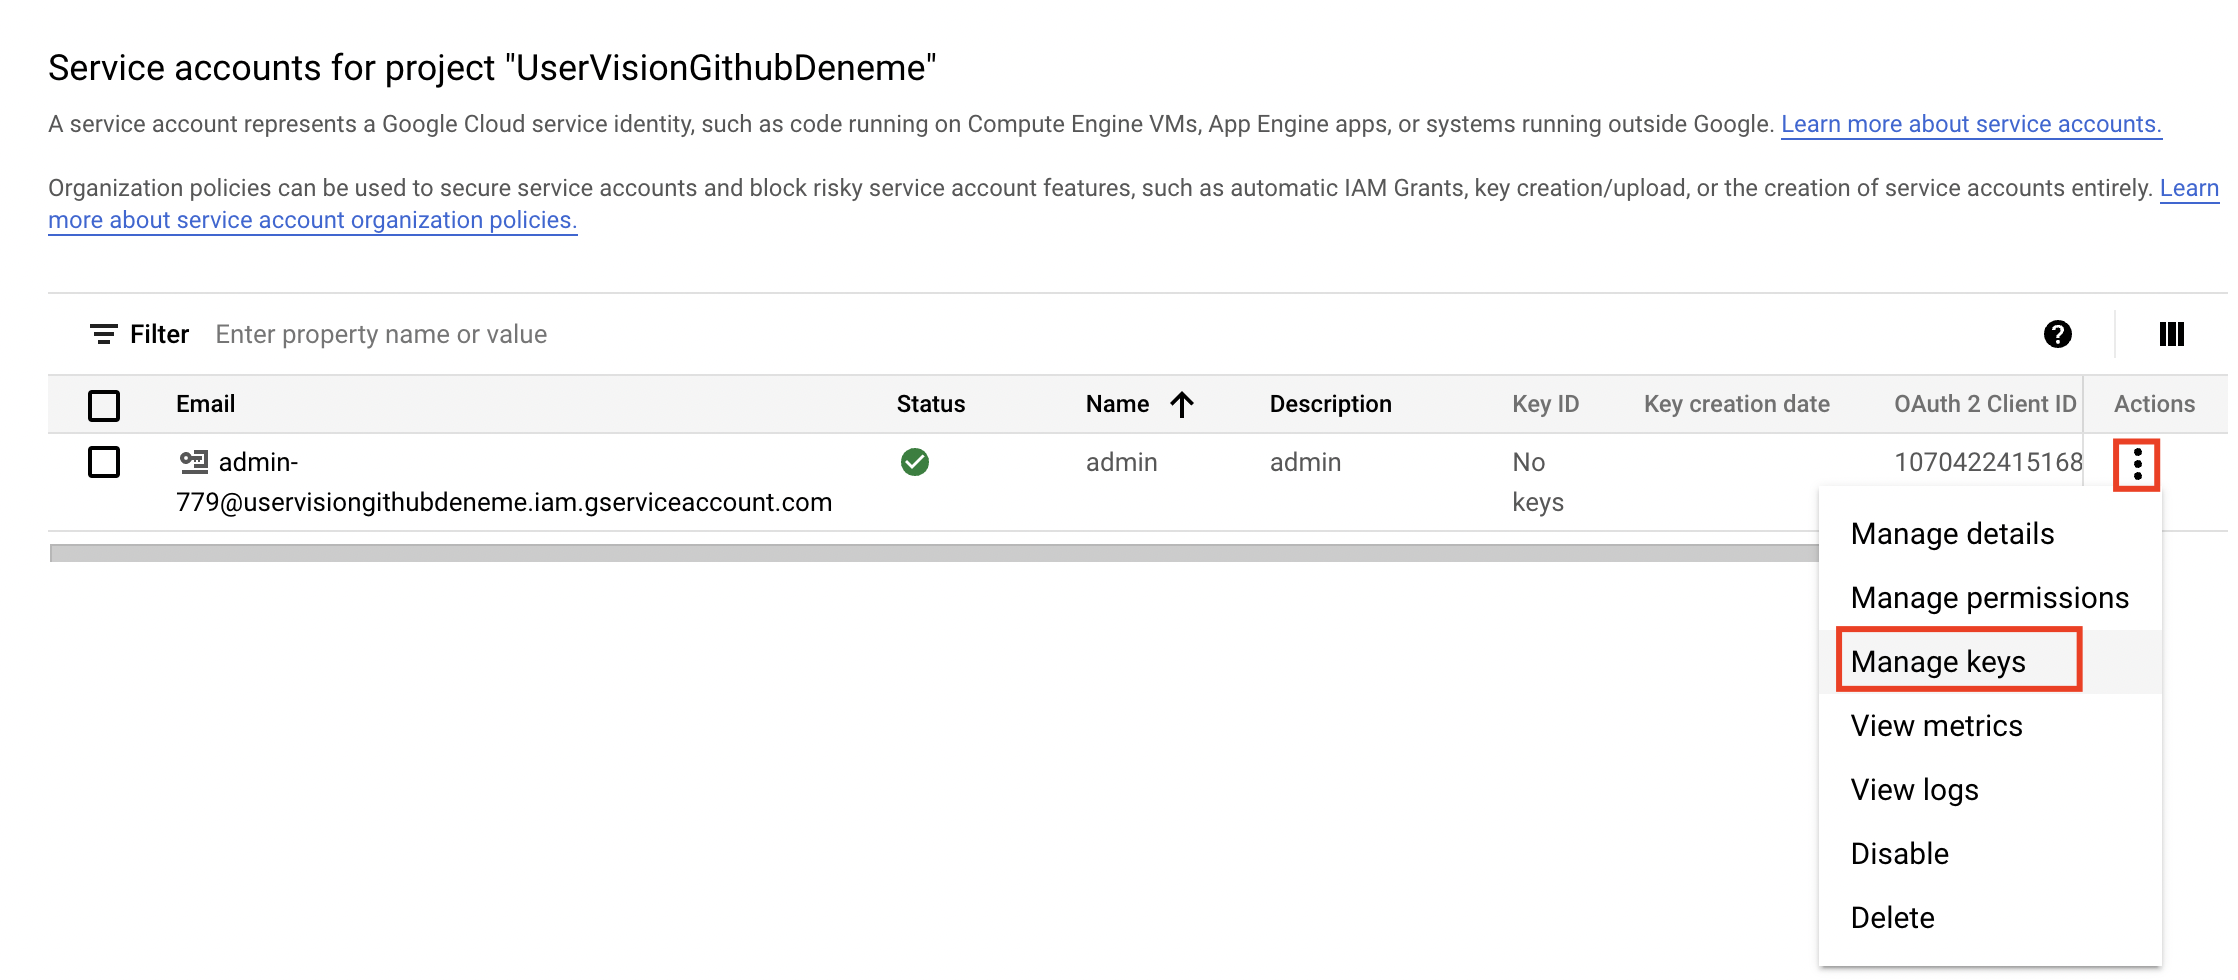
12. Now you can see you service account has been created!
13. Click the 3 dots that is at right corner of your service account and select Manage Keys option:
14. Click Add Key -> Create New Key:

15. Select JSON and click Create:
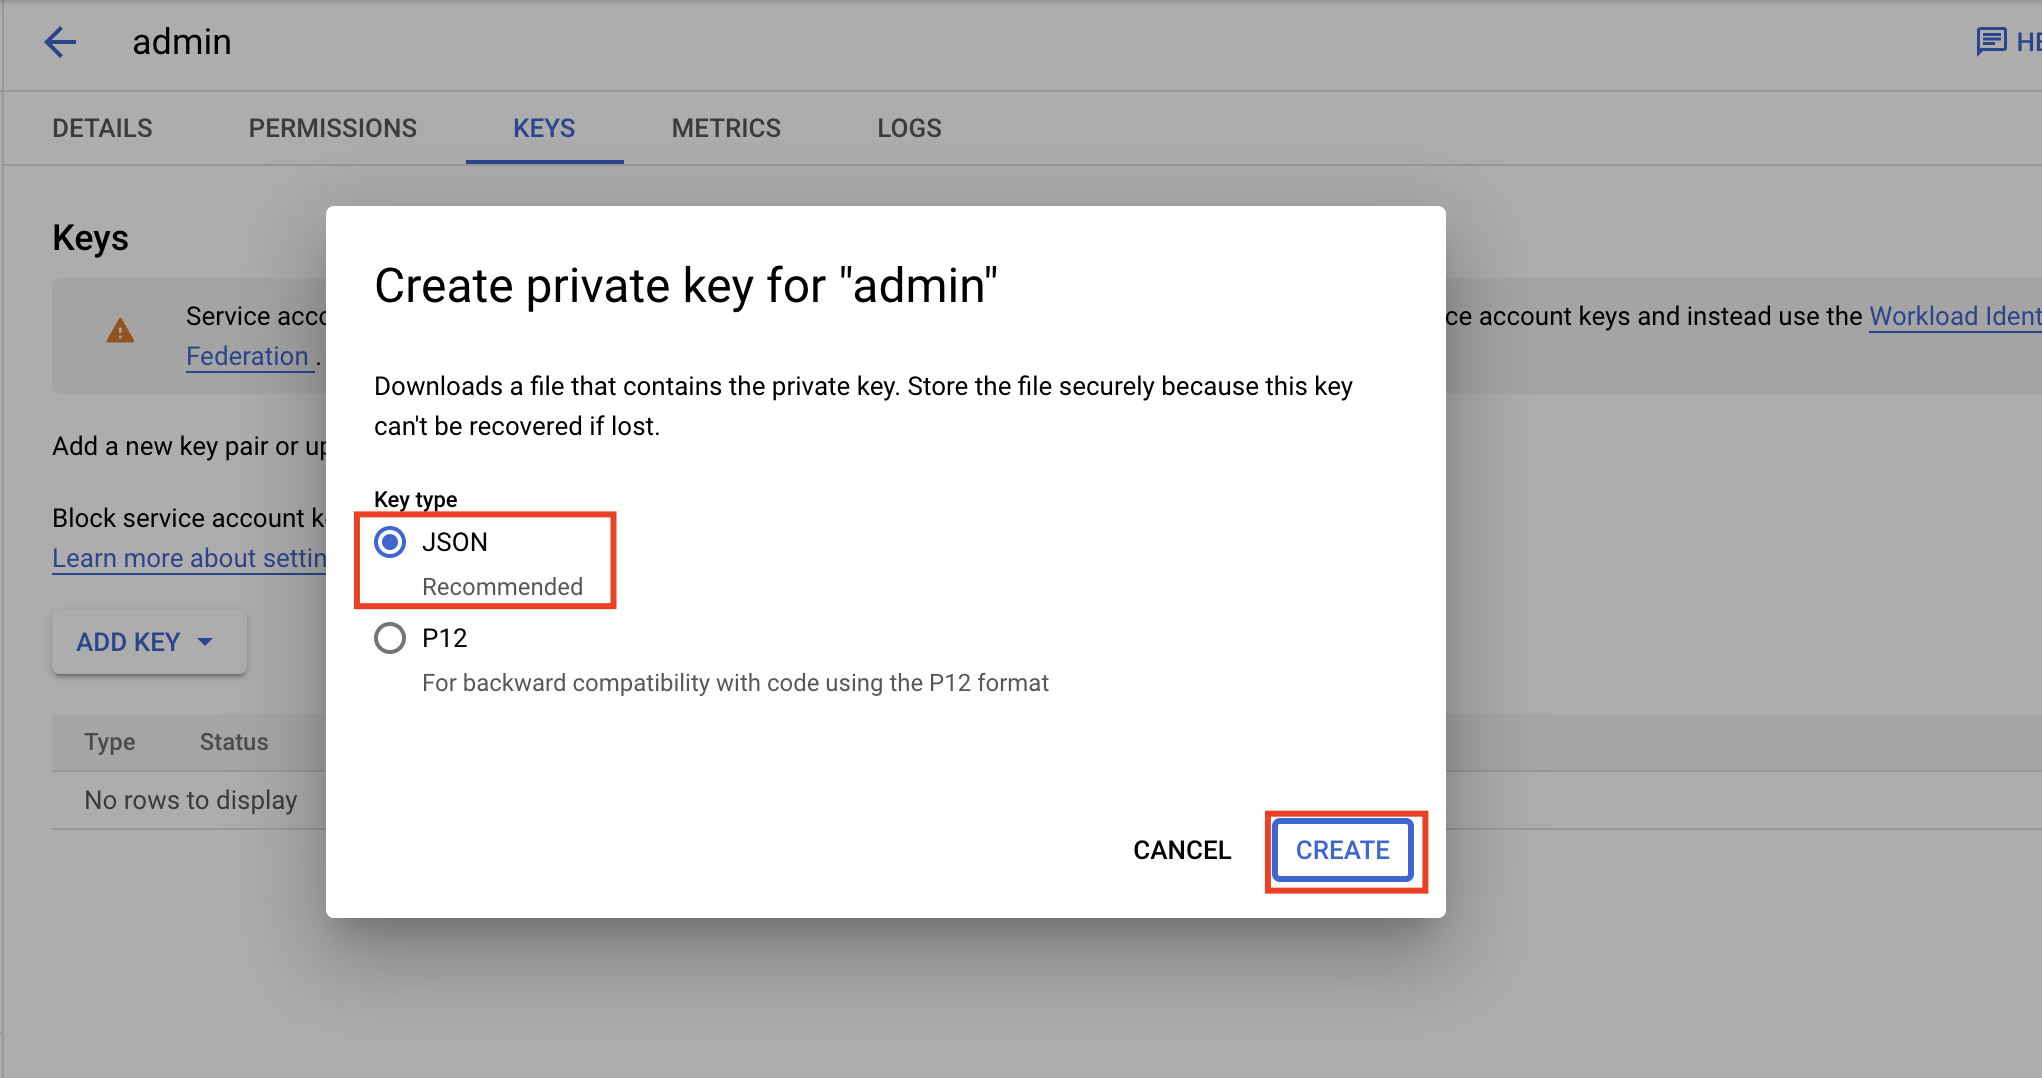
16. Your JSON file should be downloaded to your PC. Save it with safe! We will be using this JSON file for Google API Authentication.
### Setting Up GCP Storage
17. Search for Storage from the searchbox and select the Cloud Storage:

18. Create a new bucket:
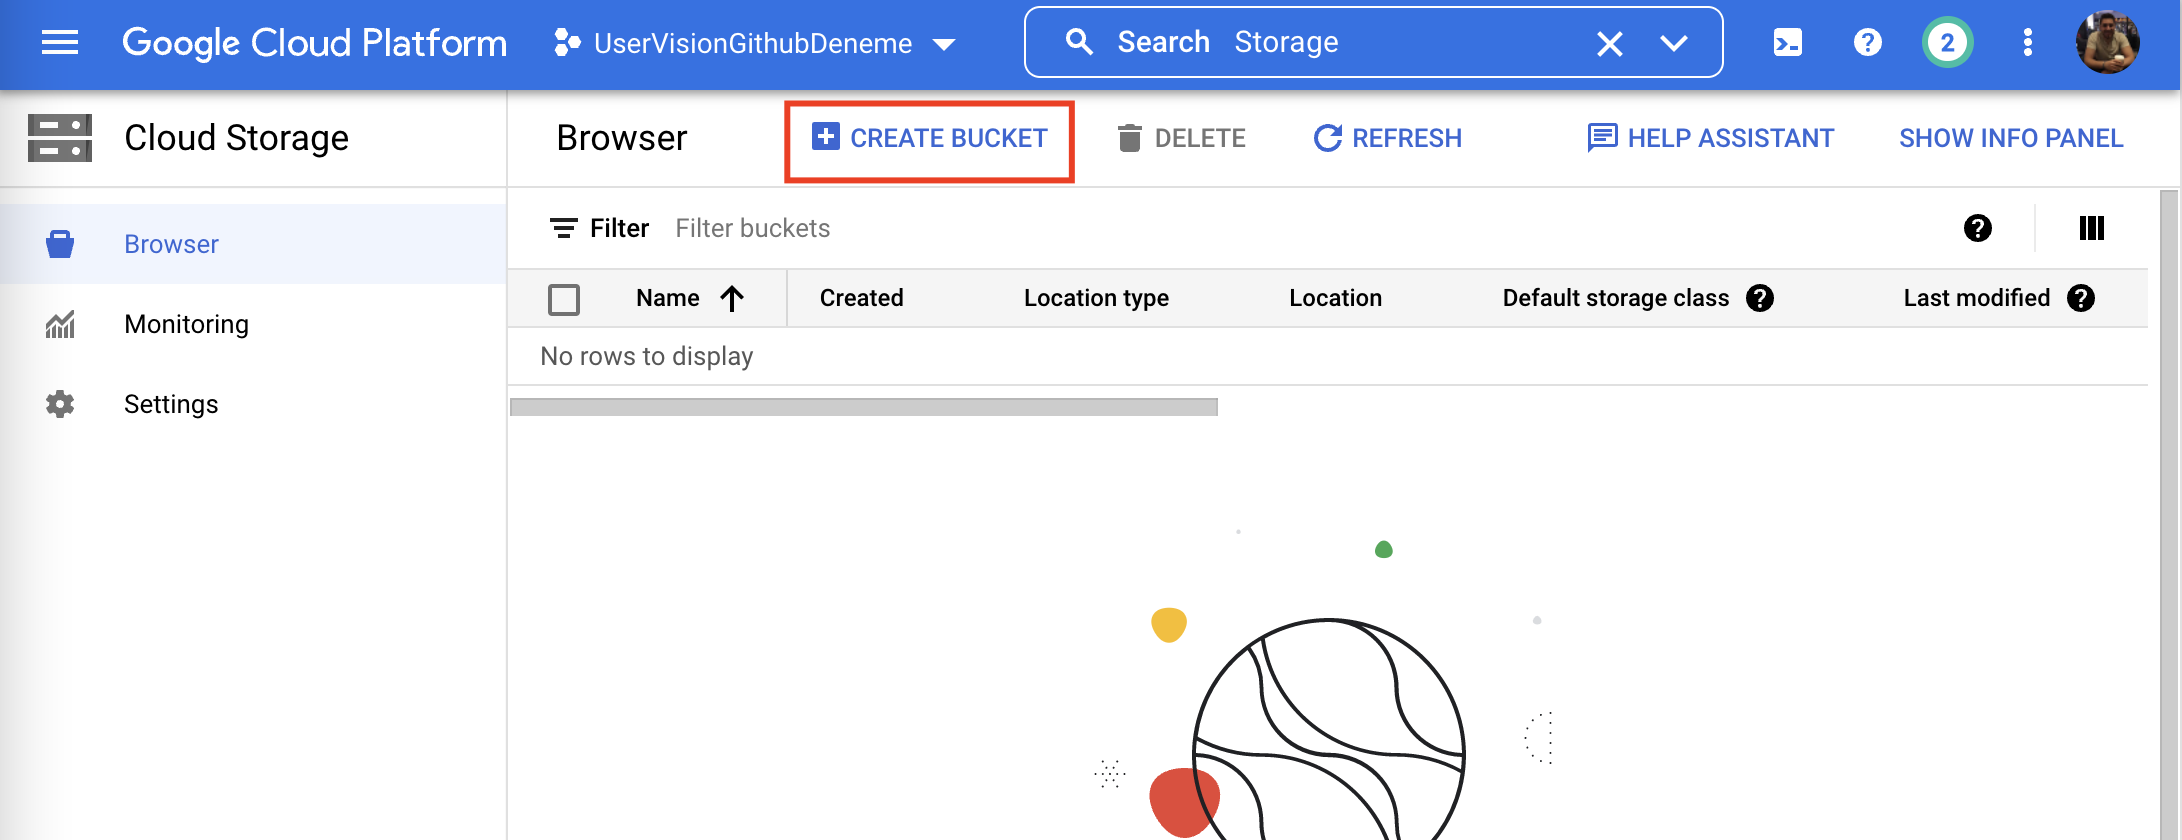
19. Name your bucket (which should be unique worlwide) and click Next for every step until you create a bucket. Now you are in your bucket

This bucket will hold you audio files which will be translated into texts. You may upload you files here.
20. I'm uploading my file name 'uzuntrim.wav' here. My audio file here has the wav extension.
# Demo
21. Clone the repository:
```bash
git clone https://github.com/UserVision/GoogleSpeechToTextPythonImplementation.git
```
22. Create a new virtual environemnt:
```bash
python3 -m venv myvenv
```
23-1. Activate your virtual environment (FOR MAC):
```bash
source myvenv/bin/activate
```
23-2. Activate your virtual environment (FOR WINDOWS):
```bash
source myvenv/bin/activate
```
NOTE: If you got error like this;

You should do the following:
- Start Windows Powershell as Administrator
- Type ```Set-ExecutionPolicy RemoteSigned``` and hit enter
- When Powershell waits for your input, enter ```A``` and hit Enter button
Now you should be able to move forward with the venv activation script
24. Install all the requirements via the following command:
```bash
pip3 install -r requirements.txt
```
25. Add your JSON file that is being downloaded at step 16 to the main directory of the project.
26. Add .env file to you main directory of the project. This file should contain the name of your JSON file with the key of JSON_NAME.
```
JSON_NAME={name}.json
```
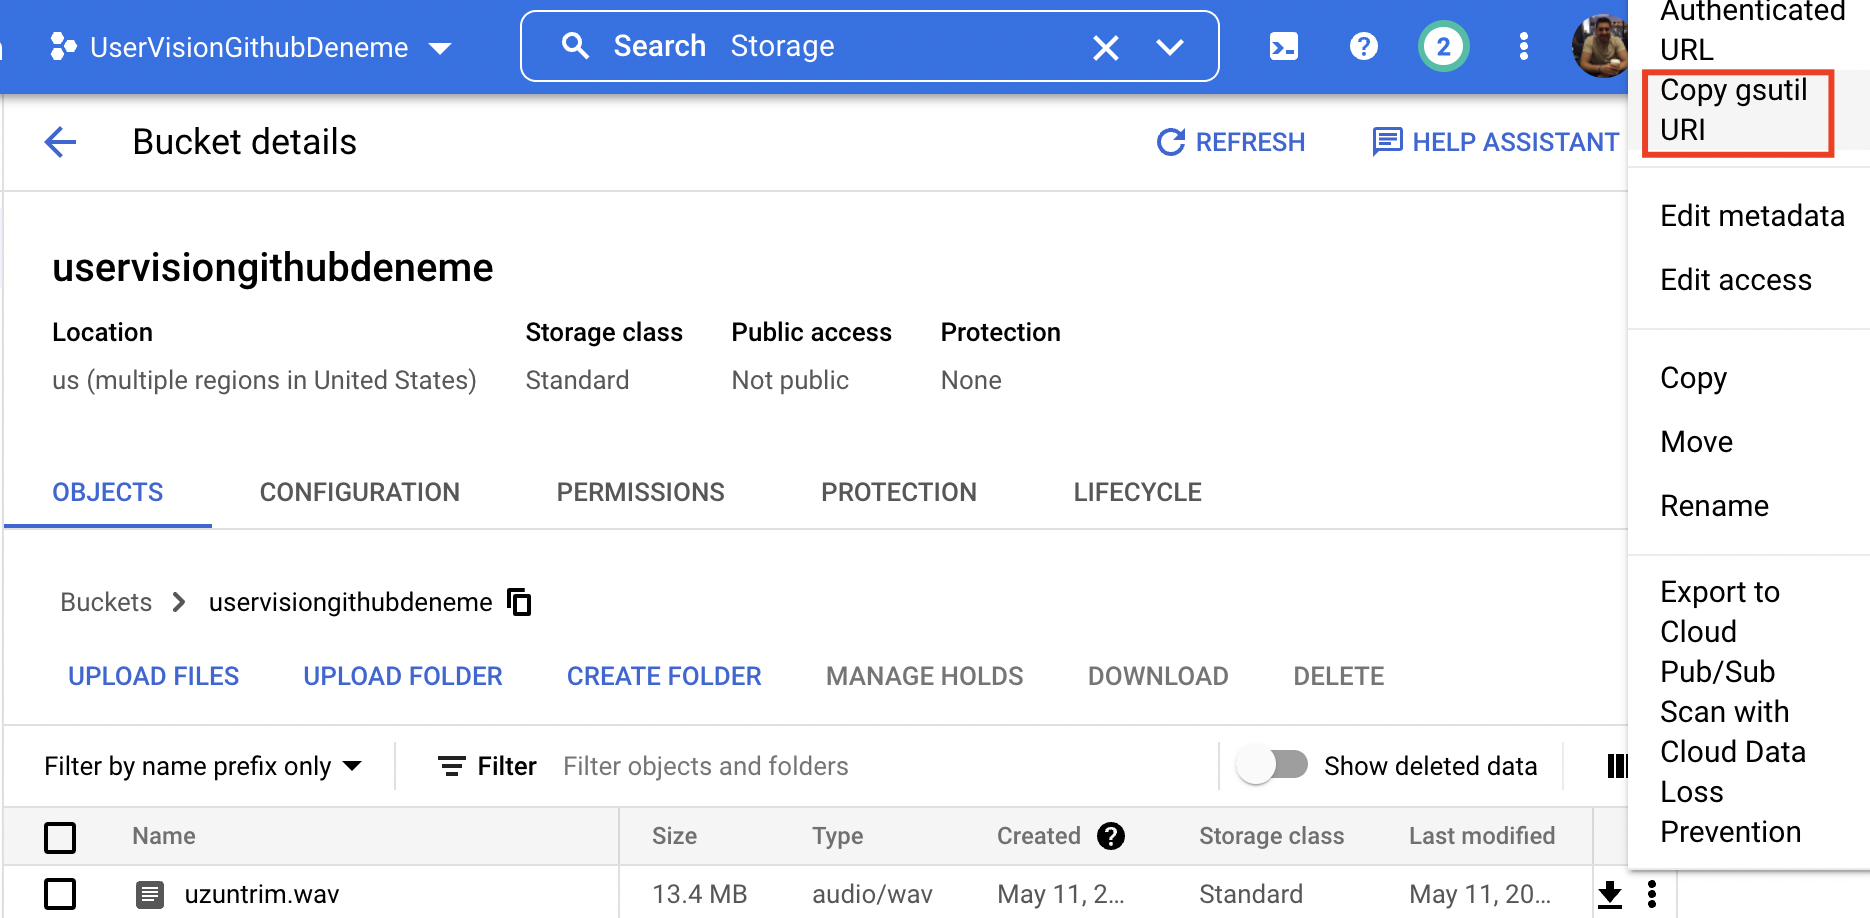
27. In ```main.py``` file, you should change this line:
```python
audio = dict(uri="gs://diarizationuv/uzuntrim.wav")
```
with the corresponding url you've taken from GCP Storage. To achieve this just select your desired audio file from Cloud platform and click to the 3 dots at the right o that line. Then choose ```Copy gsutil URI``` option.
28. If you have a recoırding more than 1 minute, you should use ```speech_to_text_long``` but if you have a recording that is not exceeding 1 minute, you may use ```speech_to_text``` functions in ```main.py``` file.
29. You should set your ```language_code``` parameter in your config dictionary which is in ```main.py``` file according to your audio's language. For example if your audio contains Turkish language, then you should set the language_code parameter as ```tr-TR'```
30. To run the python script, enter the following command:
```bash
python3 main.py
```
31. And you should be able to see the results:

32. CONGRATULATIONS! Now you converted your speech audio into text :)