https://github.com/tf63/diffusers-apple
https://zenn.dev/tf63/articles/diffusers-apple-tf63-20241126
https://github.com/tf63/diffusers-apple
Last synced: 2 months ago
JSON representation
https://zenn.dev/tf63/articles/diffusers-apple-tf63-20241126
- Host: GitHub
- URL: https://github.com/tf63/diffusers-apple
- Owner: tf63
- Created: 2024-11-25T17:22:48.000Z (7 months ago)
- Default Branch: main
- Last Pushed: 2024-11-26T06:13:27.000Z (6 months ago)
- Last Synced: 2025-02-09T06:32:09.470Z (4 months ago)
- Language: Python
- Homepage:
- Size: 123 KB
- Stars: 0
- Watchers: 1
- Forks: 0
- Open Issues: 0
-
Metadata Files:
- Readme: README.md
Awesome Lists containing this project
README
# Diffusers Apple
M2 チップの MacBook Air 上で Stable Diffusion を動かしてみる
- https://zenn.dev/tf63/articles/diffusers-apple-tf63-20241126
**動作環境**
- MacBook Air M2 チップ 16GB
- PyTorch 2.3.0
## 所感
実験したモデルの使用メモリ量と実行速度です.適当な計測なので,あくまで目安です
| モデル | VRAM | M2 | NVIDIA RTX A5000 |
| -------------------------------- | ---------- | ------------- | ---------------- |
| DDPM-cat | 0.8GB 程度 | 3 it/s 程度 | 42 it/s 程度 |
| Stable Diffusion v1.5 | 5GB 程度 | 1 it/s 程度 | 12 it/s 程度 |
| Stable Diffusion XL Turbo | 10GB 程度 | 0.5 it/s 程度 | 15 it/s 程度 |
| Stable Diffusion v2 (inpainting) | 3GB 程度 | 1 it/s 程度 | 20 it/s 程度 |
ざっくり触ってみた感じでは,実行速度は NVIDIA RTX A5000 と比べると非常に遅いですが,画像数枚程度の生成であれば M2 チップでも実用的かと思います.また,使用メモリ量の面では Stable Diffusion v1, v2 系のモデルの場合は十分軽量に動作しますが,Stable Diffusion XL 系のモデルの場合は swap が頻繁に発生してしまい重いです.小さいモデルを選んで使う必要がありそうです
## 前準備
### Installation
本記事では [uv](https://docs.astral.sh/uv/) を使用します.未インストールの場合は次のコマンドでインストールしてください
```shell
curl -LsSf https://astral.sh/uv/install.sh | sh
```
次のコマンドで Python 実行環境と依存パッケージをまとめてインストールできます
```shell
uv sync
```
デフォルトでは `.venv/` に仮想環境が作られます
### huggingface CLI のセットアップ
[HuggingFace](https://huggingface.co/) のアカウントを作成して https://huggingface.co/settings/tokens からアクセストークンを発行します.その後,トークンを使って`huggingface-cli`のログインを済ませておきます.`huggingface-cli`は`uv sync`でインストール済みです
https://huggingface.co/docs/huggingface_hub/guides/cli
```shell
huggingface-cli login
To log in, `huggingface_hub` requires a token generated from https://huggingface.co/settings/tokens .
Enter your token (input will not be visible):
```
入力したトークンは `~/.cache/huggingface/token`に保存されています
### Apple チップ上で PyTorch を利用する
Apple チップの GPU では **Metal Performance Shaders** ([`mps`](https://pytorch.org/docs/stable/notes/mps.html)) という技術が使われています.PyTorch では次のコマンドで`mps`が使用可能か確認できます
```shell
>>> import torch
>>> print(torch.backends.mps.is_available())
True
```
`mps`デバイス上で計算するには `model.to('mps')` とすればよいです.`cpu`や`cuda`と同じですね
# Experiments
## DDPM [[code](https://github.com/tf63/diffusers-apple/blob/main/src/scripts/ddpm.py)]
まずは基本的な Diffusion Model として **DDPM** を試してみましょう.使用するモデルは`google/ddpm-cat-256`です
```shell
uv run src/scripts/ddpm.py
```
https://huggingface.co/google/ddpm-cat-256
`DDPMPipeline.from_pretrained('google/ddpm-cat-256')`でモデルの読み込みとダウンロードを行います.ダウンロード先はデフォルトでは`~/.cache/huggingface/hub`となっています.色々なモデルを試しているとストレージを非常に圧迫するので定期的に整理しましょう
1 回で生成する画像枚数は`batch_size`で指定できます.MacBook 上では小さい値にしておかないとメモリを食いつぶします
シンプルな DDPM の実装では 1000 回ほどの推論ステップ `num_inference_steps` が必要です.しかし,今回は動作確認なので 100 ステップとします
```python
import os
import torch
from diffusers.pipelines.ddpm.pipeline_ddpm import DDPMPipeline
from src.utils import ExperimentalContext, options
def inference(pipeline, context: ExperimentalContext, batch_size, num_inference_steps=1000):
# 推論
images = pipeline(
batch_size=batch_size,
generator=context.generator,
num_inference_steps=num_inference_steps,
).images
# 画像の保存
for i, image in enumerate(images):
context.save_image(image, 'uncond', f'i{i}_n{num_inference_steps}')
@options
def main(seed, device):
batch_size = 1
# モデルの読み込み
pipeline = DDPMPipeline.from_pretrained('google/ddpm-cat-256', torch_dtype=torch.float16).to(device)
context = ExperimentalContext(seed=seed, device=device, root_dir=os.path.join('out', 'ddpm_cat'))
inference(pipeline=pipeline, context=context, batch_size=batch_size, num_inference_steps=100)
if __name__ == '__main__':
main()
```
生成結果です.DDPM の 100 ステップだとこんなもんですね
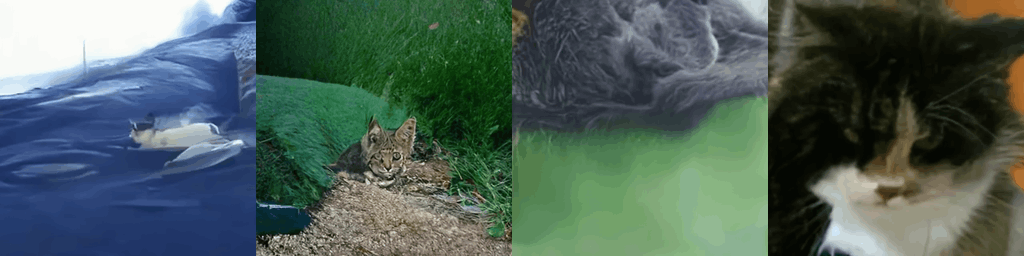
_google/ddpm-cat-256 100steps unconditional_
## Stable Diffusion v1.5 [[code](https://github.com/tf63/diffusers-apple/blob/main/src/scripts/sdv1_5_dpmsolver.py)]
Stable Diffusion v1.5 を試してみます.Stable Diffusion 系列のモデルになると平気で数 GB を超えるサイズになるので注意です
```shell
uv run src/scripts/sdv1_5_dpmsolver.py
```
https://huggingface.co/stable-diffusion-v1-5/stable-diffusion-v1-5
そのまま実行すると`diffusers`の内部でエラーが発生します.`mps`デバイスにある tensor を`numpy`の`ndarray`に直接変換できないためです.面倒ですが,diffusers の該当箇所に monkey patch を当てて対処します
```
TypeError: can't convert mps:0 device type tensor to numpy. Use Tensor.cpu() to copy the tensor to host memory first.
```
サンプリングには**DPM-Solver**を使用します.DPM-Solver であれば 25 ステップほどで十分です
`guidance_scale`で**classifier-free guidance**の強さ (簡単に言えばプロンプトの反映度) を指定しています.`guidance_scale`の適切な値はサンプラーによって異なります.大きい値に設定すると 1 ステップあたりに denoise するノイズが大きくなり,生成が崩壊するので調整が必要です
生成プロンプトはかわいい猫とします.Stable Diffusion 系のモデルでは,`len(prompts)`が`batch_size`に対応しています
```python
prompts = [
'a cat, fat, with brown fur, with short legs',
'a cat, fat, with white fur, with short legs',
]
```
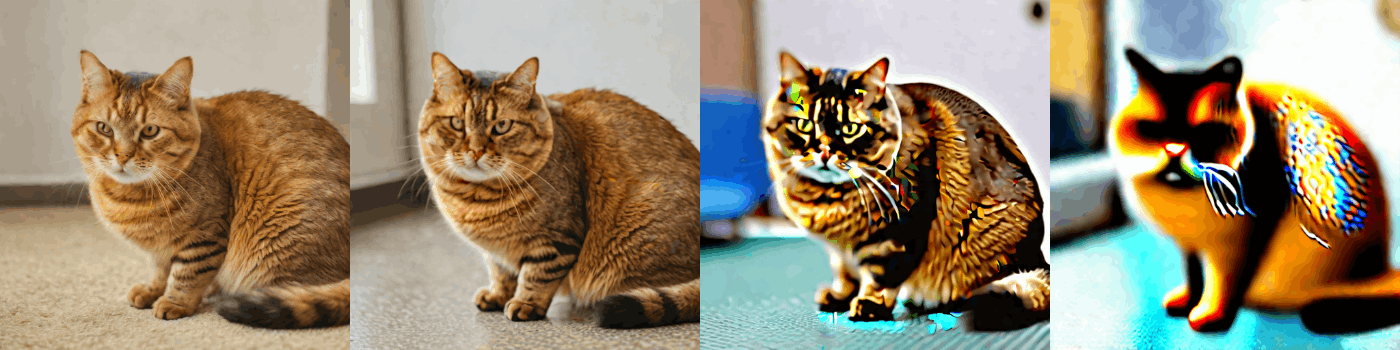
生成画像です.NSFW が入ってしまいましたが面倒なのでこのままにします

_`guidance_scale`を左から 0.0, 2.0, 4.0, 8.0 としています_
## Stable Diffusion XL Turbo [[code](https://github.com/tf63/diffusers-apple/blob/main/src/scripts/sdxl_turbo.py)]
Stable Diffusion XL Turbo も試してみます.Stable Diffusion XL 系のモデルは v1 系よりもモデルサイズが非常に大きく,環境によってはフリーズするかもしれません
https://huggingface.co/stabilityai/sdxl-turbo
Stable Diffusion XL Turbo は Stable Diffusion XL を[adversarial diffusion distillation](https://arxiv.org/abs/2311.17042)したもので,数ステップで高品質な画像を生成できます
生成画像です.Stable Diffusion XL Turbo の場合,`guidance_scale`を大きくするとすぐに生成が崩壊します.`num_inference_steps`は 2~4 にするのが良さそうです
_`num_inference_steps`を 4 とし, `guidance_scale`を左から 0.0, 2.0, 4.0, 8.0 としています_
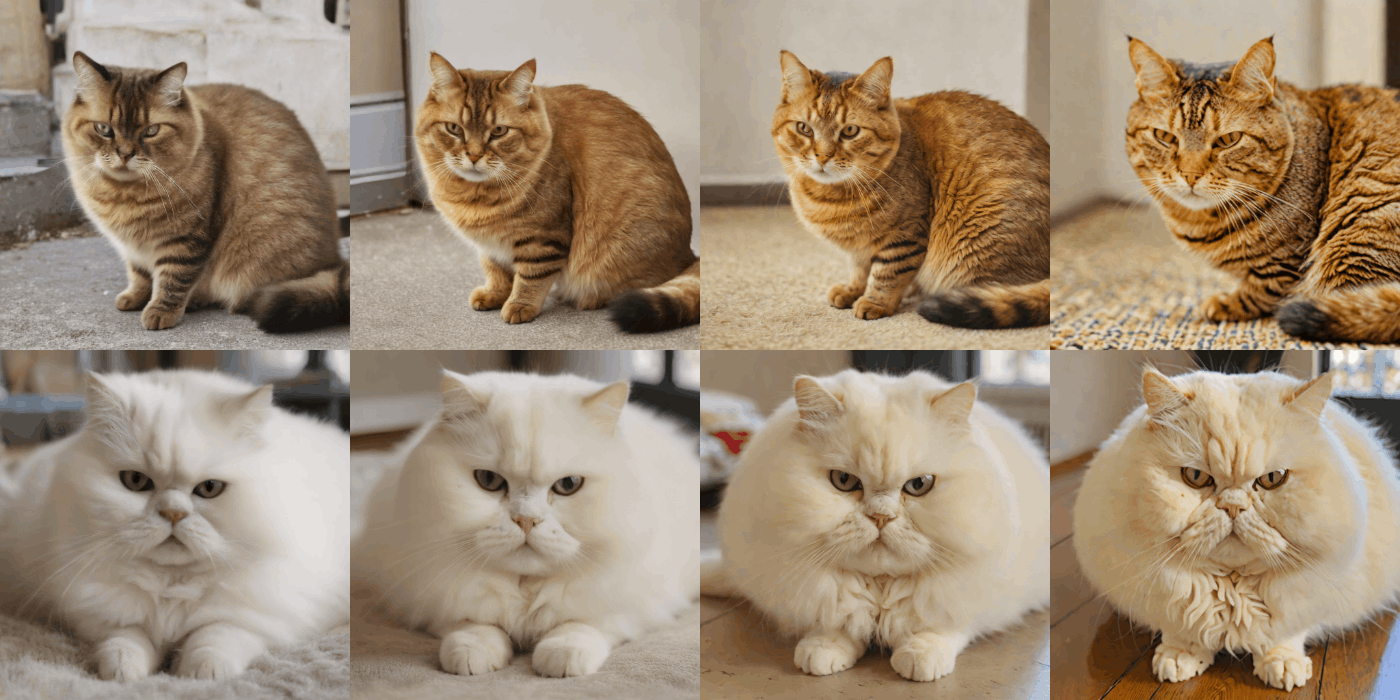
_`num_inference_steps`を左から 1, 2, 4, 8 とし, `guidance_scale`を 0.0 としています_
## Stable Diffusion v2 (inpainting) [[code](https://github.com/tf63/diffusers-apple/blob/main/src/scripts/sdv2_inpaint.py)]
画像生成の他に,inpainting タスクも良く使われていると思います.今回は Stable Diffusion v2 (inpainting)を使って[公式チュートリアルのサンプル](https://huggingface.co/docs/diffusers/ja/tutorials/autopipeline)の inpainting を試してみます
https://huggingface.co/stabilityai/stable-diffusion-2-inpainting
生成画像です.`guidance_scale`を 3.0 として 100 ステップ推論しています.プロンプトを適切に設定すれば上手く inpaint できそうです
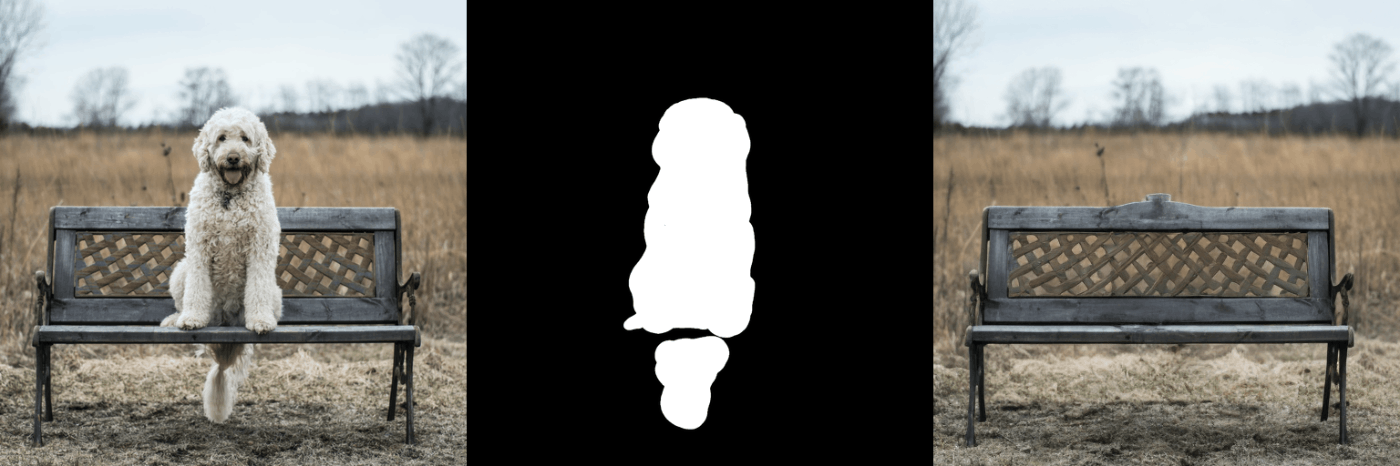
_プロンプト: a bench_
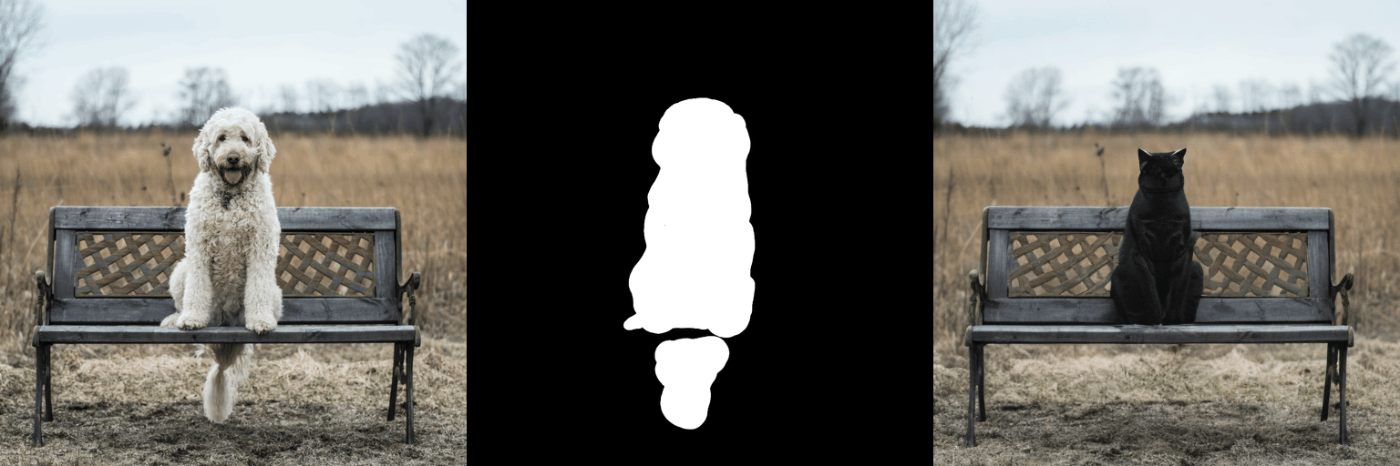
_プロンプト: a cat, sitting on a bench_