https://github.com/truefoundry/agentic-ai-deployment-cookbook
A cookbook for deploying custom multi-agent systems 1) behind FastAPI endpoint 2) as a custom MCP server using FastMCP. This project demonstrates integration with the TrueFoundry AI Gateway for production readiness.
https://github.com/truefoundry/agentic-ai-deployment-cookbook
Last synced: 3 months ago
JSON representation
A cookbook for deploying custom multi-agent systems 1) behind FastAPI endpoint 2) as a custom MCP server using FastMCP. This project demonstrates integration with the TrueFoundry AI Gateway for production readiness.
- Host: GitHub
- URL: https://github.com/truefoundry/agentic-ai-deployment-cookbook
- Owner: truefoundry
- Created: 2025-10-14T08:12:30.000Z (9 months ago)
- Default Branch: main
- Last Pushed: 2025-12-10T13:14:37.000Z (7 months ago)
- Last Synced: 2026-02-13T08:05:11.875Z (4 months ago)
- Language: Jupyter Notebook
- Size: 647 KB
- Stars: 1
- Watchers: 0
- Forks: 0
- Open Issues: 0
-
Metadata Files:
- Readme: README.md
Awesome Lists containing this project
README
# Agentic AI on TrueFoundry: Deployment Cookbook
This repository provides a minimal, end-to-end template for deploying a powerful, tool-powered **Agentic AI system**. We demonstrate wrapping an agent workflow (built with **CrewAI** or **LangGraph**) with scalable deployment via the **TrueFoundry AI Gateway** through:
1) a custom agent on a **FastAPI** endpoint as well as
2) a custom **Model Context Protocol (MCP) server** with **FastMCP**
> **Note on Security:** We demonstrate a scenario **without MCP server authentication** for simplicity. For production deployments, **TrueFoundry** offers robust security features. Refer to the [TrueFoundry MCP Gateway Authentication Guide](https://docs.truefoundry.com/gateway/mcp-gateway-auth-security) for implementation details.
---
## Cookbook Steps
This guide follows the process of developing a single-purpose agent and wrapping it for enterprise deployment.
### 1. Getting Started
#### 1a. Install and Login to TrueFoundry
Before you begin, you need to install the TrueFoundry SDK and authenticate with the platform.
**Step 1: Install TrueFoundry**
```bash
pip install -U "truefoundry"
```
**Step 2: Login to TrueFoundry** (via the tenant provided to you)
```bash
tfy login --host "https://demo.truefoundry.cloud"
```
> **Important**: Always make sure to use the correct tenant provided to you (for example, `https://demo.truefoundry.cloud`) as specified above.
#### 1b. Agent Flow Design (Jupyter Notebook)
The agent system is designed to perform **real-time research and format the output for human consumption**.
We are building a **Two-Agent Research and Report Generator** that uses the `TavilySearchTool` to find up-to-date information and then formats the final output into a clean Markdown string (we are no longer saving to a file in this simplified version).
| Agent | Role | Output |
| :--- | :--- | :--- |
| **Researcher** | Conducts web search and synthesizes findings. | A detailed, cited summary of the topic. |
| **Writer** | Takes the summary and formats it into a final Markdown report. | The final Markdown string. |
Review the design and test the flow interactively in the notebook:
- **[`With LangGraph`](./notebooks/research_report_generation_langgraph.ipynb)**
- **[`With CrewAI`](./notebooks/research_report_generation_crewai.ipynb)**
#### 1c. TrueFoundry Integration Code
You must configure your LLM framework to correctly route requests through the **TrueFoundry AI Gateway**.
**Option A: Using CrewAI**
```python
# Create an LLM instance with TrueFoundry AI Gateway
from crewai import LLM
truefoundry_llm = LLM(
api_key="your_truefoundry_api_key",
base_url="your_truefoundry_gateway_base_url",
model="openai/openai/gpt-5", # Format: /
)
# This format allows you to call any model (Anthropic, Gemini, etc.)
# configured on your TrueFoundry Gateway.
```
**Option B: Using LangChain (If building with LangGraph)**
```python
from langchain_openai import ChatOpenAI
llm = ChatOpenAI(
api_key="your_truefoundry_api_key",
base_url="your_truefoundry_gateway_base_url/v1",
model="openai/gpt-5" # Format:
)
# This format allows you to call any model (Anthropic, Gemini, etc.)
# configured on your TrueFoundry Gateway.
```
#### 1d. Python Environment Management (`uv`)
We use `uv` for ultra-fast, reproducible, and robust dependency management. Your repository uses a **[`pyproject.toml`](./pyproject.toml)** file to declare direct dependencies and a **[`uv.lock`](./uv.lock)** file to lock the entire environment.
To set up your project locally:
| Command | Purpose |
| :--- | :--- |
| `uv venv` | Creates an isolated Python virtual environment, typically named `.venv`. |
| `uv add ` | Installs a package and **adds it** to the `dependencies` list in `pyproject.toml` as well as updates `uv.lock`. |
| `uv sync` | **Installs all dependencies** listed in `pyproject.toml` using the exact versions specified in the `uv.lock` file, ensuring perfect reproducibility. |
| `uv run ` | Executes a script within the project's virtual environment. |
#### 1e. Python Script for Agent Code
The final agent logic is isolated into a runnable Python script, which exposes the core `run_agent(query)` function used by the FastAPI endpoint as well as the MCP server.
- **[`With LangGraph`](./src/agents/langgraph/server.py)**
- **[`With CrewAI`](./src/agents/crewai/server.py)**
### 2. Deploy Agent Behind FastAPI Endpoint
For traditional RESTful communication, such as serving a **web UI** or integrating with a **synchronous microservice**, you should expose your agent logic through a standard FastAPI endpoint. This section details the complete configuration for your REST service.
#### 2a. The FastAPI Endpoint Code
This script defines the application, input structure, and the core routing logic.
- **[`With LangGraph`](./src/agents/langgraph/server.py)**
- **[`With CrewAI`](./src/agents/crewai/server.py)**
#### 2b. Core Component Explanation
| Component | Code / Logic | Purpose in Deployment |
| :--- | :--- | :--- |
| **Agent Import** | `from src.{framework}.agent import run_agent` | **The single key difference** between agent frameworks. This imports the core asynchronous function. |
| **`app = FastAPI(...)`** | Initialization | Creates the **main ASGI application** that the Uvicorn server will host. |
| **`@app.get("/health")`** | Health Probe | A synchronous endpoint required by **TrueFoundry** for container health checks (Liveness). |
| **`UserInput(BaseModel)`** | Input Schema | Defines the expected request body (`{"user_input": "..."}`), providing **validation** and clear API documentation. |
| **`@app.post("/chat")`** | Main Endpoint | Defines the primary entry point for external web/REST calls. |
| **`await run_agent_endpoint(...)`** | Execution Bridge | Correctly **awaits** the asynchronous agent function. This ensures the long-running workflow does not block the main server's event loop, maintaining service responsiveness. |
***
#### 2c. Execution Command
To run the standalone FastAPI agent endpoint for web consumption:
```bash
##Example with LangGraph
uv run uvicorn src.agents.langgraph.server:app --host 0.0.0.0 --port 8000
```
### 3. Deploy a Custom MCP Server with FastMCP
#### 3a. Create the MCP Server
The **`agent_as_mcp_server.py`** file uses the **FastMCP** framework to convert the single agent function (`conduct_research_and_report`) into a network-accessible tool.
- **[`With LangGraph`](./src/agents/langgraph/agent_as_mcp_server.py)**
- **[`With CrewAI`](./src/agents/crewai/agent_as_mcp_server.py)**
#### 3b. FastMCP Overview
* **Initialization:** The `FastMCP` object handles all protocol details.
```python
mcp = FastMCP("research_report_generation", stateless_http=True)
```
* **Tool Definition:** We define a single tool that wraps the entire process.
```python
@mcp.tool()
def conduct_research_and_report(query: str) -> str:
# ... calls run_agent(query) ...
# ... returns final Markdown report ...
```
#### 3c. Key FastMCP Components
| Component | Purpose | TrueFoundry Context |
| :--- | :--- | :--- |
| **`@mcp.tool()`** | Exposes the single capability: `conduct_research_and_report(query)`. | This is the function executed by an LLM client (e.g., Cursor, Claude). |
| **`@mcp.custom_route("/health")`** | Creates a standard HTTP endpoint for health checks. | **Crucial for Deployment.** This can be used as the **Liveness Probe** to monitor the service health. |
| **Startup Configuration** | Sets the host and port for the internal Uvicorn server. | Must listen on `host="0.0.0.0"` and `port=8000` for containerization within TrueFoundry. |
The `agent_as_mcp_server.py` file uses **FastMCP** to wrap the agent logic into a deployable service and adds necessary deployment configuration.
#### 3d. Execution Command
To run the standalone FastMCP server endpoint for web consumption:
```bash
##Example with LangGraph
uv run src.agents.langgraph.agent_as_mcp_server.py
```
***
#### 3e. Local Testing with MCP Inspector
Before deployment, verify the server's functionality using the **MCP Inspector** CLI tool. This tool allows you to confirm the server's capabilities and test tools directly via HTTP.
1. **Start the MCP Server:** Run your server script in one terminal window (if not already up):
```bash
uv run src.agents.langgraph.agent_as_mcp_server.py
```
2. **Test the Server (in a new terminal):** Use `npx` to inspect the capabilities and call the tool.
```bash
# Inspect the capabilities (tools, resources, prompts)
npx @modelcontextprotocol/inspector
```
### 4. Deployment on TrueFoundry (Video Guide)
> **Important**: Sign up only on **https://demo.truefoundry.cloud/** (or the tenant provided to you) and do **NOT** use any other tenants/URLs.
---
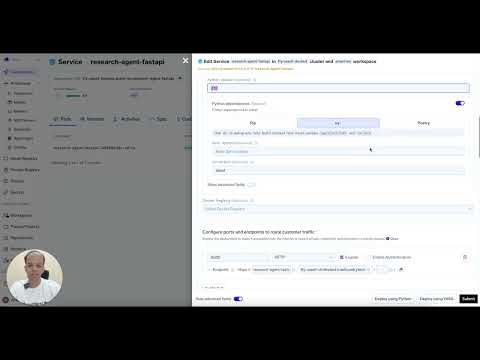
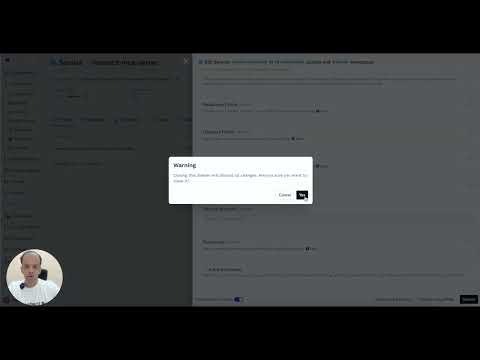
With the code complete, the service is ready for containerization and deployment.
The final deployment step involves using the TrueFoundry platform to containerize your code and 1) deploy your agent behind FastAPI endpoint and 2) deploy your custom MCP server.
#### 4a. Deploy your agent behind FastAPI endpoint on TrueFoundry (~3mins watchtime)
Watch this guide to see the full deployment process of Agent FastAPI endpoint in action.
[](https://youtu.be/Ps4h1tn10H4)
#### 4b. Deploy your custom MCP server on TrueFoundry (~3mins watchtime)
Watch this guide to see the full deployment process of MCP server in action.
[](https://youtu.be/wL1MbcwUq7Q)