Ecosyste.ms: Awesome
An open API service indexing awesome lists of open source software.
https://github.com/twihike/chat-ui-react
💬 React component for conversational UI
https://github.com/twihike/chat-ui-react
bot chat material-ui react
Last synced: about 13 hours ago
JSON representation
💬 React component for conversational UI
- Host: GitHub
- URL: https://github.com/twihike/chat-ui-react
- Owner: twihike
- License: mit
- Created: 2020-05-06T14:19:42.000Z (over 4 years ago)
- Default Branch: master
- Last Pushed: 2023-01-07T04:41:10.000Z (about 2 years ago)
- Last Synced: 2025-01-17T17:25:24.947Z (9 days ago)
- Topics: bot, chat, material-ui, react
- Language: TypeScript
- Homepage: https://chat-ui-react-demo.netlify.app/
- Size: 4.82 MB
- Stars: 94
- Watchers: 3
- Forks: 30
- Open Issues: 29
-
Metadata Files:
- Readme: README-ja.md
- Changelog: CHANGELOG.md
- License: LICENSE
Awesome Lists containing this project
README
# chat-ui-react
[](https://badge.fury.io/js/chat-ui-react) [](https://github.com/twihike/chat-ui-react/actions) [](https://github.com/twihike/chat-ui-react/actions) [](LICENSE)
chat-ui-reactは会話型のWebUIを構築するためのnpmパッケージです。
このパッケージが提供するものは次の通りです。
- Reactコンポーネント
- チャットのメッセージ
- メッセージの入力フォーム
- コンポーネントの表示制御を行うクラス
あなたのオンラインチャットやチャットボットにこれを組み込むことができます。
現在、コンポーネントはReactのUIフレームワークであるMaterial-UIを利用しています。
Material-UI以外のコンポーネントを望むなら、オリジナルのコンポーネントに差し替えて利用することもできます。

## デモ
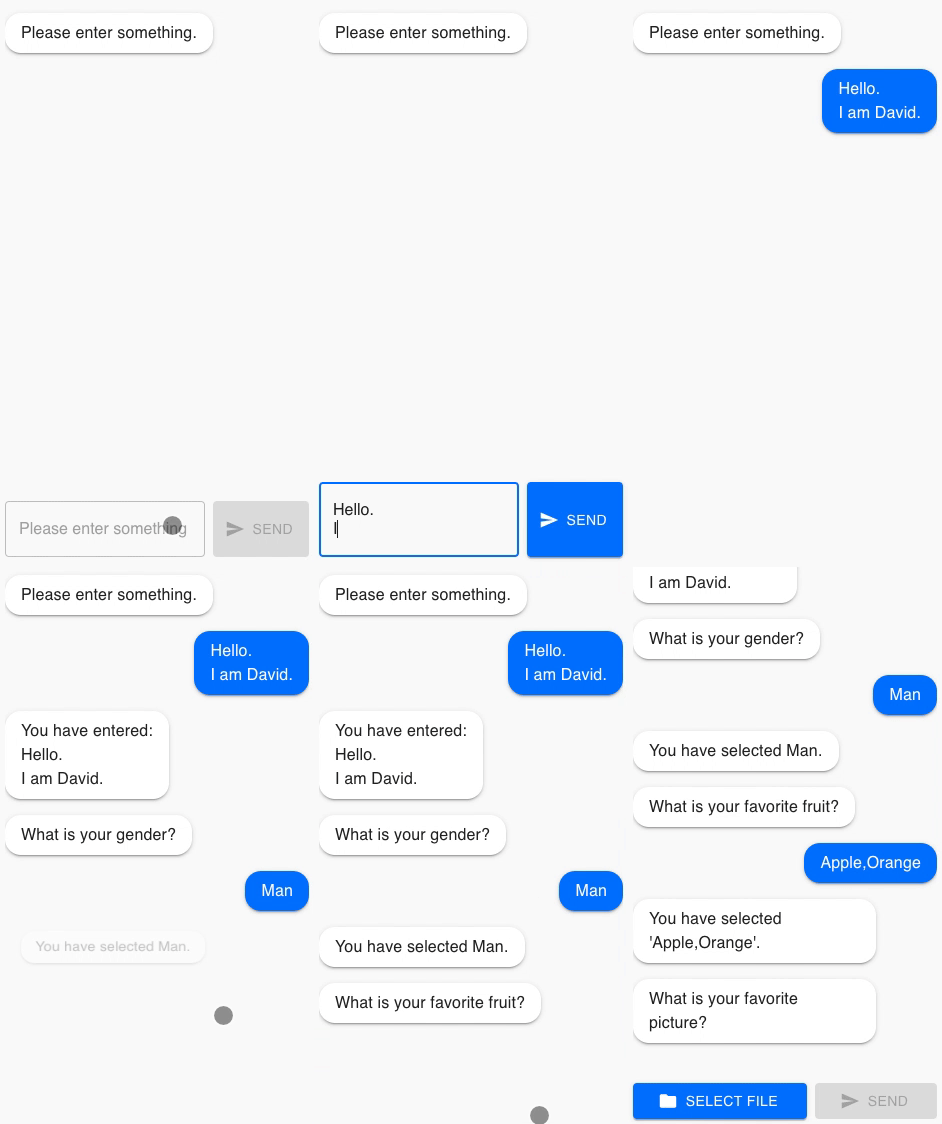
[デモサイト](https://chat-ui-react-demo.netlify.app)をご覧ください。
## サンプル
`examples`ディレクトリをご覧ください。
- echo-bot: ユーザの入力をおうむ返しするチャットボットです。
- cdn: すぐに始める簡単な方法です。
## インストール
### Node.js
With npm:
```shell
npm install chat-ui-react react react-dom @material-ui/core
```
With yarn:
```shell
yarn add chat-ui-react react react-dom @material-ui/core
```
### CDN
```html
```
## 使い方
### はじめに
このパッケージは、チャットを表示する`MuiChat`コンポーネントとチャットの表示を制御する`ChatController`クラスで構成されます。以下はそれぞれの関係を表した図です。
```text
+------------+ +------------------+ +-----------+
| | Call | | Call | |
| | | | | |
| Your App | +-----> | ChatController | +-----> | MuiChat |
| | | | | |
| | | | | |
+------------+ +------------------+ +-----------+
```
この構造により、私たちはチャットの表示内容を`ChatController`に渡すことだけに専念できます。コンポーネントの表示制御を気にする必要はありません。
見た目で気に入らない部分があれば、`MuiChat`を別のコンポーネントに差し替えることができます。差し替えによるアプリの変更は生じません。
具体的な使い方を理解するために、簡単な例を示します。
```tsx
function App(): React.ReactElement {
const [chatCtl] = React.useState(new ChatController());
React.useMemo(async () => {
// チャットの内容はChatControllerを使って表示します
await chatCtl.addMessage({
type: 'text',
content: `Hello, What's your name.`,
self: false,
});
const name = await chatCtl.setActionRequest({ type: 'text' });
}, [chatCtl]);
// 表示に使用するコンポーネントは一つだけです
return ;
}
```
以降では`ChatController`の使い方を説明します。
### メッセージ
チャットのメッセージを表示するには`addMessage`メソッドを利用します。
`self`オプションに自分のメッセージか他人のメッセージかを指定します。
```typescript
await chatCtl.addMessage({
type: 'text',
content: `Hello, What's your name.`,
self: false,
});
```
### アクション
ユーザにメッセージの入力を促すには`setActionRequest`メソッドを利用します。
#### アクションの回数
アクションには1回限りのアクションを要求する方法と常にアクションを要求する方法があります。
##### 1回限りのアクション
ユーザから1回限りのアクションを要求するには`always`オプションに`false`を指定します。
メソッドの返却値は、ユーザの入力を返却する`Promise`です。
```typescript
const response = await chatCtl.setActionRequest({
type: 'text',
always: false,
});
console.log(response.value);
```
##### 常時アクション
ユーザから常にアクションを要求するには`always`オプションに`true`を指定します。
ユーザから複数回入力されるため、入力を受け取るコールバック関数を指定します。
ユーザからの入力要求を中止するには`cancelActionRequest`メソッドを呼び出します。
```typescript
chatCtl.setActionRequest(
{ type: 'text', always: true },
(response) => {
console.log(response.value);
}
);
chatCtl.cancelActionRequest();
```
#### アクションタイプ
アクションにはテキストや選択などいくつかの種類があります。
##### テキスト
このアクションは文字列を入力します。
`type`に`text`を指定します。
メソッドの返却値はユーザが入力したメッセージです。
```typescript
const response = await chatCtl.setActionRequest({ type: 'text' });
console.log(response.value);
```
##### 単一選択
このアクションは選択肢から1つ選びます。
`type`に`select`を指定します。`options`に選択肢を指定します。`value`はhtmlの属性、`text`は画面表示に使います。
メソッドの返却値はユーザが選択した`options`の要素です。
```typescript
const response = await chatCtl.setActionRequest({
type: 'select',
options: [
{
value: 'a',
text: 'A',
},
{
value: 'b',
text: 'B',
},
],
});
console.log(response.option);
// Aが選択された場合
// { value: 'a', text: 'A' }
```
##### 複数選択
このアクションは選択肢から複数選びます。
`type`に`multi-select`を指定します。`options`に選択肢を指定します。`value`はhtmlの属性、`text`は表示に使います。メソッドの返却値は選択された`options`です。
```typescript
const response = await chatCtl.setActionRequest({
type: 'multi-select',
options: [
{
value: 'a',
text: 'A',
},
{
value: 'b',
text: 'B',
},
],
});
console.log(response.options);
// AとBが選択された場合
// [{ value: 'a', text: 'A' }, { value: 'b', text: 'B' }]
```
##### ファイル
このアクションはファイルを入力します。
`type`に`file`を指定します。`input`タグの属性として`accept`と `multiple`を指定できます。メソッドの返却値はユーザが入力したファイルの配列です。
```typescript
const response = await chatCtl.setActionRequest({
type: 'file',
accept: 'image/*',
multiple: true,
});
console.log(response.files);
```
##### 音声
このアクションは音声を入力します。
`type`に`audio`を指定します。メソッドの返却値はユーザが入力した音声の`Blob`です。音声入力に失敗した場合は`reject`された`Promise`を返します。
```typescript
try {
const response = await chatCtl.setActionRequest({
type: 'audio',
});
console.log(response.audio);
} catch (e) {
console.log(e);
}
```
##### カスタム
このアクションはあなたのカスタムコンポーネントを利用して入力します。
`type`に`custom`を指定します。`Component`にあなたのコンポーネントを指定します。
カスタムコンポーネントは、Reactの作法に倣っていつも通り入力フォームを作成します。
プロパティとして`chatController`と`actionRequest`を受け取ります。これはchat-ui-reactにより自動でセットされます。
そして、ユーザから受け取った入力を`ChatController`クラスの`setActionResponse`メソッドを使って伝搬します。
これはアプリケーションが`setActionRequest`の返却値として受け取ることができます。
```tsx
function GoodInput({
chatController,
actionRequest,
}: {
chatController: ChatController;
actionRequest: ActionRequest;
}) {
const chatCtl = chatController;
const setResponse = React.useCallback((): void => {
const res = { type: 'custom', value: 'Good!' };
chatCtl.setActionResponse(actionRequest, res);
}, [actionRequest, chatCtl]);
return (
Good!
);
}
const custom = await chatCtl.setActionRequest({
type: 'custom',
Component: GoodInput,
});
console.log(custom.value);
```
## License
Copyright (c) 2020 twihike. All rights reserved.
This project is licensed under the terms of the MIT license.