https://github.com/ujjwal5705/automate_boring_stuff
Developed six automation tools using Django. Built a stock market analysis tool, web scraping system, image compression utility, bulk email sender with open/click tracking, and import/export tools. Integrated Celery and Redis for async task handling, used Brevo (Sendinblue) for transactional emails, CKEditor for rich text input.
https://github.com/ujjwal5705/automate_boring_stuff
bootstrap5 celery ckeditor django jquery ngrok python redis sendinblue
Last synced: 4 months ago
JSON representation
Developed six automation tools using Django. Built a stock market analysis tool, web scraping system, image compression utility, bulk email sender with open/click tracking, and import/export tools. Integrated Celery and Redis for async task handling, used Brevo (Sendinblue) for transactional emails, CKEditor for rich text input.
- Host: GitHub
- URL: https://github.com/ujjwal5705/automate_boring_stuff
- Owner: Ujjwal5705
- Created: 2025-05-24T11:51:27.000Z (7 months ago)
- Default Branch: main
- Last Pushed: 2025-07-07T16:10:27.000Z (6 months ago)
- Last Synced: 2025-07-07T17:32:48.665Z (6 months ago)
- Topics: bootstrap5, celery, ckeditor, django, jquery, ngrok, python, redis, sendinblue
- Language: JavaScript
- Homepage:
- Size: 522 KB
- Stars: 1
- Watchers: 0
- Forks: 0
- Open Issues: 0
-
Metadata Files:
- Readme: README.md
Awesome Lists containing this project
README
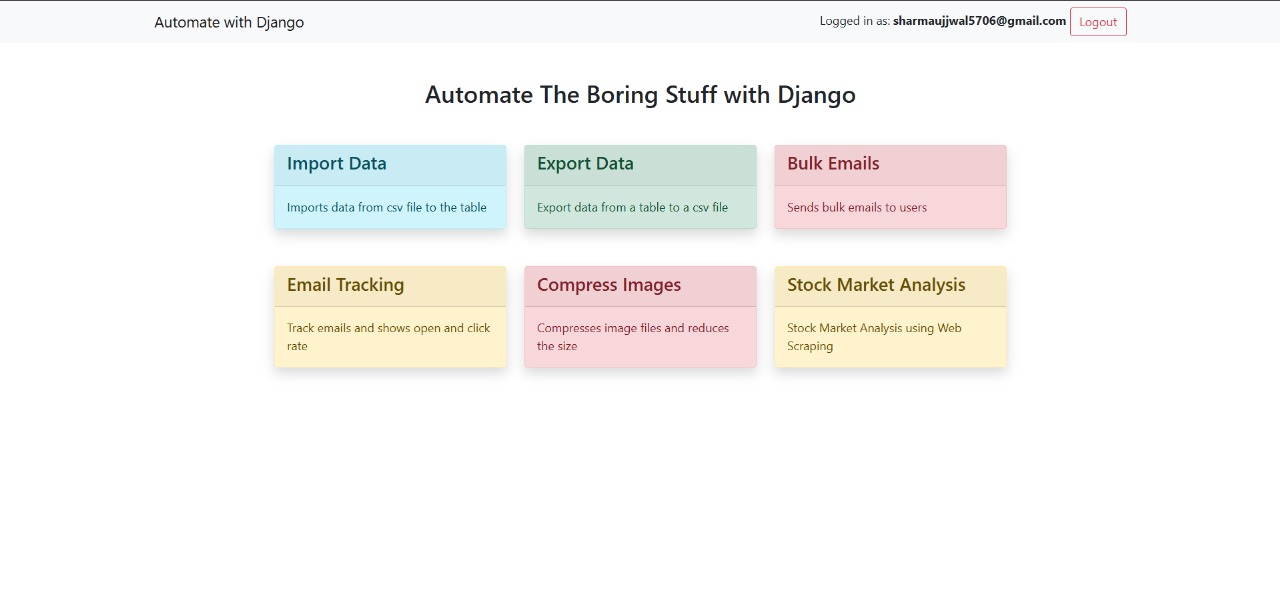
# Automate the Boring Stuff
Developed six automation tools using Django. Built a stock market analysis tool, web scraping system, image compression utility, bulk email sender with open/click tracking, and import/export tools. Integrated Celery and Redis for async task handling, used Brevo (Sendinblue) for transactional emails, CKEditor for rich text input. Used Ngrok for local tunneling, processed 1M+ records, and enabled bulk emailing with attachments.
---
[](https://postimg.cc/bG7vXNWr)
## Prerequisites
- Python 3.8+
- Git (optional)
- Redis
- Celery
- VS Code (as code editor)
## 1. Install VS Code
Download and install from: [Link](https://code.visualstudio.com/download)
## 2. Create Project Folder & Virtual Environment
```bash
mkdir automate-the-boring-stuff
cd automate-the-boring-stuff
# Create virtual environment
python -m venv env
# Activate it
source env/bin/activate # macOS/Linux
env\Scripts\activate # Windows
```
## 3. Install Django in virtual Environment
```bash
pip install django
```
## 4. Create and Migrate Models
After writing your models in `models.py`, run below commands to sync the changes with the database:
```
python manage.py makemigrations
python manage.py migrate
```
## 5. Import/Export CSV via Custom Commands
Create commands in:
```
your_app/
└── management/
└── commands/
├── importdata.py
└── exportdata.py
```
Run with:
```bash
python manage.py importdata file_path model_name
python manage.py exportdata model_name
```
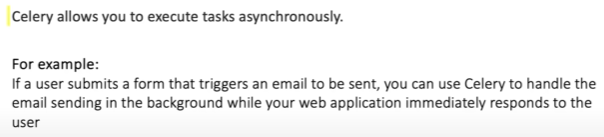
## 6. Problem: Importing Millions of Rows Takes ~7 Minutes
```
To handle large imports asynchronously and improve responsiveness, we use **Celery + Redis**.
```
![]()
![]()
![]()
## 7. Install Celery and Redis Python Packages
```bash
pip install celery redis
```
Create a `celery.py` in your project root (`automate_the_boring_stuff/celery.py`) with:
```python
import os
from celery import Celery
# Set the default Django settings module for the 'celery' program.
os.environ.setdefault('DJANGO_SETTINGS_MODULE', 'proj.settings')
app = Celery('proj')
# Using a string here means the worker doesn't have to serialize
# the configuration object to child processes.
# - namespace='CELERY' means all celery-related configuration keys
# should have a `CELERY_` prefix.
app.config_from_object('django.conf:settings', namespace='CELERY')
# Load task modules from all registered Django apps.
app.autodiscover_tasks()
@app.task(bind=True, ignore_result=True)
def debug_task(self):
print(f'Request: {self.request!r}')
```
In `__init__.py` of the project folder:
```python
# This will make sure the app is always imported when
# Django starts so that shared_task will use this app.
from .celery import app as celery_app
__all__ = ('celery_app',)
```
---
## macOS: Redis Setup
```bash
brew install redis
redis-server
brew services start redis
```
To verify Redis is running:
```bash
brew services list
```
You should see:
```
redis (homebrew.mxcl.redis)
Running: ✔
```
Test with:
```bash
redis-cli
127.0.0.1:6379> ping
PONG
```
Stop Redis:
```bash
brew services stop redis
```
---
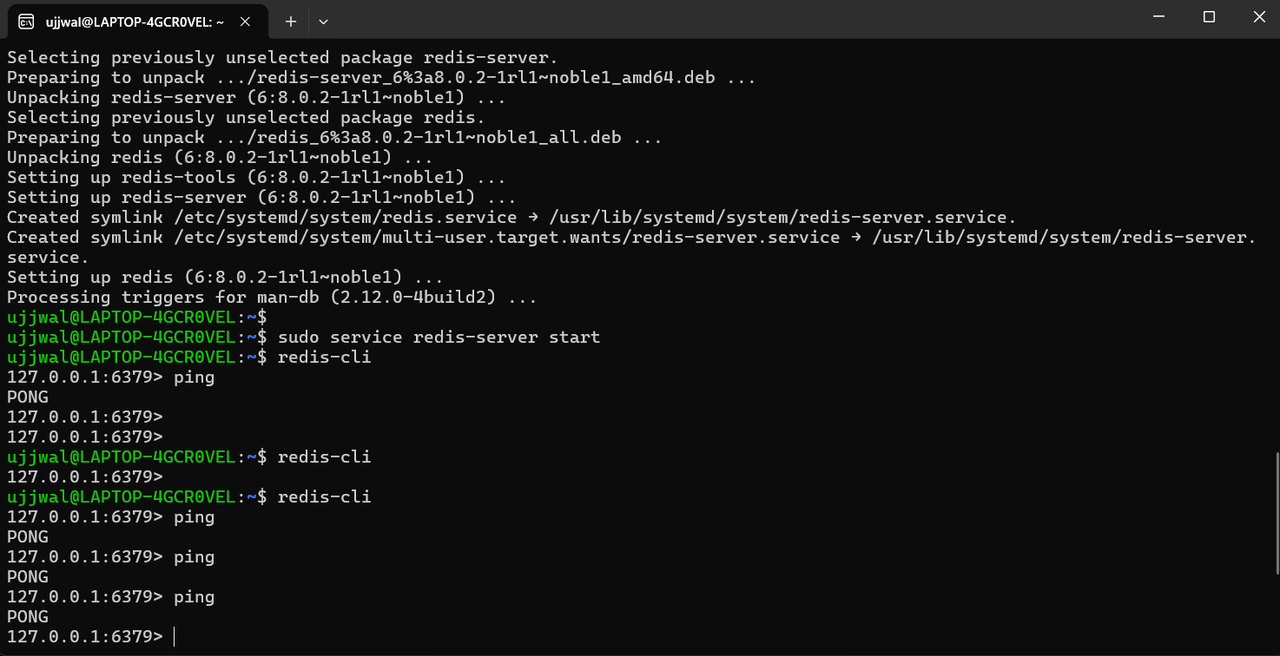
## Ubuntu (Linux): Redis Setup
```bash
sudo apt update
sudo apt install redis-tools # for redis-cli
sudo snap install redis
```
Enable Redis on startup:
```bash
sudo snap set redis service.start=true
```
Start Redis server (if using `apt`):
```bash
sudo systemctl start redis
```
Stop server:
```bash
sudo systemctl stop redis
```
Test:
```bash
redis-cli
127.0.0.1:6379> ping
PONG
```
---
## Windows: Redis Setup
Windows does **not** officially support Redis. Use the following method. It worked for me :)
### WSL
Install [WSL](https://learn.microsoft.com/en-us/windows/wsl/install), then install Redis inside Ubuntu:
Open PowerShell or Windows Command Prompt in administrator mode by right-clicking and selecting "Run as administrator", enter the wsl --install command, then restart your machine.
After that use the following command for Redis setup
```bash
curl -fsSL https://packages.redis.io/gpg | sudo gpg --dearmor -o /usr/share/keyrings/redis-archive-keyring.gpg
echo "deb [signed-by=/usr/share/keyrings/redis-archive-keyring.gpg] https://packages.redis.io/deb $(lsb_release -cs) main" | sudo tee /etc/apt/sources.list.d/redis.list
sudo apt-get update
sudo apt-get install redis
```
---
Lastly, start the Redis server like so:
```bash
sudo service redis-server start
```
Once Redis is running, you can test it by running redis-cli:
```bash
redis-cli
```
Test the connection with the ping command:
```bash
127.0.0.1:6379> ping
PONG
```
It would look like this :
---
[](https://postimg.cc/JGmnhSHr)
[](https://postimg.cc/N5402bR1)
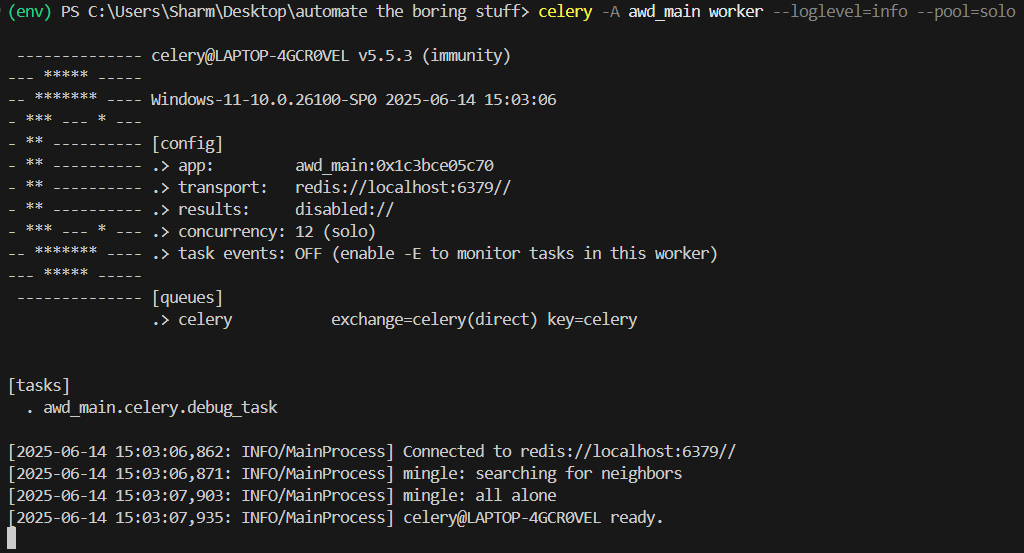
## Start Celery Worker
Below command will work in macOS/Linux only
Celery uses prefork by default, which works only on Unix systems.
```bash
celery -A automate_the_boring_stuff worker --loglevel=info
```
On Windows, you need to explicitly use the solo pool (single-threaded, no multiprocessing)
- `--pool=solo` is required for Windows due to lack of `fork()`.
- solo uses a single thread and avoids these issues but is not suitable for production (only development/testing).
```bash
celery -A awd_main worker --loglevel=info --pool=solo
```
Note: Make sure you set the Celery broker url to localhost 6379 in settings.py and redis server is running in background
```bash
CELERY_BROKER_URL = 'redis://localhost:6379'
```
After all, your terminal should look like this:
---
[](https://postimg.cc/m13QKqhd)
## Example Command Flow
```bash
python manage.py importdata file_path moel_name
# This triggers the task and Celery handles it in the background
```
---
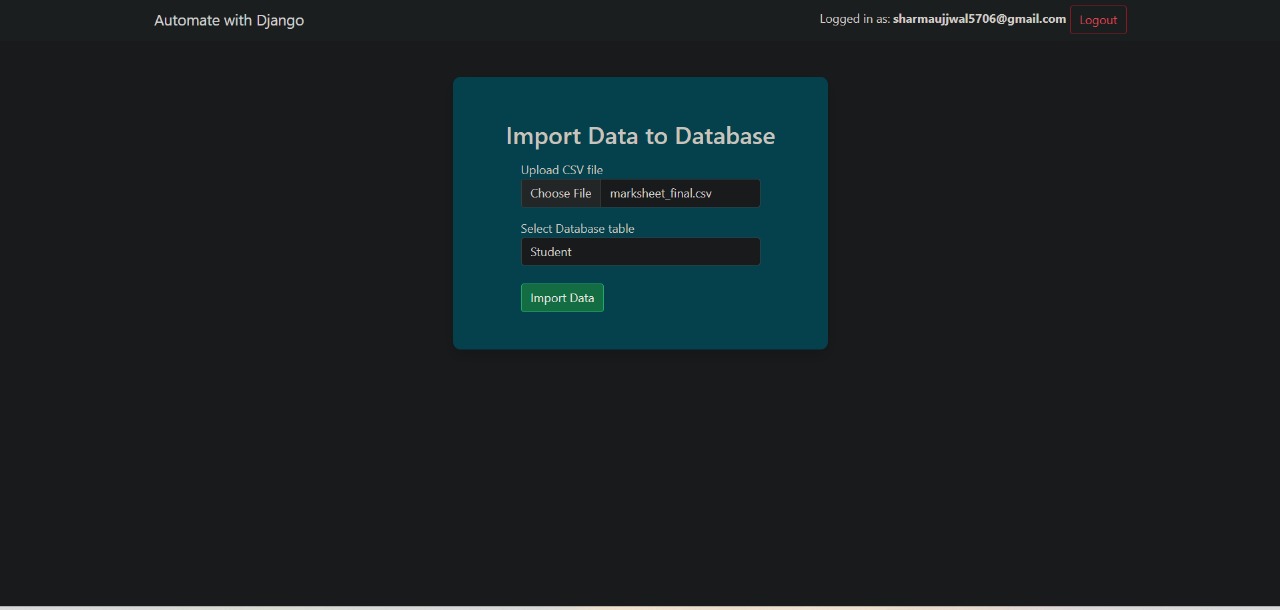
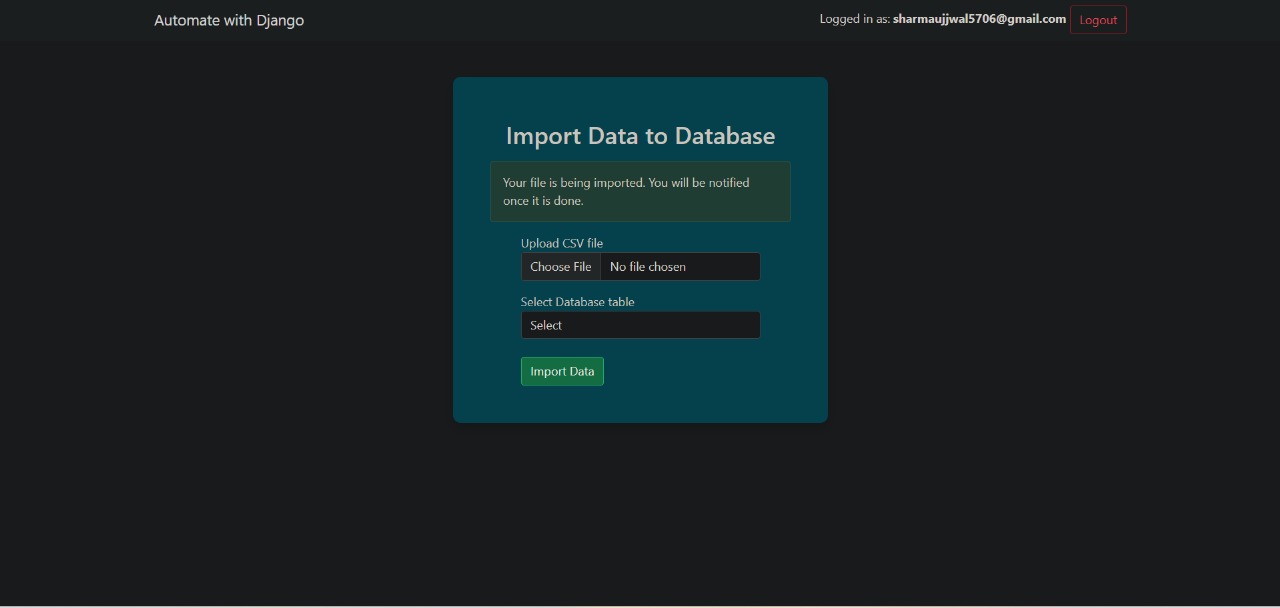
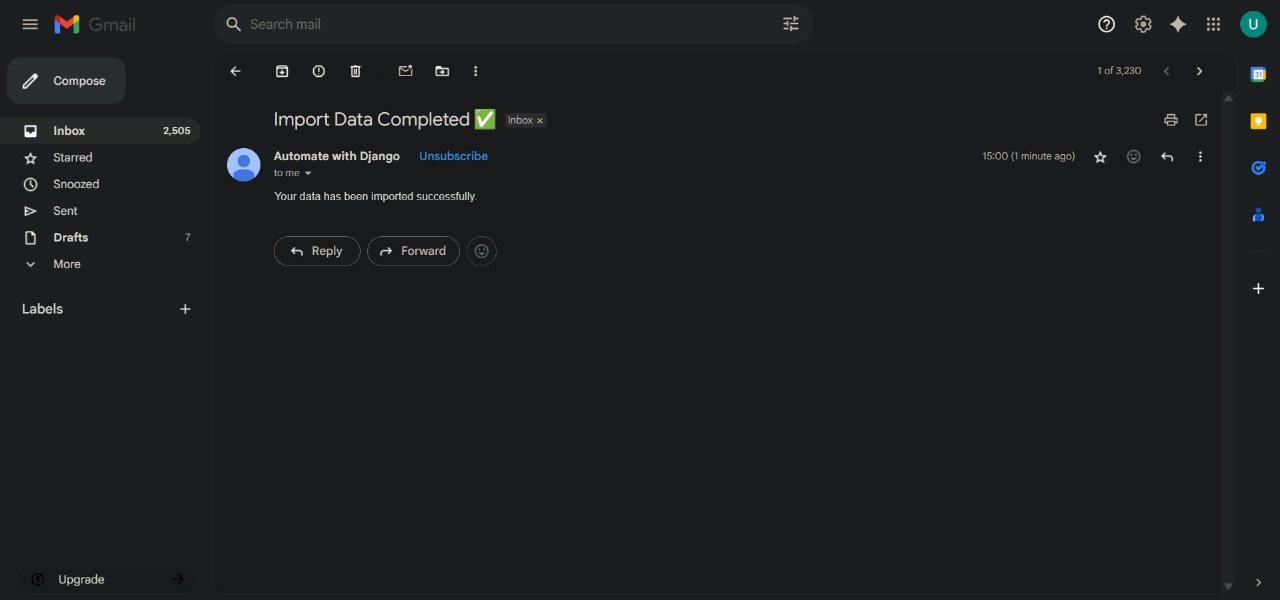
## Email on Import Completion
After a CSV import completes, the user receives an email from the default sender email configured in `settings.py`.
### Step 1: Setup Email Configuration
In your `settings.py`, add the following and
```python
EMAIL_BACKEND = 'django.core.mail.backends.smtp.EmailBackend'
EMAIL_HOST = 'smtp.gmail.com'
EMAIL_PORT = 587
EMAIL_USE_TLS = True
EMAIL_HOST_USER = 'your_email@gmail.com'
EMAIL_HOST_PASSWORD = 'your_app_password'
DEFAULT_FROM_EMAIL = EMAIL_HOST_USER
```
> If using Gmail, enable 2FA and use an App Password instead of your actual account password.
### Working:
[](https://postimg.cc/pmQx6Jx9)
[](https://postimg.cc/QHTjpryJ)
[](https://postimg.cc/JsCMx2wV)
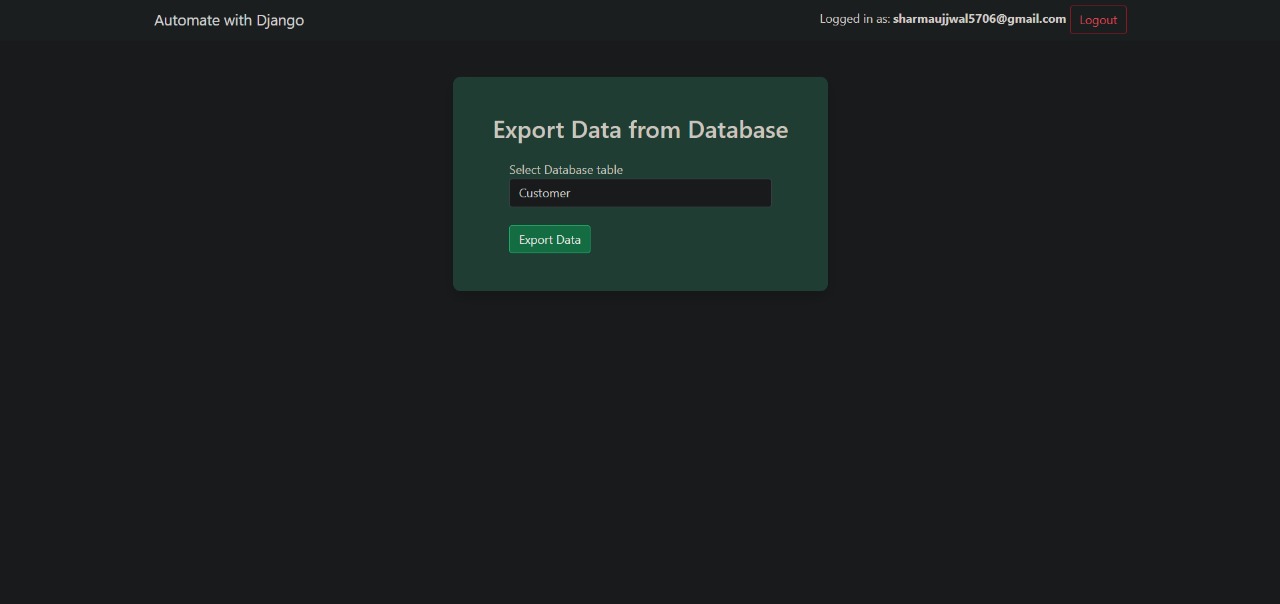
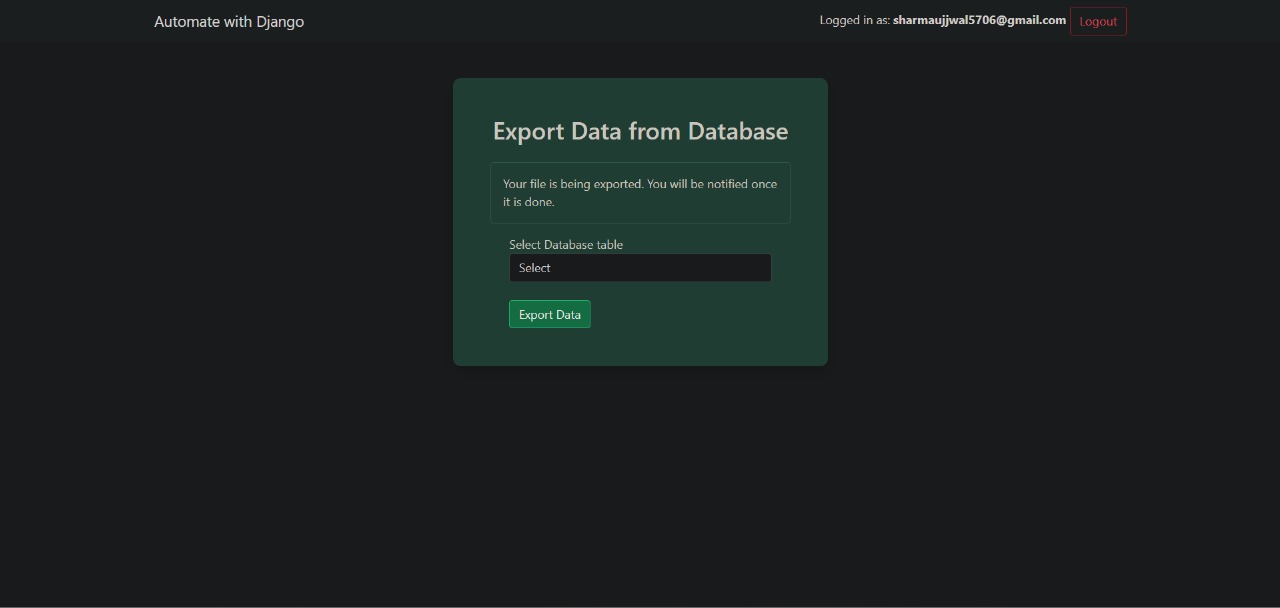
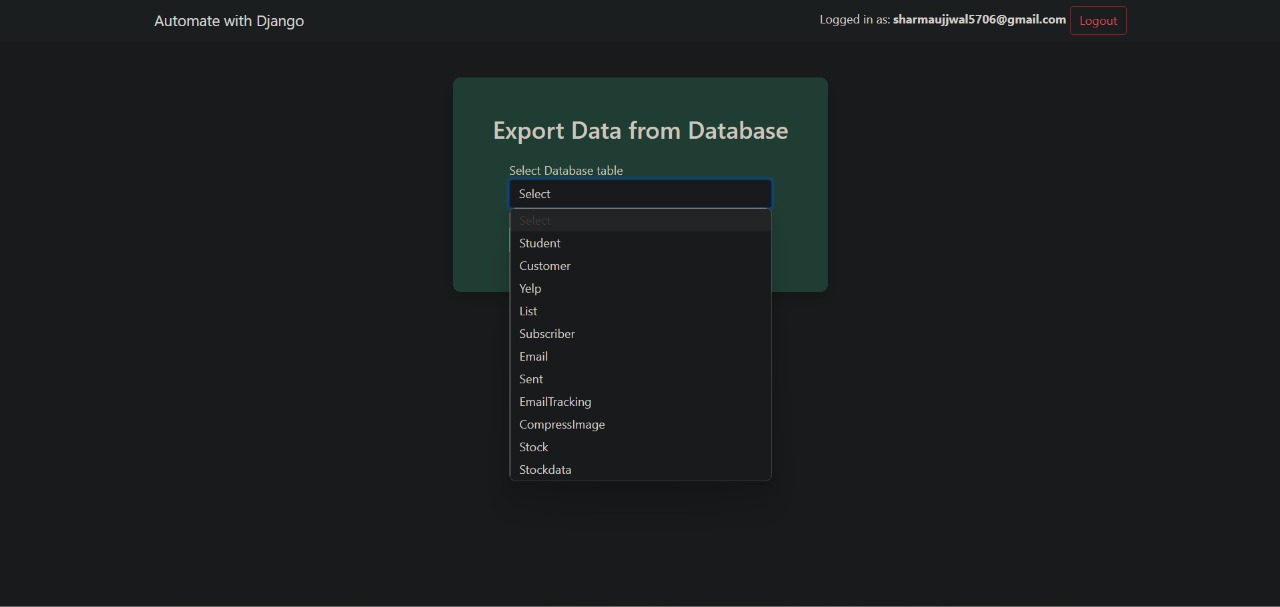
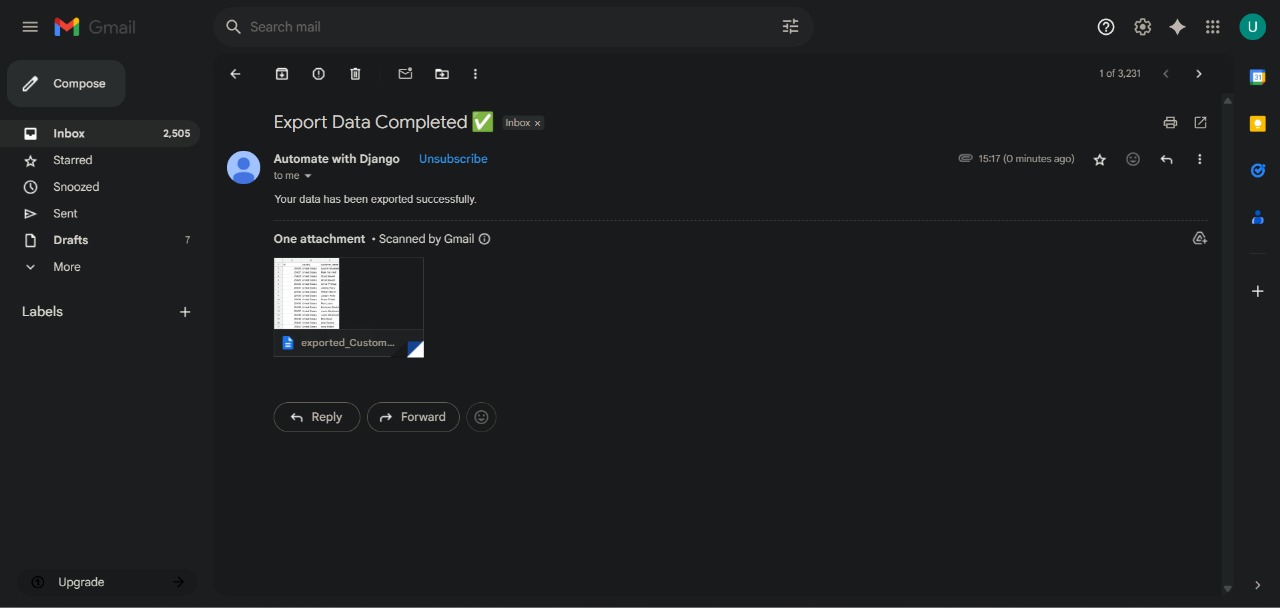
## Email on Export Completion with CSV Attachment
This feature allows users to export data from the database and receive it via email with the exported file attached.
- When a user initiates an export, the task runs asynchronously using **Celery** to avoid blocking the application in case millions of rows a re present.
- Once the export is complete, a **CSV file** containing the exported data is generated.
- The system automatically sends an **email** to the user with the CSV file **attached**.
- This ensures a smooth user experience where data is delivered reliably without manual download steps.
> Ideal for large exports, background processing, and improving user efficiency.
### Working:
[](https://postimg.cc/fVWZ10bB)
[](https://postimg.cc/v1cyZFfn)
[](https://postimg.cc/4mQs81XY)
[](https://postimg.cc/dhWvFtkv)
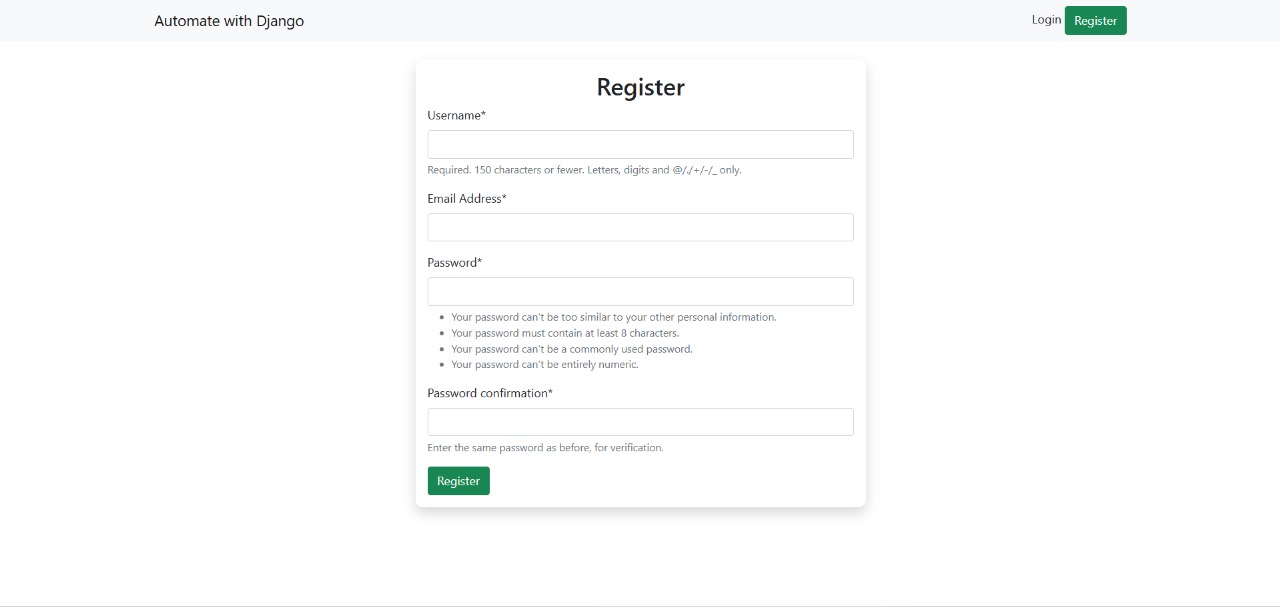
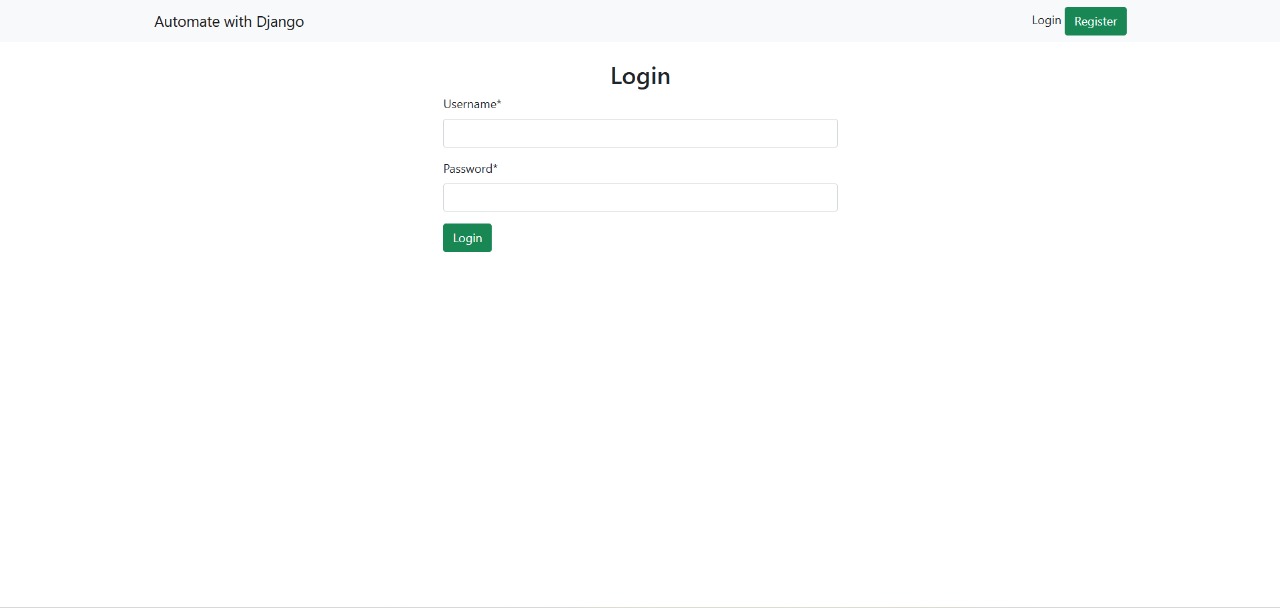
## User Registration and Login (with Crispy Forms)
The project includes a fully functional **user registration and login system** built using Django's authentication framework and **Crispy Forms** for styling.
- Users can **register** with an email and password.
- Registered users can **log in** securely to access authenticated parts of the site.
- All forms are styled using **Django Crispy Forms**, providing a clean and responsive UI without writing custom HTML or CSS.
- Feedback is provided via form validation errors and success messages.
> This ensures a smooth and user-friendly authentication experience.
### Working:
[](https://postimg.cc/tZF49GG5)
[](https://postimg.cc/68QqnPCW)
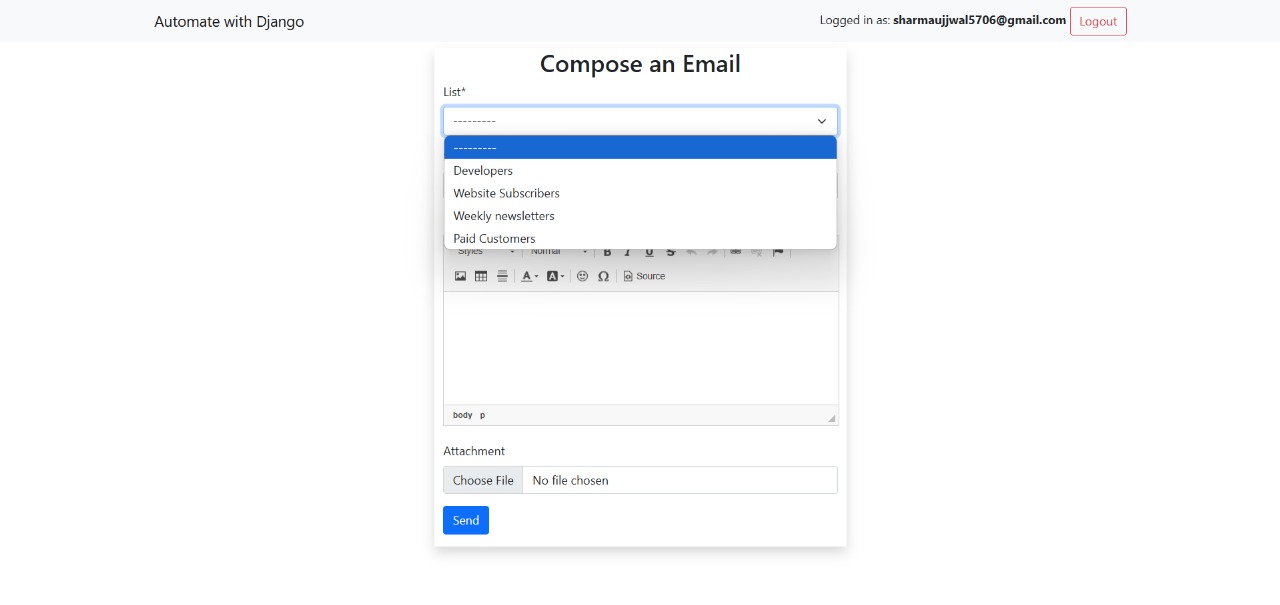
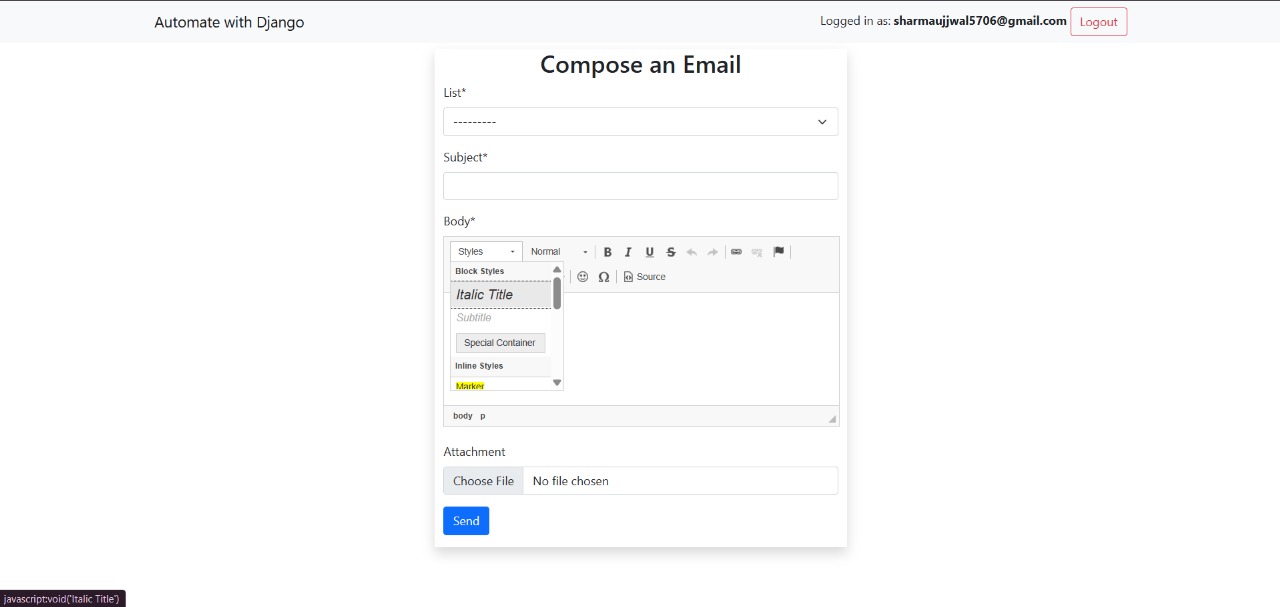
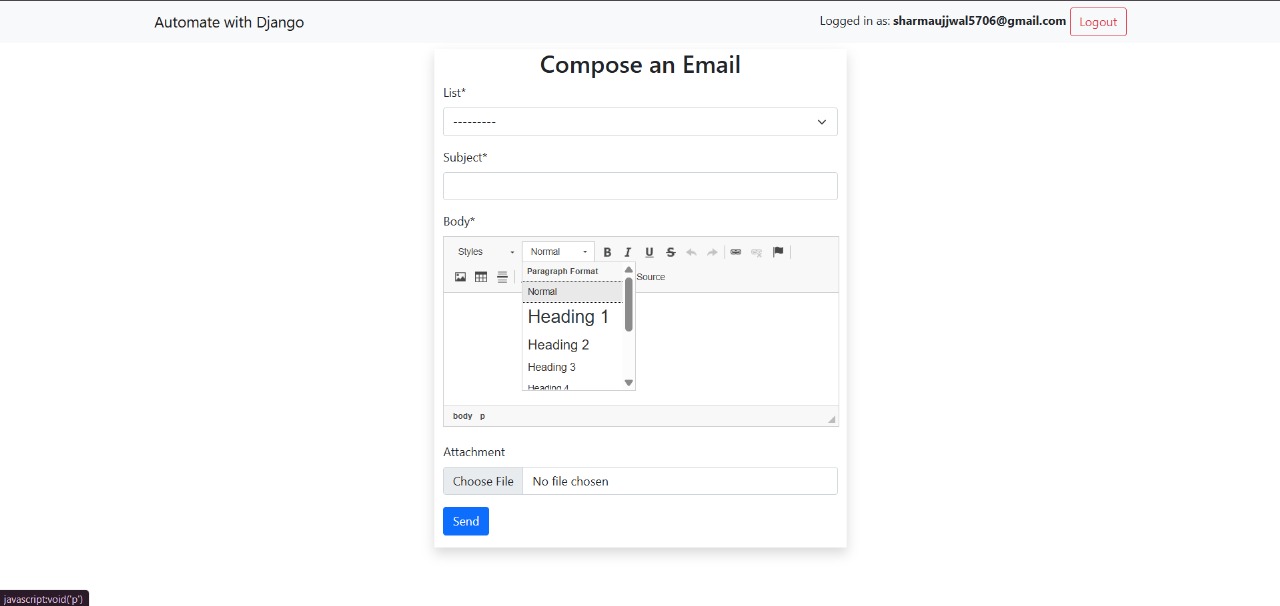
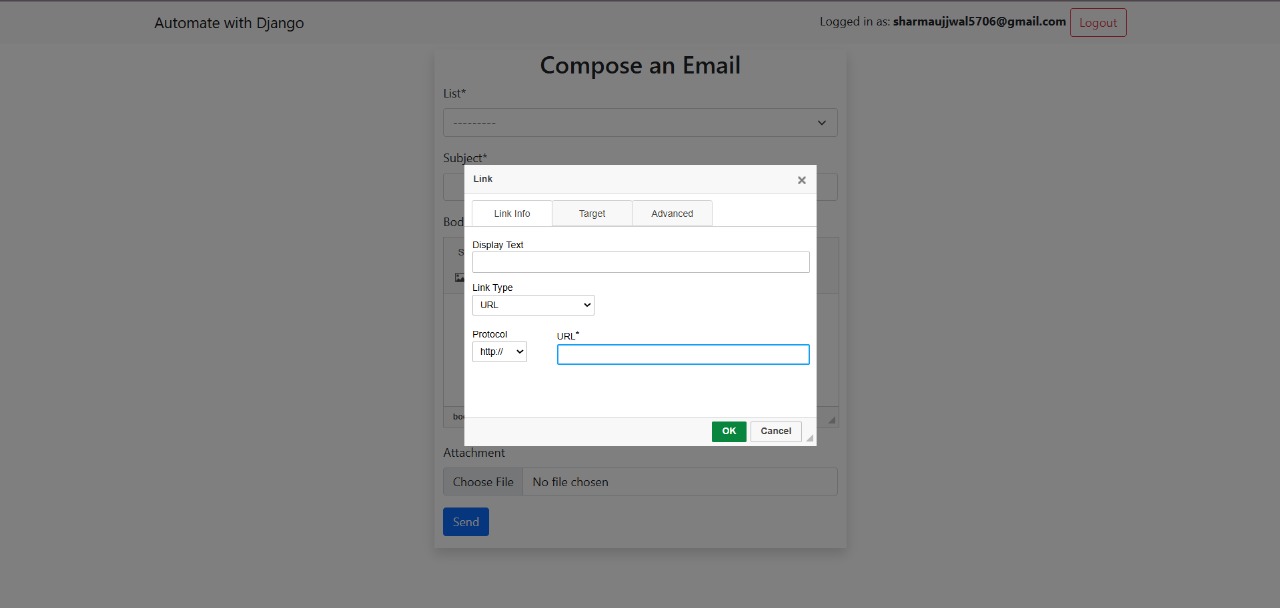
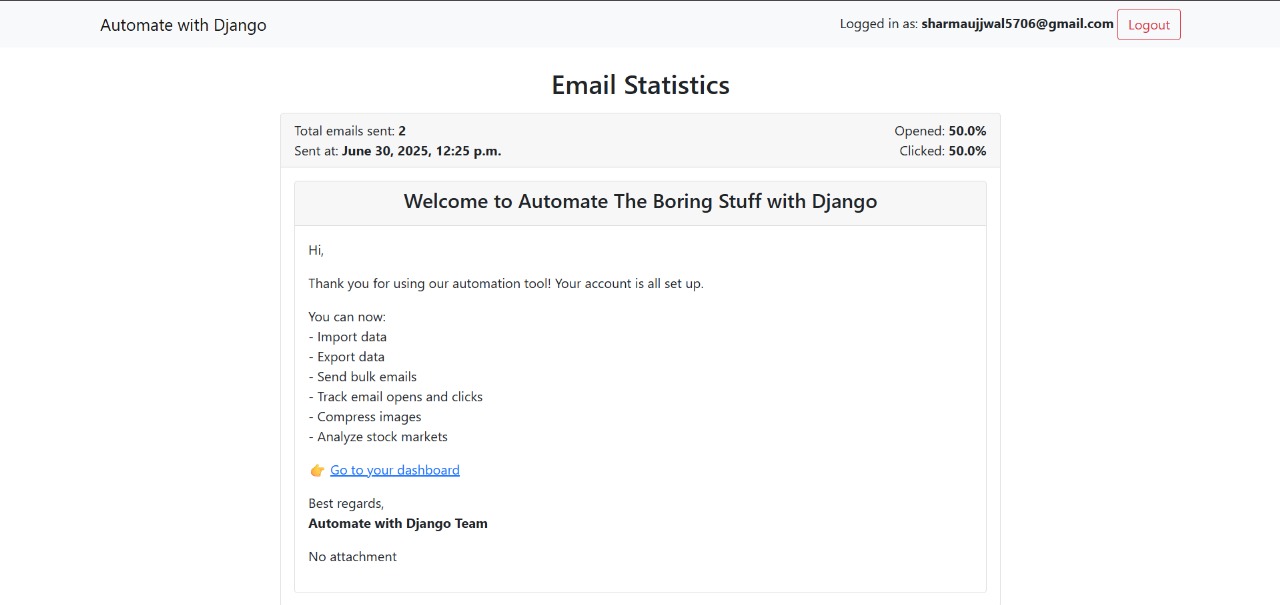
## Bulk Email Sending with CKEditor and Sendinblue
This feature allows users to send rich, formatted emails to multiple recipients at once.
- Users can compose emails using **CKEditor**, a WYSIWYG HTML editor integrated into the Django form.
- The message supports styling, images, links, and rich formatting.
- On submission, the email is sent to a list of recipients using **Sendinblue** (Brevo) as the email backend.
- All emails are sent in bulk with a single click, improving efficiency when communicating with many users.
> Ideal for newsletters, announcements, or batch notifications with clean formatting.
### Working:
[](https://postimg.cc/hzMTKmBM)
[](https://postimg.cc/3432MBPd)
[](https://postimg.cc/CdLbmcG2)
[](https://postimg.cc/ctHYCJ1W)
[](https://postimg.cc/ns4qw5Sy)
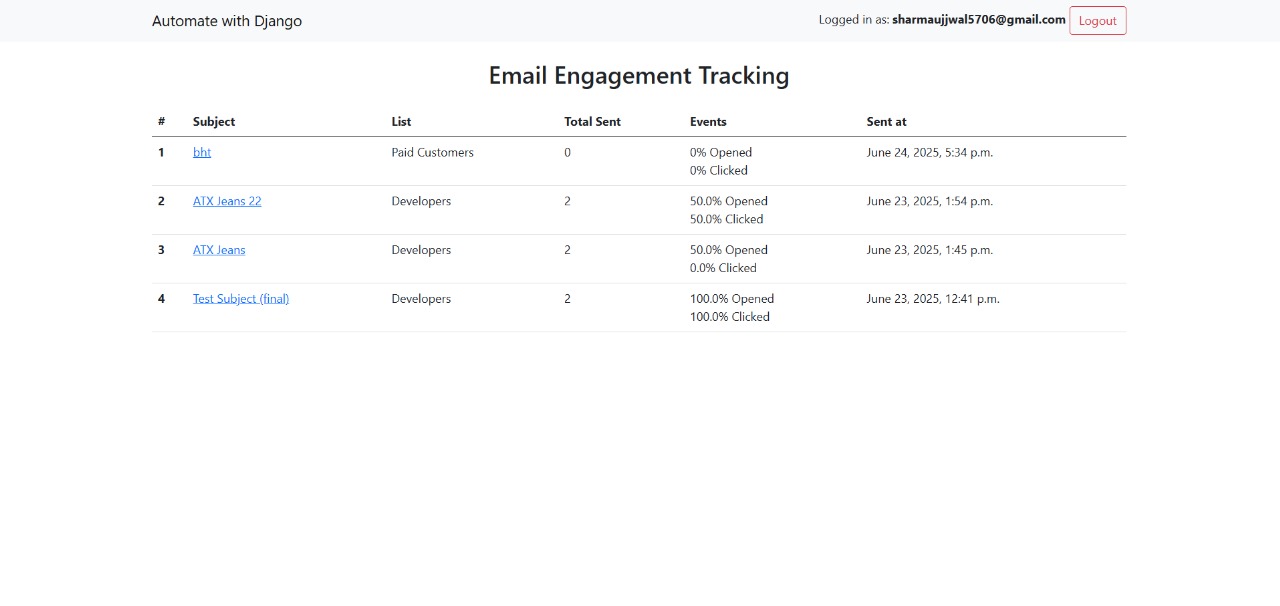
## Ngrok Integration for Email Tracking Testing
To test email open and click tracking on a local development server, **Ngrok** is integrated.
### Why Ngrok?
- Email clients cannot load tracking pixels or links from `localhost`.
- Ngrok exposes your local Django server over the internet using a secure public URL (e.g., `https://random-id.ngrok.io`).
### How It Works:
- Ngrok is started on your local Django server port (usually 8000).
- The public Ngrok URL is used in:
- Tracking pixel URLs (`/emails/track/open/`)
- Click tracking links (`/emails/track/click/`)
- This makes it possible to test email interactions from real email clients like Gmail or Outlook during development.
[](https://postimg.cc/06Ln3Fvx)
[](https://postimg.cc/066ZVxLc)
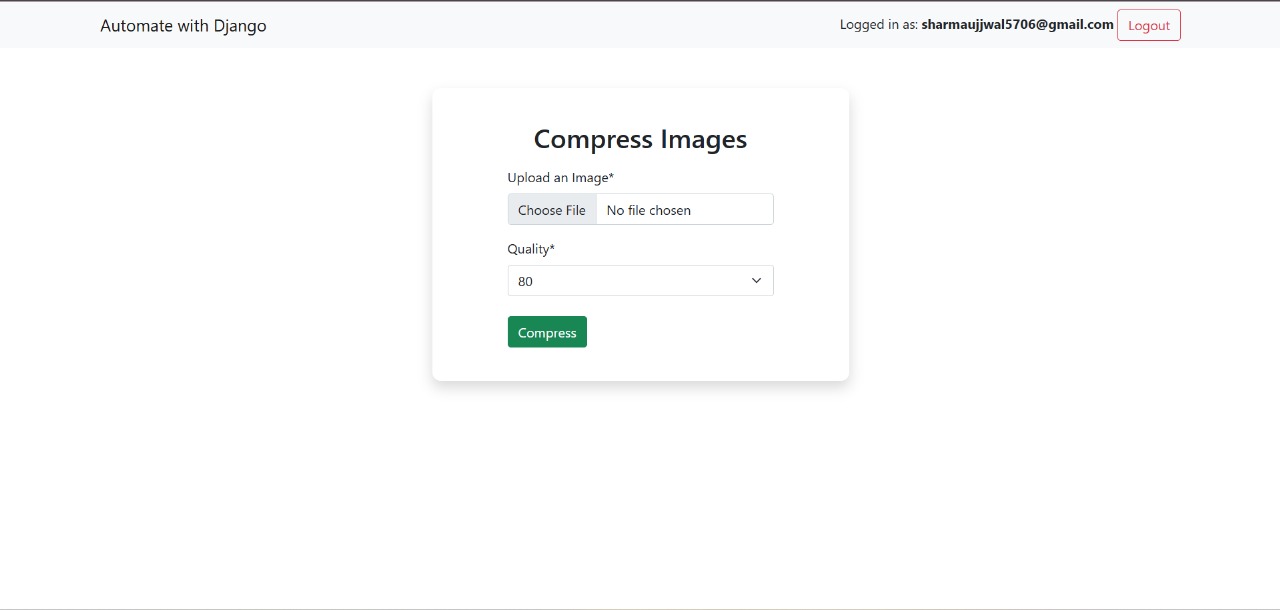
## Image Compression (with Auto Download)
This feature allows users to upload and compress image files directly from the browser.
### How It Works:
- Users upload an image and select a desired **quality level**.
- The backend uses **Pillow (PIL)** to:
- Open and convert the image to JPEG.
- Compress the image based on the selected quality.
- Save the compressed version associated with the logged-in user.
- After compression, the image is **automatically downloaded** to the user's device.
> Great for reducing file sizes before sharing or uploading images elsewhere.
[](https://postimg.cc/gxLNDG94)
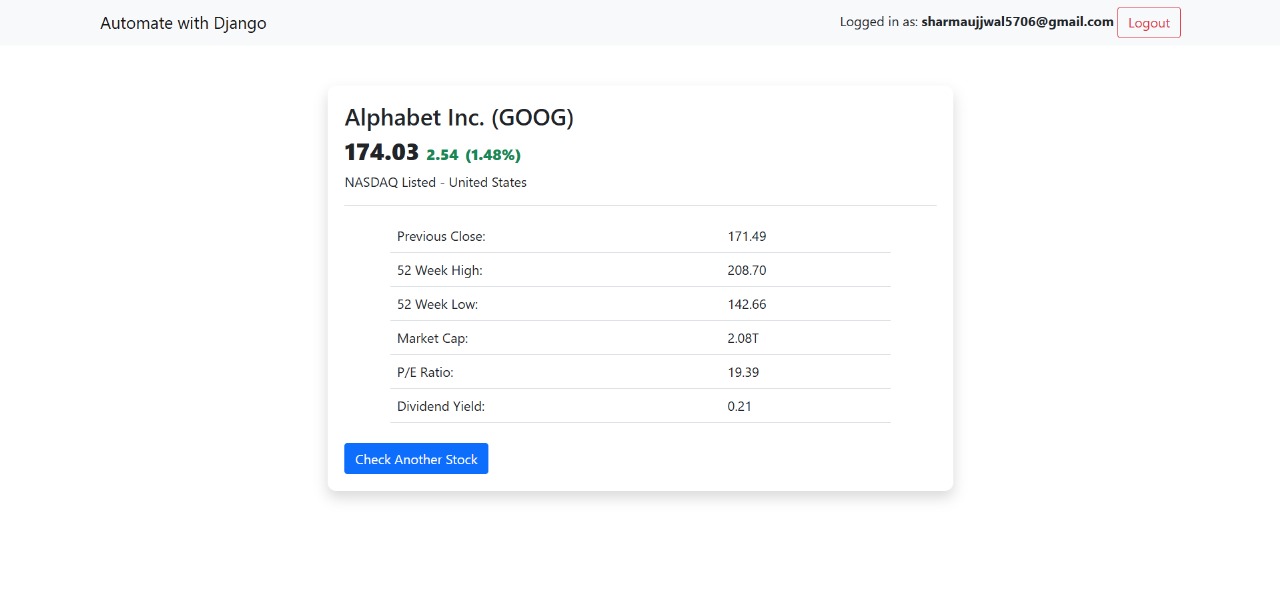
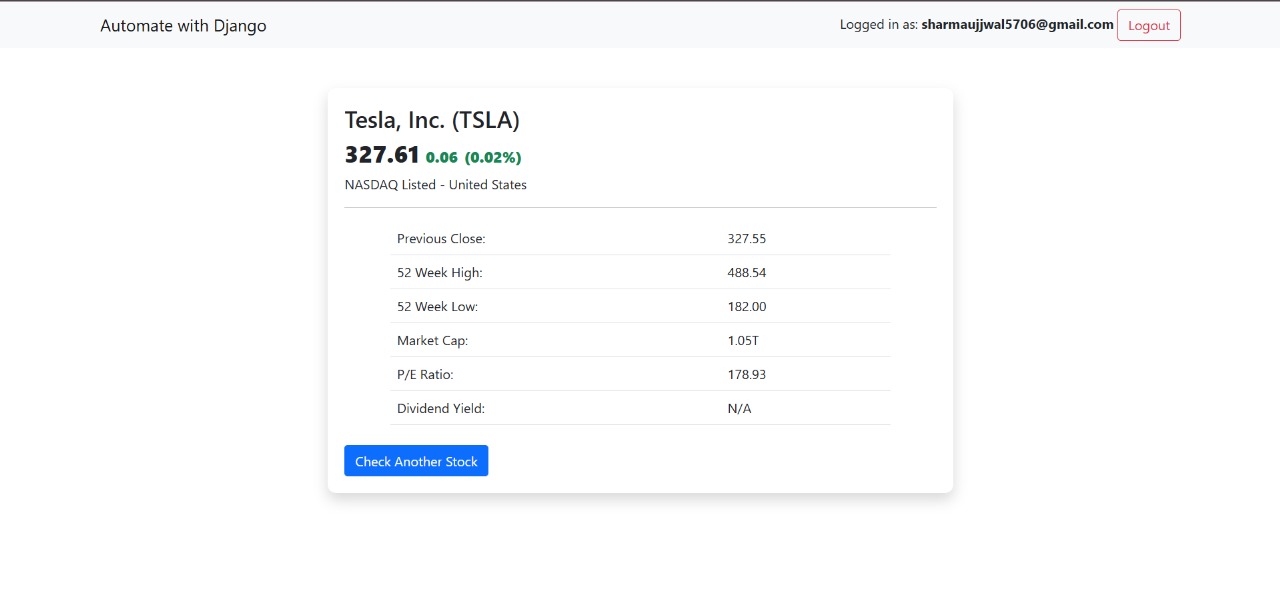
## Stock Data Scraper (MarketWatch – NASDAQ & NSE)
This feature scrapes real-time stock data from the [MarketWatch](https://www.marketwatch.com/) website using `requests` and `BeautifulSoup`.
### How It Works:
- The user provides a **stock symbol** (e.g., `AAPL` or `RELIANCE`).
- Based on the selected exchange (**NASDAQ** or **NSE**), the system builds the correct URL:
- `https://www.marketwatch.com/investing/stock/` for NASDAQ
- `https://www.marketwatch.com/investing/stock/.NS` for NSE
- The backend sends a request to MarketWatch and parses the HTML response to extract:
- **Current Price** – The latest traded price of the stock.
- **Previous Close** – The closing price from the previous trading day.
- **Price Change** – The difference between the current and previous price.
- **Percent Change** – The percentage gain or loss in price.
- **52-Week Low** – The lowest price in the past year.
- **52-Week High** – The highest price in the past year.
- **Market Cap** – The total market capitalization of the company.
- **P/E Ratio** – Price-to-Earnings ratio based on recent earnings.
- **Dividend Yield** – The dividend yield percentage for the stock.
### Technologies Used:
- `requests` – to fetch the web page
- `BeautifulSoup` – to parse HTML and extract data
- Clean error handling for invalid symbols or network issues
> Useful for integrating live stock insights into dashboards, alerts, or investment tools.
[](https://postimg.cc/PpvS6h8d)
[](https://postimg.cc/dZ84YBBX)
[](https://postimg.cc/BjZNr21Y)
---
**Thank you for checking out this project!**
Feel free to contribute, open issues, or suggest improvements.