https://github.com/wagiminator/attiny85-ir2usb
IR Remote to USB HID Converter
https://github.com/wagiminator/attiny85-ir2usb
arduino attiny attiny85 avr diy hid ir pcb project remote usb v-usb
Last synced: 5 months ago
JSON representation
IR Remote to USB HID Converter
- Host: GitHub
- URL: https://github.com/wagiminator/attiny85-ir2usb
- Owner: wagiminator
- License: other
- Created: 2021-09-17T18:40:32.000Z (almost 5 years ago)
- Default Branch: main
- Last Pushed: 2022-09-10T14:29:57.000Z (almost 4 years ago)
- Last Synced: 2025-06-08T19:03:09.936Z (about 1 year ago)
- Topics: arduino, attiny, attiny85, avr, diy, hid, ir, pcb, project, remote, usb, v-usb
- Language: C++
- Homepage: https://oshwlab.com/wagiminator/attiny85-ir2usb
- Size: 1.29 MB
- Stars: 35
- Watchers: 2
- Forks: 1
- Open Issues: 0
-
Metadata Files:
- Readme: README.md
- License: LICENSE
Awesome Lists containing this project
README
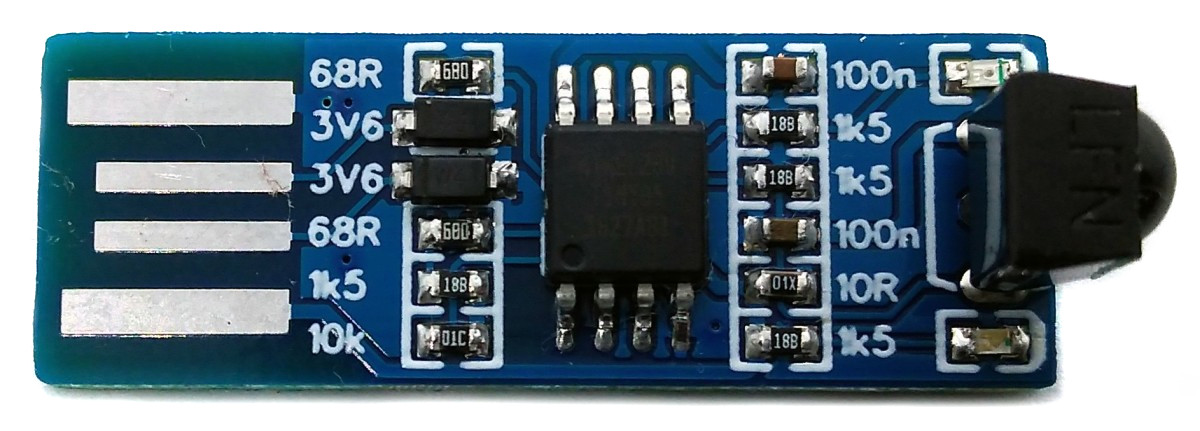
# IR2USB - IR to USB HID Converter based on ATtiny45/85
IR2USB receives signals from an infrared remote control and converts them into keyboard inputs, mouse movements or joystick inputs. Since it is recognized as a generic Human Interface Device (HID) via USB on the PC, no driver installation is necessary.
- Design Files (EasyEDA): https://easyeda.com/wagiminator/attiny85-ir2usb
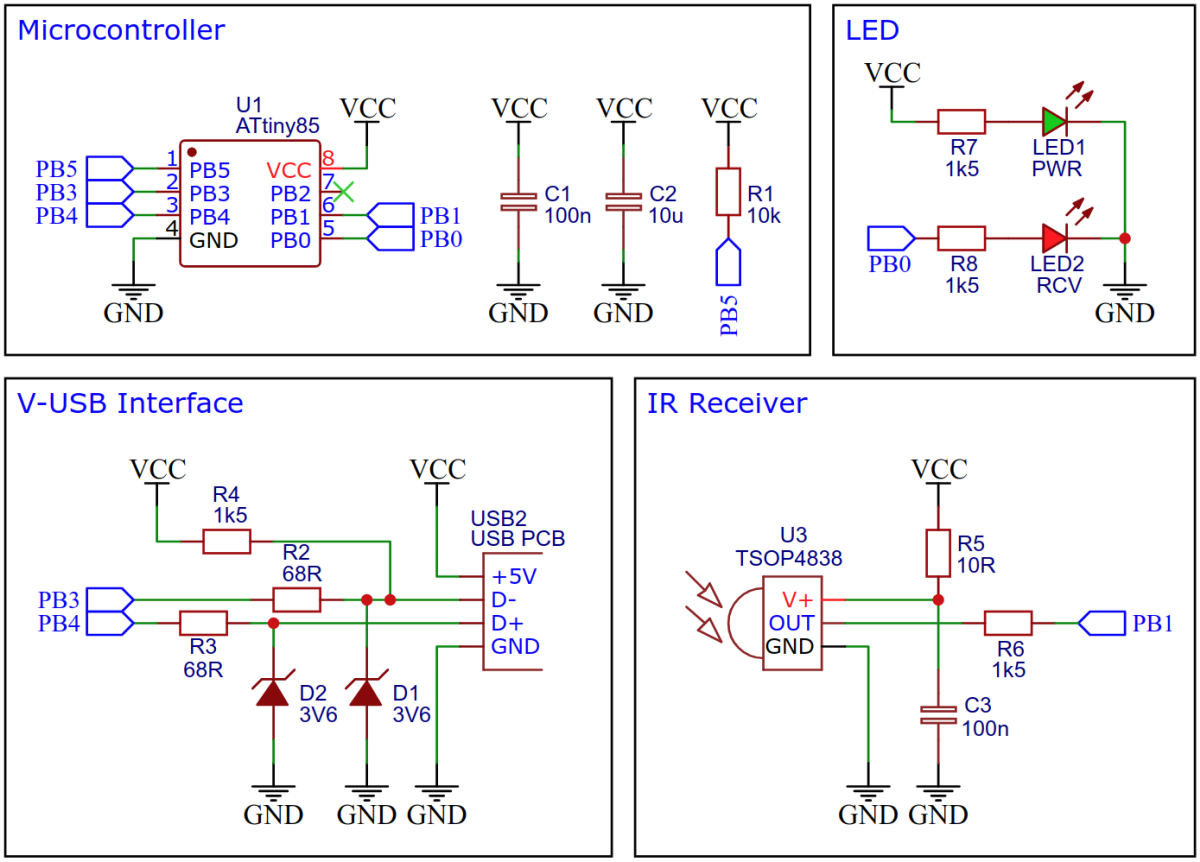
# Hardware
The schematic is shown below:
# Software
The communication via USB is handled by the [V-USB](https://www.obdev.at/products/vusb/index.html) software-only implementation of a low-speed USB device. To simplify the software development with the Arduino IDE the [VUSB_AVR board package](https://github.com/wagiminator/VUSB-AVR) is used. It includes libraries to implement keyboard, mouse and joystick devices, which makes it easy to implement a converter.
The IR receiver implementation is based on [NeoController](https://github.com/wagiminator/ATtiny13-NeoController) and supports the **NEC protocol** only, but this is used by almost all cheap IR remote controls. Alternatively, you can build such a remote control yourself with [TinyRemote](https://github.com/wagiminator/ATtiny13-TinyRemote).
# Compiling and Uploading
Since there is no ICSP header on the board, you have to program the ATtiny either before soldering using an [SOP adapter](https://aliexpress.com/wholesale?SearchText=sop-8+150mil+adapter), or after soldering using an [EEPROM clip](https://aliexpress.com/wholesale?SearchText=sop8+eeprom+programming+clip). The [AVR Programmer Adapter](https://github.com/wagiminator/AVR-Programmer/tree/master/AVR_Programmer_Adapter) can help with this.
- Open Arduino IDE.
- [Install VUSB-AVR](https://github.com/wagiminator/VUSB-AVR#Installation).
- Go to **Tools -> Board -> VUSB AVR** and select **VUSB-AVR**.
- Go to **Tools -> CPU** and select **ATtiny85 (16.5 MHz internal)**.
- Connect your programmer to your PC and to the ATtiny.
- Go to **Tools -> Programmer** and select your ISP programmer.
- Go to **Tools -> Burn Bootloader** to burn the fuses.
- Open the sketch and click **Upload**.
- Disconnect the programmer and connect the device via USB to your PC.
# References, Links and Notes
1. [ATtiny45/85 Datasheet](https://ww1.microchip.com/downloads/en/DeviceDoc/Atmel-2586-AVR-8-bit-Microcontroller-ATtiny25-ATtiny45-ATtiny85_Datasheet.pdf)
2. [TSOP4838 datasheet](https://www.vishay.com/docs/82459/tsop48.pdf)
3. [V-USB](https://www.obdev.at/products/vusb/index.html)
4. [TinyRemote](https://github.com/wagiminator/ATtiny13-TinyRemote)
# License

This work is licensed under Creative Commons Attribution-ShareAlike 3.0 Unported License.
(http://creativecommons.org/licenses/by-sa/3.0/)