https://github.com/walkthru/walkthru
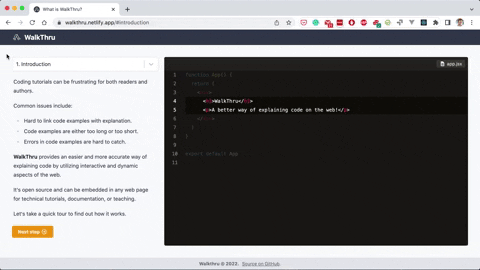
WalkThru is a better way of explaining code on the web.
https://github.com/walkthru/walkthru
react tutorial
Last synced: 11 months ago
JSON representation
WalkThru is a better way of explaining code on the web.
- Host: GitHub
- URL: https://github.com/walkthru/walkthru
- Owner: walkthru
- License: mit
- Created: 2022-06-17T06:02:49.000Z (about 4 years ago)
- Default Branch: master
- Last Pushed: 2022-07-19T23:20:21.000Z (almost 4 years ago)
- Last Synced: 2023-11-07T16:31:51.849Z (over 2 years ago)
- Topics: react, tutorial
- Language: JavaScript
- Homepage: https://walkthru.netlify.app/walkthru-intro
- Size: 4.3 MB
- Stars: 237
- Watchers: 3
- Forks: 11
- Open Issues: 1
-
Metadata Files:
- Readme: README.md
- License: LICENSE.txt
Awesome Lists containing this project
README
# WalkThru
**WalkThru is a better way of explaining code on the web.**
Check out the [live demo](https://walkthru.netlify.app/walkthru-intro) to see how it works.
See the [live demo source code](https://github.com/walkthru/next) if you want to see an implementation example using Next.js.
Follow [on Twitter](https://twitter.com/walkthruapp) for news and updates.
## Packages
To create a walkthru, you'll need to install these two packages:
- **WalkThru data module** for compiling a tutorial from markdown files.
- **WalkThru React component** for displaying a tutorial in your site or app.
## WalkThru data module
A WalkThru tutorial consists of multiple steps. Each step contains instructions and a code file and is defined in a separate markdown file. There is also a config file used for tutorial-wide settings.
This module is used to compile a tutorial before it is displayed in your app.
### Installation
```
npm i -D @walkthru/data
```
### Directory structure
First, create a folder `walkthru` in the root of your app. Each tutorial should be in a separate folder e.g. `my-walkthru`.
Inside each tutorial, you'll need a `config.json` file. Each step of the tutorial will be in a separate markdown file e.g. `step1.md`.
```
.
├── walkthru
│ ├── my-walkthru
│ └── config.json
│ └── step1.md
│ └── step2.md
```
### Config file
Here is an example walkthru config file.
```json
{
"title": "My Tutorial",
"code": {
"owner": "myname",
"repo": "myrepo",
"ref": "main"
},
"steps": [
"step1",
"step2"
]
}
```
Options:
- `title`. The tutorial title.
- `code`. An object where you declare the GitHub repo and files used.
- `owner`. Your GitHub account name.
- `repo`. The repo name.
- `ref`. The branch, tag, or commit to use.
- `steps`. An array of step name strings. These are the names of the steps you want to include in the tutorial.
### Step files
Each step of the tutorial will be in a separate markdown file, like this:
```markdown
---
title: My step
file: walkthru/my-walkthru/app.jsx
---
# Hello world
```
Frontmatter options:
- `title`. The title of the step (required).
- `file`. The repo file you want to use as the code example.
- `language`. The language of the code example. No need to set this if the language can be determined from the file extension e.g. `js`.
- `focus`. The line or range of lines to focus on e.g. `7`, `7-11`.
- `center`. The line to center the code example on e.g. `9`. Tip: probably you would use the middle line of the focus range.
- `image`
- `src`. The URL of the image (required if using `image`).
- `bgColor`. Defaults to `rgb(255,255,255)`.
- `borderColor`. Defaults to `rgb(229, 231, 235)`.
### Usage in an app
This should be used server side. For example, in the `getStaticProps` method of Next.js or in a serverless function.
First, import the `getData` method from the package at the top of the file. This method is async and takes two arguments: `githubToken` and `tutorialSlug`.
`githubToken` is a GitHub personal access token which is used to contact the GitHub API to grab the code from your repo. You can learn how to generate one [here](https://docs.github.com/en/authentication/keeping-your-account-and-data-secure/creating-a-personal-access-token). You should probably put this in an environment variable.
`tutorialSlug` is simply the name of the tutorial e.g. `"my-tutorial"`.
The method will compile the tutorial and return it as an object that can be passed as props to the [WalkThru React component](https://github.com/walkthru/react) to display the tutorial.
```js
import { getData } from '@walkthru/data'
const data = await getData(githubToken, 'my-tutorial')
```
## WalkThru React component
```
npm i -S @walkthru/react
```
Render the component anywhere in your app.
Note that you'll need a way to get the `data` object from the WalkThru data module (see above).
```jsx
import { WalkThru } from '@walkthru/react'
function App () {
// Logic
return (
)
}
```
## Props
- `data`. Returned from `getData`.
- `tutorialSlug`. The slug of the current tutorial e.g. `my-tutorial`.
- `stepSlug`. The slug of the current step e.g. `introduction`.
- `classes`. An object that can be used to add classes to elements of the component.
- `instructions`. Classes to be applied to the instructions content.
- `select`. Classes applied to React Select.
## Tips
- Don't server render this component.
- The step and tutorial slugs will usually be dynamic segments of the URL. e.g. `https://myapp.com/{tutorial-slug}#{step-slug}`.