https://github.com/webrtcHacks/aiy_vision_web_server
Show camera feed and annotations of the AIY Vision Kit in a webpage
https://github.com/webrtcHacks/aiy_vision_web_server
aiy-vision-kit raspberry-pi uv4l
Last synced: about 1 year ago
JSON representation
Show camera feed and annotations of the AIY Vision Kit in a webpage
- Host: GitHub
- URL: https://github.com/webrtcHacks/aiy_vision_web_server
- Owner: webrtcHacks
- License: other
- Created: 2018-02-21T17:39:59.000Z (over 8 years ago)
- Default Branch: master
- Last Pushed: 2019-11-04T20:54:27.000Z (over 6 years ago)
- Last Synced: 2025-03-17T23:04:58.542Z (over 1 year ago)
- Topics: aiy-vision-kit, raspberry-pi, uv4l
- Language: Python
- Size: 35.2 KB
- Stars: 44
- Watchers: 6
- Forks: 13
- Open Issues: 5
-
Metadata Files:
- Readme: README.md
- License: LICENSE
Awesome Lists containing this project
README
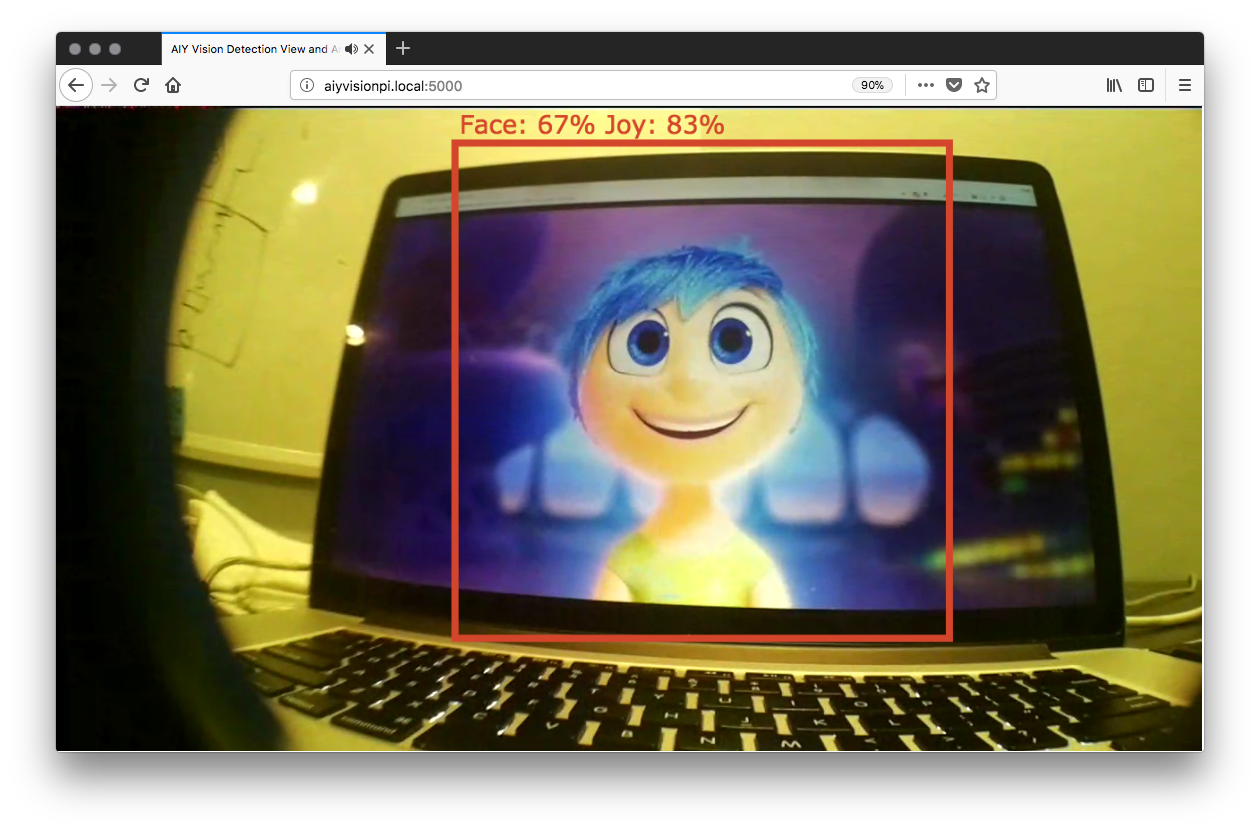
# AIY Vision Kit Web Service
Display the video feed and annotations of the [AIY Vision Kit](https://aiyprojects.withgoogle.com/vision) face detection or object detection models from
the PiCamera to any web page using [WebRTC](https://webrtc.org) and [UV4L](http://www.linux-projects.org/uv4l/).
See the [Part 2: Building a AIY Vision Kit Web Server with UV4L](https://webrtchacks.com/?p=2824&) webrtcHacks post for more details.
# Architecture

## Installation
1. [Buy](http://www.microcenter.com/site/content/google_aiy.aspx) a AIY Vision Kit
1. Follow the Vision Kit [Assembly Guide](https://aiyprojects.withgoogle.com/vision#assembly-guide-1-get-the-vision-kit-sd-image) to build it
1. Install UV4L (see the next section)
1. Install git if you don't have it: `sudo apt-get install git`
1. Clone the repo: `git clone https://github.com/webrtcHacks/aiy_vision_web_server.git`
1. Go to the directory: `cd aiy_vision_web_server/`
1. Install Python dependencies: `sudo python3 setup.py install`
1. Turn the default Joy Detection demo off: `sudo systemctl stop joy_detection_demo.service`
1. Run the server: `python3 server.py`
1. Point your web browser to [http://raspberrypi.local:5000](http://raspberrypi.local:5000) or whatever you set your hostname or IP address to
### UV4L Installation
#### Raspberry Pi Zero
```
curl http://www.linux-projects.org/listing/uv4l_repo/lpkey.asc | sudo apt-key add -
echo "deb http://www.linux-projects.org/listing/uv4l_repo/raspbian/stretch stretch main" | sudo tee -a /etc/apt/sources.list
sudo apt-get update
sudo apt-get install -y uv4l uv4l-raspicam uv4l-raspicam-extras uv4l-webrtc-armv6 uv4l-raspidisp uv4l-raspidisp-extras
```
#### Raspberry Pi 2 and 3
```
curl http://www.linux-projects.org/listing/uv4l_repo/lpkey.asc | sudo apt-key add -
echo "deb http://www.linux-projects.org/listing/uv4l_repo/raspbian/stretch stretch main" | sudo tee -a /etc/apt/sources.list
sudo apt-get update
sudo apt-get install -y uv4l uv4l-raspicam uv4l-raspicam-extras uv4l-webrtc uv4l-raspidisp uv4l-raspidisp-extras
```
## Command Line Options
They following options are available after `python server.py`:
Verbose switch | Short switch | Default | Description
---|---|---|---
--model MODEL | -m MODEL | face | Sets the model to use: `face`, `object`, or `class`
--cam-mode CAM_MODE | -c CAM_MODE | 5 | Sets the [Pi Camera Mode](https://www.raspberrypi.org/documentation/raspbian/applications/camera.md)
--framerate FRAMERATE | -f FRAMERATE | 15 | Sets the camera frame rate
--hres HRES | -hr HRES | 1280 |Sets the horizontal resolution
--vres VRES | -vr VRES | 720 |Sets the vertical resolution