https://github.com/werthdavid/homebridge-website-to-camera
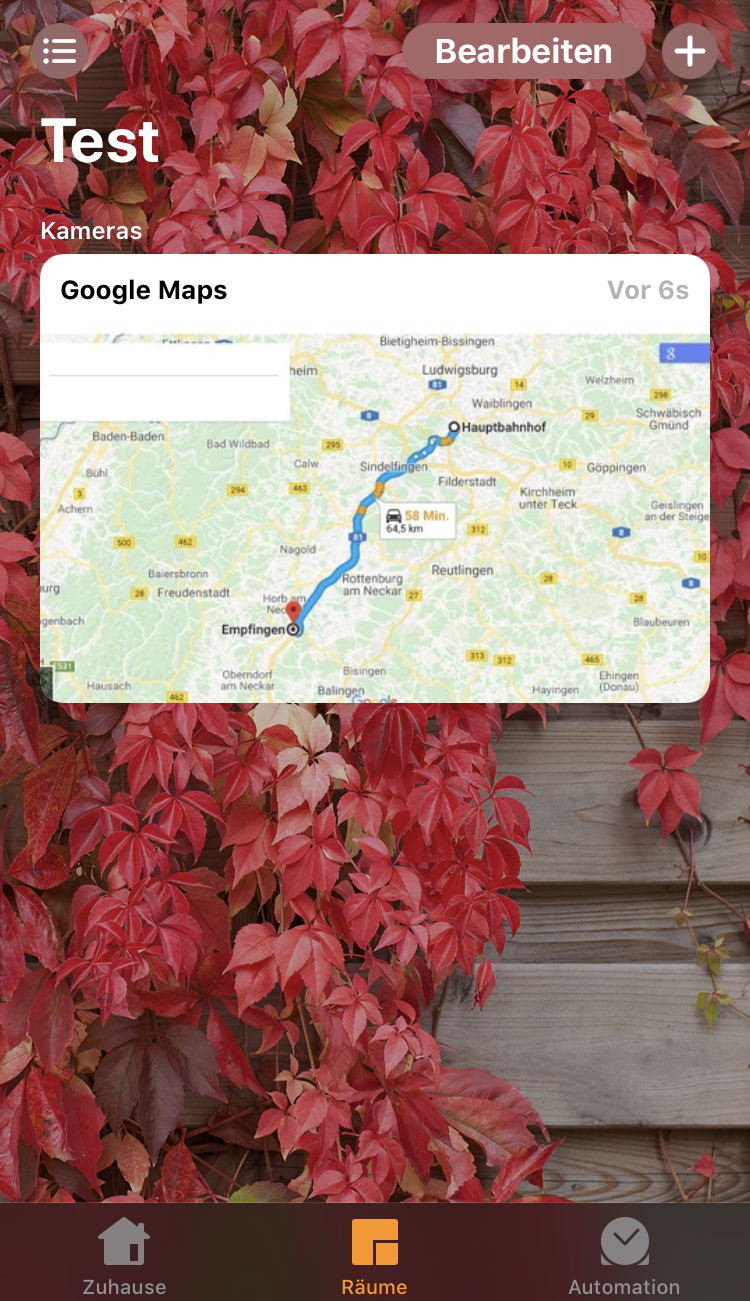
Homebridge plugin that displays a Website as virtual camera (intended for Google Maps Traffic)
https://github.com/werthdavid/homebridge-website-to-camera
camera homebridge homebridge-plugin maps phantom phantom-js traffic webcam
Last synced: over 1 year ago
JSON representation
Homebridge plugin that displays a Website as virtual camera (intended for Google Maps Traffic)
- Host: GitHub
- URL: https://github.com/werthdavid/homebridge-website-to-camera
- Owner: werthdavid
- License: mit
- Created: 2018-06-25T12:42:23.000Z (about 8 years ago)
- Default Branch: master
- Last Pushed: 2024-09-03T12:52:37.000Z (almost 2 years ago)
- Last Synced: 2025-02-27T16:50:50.937Z (over 1 year ago)
- Topics: camera, homebridge, homebridge-plugin, maps, phantom, phantom-js, traffic, webcam
- Language: JavaScript
- Homepage:
- Size: 1.98 MB
- Stars: 53
- Watchers: 10
- Forks: 7
- Open Issues: 2
-
Metadata Files:
- Readme: README.md
- Funding: .github/FUNDING.yml
- License: LICENSE
Awesome Lists containing this project
README
# homebridge-website-to-camera
**Homebridge plugin for displaying a Website (intended for Google Maps-->Traffic) as Camera**
[](https://npmjs.org/package/homebridge-website-to-camera)
[](http://makeapullrequest.com)
[](https://npmjs.org/package/homebridge-website-to-camera)
If you find my work useful you can buy me a coffee, I am very thankful for your support.

# Installation
Make sure you have Homebridge installed.
1. Download the latest Chromium `sudo apt-get install chromium-browser`
2. Verify the Chromium installation by running `chromium-browser`, output should be similar to `(chromium-browser:30533): Gtk-WARNING **: cannot open display`
3. Install this plugin using: `sudo npm install -g homebridge-website-to-camera`
4. Update your Homebridge `config.json` using the sample below (append in the block 'platforms' not 'accessories')
# Configuration
Update your config similar to this:
```json
"platforms": [
{
"platform": "website-camera",
"cameras": [
{
"name": "Website 1",
"url": "https://github.com",
"chromiumPath": "/usr/bin/chromium-browser"
}
]
}
]
```
**You can add multiple cameras!**
## Config file
Take a look at the example config.json
Fields:
* `name` name of the camera (required)
* `id` unique(!) identifier for that specific camera (optional)
* `url` the URL of the website that is to be captured (required)
* `scale` HomeApp requests a (device dependent) size for the preview-image.
With e.g. `scale` set to `2` (default) the virtual browser window is set to this size. Best is to skip this field.
* OR `width` / `height` the width/height of the virtual browser window. This is optional and overrides `scale`.
* `chromiumPath` path to chromium-executable (defaults to "/usr/bin/chromium-browser")
* `timeout` timeout in ms for waiting until the page has no more pending requests. resembles to puppeteer.goto() (defaults to 10000 --> 10s)
* `renderTimeout` timeout in ms for waiting AFTER the page has loaded before taking the screenshot. userful for PWAs. (defaults to 1ms)
* `ignoreHTTPSErrors` ignore HTTPS errors, useful for self-signed certificates (defaults to `false`)
* `cacheTime` will cache the image for the given time (in seconds) and a new screenshot will be created only if the time since the last screenshot is bigger than the given time
* `jsFile` specify the full path of a custom JS-file that will be injected to the page (e.g. if you want to hide cookie-banners)
* `live` enabled live mode to use with ffmpeg plugin (defaults to `false`). See below!
* `liveSnapshotInterval` takes a screenshot of the website in the specified interval (in milliseconds). 1000 is a good value to start with.
* `liveRefreshInterval` how often the page should be reloaded in live-mode (in milliseconds). If live mode is not enabled the page will be opened every time a screenshot is taken so refreshing is not needed.
* `livePort` when `live` is set to true, this will be the port where the live server is running (defaults to 8554). make sure you use a free port especially if you have multiple cameras.
# Usage
In some cases, the camera is not visible in Home-App:
* Press + on top right corner in Home-App
* Press `Add device`
* Press `Code missing`
* Select Camera
* Provide the code from Homebridge startup output (as stated in your config.json)
# AppleTV / Live-Stream :tada:
In Homebridge a Camera-Accessory provides two functionalities:
- deliver a "still image" that serves as a preview for the camera
- deliver a live-stream if the camera is "clicked"
In previous versions of the plugin, only the still image was supported.
This is a problem for AppleTV as this device does not show the still image, instead it directly shows the live-stream.
Implementing the live-stream is not that easy with Node.js (Homekit needs the Camera to connect to the client via SRTP
and send the video e.g. with x264). Instead of implementing this directly this plugin implements a helper, that lets
you enable live-streaming via the [homebridge-camera-ffmpeg](https://github.com/Sunoo/homebridge-camera-ffmpeg) plugin.
## Enable Live-Stream
:exclamation: You need to install [homebridge-camera-ffmpeg](https://github.com/Sunoo/homebridge-camera-ffmpeg) as well!
```json
"platforms": [
{
"platform": "website-camera",
"cameras": [
{
"name": "Website 1",
"url": "https://github.com",
"live": "true",
"liveSnapshotInterval": 1000,
"liveRefreshInterval": 5000,
"livePort": 8554
}
]
},
{
"platform": "Camera-ffmpeg",
"cameras": [
{
"name": "Website Camera",
"videoConfig": {
"source": "-i http://localhost:8554",
"stillImageSource": "-i http://localhost:8554/still"
}
}
]
}
]
```
:grey_exclamation: if `live` is enabled, the website-to-camera plugin will not expose a camera on its own!
There will only be a server listening on the given port that offers a MJPEG live-stream.
## Live-mode FPS
If you set `liveRefreshInterval` to 33, the stream will be served with about 30fps. This will consume CPU accordingly.
It does work but I recommend setting it to a value >= 1000 (so one picture per second) as this plugin is not optimized
for fast live videos.
# Background
The plugin uses Puppeteer/Chrome headless to capture the screenshots. The Browser instance stays open all the time for better performance and less CPU/Mem consumption.