https://github.com/wordpress-phoenix/local-wordpress-development
WordPress Local Web Development Guide for Mac OS X
https://github.com/wordpress-phoenix/local-wordpress-development
brew cask local-development osx-setup phpstorm vvv vvv2 wordpress-development
Last synced: about 1 year ago
JSON representation
WordPress Local Web Development Guide for Mac OS X
- Host: GitHub
- URL: https://github.com/wordpress-phoenix/local-wordpress-development
- Owner: WordPress-Phoenix
- License: gpl-2.0
- Created: 2017-03-17T19:52:39.000Z (over 9 years ago)
- Default Branch: master
- Last Pushed: 2019-01-17T14:33:49.000Z (over 7 years ago)
- Last Synced: 2024-11-02T13:51:53.607Z (over 1 year ago)
- Topics: brew, cask, local-development, osx-setup, phpstorm, vvv, vvv2, wordpress-development
- Language: Shell
- Homepage:
- Size: 102 KB
- Stars: 15
- Watchers: 10
- Forks: 5
- Open Issues: 3
-
Metadata Files:
- Readme: README.md
- License: LICENSE
Awesome Lists containing this project
README
# Getting Started
The right tools make the difference with most craft, and as a web developer your local environment is a critical foundation to set yourself up for success.
This guide is for OS X, and while some tools are cross-platform or concepts may translate, your mileage will vary.
### How-To Setup...
| How-To Setup... | - | - |
| ------------- | - | - |
| :package: [**Dependencies and Apps**](#setup-dependencies-and-apps) | :computer: [**Terminal**](#setup-terminal) | :satellite: [**SSH**](#setup-ssh) |
| :ledger: [**Local DNS**](#setup-local-dns) | :rocket: [**Virtual Environments**](#setup-virtual-environments) | :grey_question: [**Other / Misc.**](#setup-other-misc) |
# Setup Dependencies and Apps
### Quickstart
###### Download and Install Homebrew Package Manager
```bash
ruby -e "$(curl -fsSL https://raw.githubusercontent.com/Homebrew/install/master/install)"
```
#### Why Brew?
Brew helps developers manages software and tools be time-consuming and challenging to install and configure. Brew, in conjunction with Cask, can be a near-one-stop shop for installing _any_ software.
It's rad.
### Recommended Developer Packages
```bash
brew tap caskroom/cask && \
brew install grc git svn node imagemagick pkg-config hub dnsmasq && \
git config --global credential.helper osxkeychain
brew cask install virtualbox vagrant vagrant-manager
brew cask install iterm2 sequel-pro postman visual-studio-code
```
### Recommended for Productivity
```bash
brew cask install phpstorm slack
brew cask install alfred spectacle flux dash imageoptim clipy
brew cask install google-chrome spotify snagit
```
### Recommended for OS X Finder Quick Look Previews
```
brew cask install qlcolorcode qlstephen qlmarkdown quicklook-json qlprettypatch quicklook-csv webpquicklook suspicious-package quicklookase qlvideo
```
Originally from https://github.com/sindresorhus/quick-look-plugins
# Setup Terminal
Setting up your terminal profile is very important for productivity. We recommend the following enhancements. Being by opening your bash profile configuration file.
### Setup `.bash_profile`
```bash
sudo nano ~/.bash_profile
```
Then copy the following and past it into the terminal text editor we just used to open the file.
```bash
alias ls="ls -GHf"
alias ll='ls -lartG'
alias xdebug_on='vagrant ssh -c "xdebug_on" | grep php'
alias xdebug_off='vagrant ssh -c "xdebug_off" | grep php'
alias hosts='sudo nano /private/etc/hosts'
alias flushdns='sudo dscacheutil -flushcache'
alias vup="vagrant up --provision"
export PATH="/usr/local/sbin:$PATH"
alias showFiles='defaults write com.apple.finder AppleShowAllFiles YES; killall Finder/System/Library/CoreServices/Finder.app'
alias hideFiles='defaults write com.apple.finder AppleShowAllFiles NO; killall Finder /System/Library/CoreServices/Finder.app'
alias pruneknownhosts="sed -i -e s/*.*//g ~/.ssh/known_hosts"
alias prunedevhosts="sed -i -e s/.*\.dev.*//g ~/.ssh/known_hosts"
# LOCAL GIT HELPERS
alias updaterepos='ls | xargs -P10 -I{} git -C {} pull'
alias prunerepos='ls | xargs -P10 -I{} git -C {} remote prune origin'
alias checkoutdevelopall='ls | xargs -P10 -I{} git -C {} checkout develop'
# REST HELPER
httpHeaders () { /usr/bin/curl -I -L $@ ; }
# docker functions
alias dke="docker exec -i -t"
alias dkps="docker ps -a"
alias dkls="docker images"
dkRun () { docker run -dit $@ ; }
dkBuild () { docker build . -t $@ ; }
dkClean () { [[ $(docker ps -a -q -f status=exited) ]] && docker rm -v $(docker ps -a -q -f status=exited) ; }
dkCleanImages () { docker rmi $(docker images | grep "^" | awk '{print $3}') ; }
```
Lastly save and close the file with `Ctrl+X` then `Enter` and one more `Enter`.
### Setup `.inputrc`
Input RC controls what happens as you type in terminal. We are going to setup a feature that allows terminal to use "per command history". When in terminal you can hit the up and down arrows to cycle through previously used commands. With this extra configuration file, it will allow you to track "per command" history. So if you typed "git push" then "cd www", you may want to only search your history for "git" commands. To do so, simply type "git" and then press up, it will only search your history for git commands and find "git push" as desired.
Open the .inputrc file from terminals nano editor:
```
nano ~/.inputrc
```
Then copy and paste the following into the editor.
```
"\e[B": history-search-forward
"\e[A": history-search-backward
set completion-ignore-case On
```
Lastly save and close the file with `Ctrl+X` then `Enter` and one more `Enter`.
### Applying New Settings To Terminal
Updates to the `.bash_profile` don't immediately reflect in your current editor. Open a new tab, restart terminal or source your profile for the current session.
```
source ~/.bash_profile
```
# Setup SSH
Secure Shell is an encrypted protocol used to connect between two networked computers (on a local network or via the internet). Many web hosts and services like GitHub allow you to authenticate using SSH keys from a trusted machine.
SSH keys only need to be generated once. Instructions are below to copy existing keys or import keys from another computer.
### Check for Current Key(s)
```bash
ls -al ~/.ssh
```
### Copy Current Public Key
```bash
pbcopy < ~/.ssh/id_rsa.pub
```
### Generate New Keys
https://help.github.com/articles/generating-a-new-ssh-key-and-adding-it-to-the-ssh-agent/
### Moving Keys to Another Computer
If you are moving existing keys from a previous computer, you may want to import the keys instead of generating new ones.
1. Copy the existing keys into the new computer's `~/.ssh` folder.
2. After copying the keys over, the file permissions will be too open and in some cases won't be accepted when trying to connect to servers. To set the correct permissions, run `chmod 600 ~/.ssh/id_rsa` and `chmod 600 ~/.ssh/id_rsa.pub`. It should also be noted that the .ssh folder itself should only be writeable by you (`chmod 700 ~/.ssh`).
3. Run `ssh-add -k ~/.ssh/id_rsa`.
### Adding Keys to New Computer
First we should check if there is already some SSH keys generated. To do so open terminal and run
```bash
ls -al ~/.ssh
```
### If you see "ls: .ssh: No such file or directory"
Please run this command to generate the SSH directory and empty key files.
```bash
cd ~ && mkdir .ssh && chmod 700 .ssh && cd .ssh && touch id_rsa && touch id_rsa.pub && chmod 600 id_rsa && chmod 644 id_rsa.pub
```
### Now that we have the required files, let's edit them
We will need to bring in both the public key (.pub) and the private.\
**Private:** `vim ~/.ssh/id_rsa`\
**Public:** `vim ~/.ssh/id_rsa.pub`
**Basic Vim Editor Commands**\
**a** = Edit Mode\
**ESC** = Exit Edit Mode\
**:** = Command
For both key files, one at a time - vim the file.
1. **IF** File Contents are **NOT** empty, before going into edit mode press lowercase **d** and then uppercase **G**. This will truncate the file.
2. Press "**a**" to enter edit mode
3. Paste in your key normally ( **(Command/Control) + v** )
4. Press the "**ESC**" key
5. Press "**:**" (_colon_)
6. Type lowercase "**wq**" (_write & quit_)
### Understanding SSH Key Pairs
SSH keys are generated at user prompt -- they don't come installed on computers.
Key pairs are like deadbolts & keys. Your **private key** is akin to _your_ house key, it only works with _your_ house's deadbolt lock. While the **public key** is more like the deadbolt lock on your house. The pair, the key and the deadbolt, together allows you secure access into your home.
In the case of SSH key pairs, you keep the private key to yourself, never share this with anyone else. You share your public key with, well anyone who needs to grant you access to there servers. When they add your public key (deadbolt) to their servers, it’s like giving you your own backdoor into the servers that only your private key works with. (Seen the key-maker in the Matrix movie? Kind of like that).
### Configure SSH Forwarding Agent
https://developer.github.com/guides/using-ssh-agent-forwarding/#setting-up-ssh-agent-forwarding
### Example for connecting to Pagely Hosting
Open terminal editor nano for .ssh config file:
```bash
nano ~/.ssh/config
```
Then copy and paste the following into the editor.
```bash
Host *.pagelydev.com
ForwardAgent yes
Host *.pagelyhosting.com
ForwardAgent yes
```
Lastly save and close the file with `Ctrl+X` then `Enter` and one more `Enter`.
### Understanding forwarding with the ssh agent
Basically, when you are using SSH or SSH tunnels, you need to "grant access" to your private key. This allows us to pass our SSH key to the remote server we are connecting to, and it can now use your key to "forward" your requests to additional servers that it may talk to. You don't want to allow this for "just every server you connect to". That would be dangerous since you need to trust the connecting server not to abuse the use or sharing of your private key. Remember your private key, the one without .pub at the end, is like a password. Do not share your private key with anyone, and we highly recommend you do not "sync it to a cloud drive service". Certainly never store it in a Github repository, regardless of the repo is private or public.
# Setup Local DNS
### Configure `dnsmasq`
This assumes you use the standard VVV with VirtualBox and the default IP.
Install: dnsmasq was installed above, if you skipped it `brew install dnsmasq`
Setup (https://alanthing.com/blog/2012/04/24/never-touch-your-local-etchosts-file-os-x-again/):
```bash
mkdir -pv $(brew --prefix)/etc/
echo 'address=/.test/192.168.50.4' > $(brew --prefix)/etc/dnsmasq.conf
sudo echo "admin enabled - quickly do sudo tasks"
```
Next type your password in the prompt before continuing.
Now hurry a little, you only have 10 minutes to copy and paste the following commands
```bash
sudo cp -v $(brew --prefix dnsmasq)/homebrew.mxcl.dnsmasq.plist /Library/LaunchDaemons
sudo launchctl load -w /Library/LaunchDaemons/homebrew.mxcl.dnsmasq.plist
sudo mkdir -v /etc/resolver
sudo bash -c 'echo "nameserver 127.0.0.1" > /etc/resolver/test'
```
##### Test `dnsmasq` is working
Send a ping to `google.test` and you should see a local IP address in place of a std. Google IP
```
ping -c 1 -t 1 google.test
```
Expect results like:
```text
PING google.test (192.168.50.4): 56 data bytes
--- google.test ping statistics ---
1 packets transmitted, 0 packets received, 100.0% packet loss
```
#### Understanding `dnsmasq`
More info on dnsmasq setup and troubleshooting here:
http://passingcuriosity.com/2013/dnsmasq-dev-osx/
More info on OSX resolver
http://apple.stackexchange.com/questions/74639/do-etc-resolver-files-work-in-mountain-lion-for-dns-resolution
NOTE: nslookup ignores osx dns proxy, do not test with that
#### Optional: Resolve domains using alternative DNS if your ISP's lags
DNS resolves domain names and using your ISP's DNS is kind of like using your ISP's email.
Even business or fiber internet can lean on mediocre DNS, so if you frequently have problems, try a change.
1. Open __System Preferences__ and select __Network__ _[third row]_.
2. Click __Advanced...__ in the bottom-right.
3. Click DNS _[third tab]_
4. Add IPs in left column.
```
Google DNS:
8.8.8.8
8.8.4.4
OpenDNS:
208.67.222.222
208.67.222.220
```
## Setting Up WordPress Development
Fully setting up local WordPress development of a custom site isn't that complicated, but its complex enough that we don't want to try do a comprehensive explanation in readme file.
### VVV Pre Reqs:
```
vagrant plugin install vagrant-hostsupdater
vagrant plugin install vagrant-triggers
```
### Quick setup of VVV:
```
mkdir -p ~/Sites; cd ~/Sites && git clone https://github.com/Varying-Vagrant-Vagrants/VVV.git ; cd VVV && vagrant up ;
```
### Possible issue
If you run into issue with `default: There are problems and -y was used without --force-yes`,
You may be able to resolve it by:
1. `cd ~/Sites/VVV/provision/provision.sh`
2. Search for `if ! apt-get -y -o Dpkg::Options::=--force-confdef -o Dpkg::Options::=--force-confnew install`
3. Replace `apt-get -y` with `apt-get --force-yes -y` on that line
For other issue around VVV, please check the issue board: https://github.com/Varying-Vagrant-Vagrants/VVV/issues
### But I want a custom local WordPress instance
Enter VVV2 YML configs. Allowing you to tell VVV that you want more local instances, and how you want those instances configured. Read more in the [official VVV2 config docs](https://varyingvagrantvagrants.org/docs/en-US/vvv-config/). Would you like to see a video to follow along? We got you covered there too!
[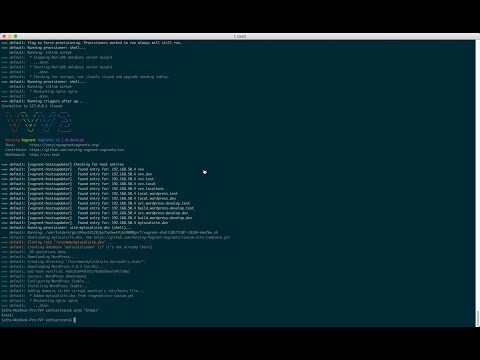](https://www.youtube.com/watch?v=6XC1er-2pmM "Video Title")
First we need to create a custom config file that VVV2 is expecting:
```bash
cp ~/Sites/VVV/vvv-config.yml ~/Sites/VVV/vvv-custom.yml
```
Next we need to add a custom domain to the configuration file.
*Please note: YML files are space sensetive, if its not working, its likely an issue with indentiation/spacing/nesting.*
Paste in the following just above the utilities section of vvv-custom.yml:
```yaml
mylocalsite.dev:
repo: https://github.com/Varying-Vagrant-Vagrants/custom-site-template.git
hosts:
- mylocalsite.dev
```
Last we need to ask VVV to build our new configuration. We can completely rebuild the entire Vagrant, or, whats faster is to ask VVV2 to just build our new site within the Vagrant. We are going to show here the more efficient way of building just our 1 new site from the config.
```
vagrant up ; vagrant provision --provision-with site-mylocalsite.dev'
```
### But I want VVV2 to mirror my production site
You mean you don't want to manually configure every site locally every time you set them up? Well, you are in luck. VVV2 allows us to do that by defining the entire environment using a Github repo. Please note that this is advanced, and requires some previous knowledge of DevOps, bash shell scripts, and VVV provisioning itself.
We have prepared a boilerplate repo for you to download / fork / clone as you would like. You can check out the readme file, and the provision/vvv-init.sh file for notes about how to go about configuring your own private staging server, right inside VVV.
https://github.com/WordPress-Phoenix/vvv2-provision-boilerplate
## Connecting Sequel Pro to VVV
1. Open Sequel Pro
2. Click +Add New Connection
3. Click SSH tab option and fill out the fields below:
```
MySQL Host: 127.0.0.1
User: wp
Pass: wp
Database: (empty)
Port: 3306
SSH Host: vvv.test
SSH User: vagrant
SSH Pass: vagrant
SSH Port: (none)
Unchecked SSL box
```
# Setup Other/Misc Config
- Plugins for PHPStorm: dash, gfm, .ignore
- PHPStorm->prefs->editor->code style->php->”Set From…”->Wordpress
- `git config --global user.name "John Doe"`
- `git config --global user.email johndoe@example.com`
- Finder-> prefs-> new finder at “choose user dir” and then setup favorites sidebar
- RSA Token + PIN Automator app https://github.com/dustingraves/RSA-Copy