https://github.com/xiadd/pastebin-worker
PasteBin based on Cloudflare
https://github.com/xiadd/pastebin-worker
cloudflare pastebin worker
Last synced: over 1 year ago
JSON representation
PasteBin based on Cloudflare
- Host: GitHub
- URL: https://github.com/xiadd/pastebin-worker
- Owner: xiadd
- License: mit
- Created: 2023-02-01T01:29:01.000Z (over 3 years ago)
- Default Branch: main
- Last Pushed: 2024-09-08T08:38:37.000Z (almost 2 years ago)
- Last Synced: 2024-10-29T01:32:35.864Z (over 1 year ago)
- Topics: cloudflare, pastebin, worker
- Language: TypeScript
- Homepage: https://as.al
- Size: 623 KB
- Stars: 180
- Watchers: 3
- Forks: 51
- Open Issues: 2
-
Metadata Files:
- Readme: README.en.md
- License: LICENSE
Awesome Lists containing this project
README
## Start Developing
1. Install wrangler-cli
```bash
npm i @cloudflare/wrangler -g
```
Log in to your Cloudflare account according to the documentation:
```bash
wrangler login
```
After executing the above command, a page will open in the browser, redirecting to the Cloudflare login page. Click to authorize login, and it will redirect to another page. Then input `wrangler whoami` in the terminal. If it displays your username, it means you have successfully logged in.
2. Install Dependencies
```bash
# Install backend dependencies
yarn install
# Install frontend dependencies
cd static
yarn install
```
3. Create kv namespace in Cloudflare

We have created two kv namespaces here, one for storing files and the other for storing text, and they are named `PBIMG` and `PB` respectively. It doesn't matter what names are given, the important thing is to remember the id, which will be used later.
4. Modify wrangler.toml
```toml
name= "pastebin-worker"
compatibility_date = "2023-11-28"
account_id= "" # Replace this with your own account_id
main = "src/index.ts"
workers_dev = false
vars = { ENVIRONMENT = "production" }
route = { pattern = "", custom_domain = true }
kv_namespaces = [
{ binding = "PB", id = "" },
{ binding = "PBIMGS", id ="" }
]
[site]
bucket = "./static/dist"
```
`account_id`, `route`, `kv_namespaces` should be modified according to your own situation. We are using two kvs here, one for storing files and the other for storing text.
`account_id` can be found in the Cloudflare dashboard. `route` is the route of your worker (i.e., the custom domain), and `kv_namespaces` is the id of the kv you created.
5. Development
```bash
# Start the backend
wrangler dev
# Start the frontend
cd static
yarn dev
```
After the server is started, the backend address is `http://localhost:8787`, and the front-end address is `http://localhost:5173`. If you want to test the frontend package, directly execute `yarn build` in the static directory, and visit `http://localhost:8787`.
# Deploy
Modify `.env.production` in the static directory, and set the environment variable to the domain name you configured above.
```env
VITE_API_URL=
```
Get the api key for your Cloudflare account, then set it as the secret for GitHub action, named `CF_API_TOKEN`. This way, whenever you push code to the main branch, it will automatically deploy to Cloudflare.
### Method to get the API Token:
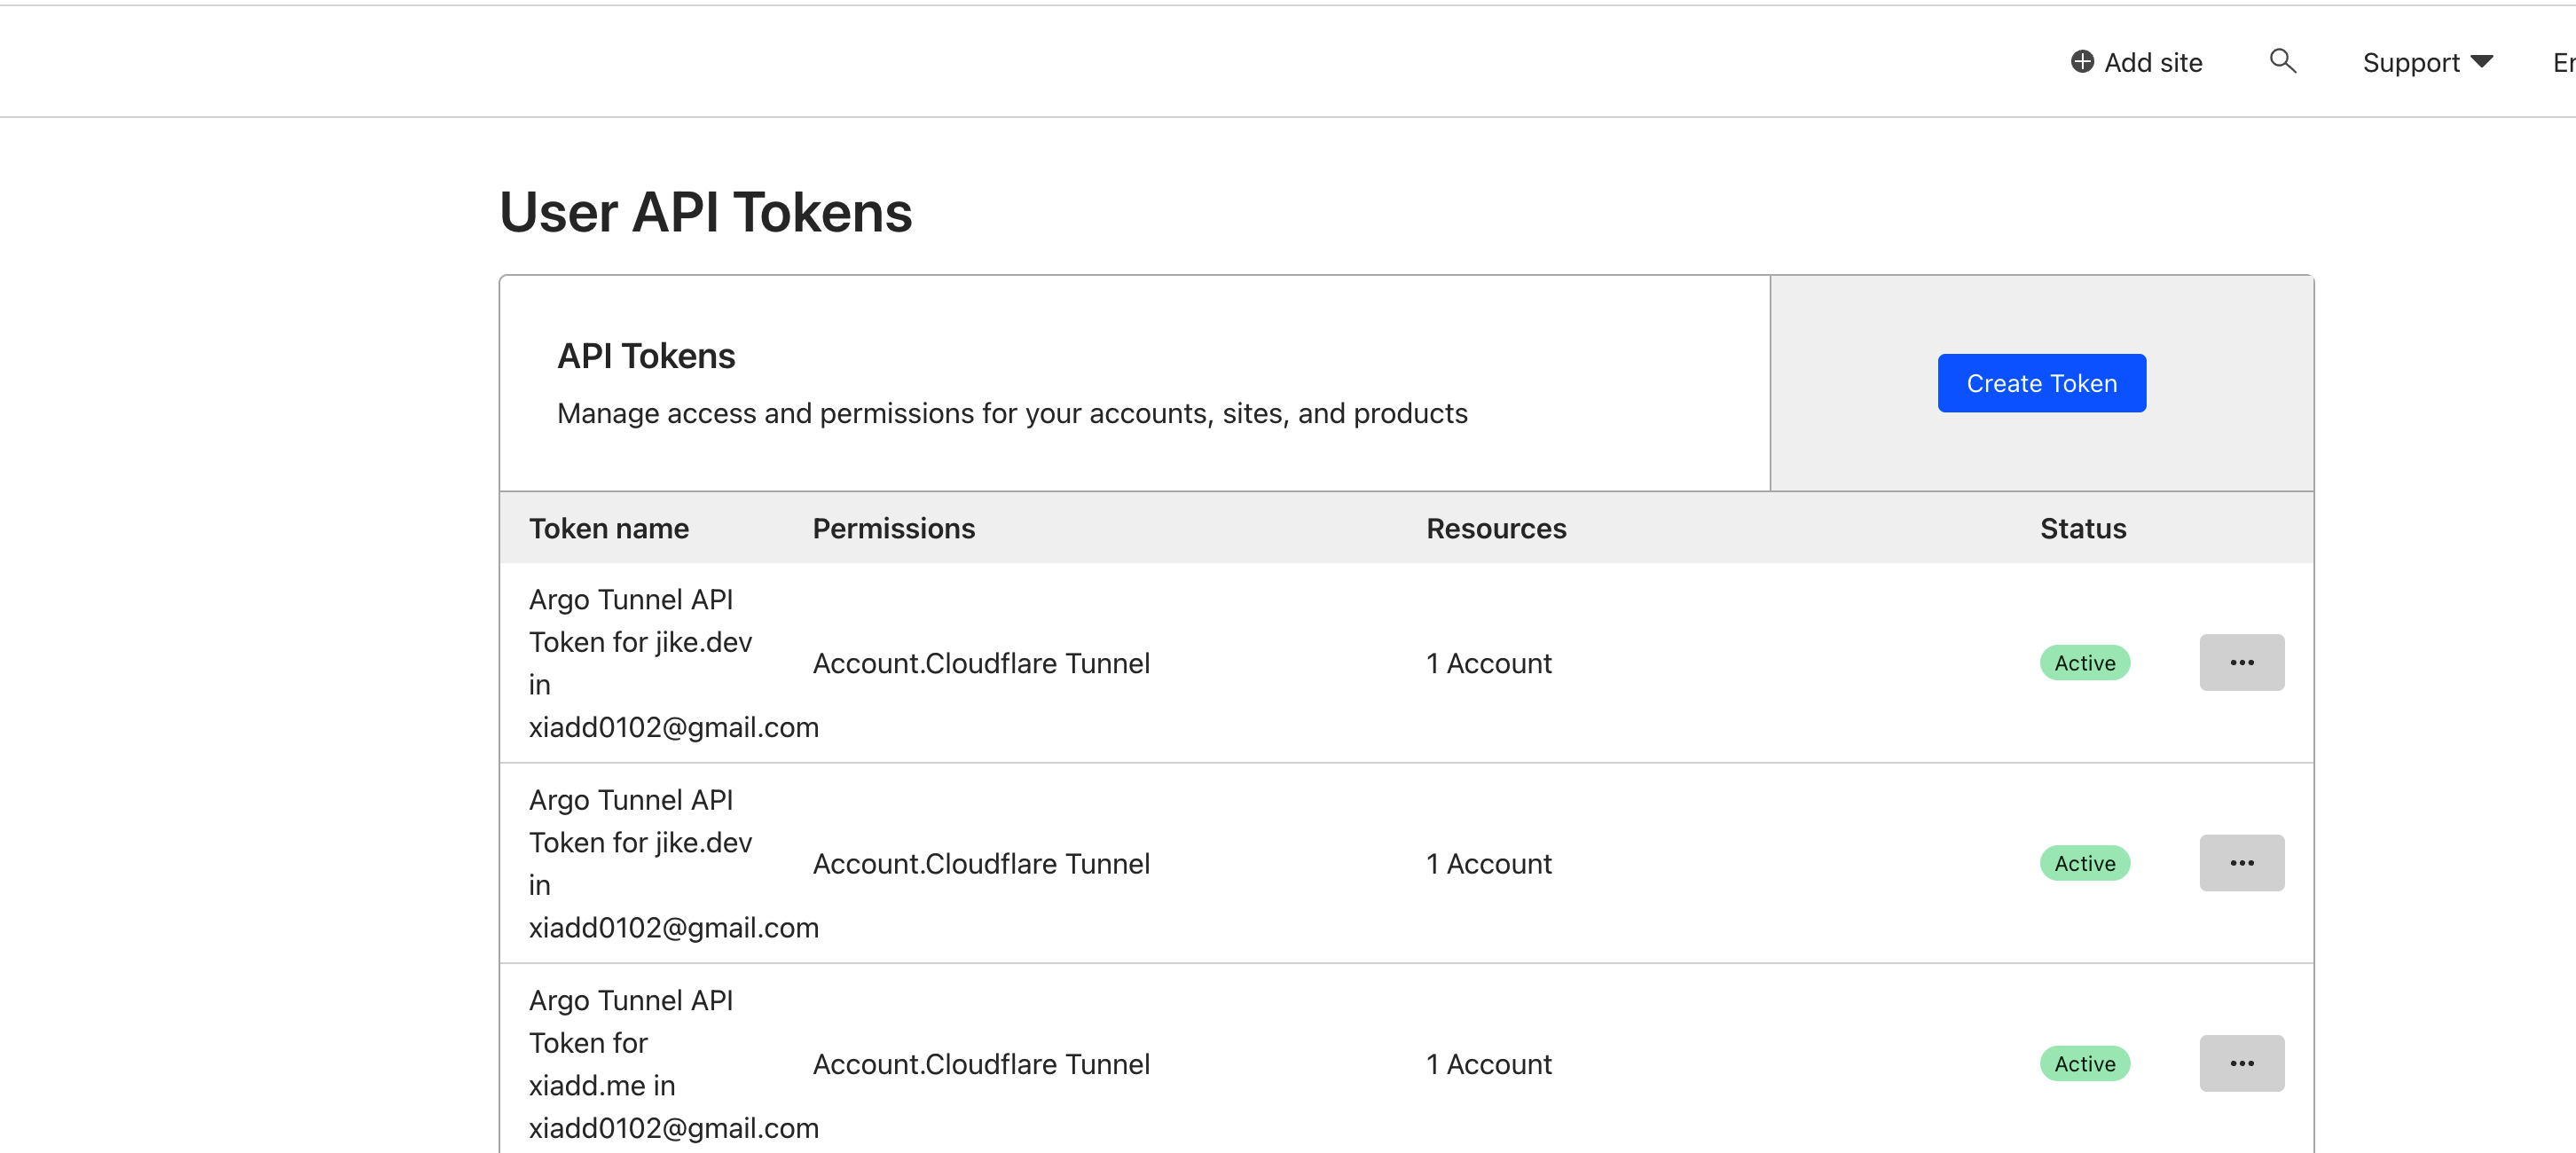
Then click `Create Token`:
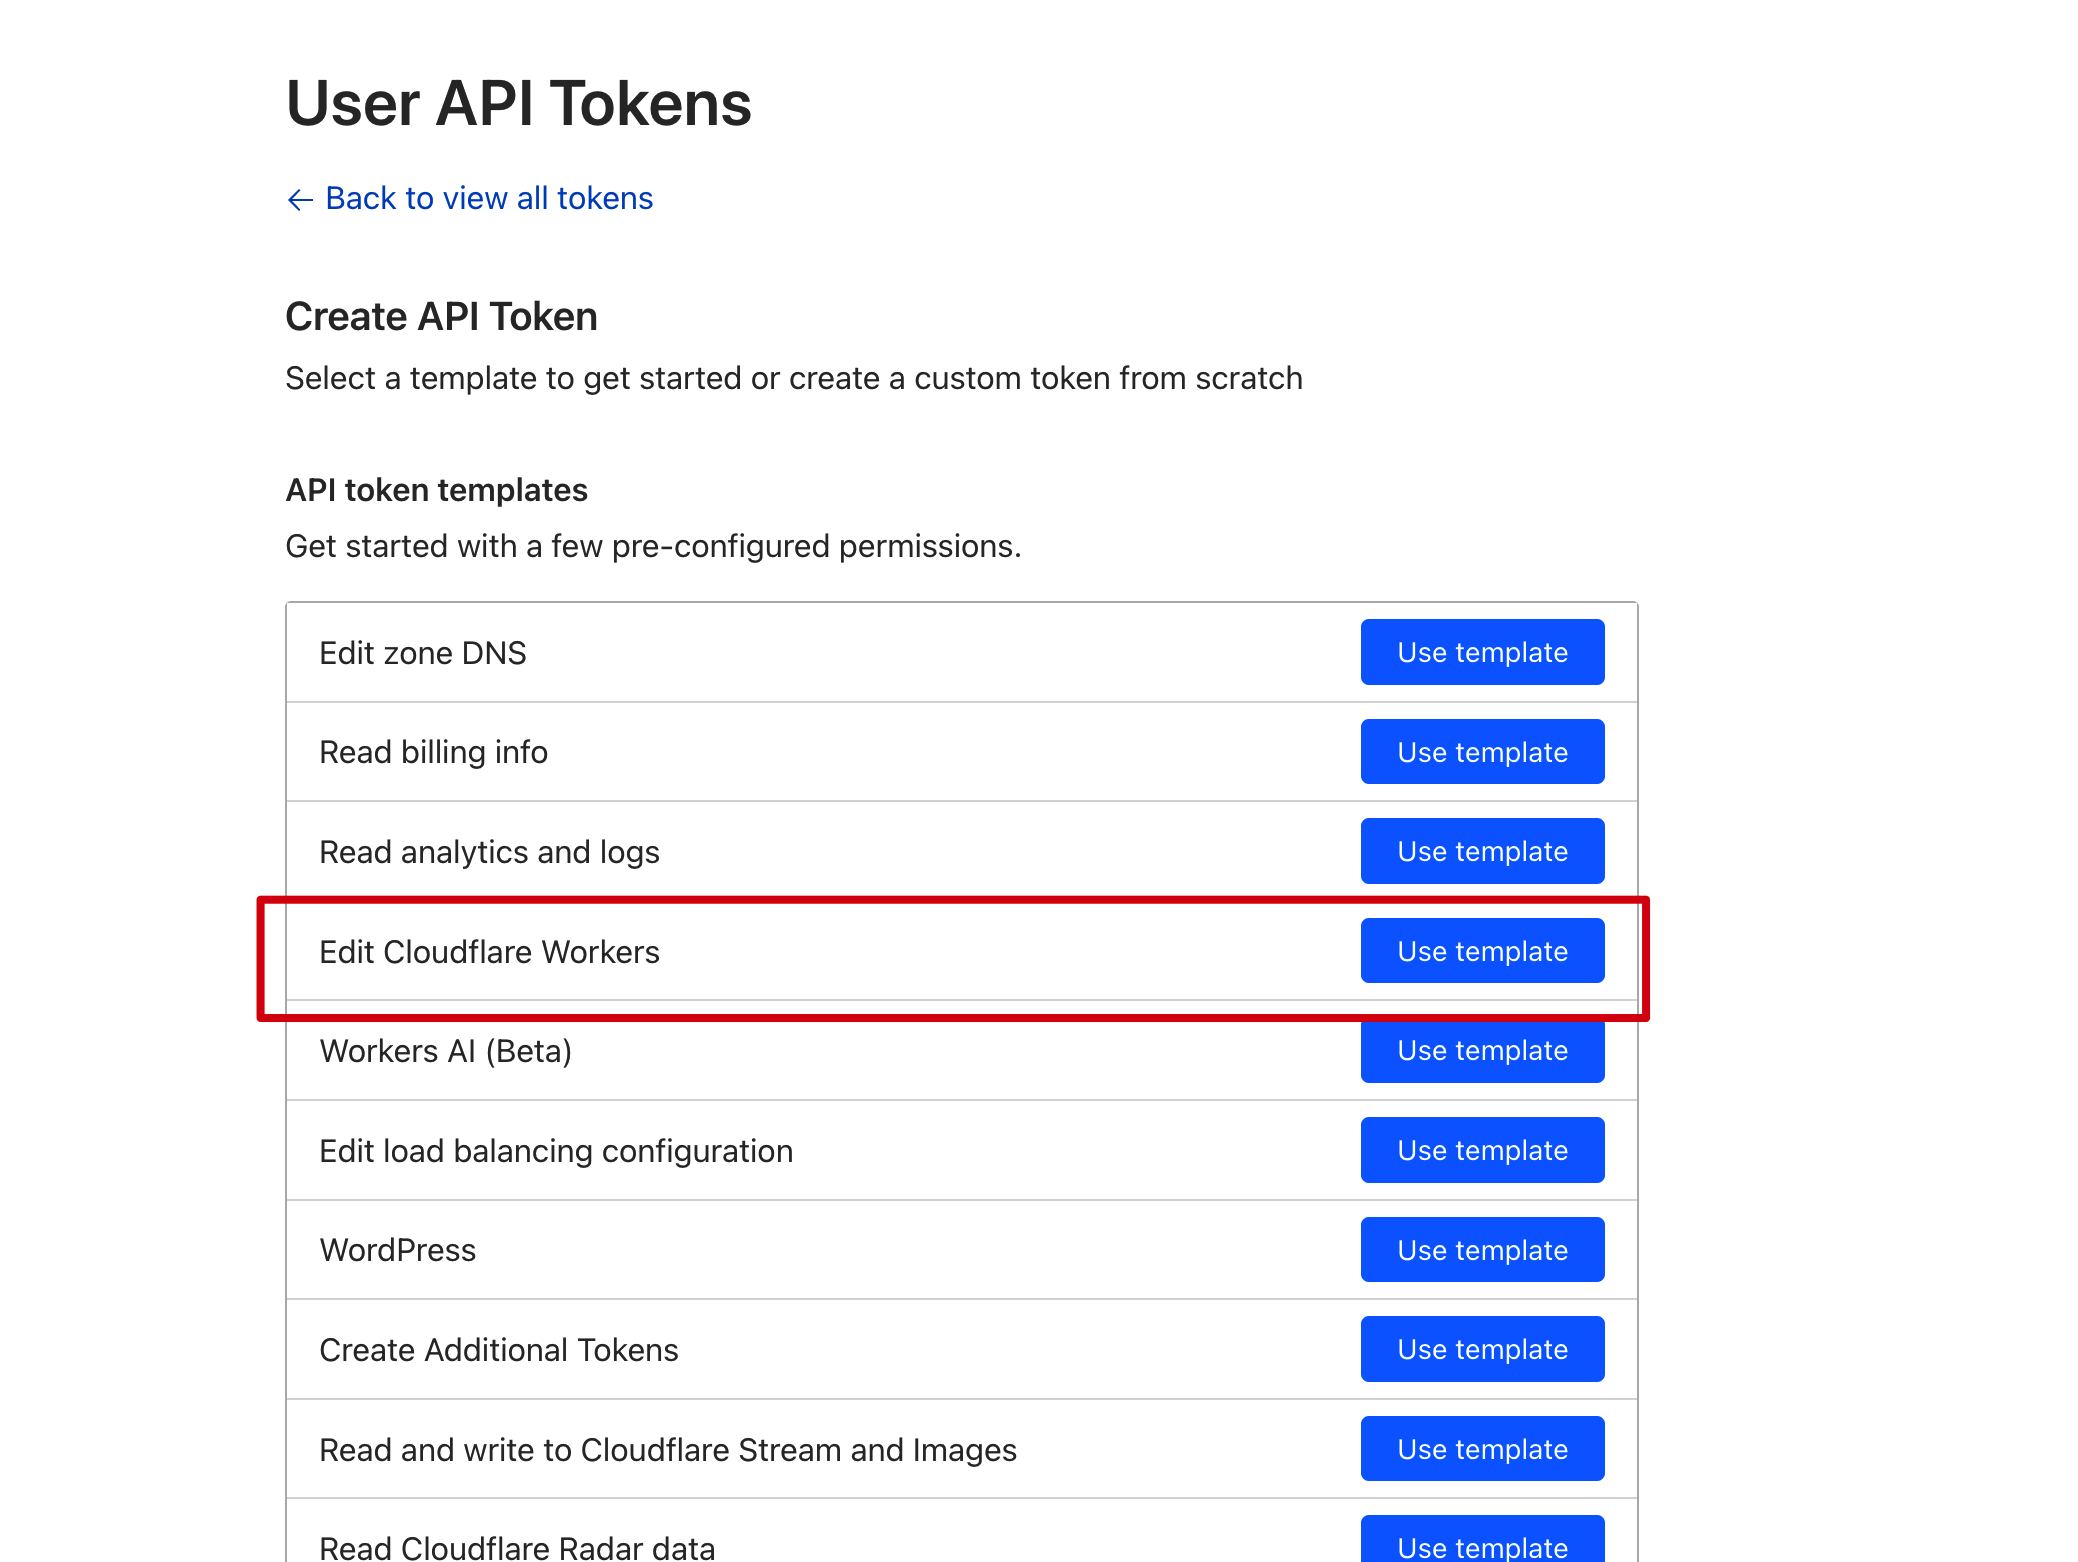
Select the worker template and create it to get the api token.
### Set the secret in the github action:
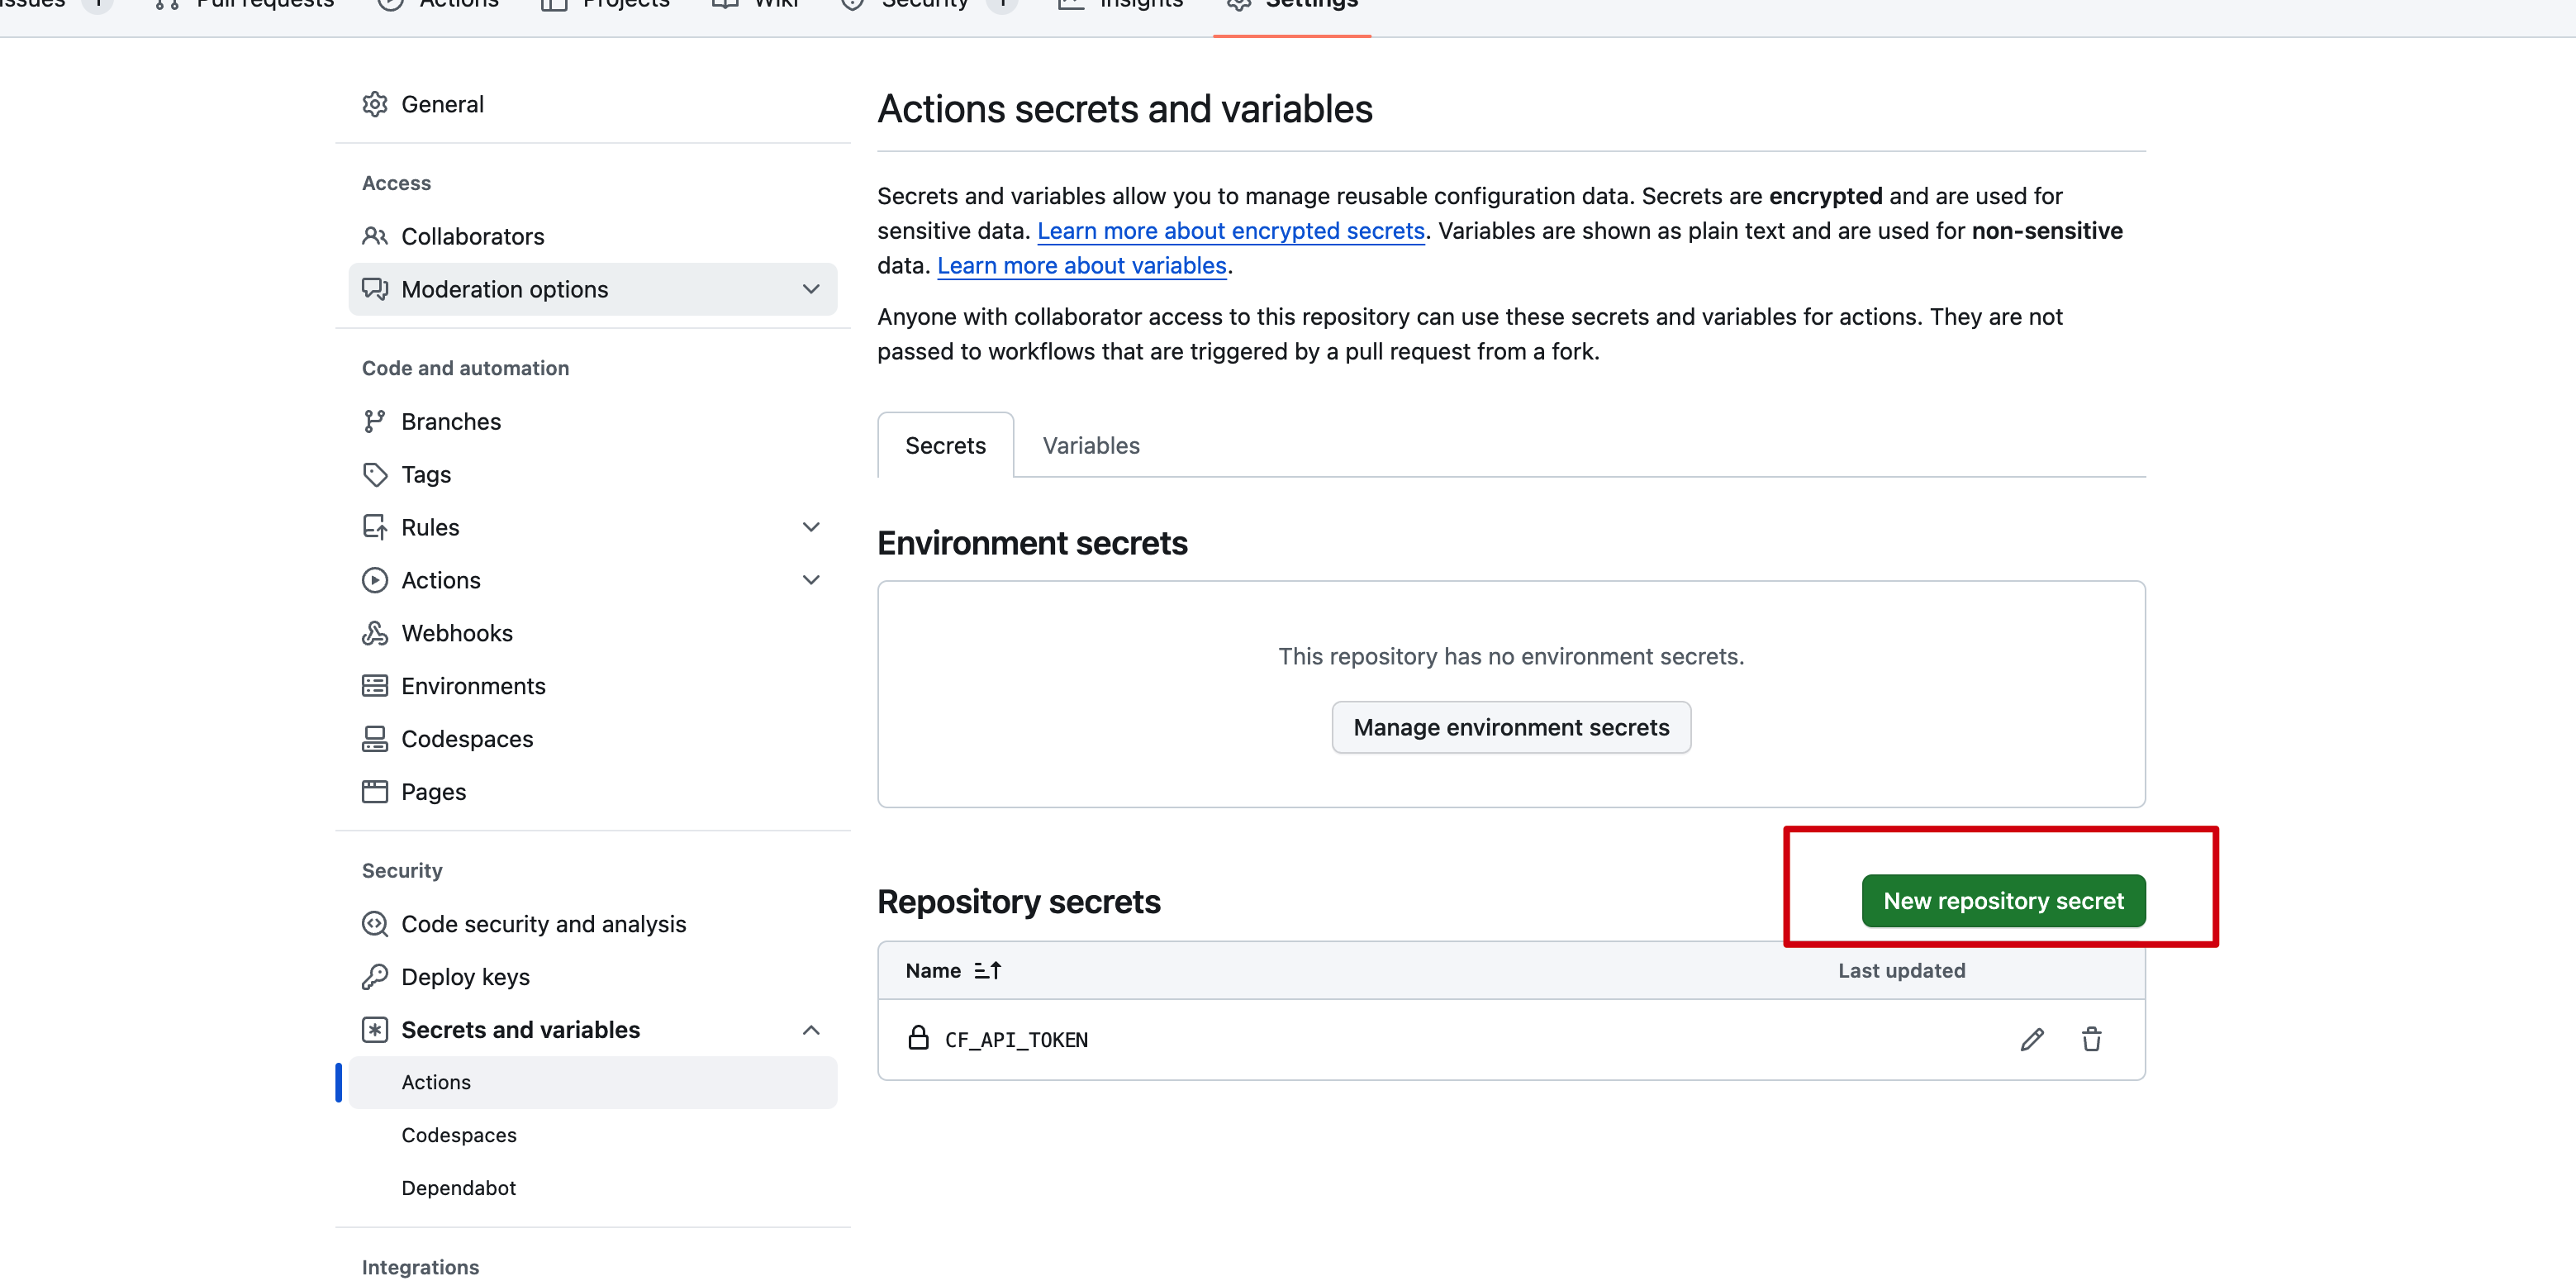
Set your api token here.