Ecosyste.ms: Awesome
An open API service indexing awesome lists of open source software.
https://github.com/xyTom/cf-page-func-proxy
Use Cloudflare Pages Functions as a reverse proxy with custom domain support.
https://github.com/xyTom/cf-page-func-proxy
Last synced: 10 days ago
JSON representation
Use Cloudflare Pages Functions as a reverse proxy with custom domain support.
- Host: GitHub
- URL: https://github.com/xyTom/cf-page-func-proxy
- Owner: xyTom
- License: apache-2.0
- Created: 2022-05-15T12:16:55.000Z (over 2 years ago)
- Default Branch: main
- Last Pushed: 2022-10-25T20:08:30.000Z (about 2 years ago)
- Last Synced: 2024-10-15T22:50:27.766Z (25 days ago)
- Language: JavaScript
- Size: 177 KB
- Stars: 181
- Watchers: 5
- Forks: 438
- Open Issues: 6
-
Metadata Files:
- Readme: README.md
- License: LICENSE
Awesome Lists containing this project
README
# cf-page-func-proxy
Use Cloudflare Pages Functions as a reverse proxy with custom domain support.
## Getting Start
1.下载或是Fork本仓库
2.修改`_worker.js`中的`url.hostname`为你需要反代的网址
https://github.com/xyTom/cf-page-func-proxy/blob/291f504f9be4a65d2daa39a954a41bd8088561f3/_worker.js#L5
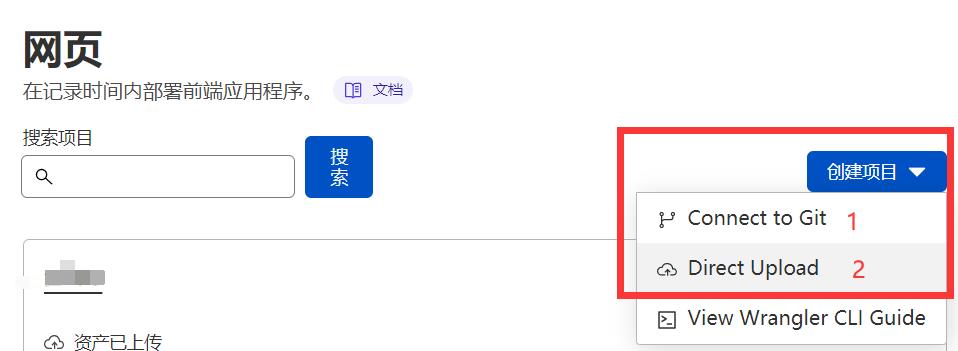
3.打开Cloudflare Dashboard,进入Pages管理页面,选择创建项目,如果在第一步中选择的是fork本仓库,则选择1`Connect to Git`,如果第一步中选择的是下载本仓库则选择2`Direct Upload`
# 绑定自定义域名
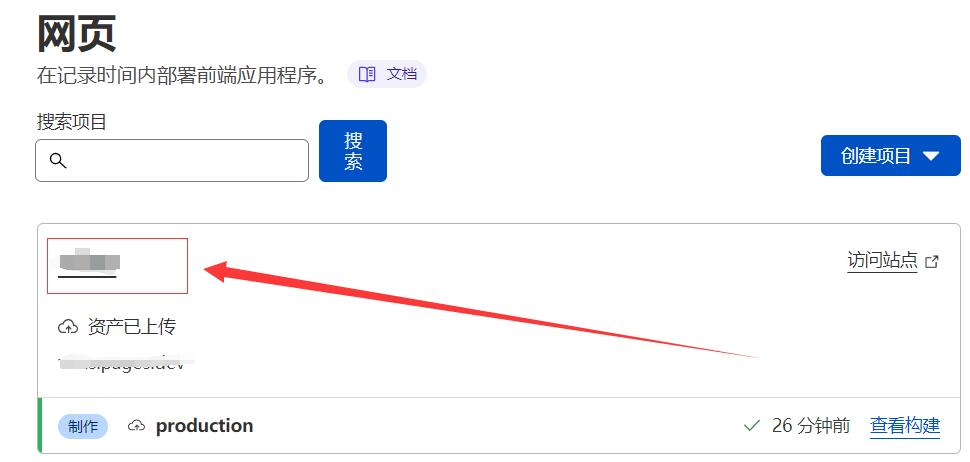
1.进入Cloudflare Pages管理页面,选择刚刚创建的Pages项目,点击名称进入项目设置页面
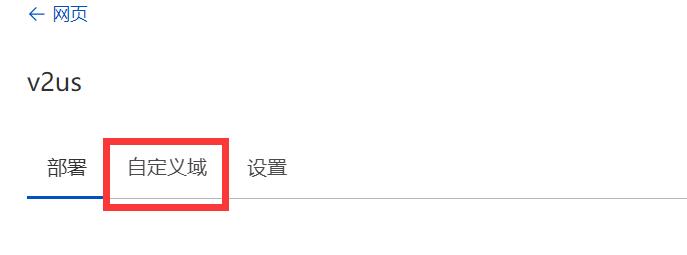
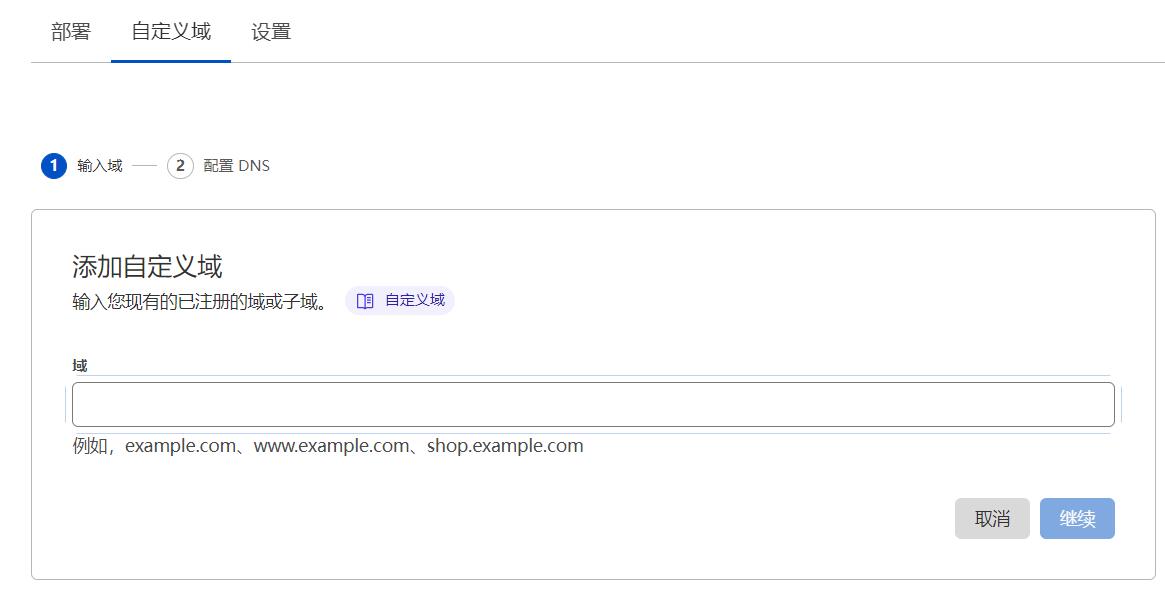
2.选择页面中的`自定义域`
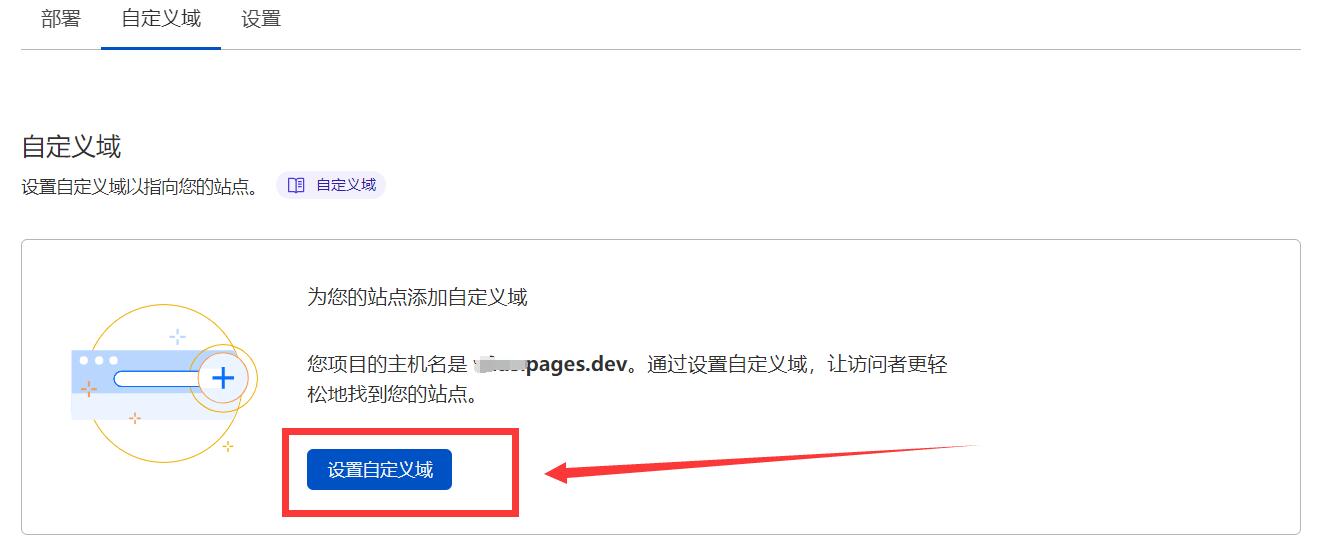
3.选择`设置自定义域`
4.在页面中输入需要绑定的域名,并点击继续,这里的域名可以是子域名
5.在设置方法中选择`开始cname设置`
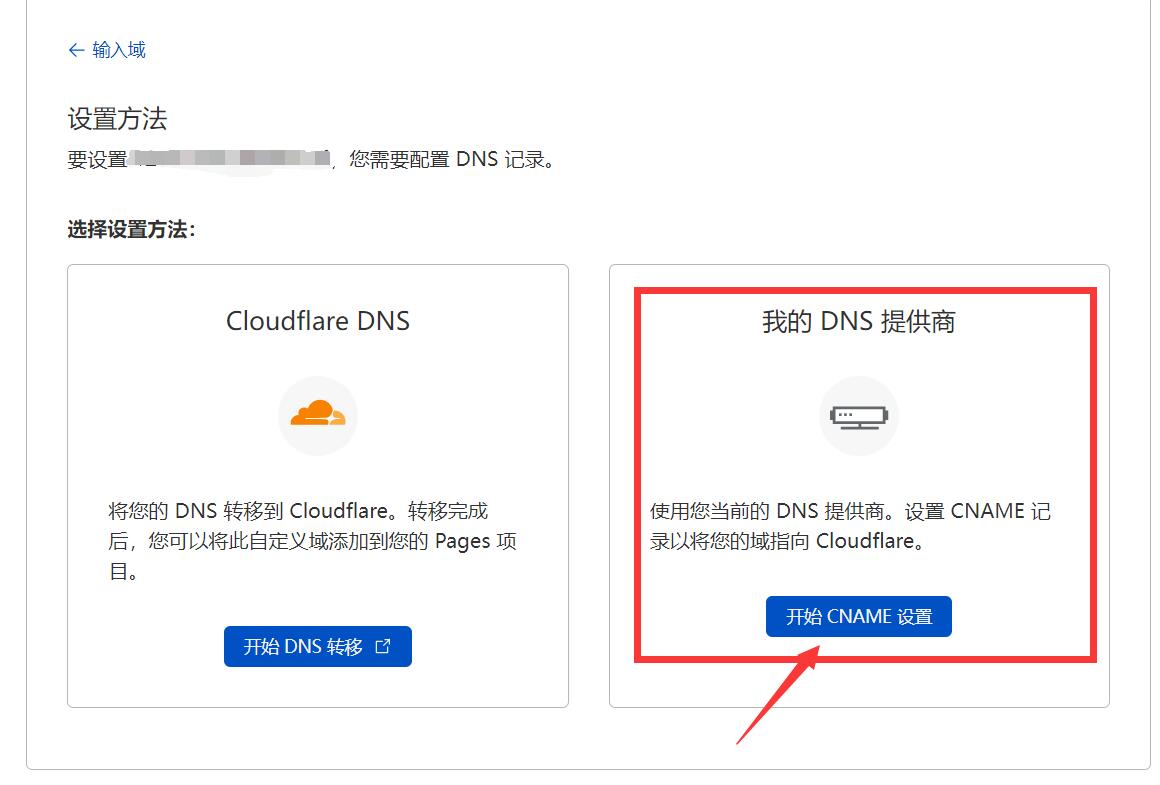
6.按照页面给出的说明去DNS服务提供商处修改DNS解析记录,即可完成自定义域名绑定
